
Author: David Bratvold
How to Unlock a Locked Item in Canva

Learning how to unlock a locked item in Canva can quickly relieve frustration when editing designs. Whether you’ve accidentally locked an element yourself or received a Canva design from someone else that you can’t edit, understanding how to unlock these items is essential.
Why Items Get Locked in Canva
Canva includes a feature allowing users to lock elements or even entire pages. This function helps maintain consistency and prevents accidental edits. However, if you’re not aware that an item or page has been locked, it can seem impossible to move or modify elements, causing significant frustration.
Steps to Unlock a Locked Item in Canva
If you’re struggling to edit or move a locked item in Canva, follow these clear, step-by-step instructions:
Step 1: Check If the Entire Page is Locked
Before attempting to unlock individual elements, ensure the page itself isn’t locked:
- Navigate to the page you wish to edit.
- Click on the three dots located at the top right corner of the Canva page.
- Select the option “Unlock Page.”
After unlocking the page, you’ll typically regain full editing capability for all elements within that page.
Step 2: Unlock Individual Items
If the page isn’t locked but individual items still can’t be edited, here’s what you should do:
- Click directly on the locked item.
- Look for a lock icon or the message indicating that the item is locked.
- Click the “Unlock” button visible near the selected item.
After clicking unlock, you should regain editing functionality immediately.
Step 3: Troubleshooting Persistent Lock Issues
Sometimes, clicking unlock once doesn’t resolve the issue completely. If the item or page still appears locked, try the following:
- Click the lock button again, effectively relocking the item or page.
- Immediately unlock it once more.
This quick double-action typically resolves lingering locking issues, restoring your ability to move and edit elements freely.
Tips for Avoiding Unintentional Locks
To prevent future frustration, follow these tips:
- Double-check if any items or pages are locked before sharing designs with others.
- Use the locking feature intentionally, clearly communicating with team members about locked elements to avoid confusion.
- Regularly familiarize yourself and your team with Canva’s features, including locking and unlocking functions, to streamline collaboration.
When Locking Items in Canva is Useful
Understanding when and why to lock elements can improve your workflow:
- Prevent accidental changes: Lock items to keep critical elements consistent.
- Streamline group collaboration: Clearly differentiate editable areas from fixed ones.
- Simplify complex designs: Lock elements that you don’t want disturbed while focusing on other parts of your design.
Additional Features in Canva to Explore
If you’ve mastered unlocking items, consider exploring other helpful features in Canva:
- Grouping Elements: Keep elements together for easy movement and adjustment.
- Version History: Recover earlier design versions easily.
- Templates: Save time by starting with professional, customizable templates.
How to Fix Incorrect Number of Years in Business on Google Guaranteed Ad (LSA)
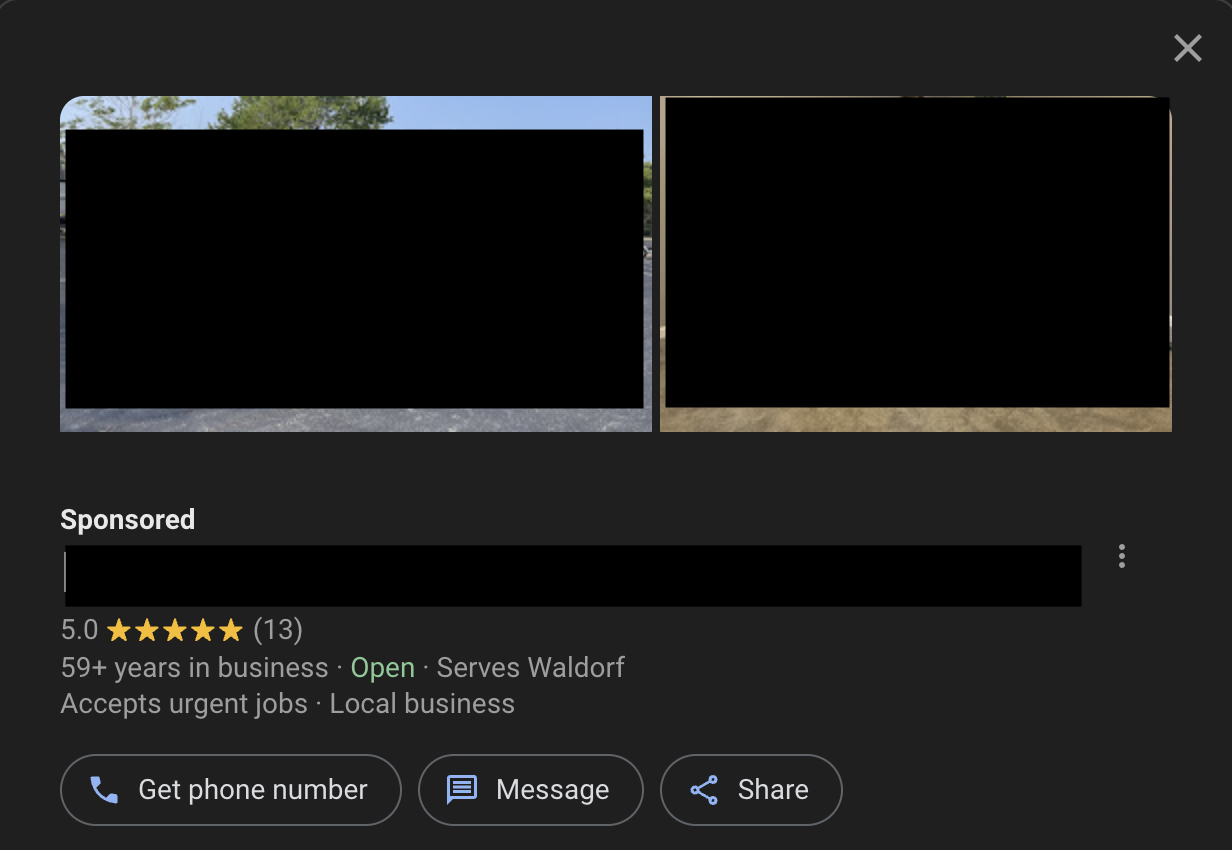
We recently had a client who had the incorrect number of “years in business” on their Local Services Ad listing online. We decided to remove the years in business from the business bio, expecting the problem to be fixed. However, a few weeks had passed, and the years in business was still incorrect.
So, we decided we would call the Local Services Ads support number to get help. The LSA support team can be reached by calling this number: +1 844-263-9884
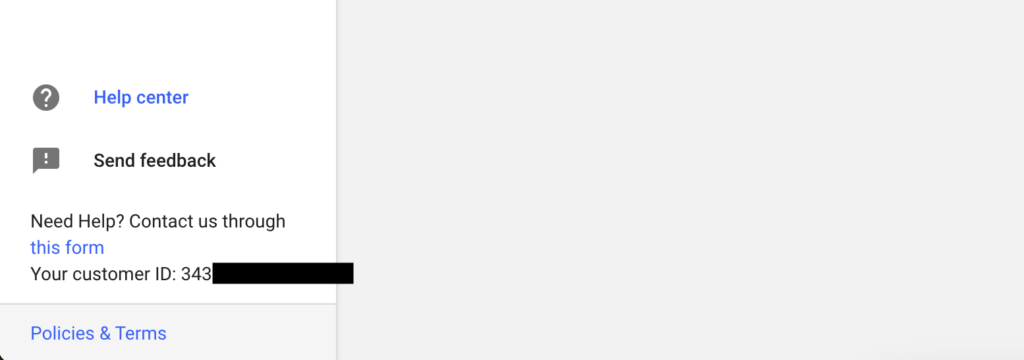
When we called, as usual, we were asked for our account ID number, which can be found by clicking the hamburger menu at the top left of the LSA dashboard, and then the number will be on the bottom left of the screen, as seen on the screenshot below:
You will also need to give the rep your email address, which can be found by going to the “Account Access” tab.
Make sure you have both your customer ID and email address handy to make the process faster.
We then explained our issue, and the rep sent us an email to confirm the changes we wanted to make to the profile:

As you can see, the email asks you to confirm the changes you want to make to the account. We gave them our customer ID, and for the second bullet point, wrote this:
“Request: I authorize Google to change the opening date/founded date of our Local Services Ads business to 1966“
Then, they put us on hold for a few minutes, and when they came back, they stated that they successfully changed our opening date on the Local Services Ad account!
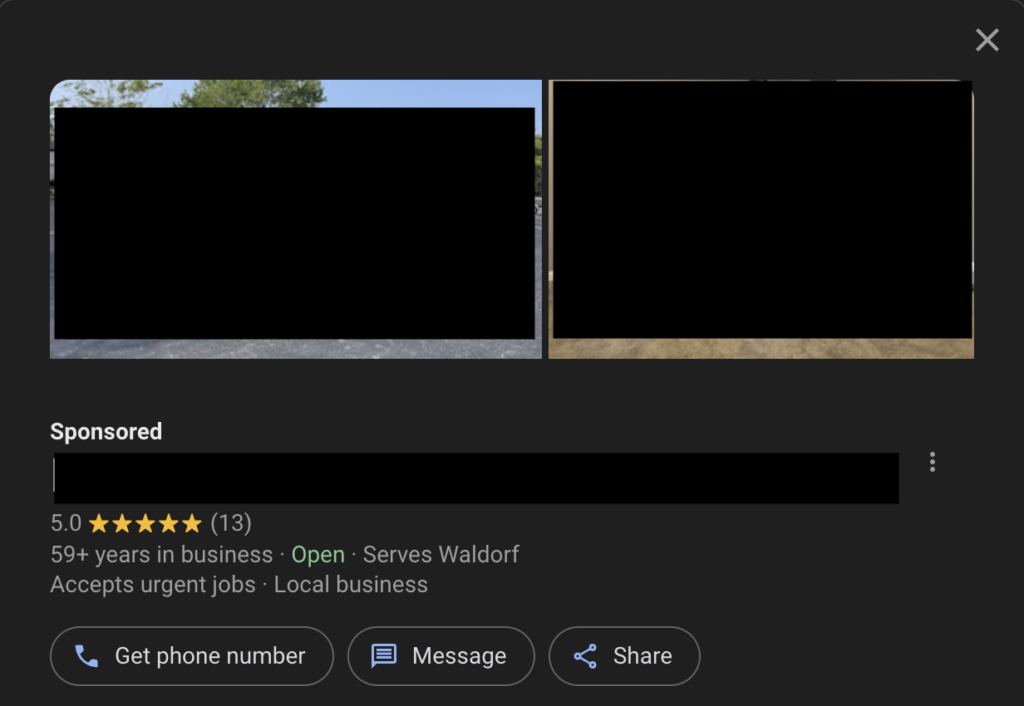
Now, as you can see, the opening date for this profile is showing up correctly, and no longer says “1+ year in business.”
How to Fix Tag Not Firing After Form Submission in Google Tag Manager

Setting up conversion tracking is critical to knowing whether leads generated from your website are being accurately recorded. However, you may encounter a situation where the Google Tag doesn’t fire when a user completes a form and is redirected to a thank you page. In this guide, we’ll show you how we solved that problem by changing the page URL and reconfiguring triggers, even though the exact underlying cause remained unclear.
Symptoms of the Issue
- Form Submission Not Tracked
The user completes a form, and although they land on a thank you page, your Google Tag isn’t registering the conversion in Google Tag Manager or Google Analytics. - Other Tags Work
Phone call click tags or other triggers might still work correctly, isolating the problem to the thank you page for form submissions. - “Not Secure” or HTTP / HTTPS Mismatch
You might notice that the original thank you page isn’t loading over HTTPS or shows “Not Secure” in the browser.
Step-by-Step Troubleshooting & Fix
1. Verify Your Tag Setup
- Open Google Tag Manager (GTM):
Ensure that you’ve set up a trigger tied to the correct page URL, e.g.,/thank-youor a custom event if you’re using form triggers. - Check GTM Preview Mode:
Click on Preview in GTM, enter the page URL, and try the form submission to see if the tag fires. If not, GTM won’t show the tag as activated.
2. Note the Problematic Thank You Page
- HTTP vs. HTTPS:
Sometimes a mismatch (or old page settings) can prevent the correct trigger. If your page isn’t loading over HTTPS, the tag may fail. - Potentially Corrupted Page:
Even rebuilding the same exact page with the same slug (e.g.,/thank-you) might still cause issues.
3. Create a New Thank You Page with a Different URL
- Rename or Create a Page with a New URL:
Instead ofexample.com/thank-you, try something likeexample.com/submission-receivedor/thank-you-2. - Replace Old Links:
Update the form’s redirect setting to this new page.
4. Test the New Page in GTM Preview
- Refresh GTM Preview:
Enter the new page URL in Preview mode. - Complete the Form Again:
Fill out the form, click submit, and ensure you land on the newly named page. - Confirm Tag Fires:
In the GTM debug panel, the conversion tag (e.g., “Form Submission Thank You”) should now appear as fired.
5. Confirm HTTPS and Security
- Use HTTPS:
Make sure the new thank you page is loading with a valid SSL certificate (i.e., it shows “https://” in the address bar). - Cache Clear (Optional):
If changes aren’t immediately reflected, clear your site cache or use an incognito window to ensure you’re seeing the most recent version.
Possible Reasons for This Fix
- Page-Specific Configurations:
The original thank you page may have had leftover scripts or settings from a previous setup. - SSL / Mixed Content Issues:
Attempting to load tracking code over HTTP or a mismatch in site settings can cause tags to fail. - URL Conflicts or Corruption:
Even brand-new pages with the same slug sometimes carry over older metadata, leading to unexpected behavior.
Best Practices for Thank You Page Tracking
- Unique, Descriptive Slug:
Use a unique URL (e.g.,/submission-received) to avoid conflicts with older page data. - Consistent SSL Configuration:
Force HTTPS across your entire site to prevent “Not Secure” warnings and possible tag failures. - Regularly Test Conversions:
Re-run GTM preview and test form submissions after site updates to catch any breaks in triggers. - Document Changes:
Keep notes on form settings, triggers, or page URLs so you can quickly revert if issues arise.
Final Thoughts
While the exact root cause of a non-firing tag may remain unclear, creating a fresh thank you page with a new URL often solves the problem. If your old page slug was causing issues—whether due to HTTP/HTTPS mismatch, leftover scripts, or page corruption—switching to a unique slug and updating your triggers can restore accurate conversion tracking.
If you still can’t get your tag to fire after these steps, consider re-examining your GTM triggers, re-checking your page’s SSL status, or contacting technical support for additional help.
The Best GMB Categories Services for Electricians (Google Business Profile SEO)

Choosing the right categories and services for your Google Business Profile (GBP) is crucial for local SEO, especially if you’re an electrician. When you accurately list all the relevant services you offer, Google can better match you with customers searching for those specific solutions. Below, we’ll walk you through how to find and set these categories and services, plus provide a curated list to streamline the process.
Why Categories and Services Matter for Electricians
- Improve Local Search Rankings
By selecting accurate categories (e.g., “Electrician,” “Lighting Consultant”) and listing your services (e.g., “Electrical panel upgrade,” “EV charger installation”), you signal to Google the scope of your work. - Reach Targeted Leads
Customers looking for a specific electrical service—such as “generator installation”—will find your profile if you’ve added it under your services. - Stand Out from Competitors
A detailed profile showing all your capabilities can help you outshine electricians who only list a few generic services.
Step 1: Identify Potential Categories and Services
Method 1: Using a GMB / GBP Category Tool (e.g., GMB Everywhere)
- Run a Competitor Search
- In Google, type “electrician near me.”
- Use a browser extension like GMB Everywhere or a similar tool to view competitors’ categories.
- Compile Categories
- Note which categories appear for top-ranking competitors. Common electrician categories might include:
- Electrician (primary)
- Electrical Installation Service
- Lighting Consultant
- Electric Vehicle Charging Station Installer (not the station itself, but the installation service)
- Note which categories appear for top-ranking competitors. Common electrician categories might include:
- Check Services
- Tools like GMB Everywhere often show recommended services for each category. Copy these into a document, removing any you don’t provide.
Method 2: Reference a Curated Services List
To save time, you can use a pre-compiled list of electrician categories and services (like the one provided in our description). Copy them into a spreadsheet or document, then remove any that don’t apply to your company.
Step 2: Add / Change Categories in Your Google Business Profile
- Access Your GBP
- Go to Google Business Profile Manager and sign in.
- Find Categories Section
- From the left-hand menu, select Info or Edit Profile.
- Scroll to Business Categories.
- Add Additional Categories
- Click Add another business category, search for terms like “Electrician,” “Lighting Consultant,” “Electrical Installation Service,” etc.
- Choose relevant categories only.
Note: You can have one primary category, so pick the one most crucial to your business (usually Electrician). Additional categories support other services you perform.
Step 3: List Services Under Each Category
- Locate Services
- In your GBP dashboard, under Info (or Edit Services), find each category you’ve added.
- Use Google’s Suggestions
- Google might suggest common services like “Outlet repair” or “Ceiling fan installation” under “Electrician.”
- Add Custom Services
- If you provide a service not listed, click Add custom service (e.g., “Backup generator installation,” “Security lighting setup”).
- Keep It Accurate
- Only list services you genuinely offer. Listing irrelevant services may confuse customers or violate Google’s guidelines.
Example Services for Electricians
- Under Electrician
- Outlet Installation / Repair
- Circuit Breaker Replacement
- Electrical Panel Upgrades
- Wiring for New Construction
- Emergency Electrical Repair
- Generator Installation / Maintenance
- Under Lighting Consultant
- LED Retrofit Services
- Landscape Lighting Design
- Security Lighting Installation
- Chandeliers and Pendant Lighting
- Under EV Charging Station Installer
- Residential EV Charger Installation
- Commercial EV Charger Maintenance
Add or remove services based on your business offerings.
Step 4: Verify and Optimize
- View Your Updated Profile
- Check that your changes appear on the public version of your GBP.
- Encourage Reviews
- Ask satisfied customers to mention the specific service performed (e.g., “They installed a new panel at my home.”). This further validates your expertise for that service.
- Monitor Insights
- Track whether the new categories/services correlate with an increase in calls or direction requests.
Troubleshooting Tips
- Category Not Found: If Google doesn’t have a matching category, pick the closest one and add services.
- Delayed Updates: Google may take a few days to reflect new categories/services.
- Service Limit: Not all services may display publicly, but it’s still beneficial to list them in your dashboard.
- Data Inconsistency: Keep your info consistent. Discrepancies can hurt SEO and confuse customers.
Best Practices
- Stay Relevant
- List only the categories/services you truly offer. Overloading your profile with irrelevant ones can backfire.
- Maintain a Master Document
- Keep a master list of categories and services (like the curated one we provide), ensuring consistency across all your online listings.
- Regular Updates
- Revisit your profile periodically to add new services or remove those you no longer provide.
Conclusion
Optimizing your GBP with the right electrician categories and services is a powerful move for local SEO. Whether you use a curated list or leverage competitor insights with a tool like GMB Everywhere, accurate categories and service listings make it easier for customers and Google to recognize your expertise. Stay consistent, keep your content relevant, and regularly review your settings to maintain a competitive edge in local search results.
The Best GMB Categories Services for Plumbers (Google Business Profile SEO)

Choosing the right categories and services for your Google Business Profile (GBP) is vital for ranking higher in local searches—especially in a competitive industry like plumbing. In this guide, we’ll walk you through how to identify the best plumbing categories, add them to your GBP, and assign relevant services that match what you actually offer. Properly setting up your GBP can significantly enhance your local SEO and attract more potential customers.
Why Categories and Services Matter for Plumbers
- Boost Local SEO
By selecting accurate categories and services, Google can better understand your business, making you more likely to appear in relevant local searches such as “plumber near me” or “emergency plumber.” - Capture Targeted Leads
Potential customers searching for specific plumbing services (e.g., “water heater installation”) will find your profile if you’ve listed those services. - Stand Out from Competitors
A detailed and accurate services list sets you apart, giving you an edge in the local map pack and search results.
Step 1: Identify Potential Categories and Services
Method 1: Using a GMB / GBP Category Tool
- Search Competitors with ‘Plumber near me’:
Use a tool like GMB Everywhere (or similar extensions) to view your competitors’ categories and services on their GBP. - Check Competitor Profiles:
- Look for categories such as Plumber, Septic System Service, Water Damage Restoration, or Water Softening Equipment Supplier if relevant.
- Identify which categories or services align with your business.
- Compile and Refine Services:
- Many tools let you copy the entire services list.
- Paste them into a document, removing any that don’t apply to your offerings.
Method 2: Using a Pre-Compiled List
- If you prefer a quicker approach, use a master list of plumbing categories and services (like the one provided in the description of our accompanying video).
- Copy it into a spreadsheet or document, then remove services you don’t provide and keep the ones you do.
Step 2: Add or Change Categories in Your Google Business Profile
- Access Your GBP Dashboard:
- Go to Google Business Profile Manager and sign in.
- Navigate to Info (or Edit Profile):
- Locate the Business Categories section.
- Add New Categories:
- If you haven’t set up a primary category yet, choose Plumber.
- To add secondary categories, click Add another business category and search for relevant terms (e.g., “Septic System Service,” “Drainage Service,” “Water Damage Restoration,” etc.).
Note: You can only have one primary category, so pick the most relevant one (most likely Plumber). You can add several additional categories if they apply.
Step 3: Add Services Under Each Category
- Locate Services Section:
- From your GBP dashboard, under Info (or Edit Services), find each category you’ve added.
- Use Auto-Suggestions:
- Google might prefill common services for each category (e.g., “Toilet Installation” for Plumber).
- Create Custom Services:
- If Google doesn’t list some of your offerings, click Add custom service.
- Type your specific service (e.g., “Drain Camera Inspection,” “Gas Line Repair,” “Water Heater Flush”).
- Optional: Add Descriptions or Prices:
- You can provide a short description (up to 300 characters) or pricing for each service.
Sample Categories and Services for a Plumber
Below is a brief example of how you might organize categories and services in your GBP:
- Primary Category: Plumber
- Services:
- Toilet Repair
- Leak Detection
- Faucet Installation
- Water Heater Installation
- Drain Cleaning
- Sewer Line Repair
- Gas Line Repair
- Hydro Jetting
- Services:
- Additional Category: Septic System Service
- Services:
- Septic Tank Installation
- Septic Tank Maintenance
- Drain Field Repair
- Services:
- (Optional) Water Damage Restoration
- Services:
- Water Extraction
- Dehumidification
- Structural Drying
- Services:
Only include categories and services you truly offer. Misrepresenting services can confuse potential customers and hurt your rankings.
Step 4: Confirm and Optimize
- Check Your Listing:
- Once updated, verify on your public Google Business Profile that your categories and services appear correctly.
- Encourage Service-Specific Reviews:
- Ask satisfied customers to mention the exact service (e.g., “toilet repair” or “water heater installation”) in their review. This further validates your services in Google’s eyes.
- Monitor Performance:
- Check your GBP insights to see if new categories/services attract more calls or website visits.
Troubleshooting
- Category Not Found: If Google doesn’t have a specific plumbing category, pick the closest match or add it as a custom service.
- Delayed Updates: Changes can take days to fully reflect. Google may also review categories before approving.
- Service Cap: If you have many services, Google might only display the most relevant or commonly searched. Keep them all in the dashboard, though, as it still helps with SEO.
Best Practices
- Be Accurate and Relevant:
- Only list categories and services you genuinely provide.
- Stay Organized:
- Maintain a master sheet of categories and services so everything remains consistent across your website, social media, and other listings.
- Stay Current:
- Periodically revisit your categories and services to add or remove offerings as your plumbing business evolves.
Conclusion
Selecting and listing the best Google Business Profile categories and services for plumbing businesses is crucial for showing up in local searches and capturing highly targeted leads. By methodically researching competitor GMB categories—or by using a pre-curated list—and carefully curating your categories in the GBP dashboard, you’ll ensure Google recognizes your full range of services. In turn, your business stands a better chance of outranking competitors in the local map pack and driving more profitable leads.
The Best GMB Categories Services for Restoration (Google Business Profile SEO)

Choosing the right categories and services on your Google Business Profile (GBP) is a game-changer when it comes to local SEO. If you operate in the restoration industry (e.g., water damage, fire damage, building restoration, or mold remediation), you need to ensure your GBP accurately reflects these services to show up in relevant local searches. Below, we’ll walk you through how to discover the best categories and services, and how to add them to your Google Business Profile.
Why GBP Categories and Services Matter
- Improve Local Search Rankings
GBP categories signal to Google what your business does, making it easier to appear in relevant searches. - Capture Qualified Leads
Listing the correct services ensures that potential customers find you for those specific needs—like mold remediation or fire restoration. - Outshine Competitors
Having detailed and accurate service listings can set you apart when customers are researching local businesses.
Step 1: Identify Potential Categories and Services
Method 1: Using a GMB Everywhere / GMB Categories Tool
- Search a Competitor
Type a query like “restoration near me” or “water damage restoration near me” in Google. - Inspect a Competitor’s Profile
Use a Google My Business (GMB) extension or tool (e.g., GMB Everywhere) to see the categories and services that competitor is using. - Compile Categories
For restoration, you’re likely to see categories like:- Water Damage Restoration Service
- Fire Damage Restoration Service
- Building Restoration Service
- (Optional) Asbestos Testing Service, depending on your business scope.
- Copy/Paste Services
Some tools provide an auto-generated list of services tied to each category. Copy these into a temporary document, and remove anything irrelevant (e.g., “Fire Extinguisher Inspection” if you don’t offer that).
Method 2: Reference a Comprehensive Category/Service List
If you prefer a quick solution, you can use a master list of restoration categories and services compiled by SEO experts. We’ve included a curated list in the description of our accompanying video, covering everything from “Water Damage Cleanup” to “Smoke Odor Removal.”
Step 2: Add Categories to Your Google Business Profile
- Open Your Google Business Profile
- Go to Google Business Profile Manager and sign in.
- Navigate to Categories
- From the left-hand menu, select Info (or Edit Profile).
- Scroll to the Business Categories section.
- Add or Change Categories
- Click Add another business category.
- Type in the new category (e.g., “Water Damage Restoration Service”).
- Google may prompt you with suggestions—select the one that best matches your service.
- Wait for Updates
- Changes may take a few minutes or hours to show up. Google often reviews category changes.
Step 3: Add or Edit Services Under Each Category
- Locate Services Section
- In the Info tab (or Edit Services depending on your GBP layout), find your newly added category.
- Click Add more services beneath it.
- Auto-Filled Suggestions
- Google may auto-suggest services related to your category (e.g., “Smoke Odor Removal” for Fire Damage Restoration). Select those that match what you actually offer.
- Create Custom Services
- If a service isn’t listed, click Add custom service.
- Enter a name (e.g., “Board-Up Services,” “Sewage Cleanup,” “Mold Remediation”).
- Save your changes.
- Refine Service Descriptions (Optional)
- Some businesses add short descriptions or pricing info. Keep it concise but clear.
Example Categories and Services for Restoration
- Primary Category: Water Damage Restoration Service
- Services:
- Water Extraction
- Flood Cleanup
- Sewage Cleanup
- Dehumidification & Drying
- Structural Repairs
- Services:
- Secondary Category: Fire Damage Restoration Service
- Services:
- Smoke Odor Removal
- Soot Cleanup
- Board-Up Services
- Structural Repairs
- Upholstery Cleaning
- Services:
- Additional Category: Building Restoration Service
- Services:
- Emergency Plumbing Repair
- Storm Damage Repair
- Asbestos Testing / Removal (if applicable)
- Mold Remediation
- Services:
Tailor these suggestions to your actual offerings—exclude anything you don’t do and add unique services that reflect your specialties.
Step 4: Verify and Optimize
- Check Your Listing
- Once updated, view your Google Business Profile to confirm the categories and services appear correctly.
- Encourage Reviews
- Ask satisfied customers to leave reviews mentioning the specific services they received. This further signals your expertise in those areas.
- Monitor Performance
- Check insights in your GBP dashboard to see if searches and requests are increasing for those services.
Troubleshooting
- Category Not Found: Not all industries have perfect category matches. Choose the closest option or add more general categories if needed.
- Service Limit: If you offer many services, pick the most relevant or high-intent ones, as Google may limit how many display.
- Changes Not Appearing: Google reviews category/service updates and might take a few days to reflect changes.
Best Practices
- Stay Relevant
- Only add categories and services that match your genuine offerings to avoid misleading potential customers and incurring Google’s disapproval.
- Use a Centralized Document
- Keep a master spreadsheet of categories and services to ensure consistency across your website, social media, and other listings.
- Regular Reviews
- Revisit your categories and services every few months to reflect any changes in your business offerings.
Conclusion
Choosing the right categories and services on your Google Business Profile is crucial for restoration companies aiming to rank higher in local searches. By leveraging methods like analyzing competitors or using curated lists—and combining them with strategic additions to your GBP—you can capture more leads, stand out from the competition, and ultimately grow your business. Remember to periodically review and update your categories and services to keep your profile accurate and highly visible.
How to Install a Podium Widget Using Google Tag Manager
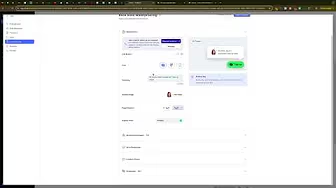
Integrating a live chat widget on your website is an effective way to engage visitors and boost conversions. In this guide, we’ll walk you through installing the Podium chat widget using Google Tag Manager (GTM) on your website. Podium’s chat widget is designed to help you capture leads, answer customer queries, and drive more conversions through real-time interactions. If you’re running a home service business or any business that relies on quick customer communication, adding this widget can be a game changer.
Why Use the Podium Chat Widget?
Podium is a powerful tool that offers an array of features to help businesses improve customer engagement and increase conversions. With the chat widget installed on your website, you can:
- Capture More Leads: Engage website visitors instantly and convert them into potential customers.
- Enhance Customer Support: Provide real-time support, answer questions, and resolve issues quickly.
- Boost Conversions: Directly interact with visitors during their decision-making process, leading to increased sales.
- Customize User Experience: Tailor the widget’s appearance and behavior to match your brand identity and specific business needs.
Using Google Tag Manager to install the Podium widget streamlines the process, allowing you to manage and update tracking codes without modifying your website’s source code.
Overview of the Installation Process
This guide explains how to install the Podium chat widget using GTM. We will cover the following key steps:
- Setting Up in Podium: How to access your Podium account and get the widget code.
- Configuring Google Tag Manager: How to add a new tag in GTM and paste the widget code.
- Deploying the Tag: How to trigger the widget on all pages of your website.
- Verifying the Installation: Testing your setup to ensure the widget appears correctly.
Step 1: Retrieve the Podium Chat Widget Code
Before you can add the widget via GTM, you need to access the Podium chat widget code from your Podium account.
Access Your Podium Account
- Sign In to Podium:
- Log in to your Podium account using your credentials.
- Ensure that you select the correct location if you manage multiple businesses or have several locations.
- Navigate to Lead Sources:
- Once logged in, go to the Lead Sources section in your Podium dashboard.
- Select Web Chat to access the chat widget options.
- Get Your Widget Code:
- Click on Widget Options (often represented by three dots in the upper right corner).
- Locate the widget code and click Copy to copy it to your clipboard.
Step 2: Configure Google Tag Manager
With your Podium widget code copied, the next step is to set up a new tag in Google Tag Manager (GTM) to deploy the widget.
Log In to Google Tag Manager
- Access GTM:
- Open your browser and go to Google Tag Manager.
- Log in with the correct account credentials. Make sure you’re in the right GTM account for the website you want to modify.
- Select the Correct Container:
- From the GTM dashboard, select the container associated with your website. This ensures that any changes you make will only affect the intended site.
Create a New Tag for Podium
- Go to Workspace and Tags:
- In your GTM account, click on Workspace from the top left menu.
- Then, select Tags in the left-hand sidebar.
- Add a New Tag:
- Click on the New button in the top right corner to create a new tag.
- Name your tag (for example, “Podium Chat Widget – 1”).
- Configure the Tag:
- Under Tag Configuration, select Custom HTML.
- Paste the Podium chat widget code you copied from your Podium account into the HTML field.
- Ensure the code is pasted correctly; this script is what will load the chat widget on your website.
Set Up Tag Triggering
- Choose Your Trigger:
- In the Triggering section, select All Pages. This will ensure the Podium chat widget loads on every page of your website, making it accessible to all visitors.
- Save Your Tag:
- Once the tag configuration and trigger settings are complete, click Save to finalize the tag setup.
Step 3: Deploy and Verify Your Podium Chat Widget
With your new tag created in GTM, it’s time to deploy it on your website and verify that it works correctly.
Publish Your Changes in GTM
- Submit Your Container:
- Click the Submit button in GTM to publish your changes.
- Optionally, add a version name or description (e.g., “Installed Podium Chat Widget”) to help keep track of updates.
- Confirm the Deployment:
- Once submitted, your GTM container will update, and the Podium chat widget should now be live on your website.
Test the Widget on Your Website
- Visit Your Website:
- Open your website in a new browser tab and navigate through a few pages.
- Look for the Podium chat widget—typically a chat box icon—on the pages.
- Perform a Test Submission:
- Interact with the widget to ensure it functions correctly.
- Check if the widget loads as expected and if its appearance matches any customizations you’ve set up in Podium.
- Debug if Necessary:
- If the widget does not appear, return to GTM and use the Preview mode to debug the tag.
- Verify that the correct code is pasted and that the trigger is set to All Pages.
Customizing the Podium Chat Widget
While the installation process using GTM gets the widget live, Podium also offers options to customize its appearance and functionality. Customizations can include:
Appearance Settings
- Theme and Colors: Adjust the color scheme of the chat widget to match your website’s branding.
- Layout Options: Configure the size and position of the widget on the page.
- Custom Greetings: Set up personalized greetings or messages that appear when a visitor interacts with the widget.
Advanced Functionality
- Automated Responses: Configure autoresponders to engage visitors immediately after they initiate a chat.
- Lead Collection: Integrate lead capture forms within the chat widget to collect visitor information.
- Analytics Integration: Connect the widget with your analytics tools to track conversions and interactions effectively.
For detailed customizations, refer to Podium’s own documentation or explore additional videos on our channel that dive into these advanced features.
Best Practices for Implementing Chat Widgets
Implementing a chat widget is not just about installation—it’s also about ensuring it enhances user experience and drives conversions. Here are some best practices:
1. Ensure Responsive Design
- Mobile-Friendly: Make sure the chat widget is optimized for mobile devices, as a significant portion of your traffic may come from smartphones and tablets.
- Fast Loading: Optimize the widget to load quickly without affecting the overall performance of your website.
2. Maintain Consistent Branding
- Visual Consistency: Use colors, fonts, and imagery that align with your brand identity.
- Professional Tone: Ensure that any automated messages or responses are written in a tone that reflects your brand’s personality.
3. Monitor and Analyze Performance
- Track Engagement: Use tools like Google Analytics and GTM to monitor how users interact with your chat widget.
- Adjust Strategies: Based on performance data, fine-tune the widget’s settings and messages to improve conversion rates.
4. Provide Clear Calls-to-Action
- Encourage Interaction: Use clear and compelling calls-to-action (CTAs) to prompt visitors to engage with the chat widget.
- Follow-Up Mechanisms: Implement a system to follow up on leads captured through the chat widget promptly.
5. Regularly Update and Test
- Ongoing Testing: Periodically test the chat widget to ensure it remains functional and effective.
- Stay Current: Update the widget’s customizations as needed to reflect changes in your branding or marketing strategies.
Common Pitfalls and How to Avoid Them
Even with the best tools, some common issues can arise during the installation and use of chat widgets. Here are a few pitfalls and how to avoid them:
1. Incorrect Code Pasting
- Impact: A misplaced or incomplete script can prevent the widget from loading.
- Solution: Double-check the Podium code in GTM to ensure it’s correctly pasted without any modifications.
2. Wrong Trigger Settings
- Impact: If the tag trigger isn’t set to All Pages, the widget may not appear on every page of your website.
- Solution: Verify the trigger settings in GTM and test the widget on multiple pages.
3. Conflicts with Other Scripts
- Impact: Other scripts or plugins might conflict with the Podium widget, causing it to malfunction.
- Solution: Use GTM’s preview mode to test for conflicts and adjust the tag sequencing if necessary.
4. Delayed Widget Loading
- Impact: Slow widget loading can negatively affect user experience and engagement.
- Solution: Ensure that your GTM container is published correctly and that your website’s performance isn’t compromised by excessive script loading.
5. Lack of Customization
- Impact: A generic widget that doesn’t reflect your brand may fail to engage users.
- Solution: Take advantage of Podium’s customization options to tailor the widget’s appearance and functionality to your specific needs.
Frequently Asked Questions
How Do I Know if the Podium Chat Widget is Working?
After publishing your GTM container, visit your website and check for the presence of the chat widget. Interact with it to ensure that it loads correctly and that automated responses or lead capture functions are working as expected.
Can I Customize the Appearance of the Podium Chat Widget?
Yes, Podium provides several customization options, including color schemes, layouts, and custom greetings. You can adjust these settings within your Podium account under Widget Options.
What Should I Do if the Widget Doesn’t Load?
If the widget fails to load, use GTM’s Preview mode to troubleshoot the tag. Verify that the correct code is pasted, that the trigger is set to All Pages, and that there are no conflicts with other scripts on your website.
Is It Necessary to Use Google Tag Manager to Install Podium?
While there are multiple methods to install Podium, using Google Tag Manager offers a centralized and efficient way to manage your tracking scripts. It also simplifies updates and troubleshooting, especially if you manage multiple tags on your site.
How Can I Track the Effectiveness of My Chat Widget?
Integrate your chat widget with analytics tools like Google Analytics and GTM. Set up conversion tracking to monitor how many leads the widget generates and use this data to optimize your marketing strategy.
Conclusion
Installing the Podium chat widget on your website using Google Tag Manager is an effective way to boost customer engagement and improve conversion rates. By following the steps outlined in this guide, you can seamlessly integrate the widget into your website and customize its functionality to align with your brand. Remember to regularly test and update the widget to ensure optimal performance and to track its impact on your marketing efforts.
Leveraging tools like GTM not only simplifies the installation process but also provides the flexibility to manage various tracking codes in one place. Whether you’re a home service business or any other type of business looking to enhance online interactions, the Podium chat widget can be a valuable addition to your digital marketing strategy.
How to Fix White Space to the Right of Mobile View on WordPress Elementor Website

When viewing your WordPress website on mobile devices or via developer tools, an annoying giant white space on the side can disrupt user experience. In this guide, we’ll walk you through a simple fix using additional CSS in the WordPress Customizer. This solution is especially useful if you’re working with WordPress Engine and need to clear caches to see the changes immediately.
Why This White Space Issue Matters
Excess white space on your mobile site can:
- Hinder User Experience: It may force users to scroll horizontally or miss important content.
- Affect Site Appearance: A cluttered layout can make your site look unprofessional.
- Reduce Engagement: Users might leave if they find the site difficult to navigate.
Step-by-Step Guide to Removing White Space
Access Your WordPress Dashboard
- Log in to Your Dashboard:
Navigate toyourwebsite.com/wp-adminand log in with your credentials. - Navigate to Appearance > Customize:
Once logged in, go to Appearance in the sidebar and select Customize. This will open the WordPress Customizer where you can make live changes to your site’s design.
Add Custom CSS to Remove White Space
- Go to Additional CSS:
In the Customizer, find and click on Additional CSS. - Paste This CSS Code:
html, body {
max-width: 100% !important;
overflow-x: hidden !important;
} - Publish Your Changes:
Once you’ve pasted the code, click Publish at the top to save your changes.
Clear Your Cache
Sometimes, changes won’t appear immediately because of cached data. If you’re using WordPress Engine:
- Access Your Hosting Environment:
Navigate to the environment where your site is hosted. - Clear All Caches:
Locate the cache management section and click Clear All Caches. This will force your site to update and reflect the new CSS changes.
Verify the Fix
After clearing your cache, refresh your website on a mobile device or use developer tools to confirm that the white space issue has been resolved. If the problem persists, double-check the CSS code for any errors and ensure that it has been published correctly.
Conclusion
Fixing the white space issue on your mobile WordPress site is a simple yet effective way to improve user experience and ensure your site looks professional. By using the Additional CSS feature in WordPress and clearing your cache in WordPress Engine, you can quickly eliminate those annoying gaps. Regular maintenance and testing can keep your site optimized and user-friendly.
How to Install Podium Webchat Widget on WordPress Website Using WordPress Plugin

Integrating a live chat widget into your website can greatly enhance customer engagement and drive conversions. In this guide, we’ll walk you through installing the Podium web chat widget on your WordPress site. While there are various methods available for different website builders, this tutorial focuses specifically on WordPress—making it ideal for home service businesses and others looking to boost their online communication without overloading their site with extra plugins.
Why Use the Podium Web Chat Widget?
Podium’s web chat widget offers a dynamic way to connect with visitors in real time. By enabling live chat on your site, you can:
- Increase Conversions: Capture leads directly by engaging visitors instantly.
- Enhance Customer Support: Provide immediate answers to questions, improving overall customer satisfaction.
- Customize Engagement: Tailor the appearance and behavior of the chat widget to match your brand.
Step-by-Step Guide to Installing Podium on WordPress
Follow these steps to install and activate the Podium web chat widget on your WordPress website.
Step 1: Install the Podium Plugin
- Log in to Your WordPress Dashboard:
- Navigate to
yourwebsite.com/wp-adminand enter your login credentials.
- Navigate to
- Add a New Plugin:
- In the left-hand sidebar, click on Plugins.
- Click Add New at the top left of the Plugins page.
- In the search bar, type Podium.
- Install and Activate:
- Locate the Podium plugin in the search results and click Install Now.
- Once installed, click Activate. If you don’t see the activation button immediately, go to your Plugins list and activate it from there.
Step 2: Configure Podium Settings
- Access the Podium Dashboard:
- Once the plugin is activated, a new Podium menu will appear at the top of your WordPress dashboard. Click on it.
- Enable the Web Chat Widget:
- In the Podium settings, you’ll be prompted to choose whether your Podium web chat is enabled or disabled. Select Enabled.
- Get Your Widget Code:
- Sign in to your Podium account (make sure you’re in the correct business or location if you manage multiple accounts).
- Click on your name in the bottom left, then select View Profile.
- Navigate to Lead Sources, and then click on Web Chat.
- Locate the Widget Options button (typically found at the top right) and click Copy to copy the widget code.
- Paste the Widget Code:
- Return to the Podium settings in WordPress.
- Paste the copied widget code into the designated field.
- Click Save Changes to confirm your settings.
Step 3: Verify and Test the Widget
- Test the Installation:
- Visit your website and navigate to a page where the widget should appear.
- Confirm that the Podium chat widget loads correctly.
- If you encounter any issues, double-check the copied code and ensure that you’re signed in with the correct Podium account.
- Customize Further (Optional):
- Explore additional settings in Podium to adjust the widget’s appearance, automated responses, and other features. For advanced users, there’s also an option to install the widget via Google Tag Manager, which can reduce the number of plugins on your site.
Best Practices for Using the Podium Web Chat Widget
Implementing the chat widget effectively is key to maximizing its benefits. Consider these best practices:
1. Maintain a Clean and Responsive Design
- Brand Consistency: Customize the widget’s colors and layout to match your website’s branding.
- Mobile Optimization: Ensure the widget functions seamlessly on mobile devices, as many visitors access your site via smartphones.
2. Monitor and Optimize Engagement
- Track Conversions: Use analytics tools to measure the effectiveness of your chat widget in generating leads.
- Adjust Settings: Regularly update the widget’s automated responses and appearance based on customer feedback and engagement metrics.
3. Keep Plugin Usage Minimal
- Streamline Your Site: As an agency or business owner, consider managing the Podium script via Google Tag Manager if you want to reduce the number of active plugins on your website.
Common Mistakes to Avoid
Avoid these pitfalls to ensure a smooth installation and optimal performance of your Podium chat widget:
- Incorrect Account Selection: Make sure you’re signed in to the correct Podium account, especially if you manage multiple businesses or locations.
- Incomplete Code Copy: Verify that you have copied the entire widget code correctly from your Podium dashboard.
- Neglecting Testing: Always test the widget after installation to confirm it’s functioning as expected on various pages and devices.
- Overloading Your Website: If you’re an agency or business owner, consider using Google Tag Manager for a cleaner integration rather than installing multiple plugins.
Conclusion
Installing the Podium web chat widget on your WordPress site is a powerful way to boost customer engagement and increase conversions. By following this step-by-step guide, you can easily add the widget via the Podium plugin and configure it to meet your specific business needs. Remember to customize the widget to align with your brand, test its functionality thoroughly, and consider more streamlined solutions like Google Tag Manager for a cleaner website setup.