
Author: David Bratvold
How to Add Voicemail Message in RingCentral for Business Hours & After Business Hours
https://www.youtube.com/watch?v=BjDx0g4_B2Q
Learning how to add a voicemail message in RingCentral for business hours and after business hours helps streamline your communication processes, ensuring that your customers and clients always receive professional and timely responses. Voicemail setups play a crucial role in customer satisfaction, managing expectations clearly by informing callers of your availability, and providing them with guidance on what to do next.
In this comprehensive guide, you’ll find detailed steps for setting up and customizing your voicemail messages in RingCentral, tailored separately for business and after-business hours.
Why Customize Voicemail Messages in RingCentral?
Customizing your voicemail messages offers numerous practical benefits:
- Professionalism: Clearly communicates your availability and enhances your business’s professional image.
- Enhanced Customer Service: Ensures callers receive timely, clear instructions even when you’re unavailable.
- Operational Clarity: Differentiates your business’s availability clearly during business hours and after hours.
Understanding these benefits emphasizes the importance of setting up your voicemail properly.
Step-by-Step Guide: Setting Up Voicemail Messages in RingCentral
Follow these straightforward steps to effectively set up your voicemail messages in RingCentral for both during and after business hours:
Step 1: Access the Admin Portal
First, log into your RingCentral account:
- Navigate to the RingCentral login page and enter your credentials.
- Access the Admin Portal from the dashboard.
Step 2: Navigate to Phone System Settings
- Within the Admin Portal, click on the “Phone System” tab.
- Select “Groups” and then choose “Call Queues”.
Step 3: Choose Your Call Queue
- Locate and select the specific call queue for which you want to set up voicemail messages.
Step 4: Customize Voicemail for Work Hours
- Scroll down to the “Voicemail and Notifications” section.
- Click on the “Work Hours” option.
- To change the voicemail message, click “Edit” next to the current message.
- Choose “Custom” to upload a personalized voicemail greeting.
- Click on the red dot icon, then select “Import”.
- Click “Browse” to locate and upload your desired voicemail audio file.
Ensure the audio file clearly communicates your business’s availability during regular working hours.
Step 5: Customize Voicemail for After Hours
- In the same “Voicemail and Notifications” section, click on the “After Hours” tab.
- Follow the same steps as for work hours: click “Edit”, choose “Custom”, click the red dot icon, select “Import”, and upload the after-hours voicemail file.
This voicemail should clearly indicate your non-availability and offer alternate methods of communication or suggest calling back during regular business hours.
Step 6: Editing Work Schedule in RingCentral
Sometimes, you might need to adjust your business hours:
- In the same area, click on “Edit Schedule”.
- Set your desired business hours clearly (e.g., 8:00 a.m. – 6:00 p.m.).
- Ensure you clearly specify the days and times for business and after-hours periods.
These defined schedules ensure that callers always receive the appropriate voicemail message based on the time they call.
Troubleshooting Common Issues
If you encounter difficulties while setting up voicemail messages, consider these troubleshooting tips:
Issue: Voicemail Not Playing Correctly
- Confirm your audio file format and ensure it’s supported by RingCentral.
- Check that your custom voicemail file has been properly uploaded and saved.
Issue: Voicemail Schedule Incorrect
- Double-check the defined schedule settings in RingCentral.
- Verify timezone settings and adjust if necessary.
Advanced Tips for Effective Voicemail Messages
Make your voicemail messages even more effective by following these best practices:
- Clear and Concise: Ensure messages are brief, clear, and easy to understand.
- Professional Tone: Use a professional yet friendly tone that reflects your business brand.
- Regular Updates: Regularly update your voicemail messages to reflect changes in business hours, holidays, or special events.
Practical Applications of Customized Voicemail
Customized voicemail messages in RingCentral can significantly enhance several operational aspects:
- Customer Engagement: Clearly inform callers of when they can expect a callback or alternate contact methods.
- Efficient Operations: Minimize miscommunications and manage caller expectations effectively.
- Brand Image: Reinforce your business’s professional image through consistent and clear communication.
Conclusion
By mastering how to add a voicemail message in RingCentral for business hours and after business hours, you greatly enhance your communication effectiveness, providing clear, professional guidance to your callers. This straightforward yet impactful setup ensures improved customer satisfaction, operational clarity, and consistent brand communication.
Take advantage of RingCentral’s voicemail customization today and optimize your business communication strategy.
How to Add reCAPTCHA to WordPress Elementor Forms on Your Website Stop Spam Submissions
https://www.youtube.com/watch?v=nuQmuQwWz1I
Knowing how to add reCAPTCHA to WordPress Elementor forms on your website is essential if you want to prevent spam submissions effectively. Spam submissions can clutter your inbox, drowning out legitimate inquiries and potential leads, which can negatively impact your business’s responsiveness and customer experience. In this detailed guide, you’ll learn exactly how to incorporate Google’s reCAPTCHA feature into your WordPress Elementor forms, streamlining your lead management process and enhancing website security.
Why Use reCAPTCHA on Your Elementor Forms?
Using reCAPTCHA on your forms provides several significant advantages:
- Reduced Spam: Significantly cut down on automated spam submissions.
- Improved Security: Protect your website from harmful bots and scripts.
- Enhanced User Experience: Ensure legitimate users can easily submit forms without inconvenience.
With these benefits in mind, let’s explore the step-by-step process to add reCAPTCHA effectively to your WordPress Elementor forms.
Step-by-Step Guide to Adding reCAPTCHA to Elementor Forms
Follow these simple steps to set up reCAPTCHA and protect your website from spam:
Step 1: Sign Up for Google reCAPTCHA
First, navigate to Google’s reCAPTCHA website:
- Go to
google.com/recaptchaor simply search “Google reCAPTCHA” in your browser. - Click on “Get Started” to access the setup page.
Step 2: Configure Your reCAPTCHA Account
After clicking “Get Started”, you’ll need to configure your reCAPTCHA:
- Label: Enter your website’s name or domain (e.g., “localsync.com”).
- Type of reCAPTCHA: Select “reCAPTCHA v3”. This option works seamlessly in the background without interrupting user experience.
- Domain: Enter your website domain without including “www” or “https://” (e.g., “localsync.com”).
- Accept Terms: Agree to Google’s terms and conditions.
- Click “Submit” to generate your site key and secret key.
Step 3: Save Your reCAPTCHA Keys
Upon submission, Google will generate two keys:
- Site Key: Publicly identifies your site.
- Secret Key: Should remain confidential.
Copy and store these keys safely, as you’ll need them shortly. Avoid sharing your secret key publicly to maintain security.
Step 4: Integrate reCAPTCHA into Elementor
Next, integrate your keys into Elementor:
- Log in to your WordPress admin dashboard.
- Navigate to “Elementor” → “Settings”.
- Scroll down to the “Integrations” tab.
- Under reCAPTCHA v3, paste the Site Key and Secret Key into the respective fields.
- Set the score threshold. The default is typically 0.5, balancing effectively between usability and security. Adjust this value higher if you continue receiving spam submissions.
- Scroll to the bottom and click “Save Changes” to confirm integration.
Step 5: Add reCAPTCHA to Your Elementor Form
After integrating keys:
- Open the Elementor editor for the page containing your form.
- Select your Elementor form widget.
- Click “Add Item” in the form settings sidebar.
- Choose “reCAPTCHA v3” from the dropdown menu.
- Configure the badge position (e.g., bottom right, bottom left, inline). Typically, the bottom right position works well as it’s unobtrusive yet clearly visible.
- Once configured, click “Publish” or “Update” to save changes.
Now, your form includes Google reCAPTCHA protection, significantly reducing spam submissions and improving the integrity of leads.
Troubleshooting Common Issues
If you encounter issues with reCAPTCHA integration, consider these troubleshooting steps:
Issue: reCAPTCHA Badge Not Visible
- Verify correct integration by checking Elementor and reCAPTCHA settings.
- Ensure no overlapping website elements obscure the badge position.
- Clear browser and website cache, then reload the page.
Issue: Spam Still Receiving
- Increase the reCAPTCHA score threshold incrementally until spam submissions significantly decrease.
- Confirm your site and secret keys are correctly integrated and active.
Advanced Tips for Optimizing reCAPTCHA
Maximize the effectiveness of reCAPTCHA by:
- Regularly reviewing submission logs to identify patterns and adjust thresholds.
- Testing user experience periodically to ensure legitimate users aren’t inadvertently blocked.
- Continuously updating your site’s plugins and themes to maintain compatibility.
Benefits of Using reCAPTCHA v3 in Elementor Forms
reCAPTCHA v3 stands out due to several unique benefits:
- Seamless User Experience: Operates invisibly, eliminating user frustration.
- Enhanced Accuracy: Reliably identifies and blocks bots and spam.
- Minimal Maintenance: Requires minimal oversight once configured correctly.
Conclusion
By mastering how to add reCAPTCHA to WordPress Elementor forms on your website, you effectively safeguard your site against spam and automated bots, thereby improving the quality of leads you receive. Implement this powerful security measure today and streamline your online interactions for optimal user engagement and operational efficiency.
How to Clone Your Voice or Client’s Voice in ElevenLabs to Easily Create More Marketing Content
https://www.youtube.com/watch?v=XE2Lej0kumI
Learning how to clone your voice or client’s voice in ElevenLabs can revolutionize your marketing content strategy. By leveraging advanced AI voice cloning technology, businesses and marketers can efficiently create engaging, personalized content at scale. This method not only saves considerable time but also maintains a consistent, professional brand voice across various media channels.
This comprehensive guide will walk you through the exact steps necessary to clone voices using ElevenLabs, including ethical considerations, best practices, and practical applications for your business or your clients.
Why Clone Voices with ElevenLabs?
Voice cloning using ElevenLabs offers several compelling benefits:
- Time Efficiency: Quickly generate audio content without repeated recording sessions.
- Consistent Branding: Maintain a uniform brand voice across ads, videos, and voice mails.
- Scalability: Easily produce high-quality voice content for various marketing campaigns.
Considering these significant advantages, let’s dive deeper into the process and best practices of voice cloning.
Ethical Considerations Before Cloning
Before proceeding, it’s critical to respect legal and ethical guidelines:
- Obtain Permission: Always get explicit permission from individuals before cloning their voice, even clients.
- Clear Communication: Explain to your client how their cloned voice will be utilized in your marketing efforts.
- Transparency: Avoid using cloned voices without clearly identifying the usage, thus maintaining trust and compliance.
Step-by-Step Guide to Cloning Voices in ElevenLabs
Here’s a detailed walkthrough on cloning voices effectively using ElevenLabs:
Step 1: Access ElevenLabs Dashboard
- Log in to your ElevenLabs account.
- Navigate to the dashboard and click the “Voices” tab in the top left.
Step 2: Add a New Voice
- Click the black “Add New Voice” button.
- Choose the “Instant Voice Clone” option for quick, effective cloning.
Step 3: Prepare Audio Samples
For optimal results, gather high-quality voice samples:
- Ideally, collect around 10 separate audio clips, ensuring the samples are clear, with minimal background noise.
- Use professional recording equipment or ensure the client’s provided audio is of high quality.
Step 4: Upload Voice Samples
- Click “Drop files” and upload your prepared audio clips.
- Ensure each clip is under 10 MB for best results.
Step 5: Background Noise Removal (Optional)
- Select the “Remove background noise from audio recordings” checkbox if your samples contain unwanted noise.
- This feature ensures cleaner, clearer voice cloning.
Step 6: Name and Describe Your Clone
- Enter a descriptive name for your voice clone for easy identification.
- Optionally, include a brief description to detail the voice’s specific use case or characteristics.
Step 7: Save Your Voice Clone
- Click the “Save Voice” button.
- Your cloned voice will now appear in your ElevenLabs voice list, ready for use.
How to Use Your Cloned Voice in Marketing Content
After creating your voice clone, leverage it effectively in your marketing strategy:
Step 1: Generate Speech from Text
- Navigate to the “Generate Speech” tab within ElevenLabs.
- Choose your newly cloned voice from the dropdown menu.
Step 2: Create Marketing Scripts
- Type or paste your marketing script into the provided text box.
- Click “Generate” to produce the audio file instantly.
Step 3: Integrate Generated Voice into Marketing Campaigns
Use your cloned voices creatively across multiple platforms:
- Video Ads: Add personalized voiceovers to your promotional videos.
- Social Media Content: Quickly generate voice-based content for platforms like TikTok, Instagram, or Facebook.
- Phone Greetings: Implement professional, customized phone system messages without additional recordings from your client.
Troubleshooting Common Issues
Here’s how to resolve typical issues encountered during the cloning process:
Issue: Low-Quality Audio Output
- Verify your initial audio samples are clear and high-quality.
- Utilize noise removal settings provided by ElevenLabs.
Issue: Cloned Voice Not Accurate
- Ensure you provide enough diverse voice samples.
- Include varied vocal expressions for more realistic cloning results.
Advanced Tips for Optimizing Voice Clones
Enhance the quality and effectiveness of your cloned voices with these tips:
- Regularly update and refresh voice samples to maintain accuracy.
- Experiment with different voice styles to find the most engaging and effective tone.
- Continuously analyze marketing campaign performance using cloned voices to refine and optimize future content.
Practical Applications of Voice Cloning
Voice cloning has vast applications, notably:
- Automated Customer Support: Use cloned voices for AI voice agents and interactive response systems.
- Personalized Marketing Messages: Quickly create tailored voice ads for specific audiences.
- Internal Communication: Efficiently generate consistent internal training or announcement messages.
Conclusion
Mastering how to clone your voice or client’s voice in ElevenLabs allows you to quickly produce high-quality, personalized marketing content. With clear ethical practices, strategic implementation, and continual optimization, voice cloning can significantly streamline your content creation efforts and elevate your brand communication.
Start using ElevenLabs today to unlock new opportunities for engaging and scalable marketing content.
Comprehensive Guide to Verifying Your Google Business Profile (GBP)
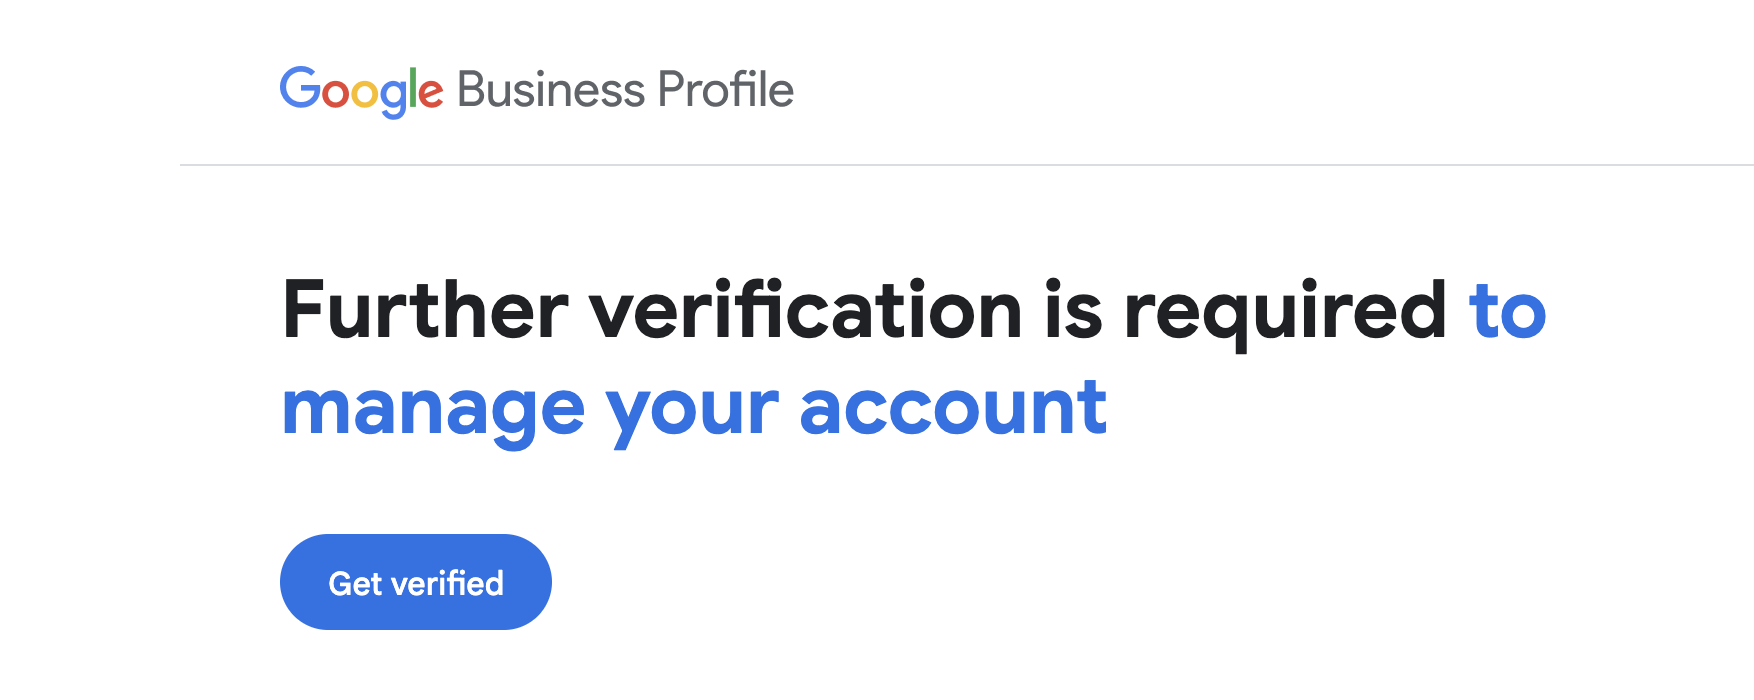
If you’ve ever gotten an email that says “Further verification is required to manage your account”, we feel your pain. Getting suspended or hit with a verification on your GMB is one of the most soul-crushing, stressful things a business owner can go through. Luckily, a verification is much easier to complete than a full suspension, and in this post we’ll show you exactly how to get your profile back as fast as possible.
Ensuring your Google Business Profile (GBP) is accurately verified can significantly enhance your visibility and credibility online. Sometimes, Google requests additional verification, such as video verification, to ensure businesses are accurately represented. This comprehensive guide covers the verification process, common issues, and helpful Q&As to simplify your verification experience.
Understanding Additional Verification
Google sometimes asks for further verification beyond typical methods (like postcards or phone calls) to confirm the authenticity and accuracy of your business listing. Video verification is increasingly common and ensures that your business details match your Google listing.
How to Successfully Complete Video Verification
Step 1: Preparing for Verification
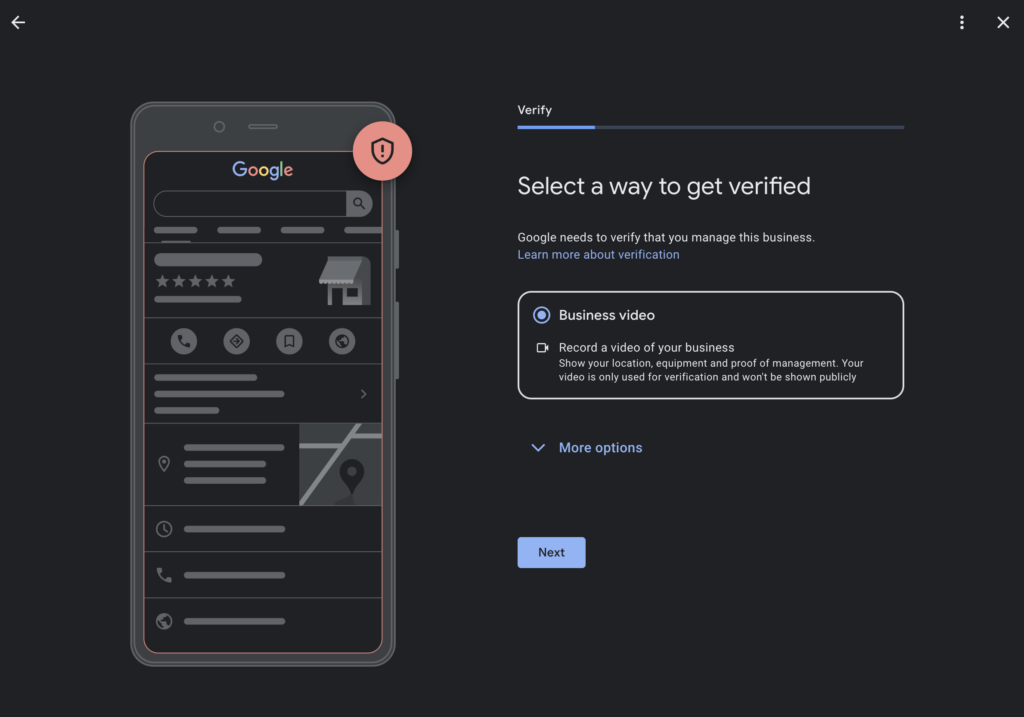
Before you start recording your verification video:
- Ensure you have sufficient lighting and stable recording conditions.
- Plan to include all required elements clearly in a continuous, uninterrupted recording.
- Keep the video concise (1-2 minutes long).
- Avoid capturing identifiable faces, sensitive documents, or personal information clearly.
Step 2: Show Your Business Location Clearly
Begin your video outside your establishment:
- Capture clear visuals of street signs, recognizable landmarks, neighboring businesses, and your building’s exterior.
- The surroundings must clearly match your listed address.
Step 3: Demonstrate Your Business Name
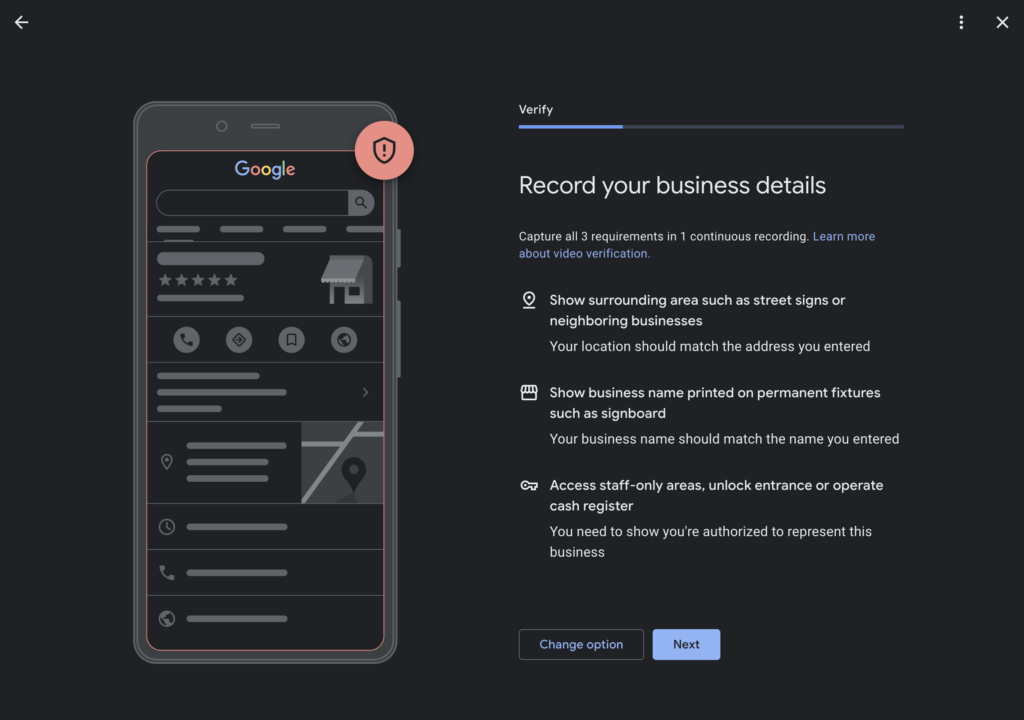
Clearly display your business name through:
- Permanent signage (outdoor signs, plaques, decals on doors/windows).
- Confirm the exact match of your business name to the one registered in your Google Business Profile.
Step 4: Prove Management Authorization
Demonstrate your authority clearly by:
- Entering staff-only areas or unlocking the main entrance.
- Operating business-specific equipment or machinery, such as cash registers or POS systems.
- Clearly indicating your active management role.
Step 5: Submit Your Verification Video
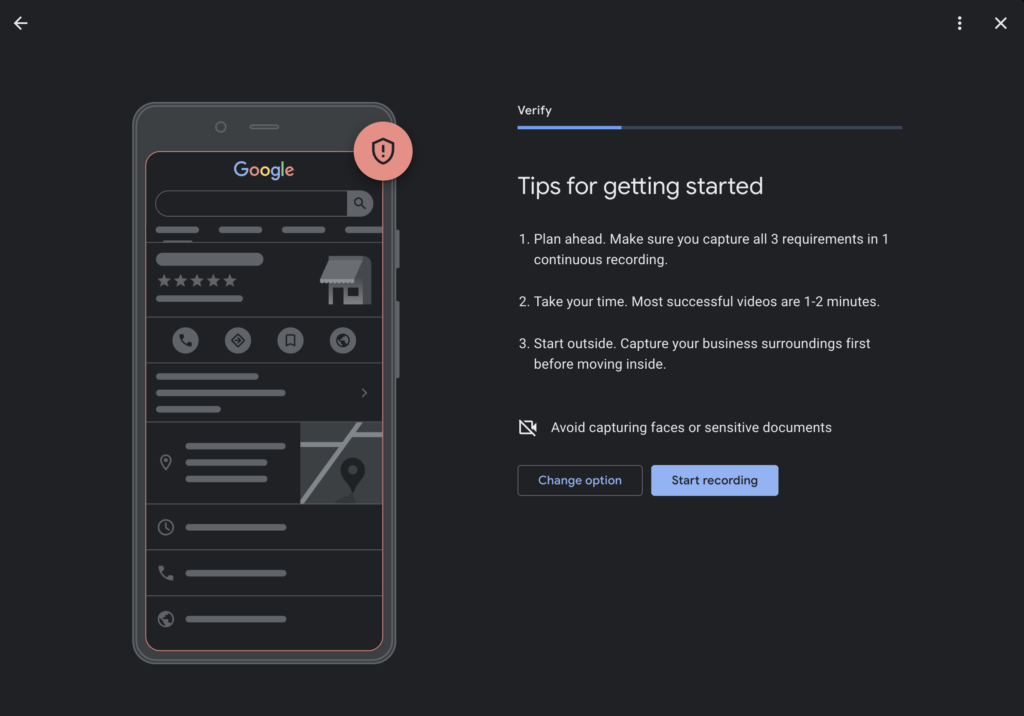
Once you’ve captured all required elements:
- Upload your video following Google’s provided instructions carefully.
- Ensure your video meets all outlined criteria clearly and accurately.
Common Issues and Solutions:
Issue: Google rejects the video.
- Solution: Review feedback carefully, ensuring you clearly include all required points. Consider improving lighting, stability, and video quality if re-recording is necessary.
Issue: Mismatched Address or Business Name
- Solution: Update your profile information to accurately reflect signage and surroundings before resubmitting.
Frequently Asked Questions (FAQs)
Q: Why is additional verification necessary?
A: Additional verification protects businesses and customers by ensuring listings are accurate and legitimate.
Q: Will my verification video be public?
A: No, your verification video remains private and is used solely for verification purposes by Google.
Q: What happens after successful verification?
A: Once verified, your profile updates will become visible to customers, enhancing your online visibility and search rankings.
Q: How long does verification take?
A: Google typically reviews verification submissions within a few days. However, processing times can vary depending on Google’s review load.
By following this detailed guide, you can efficiently navigate Google’s verification process, resolving common issues and confidently managing your Google Business Profile.
How to Change Phone Number Name in Aircall
Knowing how to change the phone number name in Aircall can streamline your business communications, especially if you’re managing multiple numbers for different services or marketing campaigns. Properly labeled phone numbers improve internal organization, enhance team productivity, and simplify customer interactions.
In this practical guide, we’ll walk you step-by-step through the easy process of updating phone number names within the Aircall dashboard, ensuring clear and efficient communication within your business.
Why Change Phone Number Names in Aircall?
Changing phone number names in Aircall provides numerous benefits, including:
- Improved Organization: Clearly label numbers to avoid confusion.
- Enhanced Tracking: Easily monitor marketing campaign effectiveness.
- Better Team Communication: Ensure all team members know which line is intended for specific business purposes.
Understanding these benefits highlights why taking the time to rename your phone numbers is crucial for effective business management.
Step-by-Step Guide to Changing Phone Number Names
Follow these straightforward steps to quickly rename your phone numbers within Aircall:
Step 1: Log into Your Aircall Dashboard
Begin by logging into your Aircall account:
- Visit the Aircall login page.
- Enter your credentials to access your dashboard.
Step 2: Navigate to Your Phone Numbers
Once logged in:
- On the left-hand menu, click the “Numbers” tab.
- This action will display a list of all your registered Aircall phone numbers.
Step 3: Select the Phone Number to Rename
- Browse through your listed numbers and select the one you want to rename by clicking on it.
Step 4: Access Number Settings
- Once you’ve clicked your chosen number, a new panel will open.
- Navigate to the “Settings” tab.
Step 5: Change the Phone Number Name
In the settings panel:
- Find the field labeled “Number Name”.
- Click into this field to edit.
- Enter the new, descriptive name you wish to assign to the number. For example, “Customer Service Line” or “Sales Inquiry Line.”
Step 6: Save Your Changes
- After entering the new name, ensure your changes are saved by clicking any available save or confirm button.
- Refresh your dashboard if necessary to confirm that your number has been renamed successfully.
Best Practices for Naming Phone Numbers in Aircall
To maximize the benefits of this functionality, consider the following best practices:
- Use Clear Descriptions: Choose intuitive names that easily indicate the number’s primary function.
- Maintain Consistency: Follow a consistent naming convention for easier tracking and reference.
- Regularly Review Names: Periodically check and update names to align with current usage or business changes.
Common Issues and Troubleshooting
If you encounter issues renaming your Aircall phone numbers, consider these troubleshooting tips:
Issue: Name Changes Not Saving
- Ensure you’re fully logged in with administrative permissions.
- Clear your browser’s cache and refresh the Aircall dashboard.
- Contact Aircall support if the issue persists.
Issue: Confusing Naming
- Adopt a standardized naming format.
- Regularly audit your number names to remove outdated or misleading labels.
Additional Features for Enhanced Communication
Aside from renaming phone numbers, Aircall offers several other valuable features:
- Custom Hold Music: Improve caller experience with personalized audio.
- AI Voice Agents: Automate simple inquiries for greater efficiency.
- Advanced Call Analytics: Track call performance and enhance customer service.
Stay tuned for more guides on leveraging these powerful Aircall features to further enhance your business communications.
Benefits of Well-Organized Aircall Numbers
Clearly labeled numbers provide significant operational advantages:
- Efficient Call Handling: Quickly identify the purpose of incoming calls.
- Improved Customer Satisfaction: Respond promptly and accurately based on line identification.
- Streamlined Internal Communication: Team members can quickly route or respond to calls, knowing exactly their intended purpose.
Conclusion
Learning how to change phone number names in Aircall significantly improves your team’s operational efficiency and customer interaction quality. By following these easy steps, you ensure your communication infrastructure remains organized, transparent, and effective.
Implement these changes today and experience firsthand the operational clarity and productivity improvements it brings to your business.
How to Add reCAPTCHA to GravityForms on WordPress Website Stop Spam Submissions
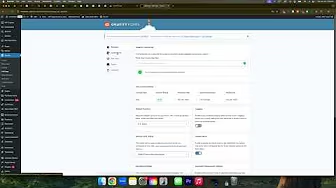
Adding reCAPTCHA to Gravity Forms on your WordPress website is essential for combating spam submissions. Spam can clutter your inbox and obscure genuine inquiries, making it challenging to manage your online communications effectively. Fortunately, setting up reCAPTCHA is straightforward.
Why Use reCAPTCHA with Gravity Forms?
reCAPTCHA helps distinguish human users from automated bots, significantly reducing spam submissions. This ensures cleaner, more reliable form entries and a better user experience for legitimate visitors.
Step-by-Step Guide to Add reCAPTCHA to Gravity Forms
Follow these easy steps to integrate reCAPTCHA on your Gravity Forms:
Step 1: Obtain reCAPTCHA Keys from Google
- Visit the Google reCAPTCHA website.
- Click the “Get Started” button.
- Enter a label (e.g., your website name).
- Choose reCAPTCHA v3 (recommended) for minimal user disruption.
- Enter your domain without “www” or “https://” (e.g., yoursite.com).
- Click “Submit.”
After submission, you will receive a Site Key and Secret Key. Copy these keys and store them safely.
Step 2: Configure Gravity Forms with reCAPTCHA Keys
- Log into your WordPress dashboard.
- Navigate to Forms > Settings.
- Click on the reCAPTCHA tab.
- Paste your copied Site Key and Secret Key into the corresponding fields.
- Select “Invisible” for reCAPTCHA v3.
- Click Save Settings.
Step 3: Verify reCAPTCHA Integration
After saving your settings:
- Visit your website and navigate to a page containing a Gravity Form.
- Look for the reCAPTCHA icon (usually located at the bottom-right corner).
This icon confirms successful integration.
Choosing Between reCAPTCHA v2 and v3
- reCAPTCHA v2 (Checkbox): Users must explicitly confirm they’re not robots.
- reCAPTCHA v3 (Invisible): Monitors user behavior in the background without requiring manual checks, offering a seamless user experience.
We recommend v3 for its unobtrusive and user-friendly design.
Troubleshooting Common Issues
If you encounter any issues:
- Ensure correct key entries.
- Clear your website cache and browser cache.
- Confirm compatibility with your current theme and plugins.
Benefits of Using reCAPTCHA
- Reduces Spam: Dramatically cuts down on automated spam submissions.
- Enhances Security: Protects forms from automated attacks.
- Improves User Experience: Minimizes manual verification tasks.
Conclusion
Implementing reCAPTCHA on Gravity Forms is a simple yet powerful step to maintain clean, spam-free communications through your WordPress website. Follow these steps to ensure smooth and secure form submissions.
Fastest & Easiest Way to Fix Elementor Sidebar Not Loading (Stuck Loading)

Experiencing Elementor sidebar not loading and getting stuck can disrupt your workflow significantly. While Elementor is a powerful page builder for WordPress, this loading issue is common and can be frustrating. Thankfully, there’s a quick workaround to immediately get back to editing your site.
Why the Elementor Sidebar Gets Stuck Loading
Several underlying issues can cause the Elementor sidebar to become stuck:
- Plugin conflicts
- Theme incompatibilities
- Insufficient PHP memory
- Caching problems
Addressing these can take significant troubleshooting, but there’s a fast, temporary solution to continue editing immediately.
Quick Fix Using Stylebot Chrome Extension
Here is the quickest and easiest method to temporarily bypass the Elementor sidebar loading issue:
Step 1: Install Stylebot Chrome Extension
- Go to the Chrome Web Store.
- Search for “Stylebot.”
- Select the Stylebot extension (with approximately 1.6K ratings).
- Click “Add to Chrome” to install it.
Step 2: Refresh Your Elementor Editor Page
Before using Stylebot:
- Refresh the Elementor editor page that’s experiencing the sidebar loading issue.
Step 3: Use Stylebot to Bypass the Issue
- Click the Stylebot icon in your Chrome extension toolbar.
- Select “Open Stylebot.”
- Paste the provided CSS code snippet (typically found in the video description or accompanying post).
- Once pasted, you can immediately begin editing within Elementor.
Step 4: Publish Your Changes
After applying the Stylebot workaround:
- Make the necessary edits in Elementor.
- Click “Publish” to save your changes.
Understanding the Temporary Nature of This Fix
This solution addresses the immediate symptom (sidebar loading indefinitely) but does not resolve the underlying problem. Consider this a temporary fix that lets you continue working without delays.
How to Troubleshoot the Root Cause
To identify and permanently fix the underlying issue:
- Increase PHP Memory Limit: Adjust your website’s PHP memory settings through your hosting provider.
- Deactivate Plugins: Disable plugins one-by-one to identify conflicts.
- Change Themes: Temporarily switch to a default theme like Twenty Twenty-Three to rule out theme issues.
- Clear Cache: Clear cache from your hosting provider or any caching plugins used.
Preventing Future Sidebar Loading Issues
To minimize recurring issues:
- Regularly update Elementor, plugins, and themes.
- Monitor PHP memory usage regularly.
- Use a reliable and well-coded theme.
Conclusion
While experiencing the Elementor sidebar stuck on loading is highly inconvenient, the Stylebot extension offers a rapid, effective workaround. Always aim to resolve the underlying issues through thorough troubleshooting, ensuring smoother performance for the future.
How to Fix the White Screen of Death in WordPress Elementor

Encountering the “White Screen of Death” in WordPress Elementor can be a daunting and frustrating experience. This common WordPress issue causes your website to display nothing but a white, blank screen, rendering your site inaccessible to visitors and administrators alike. Thankfully, troubleshooting and fixing this issue is manageable with a structured approach.
What Causes the White Screen of Death?
The White Screen of Death typically occurs due to:
- Plugin conflicts or corrupted plugins
- Theme issues or corrupted files
- PHP errors or memory exhaustion
- Caching issues
Identifying the exact cause involves systematically troubleshooting potential issues.
Step-by-Step Guide to Fixing the White Screen of Death
Follow these proven troubleshooting steps to resolve the White Screen of Death quickly and effectively:
Step 1: Clear Website Cache
Caching problems frequently cause display errors. Start by:
- Logging into your hosting platform (e.g., WP Engine, SiteGround, Bluehost).
- Navigating to your website’s cache settings.
- Clearing or purging all caches.
This simple step resolves many display and performance issues.
Step 2: Deactivate All Plugins
Plugin conflicts are a common culprit:
- Access your WordPress dashboard.
- Navigate to “Plugins” > “Installed Plugins.”
- Deactivate all plugins simultaneously.
Check your website after deactivating plugins. If the white screen disappears, reactivate plugins one-by-one, identifying the problematic plugin through a process of elimination.
Step 3: Change Your Active Theme
If deactivating plugins doesn’t resolve the issue:
- Navigate to “Appearance” > “Themes.”
- Switch your current theme to a default WordPress theme like “Twenty Twenty-Three.”
- Click “Install” if the theme isn’t already present, then “Activate.”
If your website becomes accessible, the issue lies with your original theme.
Additional Troubleshooting Tips
- Check Memory Limits: Ensure your website has sufficient PHP memory allocated, as low memory can trigger white screens.
- Review PHP Errors: Activate WordPress debugging to reveal specific errors in your
wp-config.phpfile. - Contact Hosting Support: Your hosting provider can offer insights or assist in recovery.
Preventing Future White Screen Issues
To avoid similar future issues, consider the following best practices:
- Regularly update plugins, themes, and WordPress core files.
- Regularly backup your site before making significant changes.
- Maintain minimal, reliable plugins and themes.
Conclusion
Resolving the White Screen of Death in WordPress Elementor involves methodical troubleshooting. By systematically clearing cache, checking plugins, and testing themes, you can quickly restore your website functionality.
How to Change or Add New Hold Music in RingCentral (Custom Hold Audio)
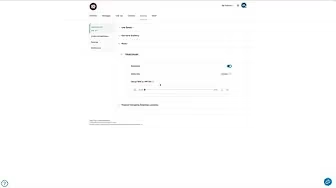
Knowing how to change or add new hold music in RingCentral custom hold audio can significantly enhance your customer’s phone experience. Customizing hold music provides a personalized touch and can help maintain caller satisfaction while they wait.
Step-by-Step Guide to Changing Hold Music in RingCentral
Follow these simple steps to successfully update or add custom hold music in RingCentral:
Step 1: Log into the Admin Portal
Begin by accessing your RingCentral admin account:
- Navigate to the RingCentral admin portal.
- Ensure you are logged in with admin credentials.
Step 2: Access Your Extension Settings
After logging in:
- Click on the profile or admin icon located at the top right corner.
- Select the option labeled “My Extension.”
Step 3: Navigate to Phone Settings
From your extension:
- Click on “Settings.”
- Select the “Phone” tab from the available options.
Step 4: Locate Hold Music Section
Scroll down until you find the “Hold Music” section. By default, this might be set to generic music.
Step 5: Upload Custom Hold Music
To use your custom audio:
- Select the “Custom” option.
- Drag and drop your chosen
.wavor.mp3audio file into the upload area. - Your file will automatically upload and save, requiring no additional actions.
Step 6: Verify Your New Hold Music
Always ensure your new hold music meets your expectations:
- Click the play button provided.
- Listen carefully to confirm audio quality and appropriateness for your callers.
Tips for Selecting Effective Hold Music
When choosing hold music, consider:
- Professional Tone: Ensure your music aligns with your brand’s professionalism.
- Customer Preference: Choose music genres likely appealing to your customer base.
- Audio Quality: High-quality audio prevents customer frustration and enhances caller experience.
Benefits of Custom Hold Music
Customizing your hold music can:
- Improve customer satisfaction by making wait times feel shorter.
- Reinforce brand identity through auditory branding.
- Reduce hang-up rates, leading to better customer retention.
Troubleshooting Common Issues
If your custom hold music isn’t playing correctly:
- Check the file format (MP3 or WAV).
- Re-upload the file if needed.
- Verify settings are correctly saved by playing the uploaded track.
Conclusion
Changing or adding new hold music in RingCentral is straightforward and can greatly enhance your customer interaction. Follow these clear steps to quickly update your RingCentral custom hold audio, boosting your business’s professional image and customer satisfaction.
How to Delete Canva Page When Delete Button Isn’t Showing Up

Knowing how to delete a Canva page when the delete button isn’t showing up can save you significant time and frustration during the design process. Although Canva is generally intuitive and user-friendly, occasionally you might encounter issues, particularly when managing locked pages.
Why the Delete Button Disappears in Canva
In Canva, pages can sometimes become locked intentionally or unintentionally. When a page is locked, the delete button might disappear, preventing you from removing unwanted pages from your design. Understanding the cause of this issue can help streamline your workflow.
Steps to Delete a Canva Page Without a Delete Button
Follow these simple, step-by-step instructions to delete a Canva page when the delete button isn’t visible:
Step 1: Unlock the Page
First, ensure the page isn’t locked:
- Click on the three dots located at the top right corner of the page you want to delete.
- Select the option “Unlock Page.”
Once unlocked, the delete button should reappear.
Step 2: Troubleshoot the Locking Bug
If unlocking the page doesn’t immediately bring back the delete button, Canva might be experiencing a minor bug. Here’s a quick fix:
- Click the three dots again.
- Choose “Lock Page” to re-lock it.
- Immediately click the three dots again and select “Unlock Page.”
After performing this quick toggle, the delete button should appear, allowing you to delete the page.
Tips to Avoid Page Deletion Issues in Canva
To prevent encountering issues in the future, follow these best practices:
- Regularly verify the lock status of your pages, especially when collaborating with others.
- Clearly communicate the lock settings with team members or collaborators.
- Familiarize yourself with Canva’s page and element locking features to use them effectively.
When to Use the Page Locking Feature in Canva
Page locking can be beneficial when:
- You want to preserve a specific page layout or content.
- You share templates with others and want to avoid accidental modifications.
- You have completed sections of a design that you don’t want to alter unintentionally.
Additional Canva Features to Enhance Your Workflow
Now that you’ve solved the deletion issue, consider exploring other valuable Canva features:
- Duplicating Pages: Quickly create similar pages without starting from scratch.
- Version Control: Review and revert to earlier versions of your designs easily.
- Magic Resize: Quickly adapt your designs for various platforms or purposes.
Conclusion
Learning how to delete a Canva page when the delete button isn’t showing up is a straightforward but essential skill. By following these simple steps and troubleshooting tips, you’ll maintain efficiency and clarity in your Canva projects.