
Category: Local SEO Tutorials
How to Delete a Service from Your Google Business Profile
Knowing how to delete a service from your Google Business Profile (GBP) is essential for maintaining an accurate and updated online presence. Outdated or incorrect services listed on your profile can confuse potential customers and negatively impact your local SEO efforts. Regularly managing and refining your GBP ensures customers clearly understand your offerings and enhances your visibility online.
In this comprehensive guide, you’ll learn step-by-step how to remove services effectively from your Google Business Profile.
Importance of Regularly Managing Your GBP Services
Regularly updating your Google Business Profile services offers several key benefits:
Improved Accuracy
Keeping your service listings accurate ensures potential customers have the correct information, preventing confusion and frustration.
Enhanced Customer Experience
Clearly and correctly listed services enhance customer trust and engagement with your business.
Optimized SEO
Removing irrelevant or outdated services helps Google better understand your business, potentially improving your local search ranking.
Understanding these benefits underlines the importance of promptly deleting irrelevant or incorrect services from your GBP.
Step-by-Step Guide: Deleting a Service from Your Google Business Profile
Follow these clear steps to effectively remove a service from your Google Business Profile:
Step 1: Access Your Google Business Profile
To start, access the backend of your Google Business Profile:
- Visit the Google Business Profile website.
- Sign in with the Google account linked to your business profile.
- Alternatively, search your business name on Google, ensuring you’re signed into the appropriate Google account.
Step 2: Edit Your Services
Once logged in:
- Click on the “Edit services” option.
- This section will display all services currently listed under various categories.
Step 3: Select the Service to Delete
Browse the service list to locate the specific service you intend to remove:
- Click on the service name to select it.
- Confirm that it is the correct service you wish to delete.
Step 4: Delete the Selected Service
After selecting the service:
- Click the “Delete service” button.
- A confirmation prompt will appear, clearly stating that the selected service will be permanently removed from your profile.
Step 5: Confirm Deletion
To finalize the removal:
- Click “Delete” again to confirm your choice.
- Your GBP will show a message confirming the deletion, noting the update will be published shortly.
Google typically processes these changes quickly, though it may not always be immediate.
Step 6: Verify Service Deletion
To confirm that the service was successfully deleted:
- Refresh your Google Business Profile.
- View your profile in an incognito or private browser window to confirm the public-facing view no longer includes the deleted service.
Bulk Deletion of Services
Currently, Google does not provide a built-in option to bulk delete services directly from the GBP backend. While third-party tools may exist for bulk management, the standard method involves manually deleting each unwanted service individually.
Best Practices for Managing Your GBP Services
For optimal profile management, adhere to these best practices:
Regular Reviews
Frequently review your service listings to ensure they accurately reflect your current offerings.
Prompt Updates
Immediately remove outdated or incorrect services to prevent customer confusion and maintain profile accuracy.
Clear Communication
Ensure service names and descriptions are clear, concise, and accurately represent what your business offers.
Troubleshooting Common Issues
Consider these solutions if you encounter any issues while deleting services:
Issue: Service Still Appearing
- Allow time for Google’s review process, as it may take some time for changes to reflect publicly.
- Clear your browser cache or view the profile from a private browser window.
Issue: Multiple Services to Delete
- Allocate sufficient time to manually delete services, as bulk deletion directly within GBP isn’t available.
Advanced Tips for Maintaining GBP Service Listings
Further enhance your GBP effectiveness:
- Regularly analyze customer feedback and queries to adjust your service listings.
- Utilize GBP analytics to understand service performance and identify services needing updates or removal.
- Continuously optimize your GBP by refining keywords and service descriptions to improve local search rankings.
Benefits of Accurate GBP Service Listings
Keeping your GBP services accurate and up-to-date offers multiple business advantages:
- Increased Customer Trust: Clearly presented and accurate information builds confidence with potential customers.
- Better SEO Outcomes: Regularly maintained and relevant listings help Google accurately rank your business.
- Higher Engagement: Updated and precise service information results in higher customer engagement and interaction rates.
Conclusion
Mastering how to delete a service from your Google Business Profile ensures your business maintains an accurate, professional online presence. Follow these easy, effective steps regularly to keep your GBP updated and aligned with your current offerings, optimizing your local SEO and enhancing customer experience.
Start refining your Google Business Profile services today to see immediate improvements in your business visibility and customer engagement.
How to Add Services to Your Google Business Profile

Learning how to add services to your Google Business Profile effectively enhances your visibility online, attracts more qualified customers, and boosts your local SEO efforts. Clearly outlining your services ensures that potential customers find exactly what they need when searching online, leading to higher engagement and conversion rates.
This comprehensive guide will take you step-by-step through the simple yet impactful process of adding services to your Google Business Profile.
Why Adding Services to Your Google Business Profile Matters
Adding services to your Google Business Profile (GBP) provides significant advantages, including:
Increased Visibility
Clearly defined services help your business appear in relevant local searches, capturing more online traffic.
Enhanced Customer Engagement
Detailed services descriptions make it easier for customers to understand your offerings, leading to higher interaction rates.
Improved Local SEO Rankings
Listing services contributes to better optimization, helping Google connect your profile with relevant search queries.
With these benefits in mind, let’s proceed with the detailed guide.
Step-by-Step Guide: How to Add Services to Your Google Business Profile
Follow these straightforward steps to effectively add services to your GBP:
Step 1: Access Your Google Business Profile
- Visit Google Business Profile.
- Sign in using your Google account associated with your business profile.
- Alternatively, search your business name on Google and select your GBP from the results.
Step 2: Navigate to Edit Services
Once logged in:
- Click on “Edit services” to access service management.
- You will see a variety of categories under which you can add services.
Step 3: Choose the Appropriate Category
- Identify the relevant category for the service you wish to add (e.g., “Marketing Consultant”).
- Select this category to view pre-defined services by Google.
Step 4: Add a Predefined Service
- Browse Google’s predefined service list.
- Click on any service that accurately matches your offerings.
- Confirm selection to add it to your profile.
Step 5: Add Custom Services
If a predefined service doesn’t match your exact offerings:
- Click “Add custom service”.
- Enter your custom service clearly and concisely (e.g., “Local SEO Consulting”).
Step 6: Enhance Your Services with Emojis (Optional)
Adding emojis to service titles is an optional yet recommended practice:
- Visit an emoji source website (like Emojipedia).
- Copy relevant emojis (e.g., a map pin for local SEO).
- Paste emojis into your service titles to increase visibility and user engagement.
Emojis help your services visually stand out, increasing click-through and interaction rates, indirectly boosting your GBP rankings.
Step 7: Add Additional Services
- Continue adding additional custom or predefined services as needed.
- After adding each service, the option to add another will appear.
Step 8: Save and Submit for Review
- After adding all desired services, click “Save”.
- Your updates will show as pending while Google reviews the changes.
- Reviews typically complete within one day, after which your services will become publicly visible.
Step 9: Confirm Service Visibility
- Open your GBP from an incognito browser window or private mode to verify updates.
- Ensure services display correctly as intended.
Best Practices for Adding Services to GBP
Follow these best practices for optimal GBP service listings:
Clearly Defined Services
Ensure each service accurately and clearly describes your offerings for maximum clarity and SEO benefit.
Regular Updates
Periodically review and update your services to reflect business changes, additions, or removals accurately.
Consistent Formatting
Maintain a consistent and professional format across all service listings for improved readability and visual appeal.
Advanced Tips to Maximize GBP Service Listings
Enhance your GBP service management further:
- Integrate keywords naturally into your service titles and descriptions.
- Monitor service performance using GBP insights to refine and optimize listings.
- Regularly update your service offerings to remain relevant to customer searches and queries.
Benefits of Regularly Managing Your GBP Services
Regular management of your GBP services provides numerous advantages:
- Increased Customer Trust: Consistently updated and clearly defined services build customer trust and brand reliability.
- Enhanced SEO Results: Active management signals to Google your business is engaged, potentially improving your ranking.
- Higher Conversion Rates: Detailed, relevant service listings attract and convert more qualified leads.
Troubleshooting Common Issues
Should you face issues while managing your services, consider these solutions:
Issue: Services Not Showing Publicly
- Allow time for Google’s approval and indexing process.
- Double-check your listings to ensure compliance with Google’s guidelines.
Issue: Engagement Rates Remain Low
- Experiment with adding emojis and refining service titles for better visibility.
- Update descriptions regularly to reflect current offerings and optimize keyword use.
Conclusion
Knowing how to add services to your Google Business Profile effectively positions your business prominently in local search results, attracts more qualified leads, and boosts overall engagement. This simple yet impactful strategy ensures you clearly communicate your business offerings, making it easy for customers to choose your services.
Start adding and optimizing your Google Business Profile services today, and see firsthand the positive impact on your business growth and visibility.
How to Add Descriptions to Services on Google Business Profile (GMB)
Knowing how to add descriptions to services on your Google Business Profile (formerly known as Google My Business or GMB) is essential to standing out online and enhancing your local SEO performance. By providing detailed service descriptions, you not only occupy more valuable digital real estate but also make your profile more informative and attractive to both potential customers and AI-driven search tools.
In this detailed guide, we’ll explore step-by-step instructions on adding compelling descriptions to your services in your Google Business Profile to optimize your visibility and enhance customer engagement.
Why Adding Service Descriptions is Crucial
Enhanced service descriptions on your Google Business Profile offer several significant benefits:
Increased Visibility
Detailed service descriptions help your profile occupy more space in search results, making your business more visible to potential customers.
Improved SEO
Detailed, relevant descriptions allow Google’s algorithms and AI tools to better understand your services, potentially increasing your ranking in search results.
Better User Engagement
Informative descriptions help prospective customers quickly understand your offerings, leading to higher engagement rates and better conversions.
Understanding these benefits emphasizes the importance of incorporating thorough service descriptions in your GBP.
Step-by-Step Guide to Adding Descriptions to GBP Services
Follow these clear instructions to effectively add descriptions to your Google Business Profile services:
Step 1: Access Your Google Business Profile
Begin by logging into your Google Business Profile:
- Visit the Google Business Profile website.
- Log in using the Gmail or Google account associated with your business profile.
Alternatively, simply search for your business name on Google while signed in to your correct Google account, and you’ll directly access your GBP editing options.
Step 2: Navigate to the Service Editing Section
Once logged in:
- Select “Edit services” from your GBP dashboard.
- You’ll see a list of your currently listed services.
Step 3: Choose a Service to Edit
- Identify and select a specific service for which you want to add or edit the description (e.g., “Local Services Ads Optimization”).
Step 4: Generate a Compelling Service Description
Craft a concise yet informative description:
- Your service description can include up to 300 characters, so ensure clarity and precision.
- Focus on clearly highlighting the key features, benefits, and unique selling points of your service.
Step 5: Insert the Description
- Copy and paste your crafted service description into the provided text box.
- Ensure your description fits within the 300-character limit.
Step 6: Add Optional Emojis
Although optional, emojis can significantly increase customer engagement:
- Insert relevant emojis to visually enhance your service descriptions.
- Emojis can make your profile stand out visually and boost user engagement.
Step 7: Save Your Changes
- After completing your edits, click “Save” to update your service description.
Step 8: Verify the Public View
Confirm your updated service description:
- Open a new incognito window or private browsing tab.
- Search for your business on Google to see your profile from a potential customer’s perspective.
Best Practices for Writing Effective Service Descriptions
To maximize the effectiveness of your GBP service descriptions, adhere to these best practices:
Use Targeted Keywords
Naturally incorporate relevant keywords related to your services to enhance SEO visibility.
Maintain Clarity and Conciseness
Write clear, concise descriptions that immediately convey your services’ key benefits and features.
Regularly Update Descriptions
Regularly review and update your service descriptions to keep them relevant, accurate, and informative.
Advanced Tips for Maximizing GBP Service Descriptions
Further improve your GBP performance:
- Leverage customer feedback to refine and enhance your service descriptions.
- Monitor your GBP analytics to gauge description effectiveness and make informed improvements.
- Consider seasonal or promotional updates to keep your service offerings relevant.
Benefits of Detailed GBP Service Descriptions
Well-crafted service descriptions yield significant business benefits:
- Enhanced SEO Ranking: Better SEO performance increases your visibility on local search results.
- Improved Customer Attraction: Detailed descriptions attract higher-quality leads by clearly communicating your value.
- Stronger Online Presence: Effective descriptions enhance your online credibility and customer trust.
Troubleshooting Common Issues
If you encounter issues while updating your service descriptions, consider these solutions:
Issue: Description Not Updating
- Ensure your description meets Google’s guidelines and character limits.
- Wait briefly, as updates might take a short time to appear.
Issue: Engagement Remains Low
- Adjust your description language and tone, considering emojis or more engaging phrasing.
- Test variations of your descriptions to identify the most effective wording.
Conclusion
Mastering how to add descriptions to services on your Google Business Profile significantly enhances your online visibility, boosts customer engagement, and positions your business prominently in local search results. Follow this comprehensive guide and optimize your GBP to attract more qualified leads and drive business growth.
Begin refining your Google Business Profile service descriptions today and witness the positive impact it has on your business.
How to Change the URL of a WordPress Page

Knowing how to change the URL of a WordPress page is crucial for maintaining an organized, SEO-friendly website structure. URLs are essential components of your website’s architecture, directly impacting how easily users and search engines can navigate your site. This detailed guide explains how to update the URL of a WordPress page, helping you manage your site’s content more effectively.
Why Changing Your WordPress URL Matters
A clear and descriptive URL structure offers multiple advantages:
Enhanced SEO Performance
Search engines prefer URLs that clearly describe the page’s content. Updating your URLs to include relevant keywords can significantly improve your website’s search rankings.
Improved User Experience
Descriptive and concise URLs help users understand exactly what to expect from a page, making it easier for them to navigate your website.
Better Content Organization
Consistent and logical URL structures contribute to better site management and organization, simplifying content updates and maintenance.
Understanding these benefits underscores the importance of managing and updating your WordPress URLs properly.
Step-by-Step Guide: How to Change a WordPress Page URL
Follow this straightforward guide to successfully change the URL of any WordPress page:
Step 1: Log into WordPress Dashboard
First, you’ll need access to your WordPress backend:
- Visit your website’s admin login, typically found at
yourwebsite.com/wp-admin. - Enter your username and password to log in.
Step 2: Locate Your Pages
Once logged into the WordPress dashboard:
- Click on the “Pages” option from the sidebar.
- Select “All Pages” to display your site’s pages.
Step 3: Select the Page to Edit
- Browse the page list to find the specific page whose URL you wish to change.
- Hover your cursor over the page title and click on the “Quick Edit” link that appears.
Step 4: Change the URL Slug
After selecting “Quick Edit”:
- Look for the field labeled “Slug”.
- Enter your desired new URL slug into this text box. For instance, to change the URL from
/aboutto/about-us, simply type “about-us” into the slug field. - WordPress automatically adds hyphens between words when the URL is updated.
Step 5: Save Your Changes
- After entering the new slug, click “Update” to apply your changes.
- This action updates your page URL immediately.
Step 6: Verify the New URL
To confirm your changes:
- Return to your page listing and click “View” under the updated page.
- Ensure the URL in your browser matches your newly entered slug.
If you encounter a 404 error (page not found), confirm the URL change again from the dashboard and refresh the page in your browser.
Handling Potential Issues After Changing URLs
Changing URLs may occasionally cause issues like broken links or SEO disruptions. Here’s how to handle them effectively:
Issue: 404 Errors
- Use redirects to guide users from the old URL to the new one.
- Check and update internal links to the page throughout your website.
Issue: SEO Impact
- Implement 301 redirects to preserve your SEO rankings and link equity.
- Update your sitemap and resubmit it to search engines to ensure they index the new URL promptly.
Best Practices for URL Management
Adopt these best practices for managing WordPress URLs:
- Keep URLs Concise: Short, descriptive URLs are easier to remember and more SEO-friendly.
- Avoid Changing URLs Frequently: Constant URL changes can negatively impact SEO and user experience.
- Include Relevant Keywords: Incorporate important keywords naturally into your URLs for better search engine performance.
Advanced Tips for Optimizing URLs
Further enhance your URL strategy with these advanced tips:
- Regularly audit your site’s URL structure for consistency.
- Use WordPress SEO plugins like Yoast SEO to streamline URL management.
- Leverage Google Search Console to monitor your site’s indexing and quickly identify URL issues.
Benefits of Proper URL Management
Effective URL management yields several tangible benefits:
- Improved Search Rankings: Clearly structured URLs positively influence your site’s search engine visibility.
- Enhanced User Engagement: User-friendly URLs increase the likelihood of clicks and engagement.
- Simplified Site Maintenance: Well-organized URLs simplify the ongoing management and updating of your content.
Conclusion
Understanding how to change the URL of a WordPress page is a valuable skill that significantly impacts your site’s SEO and user experience. By following the clear steps outlined in this guide, you’ll effectively manage your website’s URL structure, ensuring it remains organized, navigable, and optimized for search engines.
Start implementing these best practices today and experience improved website management, SEO performance, and user engagement.
How to Add/Change Google Business Profile Description for Better SEO

Knowing how to add or change your Google Business Profile description for better SEO is crucial in today’s competitive online landscape. An optimized profile description enhances your visibility, attracting more potential customers by clearly showcasing your services, service areas, and the unique aspects of your business.
In this comprehensive guide, we’ll walk you through each step of updating your Google Business Profile description effectively, ensuring you leverage the full potential of this critical SEO component.
Importance of a Strong Google Business Profile Description
A robust Google Business Profile (GBP) description significantly impacts your local SEO success. It helps:
Improved Search Rankings
Google uses profile descriptions to determine your business relevance. A well-optimized description can boost your visibility in local search results.
Enhanced Customer Engagement
Clear and detailed descriptions engage potential customers, making it easier for them to choose your services over competitors.
Greater Visibility and Credibility
Regularly updated descriptions that accurately reflect your services build trust and credibility with potential customers.
Understanding these benefits emphasizes why taking time to refine your GBP description is critical for your business.
Step-by-Step Guide: Updating Your Google Business Profile Description
Follow these straightforward steps to update your Google Business Profile description effectively:
Step 1: Access Your Google Business Profile
First, navigate to your GBP backend:
- Visit
the Google Business Profile dashbboardand log in with the Gmail account associated with your business. - Alternatively, search your business name directly in Google while logged into the correct Gmail account to quickly access your profile.
Step 2: Edit Your Business Profile
Once logged in:
- Click on the “Edit profile” button to view editable fields.
- Look for the section labeled “Description”.
Step 3: Enter or Update Your Description
In the description box:
- If you don’t have an existing description, paste your newly written description directly into the provided field.
- To update an existing description, modify it to reflect new services or changes clearly. For instance, add relevant services such as “Google Ads setup and management.”
Step 4: Maximize Your Description Length
Google provides a generous limit of up to 750 characters for your description. Make sure to utilize this fully by:
- Including all relevant services.
- Mentioning specific service areas.
- Highlighting unique selling points.
Leveraging this character allowance helps maximize the SEO impact.
Step 5: Save Your Changes
After making your updates:
- Click the “Save” button.
- Your changes will then enter a brief review period, typically up to 10 minutes, as Google’s AI checks the content.
Step 6: Confirm Your Updated Description
Once your description is approved:
- Open your Google Business Profile in an incognito or private browser tab.
- Verify your new description is correctly displayed.
Performing this quick check ensures your updates were successfully applied and visible to potential customers.
Best Practices for Optimizing Your Google Business Profile Description
To maximize your profile’s impact, consider these best practices:
Use Targeted Keywords
Naturally integrate important keywords related to your industry, services, and local area to enhance local search visibility.
Be Clear and Concise
Clearly articulate what your business offers and what sets you apart from competitors.
Regularly Update Your Description
Consistently review and refresh your description to keep it accurate and reflective of any business changes or expansions.
Troubleshooting Common Issues
If you encounter issues with updating your description, consider these solutions:
Issue: Changes Not Appearing
- Allow Google adequate time (typically up to 10 minutes) to review and publish updates.
- Refresh your browser or clear your cache if changes are delayed.
Issue: Description Rejected
- Ensure your description adheres to Google’s guidelines, avoiding inappropriate language or excessive keyword stuffing.
- Revise and resubmit your description, maintaining clear, professional language.
Advanced Tips for Enhanced Google Business Profile SEO
Further improve your GBP performance by:
- Regularly posting updates and new information directly through your profile.
- Encouraging and responding to customer reviews to enhance engagement and credibility.
- Ensuring your profile is fully completed with images, accurate business hours, and contact information.
Benefits of Regularly Updated Google Business Profile Descriptions
Regularly updated descriptions offer several measurable advantages:
- Increased Customer Trust: Accurate descriptions build reliability and confidence among potential customers.
- Enhanced SEO Performance: Regular updates signal active engagement to Google, potentially improving search rankings.
- Improved Lead Generation: Clear and detailed descriptions drive more relevant inquiries, boosting lead quality.
Conclusion
Mastering how to add or change your Google Business Profile description for better SEO positions your business prominently in local search results, effectively attracting and converting potential customers. Follow this comprehensive guide and leverage Google’s powerful local SEO tools to enhance your business visibility and success.
Begin optimizing your Google Business Profile today and experience the difference it can make for your online presence.
How to Build Out Workflow/CallFlow in AirCall for Specific Number (Time Rules, Copying Setups, AI Voice Agent, Voicemails, Etc)
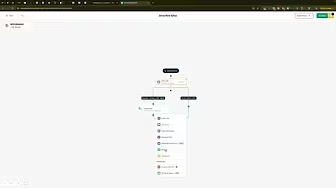
Knowing how to build out workflow/callflow in AirCall for a specific number is essential for streamlining communications, enhancing customer service, and boosting overall operational efficiency. Whether you’re managing a small business or running a large call center, AirCall provides valuable tools to automate and optimize your phone communications.
This comprehensive guide walks you step-by-step through setting up your AirCall workflows, including the application of time rules, copying setups, integrating AI voice agents, and customizing voicemail options.
Why Use CallFlow Workflows in AirCall?
Creating structured workflows in AirCall offers multiple benefits:
- Improved Customer Experience: Ensure callers are always routed to the right team or agent.
- Increased Efficiency: Automate call handling based on specific rules, reducing manual workload.
- Enhanced Organization: Clearly defined workflows prevent confusion and ensure smooth operations.
With these advantages, let’s dive into the practical steps to set up your workflow effectively.
Step-by-Step Guide to Building Out AirCall Workflows
Here’s how you can set up a comprehensive callflow workflow for your AirCall number:
Step 1: Access the AirCall Dashboard
Begin by logging into your AirCall account:
- Navigate to the AirCall dashboard.
- Click on the Numbers tab located on the left sidebar.
- Find and select the specific phone number you wish to create a workflow for.
Step 2: Starting Your Workflow Setup
- Click the option labeled “Build Out Your Call Flow”.
- You’ll see multiple options, including Start from Scratch, Import, or use an existing Template.
- For a completely customized workflow, choose Start from Scratch.
Step 3: Implementing Time Rules
Time rules are crucial if your operations differ during business and after-hours:
- Select the option “Time Rule” from the workflow settings.
- Set your business hours by defining:
- Title: Clearly label your rule for easy recognition.
- Time zone: Ensure accurate handling of calls.
- Schedule: Specify hours of operation clearly.
With time rules, incoming calls are automatically routed differently depending on the time they’re received, enhancing customer interaction and management.
Step 4: Configuring Call Routing During Business Hours
Define how calls should be handled within your operating hours:
- Select the action “Ring to Team”.
- Choose your desired team or group, such as your call center team.
- Set ring duration, typically around 30 seconds.
- Opt for simultaneous ringing to ensure all team members receive the call simultaneously.
Step 5: Handling Unanswered Calls
If your team doesn’t answer within the set time, you have multiple options:
- Voicemail:
- Upload your custom audio file, record live audio, or use AirCall’s default message.
- Customize voicemail settings, including duration, voice, and language.
- AI Voice Agent:
- Integrate an AI voice agent that handles initial inquiries, gathers essential information, and prepares calls for follow-up.
Step 6: Configuring After-Hours Routing
For after-hours calls, select actions to maintain customer engagement:
- Route calls directly to voicemail, ensuring callers receive a clear message that they’ve reached you outside of business hours.
- Deploy an AI voice agent specifically tailored for after-hours calls to gather information or manage inquiries.
How to Copy and Reuse Workflows
One significant advantage AirCall offers is the ability to copy existing workflows to new numbers, saving considerable setup time:
- After completing a workflow, click “Import Setup” at the top right.
- Select the number from which you wish to copy the workflow.
- Easily replicate proven workflows across multiple phone lines.
Troubleshooting Common Issues
Here are common issues you might face when setting up workflows and practical solutions:
Issue: Workflow Doesn’t Trigger Correctly
- Verify time rules and ensure settings match your intended operational hours.
- Double-check call routing and ring durations.
Issue: AI Voice Agent Malfunctions
- Ensure correct integration and appropriate AI voice agent settings.
- Regularly test the AI agent to maintain accuracy and effectiveness.
Issue: Voicemail Customization Issues
- Confirm that uploaded audio files meet AirCall’s technical requirements.
- Test voicemail setup immediately after configuration to ensure clarity and functionality.
Advanced Tips for Optimizing Your AirCall Workflows
To fully leverage your AirCall workflows, consider these advanced tips:
- Regularly review analytics to adjust workflows based on call performance data.
- Continuously update and refine your AI voice agent to handle evolving customer queries efficiently.
- Experiment with custom voicemail messages to discover which best resonate with your callers.
Benefits of Advanced Workflow Automation
Implementing comprehensive workflows offers measurable benefits:
- Better Call Management: Ensure no call is missed and all customers receive timely responses.
- Optimized Staff Resources: Minimize idle time by routing calls effectively.
- Enhanced Customer Satisfaction: Provide professional and prompt service consistently.
Conclusion
Mastering how to build out workflow/callflow in AirCall for a specific number significantly enhances your communication management capabilities. By following these practical steps and tips, you’ll effectively organize your phone communications, deliver exceptional customer experiences, and maximize operational efficiency.
Start setting up your AirCall workflows today and experience streamlined, professional communication that boosts your business success.
How to Add Clickable Link to Image Slides in WordPress Elementor Image Slides
Knowing how to add a link to images in a slide on WordPress Elementor is an essential skill that enhances your website’s functionality and user experience. Whether you want to direct visitors to specific pages, highlight offers, or provide additional resources, clickable image links are an intuitive and effective solution.
In this comprehensive guide, you’ll learn step-by-step how to effortlessly incorporate clickable links into individual images within your Elementor slider, ensuring visitors can easily navigate your content.
Why Add Links to Images in Elementor Slides?
Adding clickable links to your Elementor slide images serves several purposes:
- Enhanced User Navigation: Quickly guide visitors to relevant pages.
- Promotion of Special Offers: Highlight promotions or services effectively.
- Increased Engagement: Encourage visitors to interact more with your content.
With these clear benefits, mastering this straightforward technique can significantly boost your website’s user experience and effectiveness.
Step-by-Step Guide to Adding Links to Images in Elementor Slides
Below is a detailed breakdown of how you can effortlessly link images in your Elementor slides:
Step 1: Access Your Elementor Dashboard
First, you’ll need to navigate to your WordPress backend:
- Log in at your website’s admin panel, typically found at
yourwebsite.com/wp-admin. - Once logged in, you have two options:
- Option 1: Navigate directly to your pages list, select your page, and click “Edit with Elementor.”
- Option 2: From the front end of your site, click “Edit with Elementor” located at the top menu bar.
Either option will bring you into the Elementor editor, where you’ll make the necessary adjustments.
Step 2: Select the Image Slider
Once you’re in the Elementor editor:
- Locate and click on your image slider widget.
- You should see a series of images that are part of your slider in the left-hand panel.
Step 3: Add Your Desired Link
To add a clickable link to an image:
- Select the image you want to link by clicking on it in the Elementor settings panel.
- Click on the “Content” tab within the Elementor settings.
- Locate the “Link” field.
- Paste your desired URL directly into this field.
You can repeat this process for each image within the slider, allowing each slide to link to a unique destination.
Step 4: Publish Your Changes
After adding the desired links to your images:
- Click the green “Publish” or “Update” button at the bottom left corner of the Elementor editor.
- Once published, your images are now clickable and will direct users to the specified links when clicked.
Troubleshooting Common Issues
Occasionally, you might run into a few hurdles while adding links. Here are solutions to some common problems:
Issue: Link Not Working
If your link isn’t working after publishing:
- Ensure the URL entered is correct and active.
- Check if the slider plugin or Elementor needs updating.
- Refresh your browser or try clearing the cache.
Issue: Images Not Displaying Properly
If the images aren’t appearing correctly or links aren’t clickable:
- Verify image files are uploaded correctly.
- Ensure the slider widget is fully compatible with Elementor.
- Confirm there are no conflicting plugins by temporarily disabling them to test.
Advanced Tips for Better Engagement
Here are additional tips to maximize the effectiveness of your clickable images:
- Clear Call-to-Action (CTA): Use concise and descriptive CTAs near your slides to encourage clicks.
- Relevant Links: Ensure each link is relevant to the content displayed on the image.
- Track Performance: Use analytics to monitor which links are clicked most often, refining your content strategy accordingly.
Benefits of Linking Images in Elementor Slides
Leveraging image links in your slides provides several distinct advantages:
- Improved User Experience: Visitors can quickly find information without extensive navigation.
- Enhanced Conversions: Clickable images can significantly boost user interaction and conversions.
- Professional Presentation: Clickable slides offer a polished, professional look and feel, enhancing your website’s overall aesthetic.
Conclusion
Learning how to add a link to images in a slide on WordPress Elementor significantly enriches your website’s functionality, making it more interactive and user-friendly. By following these simple, effective steps, you can effortlessly enhance navigation, increase engagement, and elevate your website’s professional appearance.
Implement these techniques today to leverage Elementor’s full potential and deliver an exceptional browsing experience to your visitors.
How to Bulk Change Authors on WordPress Blog Posts
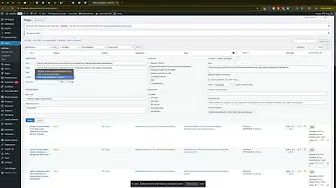
Knowing how to make bulk changes to a bunch of posts on your WordPress website can significantly streamline your website management tasks. Whether you’re dealing with incorrect authors, misplaced categories, inaccurate tags, or just general organizational improvements, bulk editing allows you to quickly apply necessary changes without the tediousness of modifying posts individually.
In this comprehensive guide, we’ll walk through the simple yet powerful process of bulk editing your WordPress posts. By the end of this guide, you’ll be able to efficiently manage your content, saving substantial amounts of time and effort.
Understanding Bulk Editing in WordPress
WordPress provides a built-in feature known as bulk editing, enabling you to edit multiple posts simultaneously. This feature mirrors the quick-edit option but on a larger scale, allowing you to apply consistent changes across numerous posts with just a few clicks.
Bulk editing can help in several scenarios:
- Changing the author of multiple posts.
- Modifying tags and categories.
- Updating publication status.
- Adjusting comments and pings.
- Editing post formats.
By mastering this feature, you significantly boost your content management productivity.
Step-by-Step Guide to Bulk Editing Posts
Here’s a clear and practical walkthrough to help you bulk edit posts on your WordPress site:
Step 1: Selecting the Posts
First, navigate to your WordPress dashboard and go to the ‘Posts’ section. Here you’ll see a list of all your posts. Begin by selecting the posts you want to modify. You have two options:
- Manually select specific posts by checking the boxes next to each title.
- Select all posts displayed on the current page by clicking the checkbox at the top.
Choose the method that fits your needs best.
Step 2: Applying Bulk Actions
Once your posts are selected:
- Locate the ‘Bulk actions’ dropdown menu at the top of the post list.
- Click the dropdown and select ‘Edit’ from the list of options.
- Click ‘Apply’ to proceed to the bulk editing interface.
Step 3: Editing Multiple Posts at Once
After clicking ‘Apply,’ a bulk edit interface will appear, similar to the quick-edit screen, but designed for bulk actions. Here you can make several modifications:
- Author: Easily switch authors for all selected posts.
- Categories: Add or remove categories.
- Tags: Adjust tags efficiently.
- Status: Publish, draft, or change the status of posts.
Make your required changes in the provided fields. For instance, to change the author, select a new author from the dropdown menu labeled ‘Author.’
Step 4: Finalizing Your Bulk Edits
After setting your preferences, confirm your changes by clicking ‘Update.’ WordPress will process the adjustments across all chosen posts. When completed, you’ll receive a confirmation, and your edits will reflect immediately across your selected posts.
Verifying Your Changes
It’s essential to verify that your bulk changes have been successfully applied. To do this quickly:
- Go back to your post list.
- Hover over individual posts and select ‘Quick Edit.’
- Ensure the changes reflect correctly, such as updated author names, adjusted categories, or modified tags.
Taking a moment to verify ensures your site remains accurate and professional-looking.
Common Use-Cases and Benefits
Bulk editing posts is beneficial in numerous scenarios:
- Site Management: Swiftly handle author changes when reassigning content after team member changes.
- SEO Improvements: Quickly adjust tags and categories to enhance SEO performance.
- Content Organization: Rapidly reorganize your content structure for better readability and navigation.
In short, the bulk editing tool is indispensable for efficiently maintaining a polished, well-managed website.
Additional Tips for Efficient Bulk Editing
Here are extra tips to make the most of bulk editing:
- Always double-check selected posts to avoid accidental changes.
- Plan bulk changes strategically to minimize disruptions.
- Regularly utilize bulk editing to maintain consistent formatting and categorization across your content.
Conclusion
Knowing how to make bulk changes to a bunch of posts on your WordPress website simplifies content management, reduces repetitive tasks, and ensures consistency across your website. Mastering bulk editing empowers you to keep your site organized and optimized with minimal effort.
Take advantage of this powerful WordPress feature to enhance your productivity and website effectiveness today.
How to Add a Redirect on GoHighLevel Form Before After Submission Button Gets Pressed Two Methods
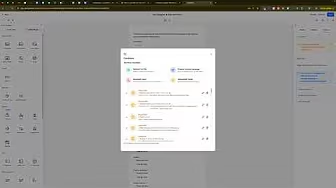
Understanding how to add a redirect on a GoHighLevel form before or after the submission button is pressed can significantly improve user navigation and conversion rates on your website. Whether you’re guiding visitors to a thank-you page, an upsell offer, or a specific action, redirects play an essential role in funnel optimization.
In this comprehensive guide, we’ll cover two distinct methods to set up redirects on your GoHighLevel forms:
- Redirecting after form submission
- Redirecting based on specific actions within the form
By the end of this guide, you’ll be fully equipped to implement effective redirects tailored to your marketing strategies.
Why Use Redirects on Your GoHighLevel Forms?
Using redirects on your forms has numerous benefits, including:
- Improved User Experience: Direct visitors to relevant content or offers.
- Enhanced Tracking: Better track conversions and user behavior.
- Higher Conversions: Seamlessly guide visitors through your sales funnel.
With these advantages in mind, let’s explore each method step-by-step.
Method 1: Redirecting After Submission
Redirecting users after they submit a form is the most common scenario. Here’s how to set it up:
Step 1: Open Your Form
Log in to your GoHighLevel account and navigate to your forms:
- Select the form you wish to add the redirect to.
Step 2: Set Up the Redirect
- Click the Styles and Options (gear icon) on the right-hand side of your form.
- Select the Options tab.
- Under On Submit, you’ll typically see it set to “Default Message.”
- Change this setting to “Open URL.”
Step 3: Insert Your Desired URL
- Paste the URL you’d like visitors to land on after submitting the form.
- Ensure the URL is complete, including “https://”.
Step 4: Save and Publish
- Once the URL is entered, click Save.
- Test your form to verify the redirect works as intended.
Now, whenever a user submits your form, they’ll automatically be redirected to your chosen URL.
Method 2: Redirecting Based on Specific Form Actions
While less common, sometimes it’s beneficial to redirect users based on specific actions they take within your form—such as selecting a radio button or filling out an email address.
Step 1: Access Conditional Logic
- Open your form editor in GoHighLevel.
- Click “Conditional Logic” located on the top-left side of your screen.
Step 2: Set Up Conditional Redirect
- Select “Redirect to URL”.
- Define your condition clearly. For instance:
- If a specific field (e.g., Email) is filled out, the user gets redirected.
- You can set similar rules for radio buttons, checkboxes, or other specific inputs.
Step 3: Enter Your Redirect URL
- Enter the URL to which you want users redirected when the specified condition is met.
Step 4: Save Your Conditional Logic
- Click Save.
- Test your form thoroughly to ensure the conditional logic triggers the redirect properly.
Troubleshooting Common Redirect Issues
Sometimes, redirects might not behave as expected. Here’s how to solve common issues:
Issue: Redirect Not Working
- Ensure your URL is correctly entered.
- Confirm the conditional logic is correctly defined.
- Clear your browser cache or test using an incognito/private window.
Issue: Redirect Delay or Error
- Test your URLs separately in a new browser tab.
- Check for conflicting scripts or plugins within your page.
- Refresh your GoHighLevel integration settings.
Advanced Tips for Optimizing Redirects
To maximize your redirects’ effectiveness, consider these advanced tips:
- Utilize Analytics: Regularly monitor how many users follow your redirects to optimize your funnel.
- Use Relevant Content: Ensure your redirected pages align closely with user expectations from the form.
- A/B Testing: Experiment with different redirect URLs or landing pages to identify which yields higher engagement.
Practical Applications of Redirects
Redirects are versatile tools suitable for various marketing scenarios, such as:
- Guiding users to a personalized thank-you page after registration.
- Offering exclusive discounts after newsletter sign-ups.
- Directing users to relevant product pages based on their selections.
Conclusion
Mastering how to add a redirect on a GoHighLevel form before or after the submission button is pressed provides a powerful capability to optimize your customer journey, enhance engagement, and boost conversions. By following these clear and practical steps, you’ll confidently implement redirects tailored to your unique marketing needs.
Make redirects an integral part of your form strategy to deliver a seamless and impactful user experience today.
How to Add a Clickable Link to an Image in WordPress Elementor

Knowing how to add a clickable link to an image in WordPress Elementor is essential for making your website more interactive and user-friendly. This functionality is particularly valuable for guiding visitors toward important pages, products, or offers seamlessly, boosting both engagement and conversions.
In this detailed guide, we’ll walk through each step necessary to link images within Elementor clearly and effectively, ensuring your visitors experience seamless navigation and effortless interactions.
Why Add Clickable Links to Images?
Clickable images are more than just visually appealing—they significantly improve user experience. When you include clickable images, you offer:
- Enhanced Navigation: Visitors easily find key pages, products, or content.
- Improved User Engagement: Images attract clicks more naturally than text-based links.
- Increased Conversions: Directing traffic to specific pages can boost conversion rates.
Step-by-Step Guide to Adding Clickable Links to Images in Elementor
Follow these clear and easy-to-follow steps to incorporate clickable links into your images using WordPress Elementor:
Step 1: Access the WordPress Backend
First, navigate to your WordPress admin panel:
- Log in to your backend by visiting your URL (typically:
yourwebsite.com/wp-admin). - Enter your credentials and log into your dashboard.
Step 2: Open Elementor Page Editor
You have two options to open Elementor:
- From the backend dashboard, go to “Pages” → “All Pages,” find your desired page, and click “Edit with Elementor.”
- Alternatively, from your website’s front end, click the “Edit with Elementor” button on the top toolbar.
This will open your page within Elementor’s intuitive visual editor.
Step 3: Select the Image to Link
Once the Elementor editor loads:
- Scroll to the image you wish to link.
- Click the image, and you’ll see settings appear in the Elementor sidebar.
Step 4: Add Your Custom Link
With your image selected:
- Find the “Link” option in the settings sidebar.
- Select “Custom URL” from the available choices.
- Paste your desired URL directly into the provided field.
You can also choose other options like linking to a media file or creating downloadable content.
Step 5: Publish or Update the Changes
After inserting the URL:
- Click the green “Publish” or “Update” button at the top right corner of the Elementor editor.
- Your changes will go live, and the image becomes clickable.
Step 6: Clear Cache if Necessary
Sometimes your changes may not immediately reflect on the live site due to caching:
- Clear your browser’s cache.
- Refresh your webpage.
- Check your link to ensure it works properly.
Typically, updates appear quickly, but clearing cache helps verify the link promptly.
Common Issues and How to Solve Them
While adding links to images is usually straightforward, you might encounter common issues. Here’s how to handle them:
Issue: Link Isn’t Working
If your clickable image doesn’t link correctly, try the following:
- Double-check the URL entered for accuracy.
- Ensure the URL format is complete and correct (include “https://”).
- Update or refresh the Elementor page editor to confirm changes are saved.
Issue: Changes Aren’t Visible
If updates don’t immediately show:
- Clear your browser cache or WordPress site cache if using a caching plugin.
- Try refreshing the page after clearing cache.
- Check in another browser or incognito window to verify updates.
Benefits of Clickable Image Links in Elementor
Including clickable image links within Elementor brings several distinct advantages:
- Professional Appearance: Your website appears more sophisticated and professionally designed.
- Better Navigation: Visitors can intuitively explore and access content.
- Increased Conversion Rates: Directly linking promotional images can significantly boost your conversions and engagement metrics.
Advanced Tips for Enhancing Clickable Images
Here are some additional tips for making your clickable images more effective:
- Strategic Placement: Position clickable images prominently to attract attention and encourage interaction.
- Clear Calls to Action: Use clear, concise text or visual cues around the image to prompt clicks.
- Monitor Performance: Utilize analytics tools to assess which images drive the most clicks and engagement.
Conclusion
Learning how to add a clickable link to an image in WordPress Elementor significantly boosts your website’s user experience, guiding visitors smoothly through your content. By following this comprehensive guide, you ensure that your clickable images function perfectly, enhancing your website’s overall effectiveness and appeal.
Master this essential Elementor feature today, and watch your user engagement and conversion rates improve.