
Category: Local SEO Tutorials
How to Add Voicemail Message in RingCentral for Business Hours & After Business Hours

https://www.youtube.com/watch?v=BjDx0g4_B2Q
Learning how to add a voicemail message in RingCentral for business hours and after business hours helps streamline your communication processes, ensuring that your customers and clients always receive professional and timely responses. Voicemail setups play a crucial role in customer satisfaction, managing expectations clearly by informing callers of your availability, and providing them with guidance on what to do next.
In this comprehensive guide, you’ll find detailed steps for setting up and customizing your voicemail messages in RingCentral, tailored separately for business and after-business hours.
Why Customize Voicemail Messages in RingCentral?
Customizing your voicemail messages offers numerous practical benefits:
- Professionalism: Clearly communicates your availability and enhances your business’s professional image.
- Enhanced Customer Service: Ensures callers receive timely, clear instructions even when you’re unavailable.
- Operational Clarity: Differentiates your business’s availability clearly during business hours and after hours.
Understanding these benefits emphasizes the importance of setting up your voicemail properly.
Step-by-Step Guide: Setting Up Voicemail Messages in RingCentral
Follow these straightforward steps to effectively set up your voicemail messages in RingCentral for both during and after business hours:
Step 1: Access the Admin Portal
First, log into your RingCentral account:
- Navigate to the RingCentral login page and enter your credentials.
- Access the Admin Portal from the dashboard.
Step 2: Navigate to Phone System Settings
- Within the Admin Portal, click on the “Phone System” tab.
- Select “Groups” and then choose “Call Queues”.
Step 3: Choose Your Call Queue
- Locate and select the specific call queue for which you want to set up voicemail messages.
Step 4: Customize Voicemail for Work Hours
- Scroll down to the “Voicemail and Notifications” section.
- Click on the “Work Hours” option.
- To change the voicemail message, click “Edit” next to the current message.
- Choose “Custom” to upload a personalized voicemail greeting.
- Click on the red dot icon, then select “Import”.
- Click “Browse” to locate and upload your desired voicemail audio file.
Ensure the audio file clearly communicates your business’s availability during regular working hours.
Step 5: Customize Voicemail for After Hours
- In the same “Voicemail and Notifications” section, click on the “After Hours” tab.
- Follow the same steps as for work hours: click “Edit”, choose “Custom”, click the red dot icon, select “Import”, and upload the after-hours voicemail file.
This voicemail should clearly indicate your non-availability and offer alternate methods of communication or suggest calling back during regular business hours.
Step 6: Editing Work Schedule in RingCentral
Sometimes, you might need to adjust your business hours:
- In the same area, click on “Edit Schedule”.
- Set your desired business hours clearly (e.g., 8:00 a.m. – 6:00 p.m.).
- Ensure you clearly specify the days and times for business and after-hours periods.
These defined schedules ensure that callers always receive the appropriate voicemail message based on the time they call.
Troubleshooting Common Issues
If you encounter difficulties while setting up voicemail messages, consider these troubleshooting tips:
Issue: Voicemail Not Playing Correctly
- Confirm your audio file format and ensure it’s supported by RingCentral.
- Check that your custom voicemail file has been properly uploaded and saved.
Issue: Voicemail Schedule Incorrect
- Double-check the defined schedule settings in RingCentral.
- Verify timezone settings and adjust if necessary.
Advanced Tips for Effective Voicemail Messages
Make your voicemail messages even more effective by following these best practices:
- Clear and Concise: Ensure messages are brief, clear, and easy to understand.
- Professional Tone: Use a professional yet friendly tone that reflects your business brand.
- Regular Updates: Regularly update your voicemail messages to reflect changes in business hours, holidays, or special events.
Practical Applications of Customized Voicemail
Customized voicemail messages in RingCentral can significantly enhance several operational aspects:
- Customer Engagement: Clearly inform callers of when they can expect a callback or alternate contact methods.
- Efficient Operations: Minimize miscommunications and manage caller expectations effectively.
- Brand Image: Reinforce your business’s professional image through consistent and clear communication.
Conclusion
By mastering how to add a voicemail message in RingCentral for business hours and after business hours, you greatly enhance your communication effectiveness, providing clear, professional guidance to your callers. This straightforward yet impactful setup ensures improved customer satisfaction, operational clarity, and consistent brand communication.
Take advantage of RingCentral’s voicemail customization today and optimize your business communication strategy.
How to Add reCAPTCHA to WordPress Elementor Forms on Your Website Stop Spam Submissions
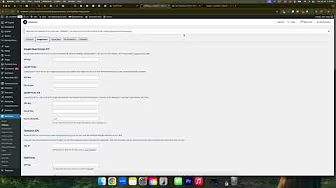
https://www.youtube.com/watch?v=nuQmuQwWz1I
Knowing how to add reCAPTCHA to WordPress Elementor forms on your website is essential if you want to prevent spam submissions effectively. Spam submissions can clutter your inbox, drowning out legitimate inquiries and potential leads, which can negatively impact your business’s responsiveness and customer experience. In this detailed guide, you’ll learn exactly how to incorporate Google’s reCAPTCHA feature into your WordPress Elementor forms, streamlining your lead management process and enhancing website security.
Why Use reCAPTCHA on Your Elementor Forms?
Using reCAPTCHA on your forms provides several significant advantages:
- Reduced Spam: Significantly cut down on automated spam submissions.
- Improved Security: Protect your website from harmful bots and scripts.
- Enhanced User Experience: Ensure legitimate users can easily submit forms without inconvenience.
With these benefits in mind, let’s explore the step-by-step process to add reCAPTCHA effectively to your WordPress Elementor forms.
Step-by-Step Guide to Adding reCAPTCHA to Elementor Forms
Follow these simple steps to set up reCAPTCHA and protect your website from spam:
Step 1: Sign Up for Google reCAPTCHA
First, navigate to Google’s reCAPTCHA website:
- Go to
google.com/recaptchaor simply search “Google reCAPTCHA” in your browser. - Click on “Get Started” to access the setup page.
Step 2: Configure Your reCAPTCHA Account
After clicking “Get Started”, you’ll need to configure your reCAPTCHA:
- Label: Enter your website’s name or domain (e.g., “localsync.com”).
- Type of reCAPTCHA: Select “reCAPTCHA v3”. This option works seamlessly in the background without interrupting user experience.
- Domain: Enter your website domain without including “www” or “https://” (e.g., “localsync.com”).
- Accept Terms: Agree to Google’s terms and conditions.
- Click “Submit” to generate your site key and secret key.
Step 3: Save Your reCAPTCHA Keys
Upon submission, Google will generate two keys:
- Site Key: Publicly identifies your site.
- Secret Key: Should remain confidential.
Copy and store these keys safely, as you’ll need them shortly. Avoid sharing your secret key publicly to maintain security.
Step 4: Integrate reCAPTCHA into Elementor
Next, integrate your keys into Elementor:
- Log in to your WordPress admin dashboard.
- Navigate to “Elementor” → “Settings”.
- Scroll down to the “Integrations” tab.
- Under reCAPTCHA v3, paste the Site Key and Secret Key into the respective fields.
- Set the score threshold. The default is typically 0.5, balancing effectively between usability and security. Adjust this value higher if you continue receiving spam submissions.
- Scroll to the bottom and click “Save Changes” to confirm integration.
Step 5: Add reCAPTCHA to Your Elementor Form
After integrating keys:
- Open the Elementor editor for the page containing your form.
- Select your Elementor form widget.
- Click “Add Item” in the form settings sidebar.
- Choose “reCAPTCHA v3” from the dropdown menu.
- Configure the badge position (e.g., bottom right, bottom left, inline). Typically, the bottom right position works well as it’s unobtrusive yet clearly visible.
- Once configured, click “Publish” or “Update” to save changes.
Now, your form includes Google reCAPTCHA protection, significantly reducing spam submissions and improving the integrity of leads.
Troubleshooting Common Issues
If you encounter issues with reCAPTCHA integration, consider these troubleshooting steps:
Issue: reCAPTCHA Badge Not Visible
- Verify correct integration by checking Elementor and reCAPTCHA settings.
- Ensure no overlapping website elements obscure the badge position.
- Clear browser and website cache, then reload the page.
Issue: Spam Still Receiving
- Increase the reCAPTCHA score threshold incrementally until spam submissions significantly decrease.
- Confirm your site and secret keys are correctly integrated and active.
Advanced Tips for Optimizing reCAPTCHA
Maximize the effectiveness of reCAPTCHA by:
- Regularly reviewing submission logs to identify patterns and adjust thresholds.
- Testing user experience periodically to ensure legitimate users aren’t inadvertently blocked.
- Continuously updating your site’s plugins and themes to maintain compatibility.
Benefits of Using reCAPTCHA v3 in Elementor Forms
reCAPTCHA v3 stands out due to several unique benefits:
- Seamless User Experience: Operates invisibly, eliminating user frustration.
- Enhanced Accuracy: Reliably identifies and blocks bots and spam.
- Minimal Maintenance: Requires minimal oversight once configured correctly.
Conclusion
By mastering how to add reCAPTCHA to WordPress Elementor forms on your website, you effectively safeguard your site against spam and automated bots, thereby improving the quality of leads you receive. Implement this powerful security measure today and streamline your online interactions for optimal user engagement and operational efficiency.
How to Clone Your Voice or Client’s Voice in ElevenLabs to Easily Create More Marketing Content

https://www.youtube.com/watch?v=XE2Lej0kumI
Learning how to clone your voice or client’s voice in ElevenLabs can revolutionize your marketing content strategy. By leveraging advanced AI voice cloning technology, businesses and marketers can efficiently create engaging, personalized content at scale. This method not only saves considerable time but also maintains a consistent, professional brand voice across various media channels.
This comprehensive guide will walk you through the exact steps necessary to clone voices using ElevenLabs, including ethical considerations, best practices, and practical applications for your business or your clients.
Why Clone Voices with ElevenLabs?
Voice cloning using ElevenLabs offers several compelling benefits:
- Time Efficiency: Quickly generate audio content without repeated recording sessions.
- Consistent Branding: Maintain a uniform brand voice across ads, videos, and voice mails.
- Scalability: Easily produce high-quality voice content for various marketing campaigns.
Considering these significant advantages, let’s dive deeper into the process and best practices of voice cloning.
Ethical Considerations Before Cloning
Before proceeding, it’s critical to respect legal and ethical guidelines:
- Obtain Permission: Always get explicit permission from individuals before cloning their voice, even clients.
- Clear Communication: Explain to your client how their cloned voice will be utilized in your marketing efforts.
- Transparency: Avoid using cloned voices without clearly identifying the usage, thus maintaining trust and compliance.
Step-by-Step Guide to Cloning Voices in ElevenLabs
Here’s a detailed walkthrough on cloning voices effectively using ElevenLabs:
Step 1: Access ElevenLabs Dashboard
- Log in to your ElevenLabs account.
- Navigate to the dashboard and click the “Voices” tab in the top left.
Step 2: Add a New Voice
- Click the black “Add New Voice” button.
- Choose the “Instant Voice Clone” option for quick, effective cloning.
Step 3: Prepare Audio Samples
For optimal results, gather high-quality voice samples:
- Ideally, collect around 10 separate audio clips, ensuring the samples are clear, with minimal background noise.
- Use professional recording equipment or ensure the client’s provided audio is of high quality.
Step 4: Upload Voice Samples
- Click “Drop files” and upload your prepared audio clips.
- Ensure each clip is under 10 MB for best results.
Step 5: Background Noise Removal (Optional)
- Select the “Remove background noise from audio recordings” checkbox if your samples contain unwanted noise.
- This feature ensures cleaner, clearer voice cloning.
Step 6: Name and Describe Your Clone
- Enter a descriptive name for your voice clone for easy identification.
- Optionally, include a brief description to detail the voice’s specific use case or characteristics.
Step 7: Save Your Voice Clone
- Click the “Save Voice” button.
- Your cloned voice will now appear in your ElevenLabs voice list, ready for use.
How to Use Your Cloned Voice in Marketing Content
After creating your voice clone, leverage it effectively in your marketing strategy:
Step 1: Generate Speech from Text
- Navigate to the “Generate Speech” tab within ElevenLabs.
- Choose your newly cloned voice from the dropdown menu.
Step 2: Create Marketing Scripts
- Type or paste your marketing script into the provided text box.
- Click “Generate” to produce the audio file instantly.
Step 3: Integrate Generated Voice into Marketing Campaigns
Use your cloned voices creatively across multiple platforms:
- Video Ads: Add personalized voiceovers to your promotional videos.
- Social Media Content: Quickly generate voice-based content for platforms like TikTok, Instagram, or Facebook.
- Phone Greetings: Implement professional, customized phone system messages without additional recordings from your client.
Troubleshooting Common Issues
Here’s how to resolve typical issues encountered during the cloning process:
Issue: Low-Quality Audio Output
- Verify your initial audio samples are clear and high-quality.
- Utilize noise removal settings provided by ElevenLabs.
Issue: Cloned Voice Not Accurate
- Ensure you provide enough diverse voice samples.
- Include varied vocal expressions for more realistic cloning results.
Advanced Tips for Optimizing Voice Clones
Enhance the quality and effectiveness of your cloned voices with these tips:
- Regularly update and refresh voice samples to maintain accuracy.
- Experiment with different voice styles to find the most engaging and effective tone.
- Continuously analyze marketing campaign performance using cloned voices to refine and optimize future content.
Practical Applications of Voice Cloning
Voice cloning has vast applications, notably:
- Automated Customer Support: Use cloned voices for AI voice agents and interactive response systems.
- Personalized Marketing Messages: Quickly create tailored voice ads for specific audiences.
- Internal Communication: Efficiently generate consistent internal training or announcement messages.
Conclusion
Mastering how to clone your voice or client’s voice in ElevenLabs allows you to quickly produce high-quality, personalized marketing content. With clear ethical practices, strategic implementation, and continual optimization, voice cloning can significantly streamline your content creation efforts and elevate your brand communication.
Start using ElevenLabs today to unlock new opportunities for engaging and scalable marketing content.
How to Change Phone Number Name in Aircall
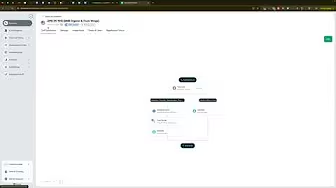
Knowing how to change the phone number name in Aircall can streamline your business communications, especially if you’re managing multiple numbers for different services or marketing campaigns. Properly labeled phone numbers improve internal organization, enhance team productivity, and simplify customer interactions.
In this practical guide, we’ll walk you step-by-step through the easy process of updating phone number names within the Aircall dashboard, ensuring clear and efficient communication within your business.
Why Change Phone Number Names in Aircall?
Changing phone number names in Aircall provides numerous benefits, including:
- Improved Organization: Clearly label numbers to avoid confusion.
- Enhanced Tracking: Easily monitor marketing campaign effectiveness.
- Better Team Communication: Ensure all team members know which line is intended for specific business purposes.
Understanding these benefits highlights why taking the time to rename your phone numbers is crucial for effective business management.
Step-by-Step Guide to Changing Phone Number Names
Follow these straightforward steps to quickly rename your phone numbers within Aircall:
Step 1: Log into Your Aircall Dashboard
Begin by logging into your Aircall account:
- Visit the Aircall login page.
- Enter your credentials to access your dashboard.
Step 2: Navigate to Your Phone Numbers
Once logged in:
- On the left-hand menu, click the “Numbers” tab.
- This action will display a list of all your registered Aircall phone numbers.
Step 3: Select the Phone Number to Rename
- Browse through your listed numbers and select the one you want to rename by clicking on it.
Step 4: Access Number Settings
- Once you’ve clicked your chosen number, a new panel will open.
- Navigate to the “Settings” tab.
Step 5: Change the Phone Number Name
In the settings panel:
- Find the field labeled “Number Name”.
- Click into this field to edit.
- Enter the new, descriptive name you wish to assign to the number. For example, “Customer Service Line” or “Sales Inquiry Line.”
Step 6: Save Your Changes
- After entering the new name, ensure your changes are saved by clicking any available save or confirm button.
- Refresh your dashboard if necessary to confirm that your number has been renamed successfully.
Best Practices for Naming Phone Numbers in Aircall
To maximize the benefits of this functionality, consider the following best practices:
- Use Clear Descriptions: Choose intuitive names that easily indicate the number’s primary function.
- Maintain Consistency: Follow a consistent naming convention for easier tracking and reference.
- Regularly Review Names: Periodically check and update names to align with current usage or business changes.
Common Issues and Troubleshooting
If you encounter issues renaming your Aircall phone numbers, consider these troubleshooting tips:
Issue: Name Changes Not Saving
- Ensure you’re fully logged in with administrative permissions.
- Clear your browser’s cache and refresh the Aircall dashboard.
- Contact Aircall support if the issue persists.
Issue: Confusing Naming
- Adopt a standardized naming format.
- Regularly audit your number names to remove outdated or misleading labels.
Additional Features for Enhanced Communication
Aside from renaming phone numbers, Aircall offers several other valuable features:
- Custom Hold Music: Improve caller experience with personalized audio.
- AI Voice Agents: Automate simple inquiries for greater efficiency.
- Advanced Call Analytics: Track call performance and enhance customer service.
Stay tuned for more guides on leveraging these powerful Aircall features to further enhance your business communications.
Benefits of Well-Organized Aircall Numbers
Clearly labeled numbers provide significant operational advantages:
- Efficient Call Handling: Quickly identify the purpose of incoming calls.
- Improved Customer Satisfaction: Respond promptly and accurately based on line identification.
- Streamlined Internal Communication: Team members can quickly route or respond to calls, knowing exactly their intended purpose.
Conclusion
Learning how to change phone number names in Aircall significantly improves your team’s operational efficiency and customer interaction quality. By following these easy steps, you ensure your communication infrastructure remains organized, transparent, and effective.
Implement these changes today and experience firsthand the operational clarity and productivity improvements it brings to your business.
The Best GMB Categories Services for Electricians (Google Business Profile SEO)

Choosing the right categories and services for your Google Business Profile (GBP) is crucial for local SEO, especially if you’re an electrician. When you accurately list all the relevant services you offer, Google can better match you with customers searching for those specific solutions. Below, we’ll walk you through how to find and set these categories and services, plus provide a curated list to streamline the process.
Why Categories and Services Matter for Electricians
- Improve Local Search Rankings
By selecting accurate categories (e.g., “Electrician,” “Lighting Consultant”) and listing your services (e.g., “Electrical panel upgrade,” “EV charger installation”), you signal to Google the scope of your work. - Reach Targeted Leads
Customers looking for a specific electrical service—such as “generator installation”—will find your profile if you’ve added it under your services. - Stand Out from Competitors
A detailed profile showing all your capabilities can help you outshine electricians who only list a few generic services.
Step 1: Identify Potential Categories and Services
Method 1: Using a GMB / GBP Category Tool (e.g., GMB Everywhere)
- Run a Competitor Search
- In Google, type “electrician near me.”
- Use a browser extension like GMB Everywhere or a similar tool to view competitors’ categories.
- Compile Categories
- Note which categories appear for top-ranking competitors. Common electrician categories might include:
- Electrician (primary)
- Electrical Installation Service
- Lighting Consultant
- Electric Vehicle Charging Station Installer (not the station itself, but the installation service)
- Note which categories appear for top-ranking competitors. Common electrician categories might include:
- Check Services
- Tools like GMB Everywhere often show recommended services for each category. Copy these into a document, removing any you don’t provide.
Method 2: Reference a Curated Services List
To save time, you can use a pre-compiled list of electrician categories and services (like the one provided in our description). Copy them into a spreadsheet or document, then remove any that don’t apply to your company.
Step 2: Add / Change Categories in Your Google Business Profile
- Access Your GBP
- Go to Google Business Profile Manager and sign in.
- Find Categories Section
- From the left-hand menu, select Info or Edit Profile.
- Scroll to Business Categories.
- Add Additional Categories
- Click Add another business category, search for terms like “Electrician,” “Lighting Consultant,” “Electrical Installation Service,” etc.
- Choose relevant categories only.
Note: You can have one primary category, so pick the one most crucial to your business (usually Electrician). Additional categories support other services you perform.
Step 3: List Services Under Each Category
- Locate Services
- In your GBP dashboard, under Info (or Edit Services), find each category you’ve added.
- Use Google’s Suggestions
- Google might suggest common services like “Outlet repair” or “Ceiling fan installation” under “Electrician.”
- Add Custom Services
- If you provide a service not listed, click Add custom service (e.g., “Backup generator installation,” “Security lighting setup”).
- Keep It Accurate
- Only list services you genuinely offer. Listing irrelevant services may confuse customers or violate Google’s guidelines.
Example Services for Electricians
- Under Electrician
- Outlet Installation / Repair
- Circuit Breaker Replacement
- Electrical Panel Upgrades
- Wiring for New Construction
- Emergency Electrical Repair
- Generator Installation / Maintenance
- Under Lighting Consultant
- LED Retrofit Services
- Landscape Lighting Design
- Security Lighting Installation
- Chandeliers and Pendant Lighting
- Under EV Charging Station Installer
- Residential EV Charger Installation
- Commercial EV Charger Maintenance
Add or remove services based on your business offerings.
Step 4: Verify and Optimize
- View Your Updated Profile
- Check that your changes appear on the public version of your GBP.
- Encourage Reviews
- Ask satisfied customers to mention the specific service performed (e.g., “They installed a new panel at my home.”). This further validates your expertise for that service.
- Monitor Insights
- Track whether the new categories/services correlate with an increase in calls or direction requests.
Troubleshooting Tips
- Category Not Found: If Google doesn’t have a matching category, pick the closest one and add services.
- Delayed Updates: Google may take a few days to reflect new categories/services.
- Service Limit: Not all services may display publicly, but it’s still beneficial to list them in your dashboard.
- Data Inconsistency: Keep your info consistent. Discrepancies can hurt SEO and confuse customers.
Best Practices
- Stay Relevant
- List only the categories/services you truly offer. Overloading your profile with irrelevant ones can backfire.
- Maintain a Master Document
- Keep a master list of categories and services (like the curated one we provide), ensuring consistency across all your online listings.
- Regular Updates
- Revisit your profile periodically to add new services or remove those you no longer provide.
Conclusion
Optimizing your GBP with the right electrician categories and services is a powerful move for local SEO. Whether you use a curated list or leverage competitor insights with a tool like GMB Everywhere, accurate categories and service listings make it easier for customers and Google to recognize your expertise. Stay consistent, keep your content relevant, and regularly review your settings to maintain a competitive edge in local search results.
The Best GMB Categories Services for Plumbers (Google Business Profile SEO)

Choosing the right categories and services for your Google Business Profile (GBP) is vital for ranking higher in local searches—especially in a competitive industry like plumbing. In this guide, we’ll walk you through how to identify the best plumbing categories, add them to your GBP, and assign relevant services that match what you actually offer. Properly setting up your GBP can significantly enhance your local SEO and attract more potential customers.
Why Categories and Services Matter for Plumbers
- Boost Local SEO
By selecting accurate categories and services, Google can better understand your business, making you more likely to appear in relevant local searches such as “plumber near me” or “emergency plumber.” - Capture Targeted Leads
Potential customers searching for specific plumbing services (e.g., “water heater installation”) will find your profile if you’ve listed those services. - Stand Out from Competitors
A detailed and accurate services list sets you apart, giving you an edge in the local map pack and search results.
Step 1: Identify Potential Categories and Services
Method 1: Using a GMB / GBP Category Tool
- Search Competitors with ‘Plumber near me’:
Use a tool like GMB Everywhere (or similar extensions) to view your competitors’ categories and services on their GBP. - Check Competitor Profiles:
- Look for categories such as Plumber, Septic System Service, Water Damage Restoration, or Water Softening Equipment Supplier if relevant.
- Identify which categories or services align with your business.
- Compile and Refine Services:
- Many tools let you copy the entire services list.
- Paste them into a document, removing any that don’t apply to your offerings.
Method 2: Using a Pre-Compiled List
- If you prefer a quicker approach, use a master list of plumbing categories and services (like the one provided in the description of our accompanying video).
- Copy it into a spreadsheet or document, then remove services you don’t provide and keep the ones you do.
Step 2: Add or Change Categories in Your Google Business Profile
- Access Your GBP Dashboard:
- Go to Google Business Profile Manager and sign in.
- Navigate to Info (or Edit Profile):
- Locate the Business Categories section.
- Add New Categories:
- If you haven’t set up a primary category yet, choose Plumber.
- To add secondary categories, click Add another business category and search for relevant terms (e.g., “Septic System Service,” “Drainage Service,” “Water Damage Restoration,” etc.).
Note: You can only have one primary category, so pick the most relevant one (most likely Plumber). You can add several additional categories if they apply.
Step 3: Add Services Under Each Category
- Locate Services Section:
- From your GBP dashboard, under Info (or Edit Services), find each category you’ve added.
- Use Auto-Suggestions:
- Google might prefill common services for each category (e.g., “Toilet Installation” for Plumber).
- Create Custom Services:
- If Google doesn’t list some of your offerings, click Add custom service.
- Type your specific service (e.g., “Drain Camera Inspection,” “Gas Line Repair,” “Water Heater Flush”).
- Optional: Add Descriptions or Prices:
- You can provide a short description (up to 300 characters) or pricing for each service.
Sample Categories and Services for a Plumber
Below is a brief example of how you might organize categories and services in your GBP:
- Primary Category: Plumber
- Services:
- Toilet Repair
- Leak Detection
- Faucet Installation
- Water Heater Installation
- Drain Cleaning
- Sewer Line Repair
- Gas Line Repair
- Hydro Jetting
- Services:
- Additional Category: Septic System Service
- Services:
- Septic Tank Installation
- Septic Tank Maintenance
- Drain Field Repair
- Services:
- (Optional) Water Damage Restoration
- Services:
- Water Extraction
- Dehumidification
- Structural Drying
- Services:
Only include categories and services you truly offer. Misrepresenting services can confuse potential customers and hurt your rankings.
Step 4: Confirm and Optimize
- Check Your Listing:
- Once updated, verify on your public Google Business Profile that your categories and services appear correctly.
- Encourage Service-Specific Reviews:
- Ask satisfied customers to mention the exact service (e.g., “toilet repair” or “water heater installation”) in their review. This further validates your services in Google’s eyes.
- Monitor Performance:
- Check your GBP insights to see if new categories/services attract more calls or website visits.
Troubleshooting
- Category Not Found: If Google doesn’t have a specific plumbing category, pick the closest match or add it as a custom service.
- Delayed Updates: Changes can take days to fully reflect. Google may also review categories before approving.
- Service Cap: If you have many services, Google might only display the most relevant or commonly searched. Keep them all in the dashboard, though, as it still helps with SEO.
Best Practices
- Be Accurate and Relevant:
- Only list categories and services you genuinely provide.
- Stay Organized:
- Maintain a master sheet of categories and services so everything remains consistent across your website, social media, and other listings.
- Stay Current:
- Periodically revisit your categories and services to add or remove offerings as your plumbing business evolves.
Conclusion
Selecting and listing the best Google Business Profile categories and services for plumbing businesses is crucial for showing up in local searches and capturing highly targeted leads. By methodically researching competitor GMB categories—or by using a pre-curated list—and carefully curating your categories in the GBP dashboard, you’ll ensure Google recognizes your full range of services. In turn, your business stands a better chance of outranking competitors in the local map pack and driving more profitable leads.
The Best GMB Categories Services for Restoration (Google Business Profile SEO)

Choosing the right categories and services on your Google Business Profile (GBP) is a game-changer when it comes to local SEO. If you operate in the restoration industry (e.g., water damage, fire damage, building restoration, or mold remediation), you need to ensure your GBP accurately reflects these services to show up in relevant local searches. Below, we’ll walk you through how to discover the best categories and services, and how to add them to your Google Business Profile.
Why GBP Categories and Services Matter
- Improve Local Search Rankings
GBP categories signal to Google what your business does, making it easier to appear in relevant searches. - Capture Qualified Leads
Listing the correct services ensures that potential customers find you for those specific needs—like mold remediation or fire restoration. - Outshine Competitors
Having detailed and accurate service listings can set you apart when customers are researching local businesses.
Step 1: Identify Potential Categories and Services
Method 1: Using a GMB Everywhere / GMB Categories Tool
- Search a Competitor
Type a query like “restoration near me” or “water damage restoration near me” in Google. - Inspect a Competitor’s Profile
Use a Google My Business (GMB) extension or tool (e.g., GMB Everywhere) to see the categories and services that competitor is using. - Compile Categories
For restoration, you’re likely to see categories like:- Water Damage Restoration Service
- Fire Damage Restoration Service
- Building Restoration Service
- (Optional) Asbestos Testing Service, depending on your business scope.
- Copy/Paste Services
Some tools provide an auto-generated list of services tied to each category. Copy these into a temporary document, and remove anything irrelevant (e.g., “Fire Extinguisher Inspection” if you don’t offer that).
Method 2: Reference a Comprehensive Category/Service List
If you prefer a quick solution, you can use a master list of restoration categories and services compiled by SEO experts. We’ve included a curated list in the description of our accompanying video, covering everything from “Water Damage Cleanup” to “Smoke Odor Removal.”
Step 2: Add Categories to Your Google Business Profile
- Open Your Google Business Profile
- Go to Google Business Profile Manager and sign in.
- Navigate to Categories
- From the left-hand menu, select Info (or Edit Profile).
- Scroll to the Business Categories section.
- Add or Change Categories
- Click Add another business category.
- Type in the new category (e.g., “Water Damage Restoration Service”).
- Google may prompt you with suggestions—select the one that best matches your service.
- Wait for Updates
- Changes may take a few minutes or hours to show up. Google often reviews category changes.
Step 3: Add or Edit Services Under Each Category
- Locate Services Section
- In the Info tab (or Edit Services depending on your GBP layout), find your newly added category.
- Click Add more services beneath it.
- Auto-Filled Suggestions
- Google may auto-suggest services related to your category (e.g., “Smoke Odor Removal” for Fire Damage Restoration). Select those that match what you actually offer.
- Create Custom Services
- If a service isn’t listed, click Add custom service.
- Enter a name (e.g., “Board-Up Services,” “Sewage Cleanup,” “Mold Remediation”).
- Save your changes.
- Refine Service Descriptions (Optional)
- Some businesses add short descriptions or pricing info. Keep it concise but clear.
Example Categories and Services for Restoration
- Primary Category: Water Damage Restoration Service
- Services:
- Water Extraction
- Flood Cleanup
- Sewage Cleanup
- Dehumidification & Drying
- Structural Repairs
- Services:
- Secondary Category: Fire Damage Restoration Service
- Services:
- Smoke Odor Removal
- Soot Cleanup
- Board-Up Services
- Structural Repairs
- Upholstery Cleaning
- Services:
- Additional Category: Building Restoration Service
- Services:
- Emergency Plumbing Repair
- Storm Damage Repair
- Asbestos Testing / Removal (if applicable)
- Mold Remediation
- Services:
Tailor these suggestions to your actual offerings—exclude anything you don’t do and add unique services that reflect your specialties.
Step 4: Verify and Optimize
- Check Your Listing
- Once updated, view your Google Business Profile to confirm the categories and services appear correctly.
- Encourage Reviews
- Ask satisfied customers to leave reviews mentioning the specific services they received. This further signals your expertise in those areas.
- Monitor Performance
- Check insights in your GBP dashboard to see if searches and requests are increasing for those services.
Troubleshooting
- Category Not Found: Not all industries have perfect category matches. Choose the closest option or add more general categories if needed.
- Service Limit: If you offer many services, pick the most relevant or high-intent ones, as Google may limit how many display.
- Changes Not Appearing: Google reviews category/service updates and might take a few days to reflect changes.
Best Practices
- Stay Relevant
- Only add categories and services that match your genuine offerings to avoid misleading potential customers and incurring Google’s disapproval.
- Use a Centralized Document
- Keep a master spreadsheet of categories and services to ensure consistency across your website, social media, and other listings.
- Regular Reviews
- Revisit your categories and services every few months to reflect any changes in your business offerings.
Conclusion
Choosing the right categories and services on your Google Business Profile is crucial for restoration companies aiming to rank higher in local searches. By leveraging methods like analyzing competitors or using curated lists—and combining them with strategic additions to your GBP—you can capture more leads, stand out from the competition, and ultimately grow your business. Remember to periodically review and update your categories and services to keep your profile accurate and highly visible.
How to Boost Local SEO with a Citation on ebusinesspages

Building robust citations is essential for enhancing your business’s online visibility and credibility. While many businesses focus on traditional citation sources like Google My Business and Yelp, leveraging platforms like eBusinessPages can significantly bolster your local SEO efforts. This comprehensive guide will walk you through the process of building a citation on eBusinessPages, utilizing tools like Whitespark’s Local Citation Finder to maximize your SEO benefits and ensure your business stands out in local search results.
Why Building Citations Matters for Your Business
Citations—mentions of your business’s Name, Address, and Phone number (NAP) across various online platforms—are fundamental components of local SEO. They help search engines verify your business’s legitimacy and relevance within a specific geographic area, ultimately improving your rankings in local search results.
Benefits of Building Citations
- Enhanced Local SEO: Citations are a key factor in Google’s local search algorithms, helping your business appear in relevant local searches.
- Increased Online Visibility: Being listed across multiple platforms increases the chances of potential customers finding your business.
- Credibility and Trust: Consistent citations establish your business as trustworthy and legitimate.
- Competitive Advantage: Building comprehensive citations sets you apart from competitors who may have fewer or inconsistent listings.
Step-by-Step Guide to Building a Citation on eBusinessPages
Follow these detailed steps to create and optimize your business listing on eBusinessPages, ensuring it contributes effectively to your local SEO strategy.
Step 1: Utilize Whitespark’s Local Citation Finder Tool
Before diving into eBusinessPages, it’s beneficial to identify all potential citation opportunities. Whitespark’s Local Citation Finder is a valuable tool that streamlines this process.
- Access Whitespark’s Local Citation Finder:
- Visit Whitespark’s Local Citation Finder and sign up for an account if you haven’t already.
- Run a Local Citation Scan:
- Enter your business details, including NAP information.
- Select eBusinessPages as one of the platforms to include in your citation search.
- Initiate the scan to identify potential citation opportunities on eBusinessPages and other platforms.
- Review Opportunities:
- Browse through the list of suggested citation sources.
- Prioritize adding your business to reputable directories and platforms to maximize SEO benefits.
Step 2: Register and Create a Business Listing on eBusinessPages
To use eBusinessPages effectively for citations, ensure your business listing is fully optimized with accurate information.
- Visit eBusinessPages.com:
- Open your web browser and navigate to eBusinessPages.
- Claim Your Listing:
- On the homepage, locate and click the “Add Your Business for Free” button.
- Search for Your Business:
- Enter your business name (e.g., “Local Sync”) and city (e.g., “Las Vegas”).
- If your business appears in the search results, select it. If not, proceed to create a new listing.
- Create a New Listing:
- Click on “Claim a New Listing”.
- Fill Out Business Information:
- Business Name: Enter your official business name.
- Category: Select the primary category that best describes your business (e.g., Advertising Agency).
- Address: Enter your complete business address, ensuring it matches the address listed on your Google Business Profile and other citation sources.
- Phone Number: Provide a business-specific phone number. If you use tracking software like CallRail, consider using a tracking number here.
- Website: Enter your official business website URL (e.g.,
https://www.localsync.com). - Short Description: Provide a concise description of your business (e.g., “We help Home Service businesses fix their digital marketing”).
- Long Description: Offer a more detailed description of your business, highlighting your services, mission, and unique selling points.
- Add Visual Elements:
- Header Image: Upload a high-quality header image that represents your business visually.
- Main Image: Upload your business logo or another relevant image to enhance your listing’s visual appeal.
- Complete Additional Information:
- Service Area: Define the geographical areas you serve. For example, if you operate in Las Vegas, Nevada, specify that.
- Operating Hours: Enter your business’s operating hours to provide accurate information to potential customers.
- Privacy and Legal Information: Add links to your privacy policy and any other relevant legal information.
- Save and Publish Your Listing:
- After filling out all the necessary information, click “Submit” to make your business listing live on eBusinessPages.
Step 3: Add Your eBusinessPages Citation to Whitespark’s To-Do List
- Access Whitespark’s To-Do List:
- Log in to your Whitespark account.
- Navigate to your To-Do List where you manage your citation-building tasks.
- Mark eBusinessPages Citation as Done:
- Once your business listing on eBusinessPages is live, go back to Whitespark and mark the eBusinessPages citation as completed.
- Add the link to your eBusinessPages business listing for future reference and verification.
Step 4: Ensure Consistency Across All Citation Sources
Maintaining consistent information across all citation sources is crucial for effective local SEO.
- Verify NAP Consistency:
- Ensure that your Name, Address, and Phone number (NAP) are identical across all platforms, including eBusinessPages, Google My Business, Yelp, and your website.
- Use Tracking Numbers (Optional):
- If you use tracking software, assign unique phone numbers to specific citation sources to monitor lead sources effectively.
- Link to All Social Media Profiles:
- Ensure your eBusinessPages business listing links to all your other social media profiles (e.g., Facebook, Instagram, LinkedIn) to create a cohesive online presence.
Step 5: Monitor and Maintain Your Citations
Regularly updating and maintaining your citations ensures continued SEO benefits and accurate information across all platforms.
- Regular Audits:
- Periodically review your citation sources to ensure all information is up-to-date and consistent.
- Use Whitespark for Ongoing Citation Building:
- Continuously use tools like Whitespark to identify new citation opportunities and expand your online presence.
- Engage with Customers:
- Monitor reviews and feedback on eBusinessPages and other citation platforms to engage with customers and address any concerns promptly.
Best Practices for Building Citations on eBusinessPages
Implementing best practices ensures that your eBusinessPages citations are effective and contribute positively to your local SEO strategy.
1. Maintain NAP Consistency
- Uniform Information: Ensure that your Name, Address, and Phone number (NAP) are consistent across all citation platforms, including eBusinessPages.
- Standard Formatting: Use the same format for your address and phone number to improve search engine recognition.
2. Optimize Your eBusinessPages Business Listing
- Complete All Sections: Fill out every section of your eBusinessPages business listing with accurate and comprehensive information.
- Use Relevant Keywords: Incorporate keywords related to your services and location in your business description to enhance searchability.
3. Leverage High-Quality Visuals
- Professional Images: Use high-resolution images for your header and main images to present a professional image.
- Engaging Visuals: Choose visuals that accurately represent your business and resonate with your target audience.
4. Engage with Your Community
- Regular Updates: Post updates, news, and valuable content regularly on your eBusinessPages business page to keep your audience engaged.
- Respond to Reviews: Engage with customer reviews and feedback to build trust and improve your business’s reputation.
5. Utilize Tools for Efficiency
- Whitespark’s Local Citation Finder: Use this tool to identify and manage citation opportunities efficiently.
- Centralized Documentation: Maintain a centralized document with all your citation information to ensure consistency and ease of use.
Common Mistakes to Avoid When Building eBusinessPages Citations
Avoiding these common pitfalls can enhance the effectiveness of your eBusinessPages citations and improve your local SEO outcomes.
1. Incomplete Business Information
- Impact: Missing details can weaken your citation’s effectiveness and reduce search engine trust.
- Solution: Ensure all sections of your eBusinessPages business listing are fully completed with accurate information.
2. Ignoring Visual Branding
- Impact: Poor-quality images can detract from your business’s professionalism and deter potential customers.
- Solution: Always use high-resolution images that match your brand’s aesthetics and identity.
3. Neglecting to Link Other Assets
- Impact: Failing to link to your website and other social media profiles can limit your citation’s impact.
- Solution: Ensure all your online assets are interconnected through your eBusinessPages business listing.
4. Overlooking Regular Updates
- Impact: An inactive page can signal to search engines that your business is not engaged.
- Solution: Keep your eBusinessPages business page active by posting regular updates and engaging with your audience.
5. Not Monitoring Citation Consistency
- Impact: Inconsistent information across citation sources can confuse search engines and harm your SEO.
- Solution: Regularly audit your citation sources to ensure all information is consistent and up-to-date.
Frequently Asked Questions
Can I Use eBusinessPages as the Only Citation Source for My Business?
While eBusinessPages is a powerful citation source, it’s advisable to build citations across multiple platforms to maximize your SEO benefits and online visibility. Diversifying your citation sources helps establish your business’s credibility and ensures consistent NAP information across the web.
How Often Should I Update My eBusinessPages Citations?
Regularly review and update your eBusinessPages business page to reflect any changes in your business information, such as address, phone number, or services offered. Additionally, use tools like Whitespark to identify new citation opportunities and keep your online presence up-to-date.
Do Citations from Social Media Platforms Like eBusinessPages Directly Affect SEO?
Yes, citations from reputable platforms like eBusinessPages contribute to your local SEO efforts. They help search engines verify your business’s legitimacy and relevance within a specific geographic area, enhancing your visibility in local search results.
What If My eBusinessPages Page Isn’t Showing Up in Search Results?
- Solution:
- Ensure Page is Published: Make sure your eBusinessPages business page is published and not set to private.
- Complete All Information: Fully complete your page’s profile with accurate NAP information, services, and descriptions.
- Engage Regularly: Regular posts and interactions can improve your page’s visibility.
- Check Search Settings: Navigate to Settings and ensure that your page is discoverable by search engines.
How Can I Track Leads from eBusinessPages Citations?
- Use Tracking Software: Implement tracking tools like CallRail to assign unique phone numbers to your eBusinessPages citations, allowing you to monitor calls generated from your eBusinessPages business page.
- Google Analytics: Set up conversion goals in Google Analytics to track traffic and form submissions originating from your eBusinessPages business page.
Maximizing the Impact of eBusinessPages Citations
To fully leverage the benefits of building citations on eBusinessPages, integrate these strategies into your broader marketing and SEO efforts.
Align with Your Overall SEO Strategy
- Consistent NAP Information: Ensure that your Name, Address, and Phone number are consistent across all online platforms.
- Keyword Integration: Use relevant keywords in your eBusinessPages page’s description and services to enhance search engine visibility.
Utilize Data-Driven Insights
- Monitor Performance: Use eBusinessPages’ analytics tools to track engagement and the effectiveness of your citations.
- Refine Strategies: Adjust your citation-building efforts based on performance data to maximize effectiveness.
Integrate with Other Marketing Channels
- Social Media: Share updates from your eBusinessPages business page on other social media platforms to increase visibility.
- Email Marketing: Include links to your eBusinessPages page in your email signatures and newsletters to drive traffic and build citations.
Foster Team Collaboration
- Delegate Tasks: Assign team members to manage and update your eBusinessPages business page to ensure it remains active and up-to-date.
- Share Best Practices: Educate your team on the importance of citations and how to maintain consistency across platforms.
Enhance Customer Experience
- Engaging Content: Share valuable and engaging content on your eBusinessPages business page to attract and retain customers.
- Responsive Interaction: Actively respond to customer inquiries and feedback on your eBusinessPages business page to build trust and loyalty.
Conclusion
Building a citation on eBusinessPages is a strategic approach that enhances your local SEO efforts, increases online visibility, and establishes your business as a credible and trustworthy entity. By following this step-by-step guide and adhering to best practices, you can effectively manage your eBusinessPages citations and drive meaningful results for your business. Remember to maintain consistency, engage actively with your audience, and regularly update your citations to ensure long-term SEO success and business growth.
How to Boost Local SEO with a Citation on Hotfrog
Building robust citations is essential for enhancing your business’s online visibility and credibility. While many businesses focus on traditional citation sources like Google My Business and Yelp, leveraging platforms like eBusinessPages can significantly bolster your local SEO efforts. This comprehensive guide will walk you through the process of building a citation on eBusinessPages, utilizing tools like Whitespark’s Local Citation Finder to maximize your SEO benefits and ensure your business stands out in local search results.
Why Building Citations Matters for Your Business
Citations—mentions of your business’s Name, Address, and Phone number (NAP) across various online platforms—are fundamental components of local SEO. They help search engines verify your business’s legitimacy and relevance within a specific geographic area, ultimately improving your rankings in local search results.
Benefits of Building Citations
- Enhanced Local SEO: Citations are a key factor in Google’s local search algorithms, helping your business appear in relevant local searches.
- Increased Online Visibility: Being listed across multiple platforms increases the chances of potential customers finding your business.
- Credibility and Trust: Consistent citations establish your business as trustworthy and legitimate.
- Competitive Advantage: Building comprehensive citations sets you apart from competitors who may have fewer or inconsistent listings.
Step-by-Step Guide to Building a Citation on eBusinessPages
Follow these detailed steps to create and optimize your business listing on eBusinessPages, ensuring it contributes effectively to your local SEO strategy.
Step 1: Utilize Whitespark’s Local Citation Finder Tool
Before diving into eBusinessPages, it’s beneficial to identify all potential citation opportunities. Whitespark’s Local Citation Finder is a valuable tool that streamlines this process.
- Access Whitespark’s Local Citation Finder:
- Visit Whitespark’s Local Citation Finder and sign up for an account if you haven’t already.
- Run a Local Citation Scan:
- Enter your business details, including NAP information.
- Select eBusinessPages as one of the platforms to include in your citation search.
- Initiate the scan to identify potential citation opportunities on eBusinessPages and other platforms.
- Review Opportunities:
- Browse through the list of suggested citation sources.
- Prioritize adding your business to reputable directories and platforms to maximize SEO benefits.
Step 2: Register and Create a Business Listing on eBusinessPages
To use eBusinessPages effectively for citations, ensure your business listing is fully optimized with accurate information.
- Visit eBusinessPages.com:
- Open your web browser and navigate to eBusinessPages.
- Claim Your Listing:
- On the homepage, locate and click the “Add Your Business for Free” button.
- Search for Your Business:
- Enter your business name (e.g., “Local Sync”) and city (e.g., “Las Vegas”).
- If your business appears in the search results, select it. If not, proceed to create a new listing.
- Create a New Listing:
- Click on “Claim a New Listing”.
- Important: Ensure that you do not use someone else’s information. Your business details should be unique and accurate.
- Fill Out Business Information:
- Business Name: Enter your official business name.
- Category: Select the primary category that best describes your business (e.g., Advertising Agency).
- Address: Enter your complete business address, ensuring it matches the address listed on your Google Business Profile and other citation sources.
- Phone Number: Provide a business-specific phone number. If you use tracking software like CallRail, consider using a tracking number here.
- Website: Enter your official business website URL (e.g.,
https://www.localsync.com). - Short Description: Provide a concise description of your business (e.g., “We help Home Service businesses fix their digital marketing”).
- Long Description: Offer a more detailed description of your business, highlighting your services, mission, and unique selling points.
- Add Visual Elements:
- Header Image: Upload a high-quality header image that represents your business visually.
- Main Image: Upload your business logo or another relevant image to enhance your listing’s visual appeal.
- Complete Additional Information:
- Service Area: Define the geographical areas you serve. For example, if you operate in Las Vegas, Nevada, specify that.
- Operating Hours: Enter your business’s operating hours to provide accurate information to potential customers.
- Privacy and Legal Information: Add links to your privacy policy and any other relevant legal information.
- Save and Publish Your Listing:
- After filling out all the necessary information, click “Submit” to make your business listing live on eBusinessPages.
Step 3: Add Your eBusinessPages Citation to Whitespark’s To-Do List
- Access Whitespark’s To-Do List:
- Log in to your Whitespark account.
- Navigate to your To-Do List where you manage your citation-building tasks.
- Mark eBusinessPages Citation as Done:
- Once your business listing on eBusinessPages is live, go back to Whitespark and mark the eBusinessPages citation as completed.
- Add the link to your eBusinessPages business listing for future reference and verification.
Step 4: Ensure Consistency Across All Citation Sources
Maintaining consistent information across all citation sources is crucial for effective local SEO.
- Verify NAP Consistency:
- Ensure that your Name, Address, and Phone number (NAP) are identical across all platforms, including eBusinessPages, Google My Business, Yelp, and your website.
- Use Tracking Numbers (Optional):
- If you use tracking software, assign unique phone numbers to specific citation sources to monitor lead sources effectively.
- Link to All Social Media Profiles:
- Ensure your eBusinessPages business listing links to all your other social media profiles (e.g., Facebook, Instagram, LinkedIn) to create a cohesive online presence.
Step 5: Monitor and Maintain Your Citations
Regularly updating and maintaining your citations ensures continued SEO benefits and accurate information across all platforms.
- Regular Audits:
- Periodically review your citation sources to ensure all information is up-to-date and consistent.
- Use Whitespark for Ongoing Citation Building:
- Continuously use tools like Whitespark to identify new citation opportunities and expand your online presence.
- Engage with Customers:
- Monitor reviews and feedback on eBusinessPages and other citation platforms to engage with customers and address any concerns promptly.
Best Practices for Building Citations on eBusinessPages
Implementing best practices ensures that your eBusinessPages citations are effective and contribute positively to your local SEO strategy.
1. Maintain NAP Consistency
- Uniform Information: Ensure that your Name, Address, and Phone number (NAP) are consistent across all citation platforms, including eBusinessPages.
- Standard Formatting: Use the same format for your address and phone number to improve search engine recognition.
2. Optimize Your eBusinessPages Business Listing
- Complete All Sections: Fill out every section of your eBusinessPages business listing with accurate and comprehensive information.
- Use Relevant Keywords: Incorporate keywords related to your services and location in your business description to enhance searchability.
3. Leverage High-Quality Visuals
- Professional Images: Use high-resolution images for your header and main images to present a professional image.
- Engaging Visuals: Choose visuals that accurately represent your business and resonate with your target audience.
4. Engage with Your Community
- Regular Updates: Post updates, news, and valuable content regularly on your eBusinessPages business page to keep your audience engaged.
- Respond to Reviews: Engage with customer reviews and feedback to build trust and improve your business’s reputation.
5. Utilize Tools for Efficiency
- Whitespark’s Local Citation Finder: Use this tool to identify and manage citation opportunities efficiently.
- Centralized Documentation: Maintain a centralized document with all your citation information to ensure consistency and ease of use.
Common Mistakes to Avoid When Building eBusinessPages Citations
Avoiding these common pitfalls can enhance the effectiveness of your eBusinessPages citations and improve your local SEO outcomes.
1. Incomplete Business Information
- Impact: Missing details can weaken your citation’s effectiveness and reduce search engine trust.
- Solution: Ensure all sections of your eBusinessPages business listing are fully completed with accurate information.
2. Ignoring Visual Branding
- Impact: Poor-quality images can detract from your business’s professionalism and deter potential customers.
- Solution: Always use high-resolution images that match your brand’s aesthetics and identity.
3. Neglecting to Link Other Assets
- Impact: Failing to link to your website and other social media profiles can limit your citation’s impact.
- Solution: Ensure all your online assets are interconnected through your eBusinessPages business listing.
4. Overlooking Regular Updates
- Impact: An inactive page can signal to search engines that your business is not engaged.
- Solution: Keep your eBusinessPages business page active by posting regular updates and engaging with your audience.
5. Not Monitoring Citation Consistency
- Impact: Inconsistent information across citation sources can confuse search engines and harm your SEO.
- Solution: Regularly audit your citation sources to ensure all information is consistent and up-to-date.
Frequently Asked Questions
Can I Use eBusinessPages as the Only Citation Source for My Business?
While eBusinessPages is a powerful citation source, it’s advisable to build citations across multiple platforms to maximize your SEO benefits and online visibility. Diversifying your citation sources helps establish your business’s credibility and ensures consistent NAP information across the web.
How Often Should I Update My eBusinessPages Citations?
Regularly review and update your eBusinessPages business page to reflect any changes in your business information, such as address, phone number, or services offered. Additionally, use tools like Whitespark to identify new citation opportunities and keep your online presence up-to-date.
Do Citations from Social Media Platforms Like eBusinessPages Directly Affect SEO?
Yes, citations from reputable platforms like eBusinessPages contribute to your local SEO efforts. They help search engines verify your business’s legitimacy and relevance within a specific geographic area, enhancing your visibility in local search results.
What If My eBusinessPages Page Isn’t Showing Up in Search Results?
- Solution:
- Ensure Page is Published: Make sure your eBusinessPages business page is published and not set to private.
- Complete All Information: Fully complete your page’s profile with accurate NAP information, services, and descriptions.
- Engage Regularly: Regular posts and interactions can improve your page’s visibility.
- Check Search Settings: Navigate to Settings and ensure that your page is discoverable by search engines.
How Can I Track Leads from eBusinessPages Citations?
- Use Tracking Software: Implement tracking tools like CallRail to assign unique phone numbers to your eBusinessPages citations, allowing you to monitor calls generated from your eBusinessPages business page.
- Google Analytics: Set up conversion goals in Google Analytics to track traffic and form submissions originating from your eBusinessPages business page.
Maximizing the Impact of eBusinessPages Citations
To fully leverage the benefits of building citations on eBusinessPages, integrate these strategies into your broader marketing and SEO efforts.
Align with Your Overall SEO Strategy
- Consistent NAP Information: Ensure that your Name, Address, and Phone number are consistent across all online platforms.
- Keyword Integration: Use relevant keywords in your eBusinessPages page’s description and services to enhance search engine visibility.
Utilize Data-Driven Insights
- Monitor Performance: Use eBusinessPages’ analytics tools to track engagement and the effectiveness of your citations.
- Refine Strategies: Adjust your citation-building efforts based on performance data to maximize effectiveness.
Integrate with Other Marketing Channels
- Social Media: Share updates from your eBusinessPages business page on other social media platforms to increase visibility.
- Email Marketing: Include links to your eBusinessPages page in your email signatures and newsletters to drive traffic and build citations.
Foster Team Collaboration
- Delegate Tasks: Assign team members to manage and update your eBusinessPages business page to ensure it remains active and up-to-date.
- Share Best Practices: Educate your team on the importance of citations and how to maintain consistency across platforms.
Enhance Customer Experience
- Engaging Content: Share valuable and engaging content on your eBusinessPages business page to attract and retain customers.
- Responsive Interaction: Actively respond to customer inquiries and feedback on your eBusinessPages business page to build trust and loyalty.
Conclusion
Building a citation on eBusinessPages is a strategic approach that enhances your local SEO efforts, increases online visibility, and establishes your business as a credible and trustworthy entity. By following this step-by-step guide and adhering to best practices, you can effectively manage your eBusinessPages citations and drive meaningful results for your business. Remember to maintain consistency, engage actively with your audience, and regularly update your citations to ensure long-term SEO success and business growth.
How to Boost Local SEO with a Citation on Yahoo Local

Building robust citations is essential for enhancing your business’s online visibility and credibility. While many businesses focus on traditional citation sources like Google My Business and Yelp, leveraging platforms like Yahoo can significantly bolster your local SEO efforts. This comprehensive guide will walk you through the process of building a citation on Yahoo, utilizing tools like Whitespark’s Local Citation Finder to maximize your SEO benefits and ensure your business stands out in local search results.
Why Building Citations Matters for Your Business
Citations—mentions of your business’s Name, Address, and Phone number (NAP) across various online platforms—are fundamental components of local SEO. They help search engines verify your business’s legitimacy and relevance within a specific geographic area, ultimately improving your rankings in local search results.
Benefits of Building Citations
- Enhanced Local SEO: Citations are a key factor in Google’s local search algorithms, helping your business appear in relevant local searches.
- Increased Online Visibility: Being listed across multiple platforms increases the chances of potential customers finding your business.
- Credibility and Trust: Consistent citations establish your business as trustworthy and legitimate.
- Competitive Advantage: Building comprehensive citations sets you apart from competitors who may have fewer or inconsistent listings.
Step-by-Step Guide to Building a Citation on Yahoo
Follow these detailed steps to create and optimize your business listing on Yahoo, ensuring it contributes effectively to your local SEO strategy.
Step 1: Utilize Whitespark’s Local Citation Finder Tool
Before diving into Yahoo, it’s beneficial to identify all potential citation opportunities. Whitespark’s Local Citation Finder is a valuable tool that streamlines this process.
- Access Whitespark’s Local Citation Finder:
- Visit Whitespark’s Local Citation Finder and sign up for an account if you haven’t already.
- Run a Local Citation Scan:
- Enter your business details, including NAP information.
- Select Yahoo as one of the platforms to include in your citation search.
- Initiate the scan to identify potential citation opportunities on Yahoo and other platforms.
- Review Opportunities:
- Browse through the list of suggested citation sources.
- Prioritize adding your business to reputable directories and platforms to maximize SEO benefits.
Step 2: Register and Create a Business Listing on Yahoo
To use Yahoo effectively for citations, ensure your business listing is fully optimized with accurate information.
- Visit Yahoo Small Business:
- Open your web browser and navigate to Yahoo Small Business.
- Claim Your Listing:
- On the homepage, locate and click the “Claim Your Listing” button.
- Search for Your Business:
- Enter your business name (e.g., “Local Sync”) and city (e.g., “Las Vegas”).
- If your business appears in the search results, select it. If not, proceed to create a new listing.
- Create a New Listing:
- Click on “Start Your Free Business Listing”.
- Important: Ensure that you do not use someone else’s information. Your business details should be unique and accurate.
- Fill Out Business Information:
- Business Name: Enter your official business name.
- Category: Select the primary category that best describes your business (e.g., Advertising Agency).
- Address: Enter your complete business address, ensuring it matches the address listed on your Google Business Profile and other citation sources.
- Phone Number: Provide a business-specific phone number. If you use tracking software like CallRail, consider using a tracking number here.
- Website: Enter your official business website URL (e.g.,
https://www.localsync.com). - Short Description: Provide a concise description of your business (e.g., “We help Home Service businesses fix their digital marketing”).
- Long Description: Offer a more detailed description of your business, highlighting your services, mission, and unique selling points.
- Add Visual Elements:
- Header Image: Upload a high-quality header image that represents your business visually.
- Main Image: Upload your business logo or another relevant image to enhance your listing’s visual appeal.
- Complete Additional Information:
- Service Area: Define the geographical areas you serve. For example, if you operate in Las Vegas, Nevada, specify that.
- Operating Hours: Enter your business’s operating hours to provide accurate information to potential customers.
- Privacy and Legal Information: Add links to your privacy policy and any other relevant legal information.
- Save and Publish Your Listing:
- After filling out all the necessary information, click “Submit” to make your business listing live on Yahoo.
Step 3: Add Your Yahoo Citation to Whitespark’s To-Do List
- Access Whitespark’s To-Do List:
- Log in to your Whitespark account.
- Navigate to your To-Do List where you manage your citation-building tasks.
- Mark Yahoo Citation as Done:
- Once your business listing on Yahoo is live, go back to Whitespark and mark the Yahoo citation as completed.
- Add the link to your Yahoo business listing for future reference and verification.
Step 4: Ensure Consistency Across All Citation Sources
Maintaining consistent information across all citation sources is crucial for effective local SEO.
- Verify NAP Consistency:
- Ensure that your Name, Address, and Phone number (NAP) are identical across all platforms, including Yahoo, Google My Business, Yelp, and your website.
- Use Tracking Numbers (Optional):
- If you use tracking software, assign unique phone numbers to specific citation sources to monitor lead sources effectively.
- Link to All Social Media Profiles:
- Ensure your Yahoo business listing links to all your other social media profiles (e.g., Facebook, Instagram, LinkedIn) to create a cohesive online presence.
Step 5: Monitor and Maintain Your Citations
Regularly updating and maintaining your citations ensures continued SEO benefits and accurate information across all platforms.
- Regular Audits:
- Periodically review your citation sources to ensure all information is up-to-date and consistent.
- Use Whitespark for Ongoing Citation Building:
- Continuously use tools like Whitespark to identify new citation opportunities and expand your online presence.
- Engage with Customers:
- Monitor reviews and feedback on Yahoo and other citation platforms to engage with customers and address any concerns promptly.
Best Practices for Building Citations on Yahoo
Implementing best practices ensures that your Yahoo citations are effective and contribute positively to your local SEO strategy.
1. Maintain NAP Consistency
- Uniform Information: Ensure that your Name, Address, and Phone number (NAP) are consistent across all citation platforms, including Yahoo.
- Standard Formatting: Use the same format for your address and phone number to improve search engine recognition.
2. Optimize Your Yahoo Business Listing
- Complete All Sections: Fill out every section of your Yahoo business listing with accurate and comprehensive information.
- Use Relevant Keywords: Incorporate keywords related to your services and location in your business description to enhance searchability.
3. Leverage High-Quality Visuals
- Professional Images: Use high-resolution images for your header and main images to present a professional image.
- Engaging Visuals: Choose visuals that accurately represent your business and resonate with your target audience.
4. Engage with Your Community
- Regular Updates: Post updates, news, and valuable content regularly on your Yahoo business page to keep your audience engaged.
- Respond to Reviews: Engage with customer reviews and feedback to build trust and improve your business’s reputation.
5. Utilize Tools for Efficiency
- Whitespark’s Local Citation Finder: Use this tool to identify and manage citation opportunities efficiently.
- Centralized Documentation: Maintain a centralized document with all your citation information to ensure consistency and ease of use.
Common Mistakes to Avoid When Building Yahoo Citations
Avoiding these common pitfalls can enhance the effectiveness of your Yahoo citations and improve your local SEO outcomes.
1. Incomplete Business Information
- Impact: Missing details can weaken your citation’s effectiveness and reduce search engine trust.
- Solution: Ensure all sections of your Yahoo business listing are fully completed with accurate information.
2. Ignoring Visual Branding
- Impact: Poor-quality images can detract from your business’s professionalism and deter potential customers.
- Solution: Always use high-resolution images that match your brand’s aesthetics and identity.
3. Neglecting to Link Other Assets
- Impact: Failing to link to your website and other social media profiles can limit your citation’s impact.
- Solution: Ensure all your online assets are interconnected through your Yahoo business listing.
4. Overlooking Regular Updates
- Impact: An inactive page can signal to search engines that your business is not engaged.
- Solution: Keep your Yahoo business page active by posting regular updates and engaging with your audience.
5. Not Monitoring Citation Consistency
- Impact: Inconsistent information across citation sources can confuse search engines and harm your SEO.
- Solution: Regularly audit your citation sources to ensure all information is consistent and up-to-date.
Frequently Asked Questions
Can I Use Yahoo as the Only Citation Source for My Business?
While Yahoo is a powerful citation source, it’s advisable to build citations across multiple platforms to maximize your SEO benefits and online visibility. Diversifying your citation sources helps establish your business’s credibility and ensures consistent NAP information across the web.
How Often Should I Update My Yahoo Citations?
Regularly review and update your Yahoo business page to reflect any changes in your business information, such as address, phone number, or services offered. Additionally, use tools like Whitespark to identify new citation opportunities and keep your online presence up-to-date.
Do Citations from Social Media Platforms Like Yahoo Directly Affect SEO?
Yes, citations from reputable platforms like Yahoo contribute to your local SEO efforts. They help search engines verify your business’s legitimacy and relevance within a specific geographic area, enhancing your visibility in local search results.
What If My Yahoo Page Isn’t Showing Up in Search Results?
- Solution:
- Ensure Page is Published: Make sure your Yahoo business page is published and not set to private.
- Complete All Information: Fully complete your page’s profile with accurate NAP information, services, and descriptions.
- Engage Regularly: Regular posts and interactions can improve your page’s visibility.
- Check Search Settings: Navigate to Settings and ensure that your page is discoverable by search engines.
How Can I Track Leads from Yahoo Citations?
- Use Tracking Software: Implement tracking tools like CallRail to assign unique phone numbers to your Yahoo citations, allowing you to monitor calls generated from your Yahoo business page.
- Google Analytics: Set up conversion goals in Google Analytics to track traffic and form submissions originating from your Yahoo business page.
Maximizing the Impact of Yahoo Citations
To fully leverage the benefits of building citations on Yahoo, integrate these strategies into your broader marketing and SEO efforts.
Align with Your Overall SEO Strategy
- Consistent NAP Information: Ensure that your Name, Address, and Phone number are consistent across all online platforms.
- Keyword Integration: Use relevant keywords in your Yahoo page’s description and services to enhance search engine visibility.
Utilize Data-Driven Insights
- Monitor Performance: Use Yahoo’s analytics tools to track engagement and the effectiveness of your citations.
- Refine Strategies: Adjust your citation-building efforts based on performance data to maximize effectiveness.
Integrate with Other Marketing Channels
- Social Media: Share updates from your Yahoo business page on other social media platforms to increase visibility.
- Email Marketing: Include links to your Yahoo page in your email signatures and newsletters to drive traffic and build citations.
Foster Team Collaboration
- Delegate Tasks: Assign team members to manage and update your Yahoo business page to ensure it remains active and up-to-date.
- Share Best Practices: Educate your team on the importance of citations and how to maintain consistency across platforms.
Enhance Customer Experience
- Engaging Content: Share valuable and engaging content on your Yahoo business page to attract and retain customers.
- Responsive Interaction: Actively respond to customer inquiries and feedback on your Yahoo business page to build trust and loyalty.
Conclusion
Building a citation on Yahoo is a strategic approach that enhances your local SEO efforts, increases online visibility, and establishes your business as a credible and trustworthy entity. By following this step-by-step guide and adhering to best practices, you can effectively manage your Yahoo citations and drive meaningful results for your business. Remember to maintain consistency, engage actively with your audience, and regularly update your citations to ensure long-term SEO success and business growth.