
Category: Local SEO Tutorials
How to Boost Local SEO with a Citation on Superpages
Building robust citations is essential for enhancing your business’s online visibility and credibility. While many businesses focus on traditional citation sources like Google My Business and Yelp, leveraging platforms like Super Pages can significantly bolster your local SEO efforts. This comprehensive guide will walk you through the process of building a citation on Super Pages, utilizing tools like Whitespark’s Local Citation Finder to maximize your SEO benefits and ensure your business stands out in local search results.
Why Building Citations Matters for Your Business
Citations—mentions of your business’s Name, Address, and Phone number (NAP) across various online platforms—are fundamental components of local SEO. They help search engines verify your business’s legitimacy and relevance within a specific geographic area, ultimately improving your rankings in local search results.
Benefits of Building Citations
- Enhanced Local SEO: Citations are a key factor in Google’s local search algorithms, helping your business appear in relevant local searches.
- Increased Online Visibility: Being listed across multiple platforms increases the chances of potential customers finding your business.
- Credibility and Trust: Consistent citations establish your business as trustworthy and legitimate.
- Competitive Advantage: Building comprehensive citations sets you apart from competitors who may have fewer or inconsistent listings.
Step-by-Step Guide to Building a Citation on Super Pages
Follow these detailed steps to create and optimize your business listing on Super Pages, ensuring it contributes effectively to your local SEO strategy.
Step 1: Utilize Whitespark’s Local Citation Finder Tool
Before diving into Super Pages, it’s beneficial to identify all potential citation opportunities. Whitespark’s Local Citation Finder is a valuable tool that streamlines this process.
- Access Whitespark’s Local Citation Finder:
- Visit Whitespark’s Local Citation Finder and sign up for an account if you haven’t already.
- Run a Local Citation Scan:
- Enter your business details, including NAP information.
- Select Super Pages as one of the platforms to include in your citation search.
- Initiate the scan to identify potential citation opportunities on Super Pages and other platforms.
- Review Opportunities:
- Browse through the list of suggested citation sources.
- Prioritize adding your business to reputable directories and platforms to maximize SEO benefits.
Step 2: Register and Create a Business Listing on Super Pages
To use Super Pages effectively for citations, ensure your business listing is fully optimized with accurate information.
- Visit SuperPages.com:
- Open your web browser and navigate to SuperPages.
- Claim Your Listing:
- On the homepage, locate and click the “Claim Your Listing” button.
- Search for Your Business:
- Enter your business name (e.g., “Local Sync”) and city (e.g., “Las Vegas”).
- If your business appears in the search results, select it. If not, proceed to create a new listing.
- Create a New Listing:
- Click on “Start Your Free Business Listing”.
- Important: Ensure that you do not use someone else’s information. Your business details should be unique and accurate.
- Fill Out Business Information:
- Business Name: Enter your official business name.
- Category: Select the primary category that best describes your business (e.g., Advertising Agency).
- Address: Enter your complete business address, ensuring it matches the address listed on your Google Business Profile and other citation sources.
- Phone Number: Provide a business-specific phone number. If you use tracking software like CallRail, consider using a tracking number here.
- Website: Enter your official business website URL (e.g.,
https://www.localsync.com). - Short Description: Provide a concise description of your business (e.g., “We help Home Service businesses fix their digital marketing”).
- Long Description: Offer a more detailed description of your business, highlighting your services, mission, and unique selling points.
- Add Visual Elements:
- Header Image: Upload a high-quality header image that represents your business visually.
- Main Image: Upload your business logo or another relevant image to enhance your listing’s visual appeal.
- Complete Additional Information:
- Service Area: Define the geographical areas you serve. For example, if you operate in Las Vegas, Nevada, specify that.
- Operating Hours: Enter your business’s operating hours to provide accurate information to potential customers.
- Privacy and Legal Information: Add links to your privacy policy and any other relevant legal information.
- Save and Publish Your Listing:
- After filling out all the necessary information, click “Submit” to make your business listing live on Super Pages.
Step 3: Add Your Super Pages Citation to Whitespark’s To-Do List
- Access Whitespark’s To-Do List:
- Log in to your Whitespark account.
- Navigate to your To-Do List where you manage your citation-building tasks.
- Mark Super Pages Citation as Done:
- Once your business listing on Super Pages is live, go back to Whitespark and mark the Super Pages citation as completed.
- Add the link to your Super Pages business listing for future reference and verification.
Step 4: Ensure Consistency Across All Citation Sources
Maintaining consistent information across all citation sources is crucial for effective local SEO.
- Verify NAP Consistency:
- Ensure that your Name, Address, and Phone number (NAP) are identical across all platforms, including Super Pages, Google My Business, Yelp, and your website.
- Use Tracking Numbers (Optional):
- If you use tracking software, assign unique phone numbers to specific citation sources to monitor lead sources effectively.
- Link to All Social Media Profiles:
- Ensure your Super Pages business listing links to all your other social media profiles (e.g., Facebook, Instagram, LinkedIn) to create a cohesive online presence.
Step 5: Monitor and Maintain Your Citations
Regularly updating and maintaining your citations ensures continued SEO benefits and accurate information across all platforms.
- Regular Audits:
- Periodically review your citation sources to ensure all information is up-to-date and consistent.
- Use Whitespark for Ongoing Citation Building:
- Continuously use tools like Whitespark to identify new citation opportunities and expand your online presence.
- Engage with Customers:
- Monitor reviews and feedback on Super Pages and other citation platforms to engage with customers and address any concerns promptly.
Best Practices for Building Citations on Super Pages
Implementing best practices ensures that your Super Pages citations are effective and contribute positively to your local SEO strategy.
1. Maintain NAP Consistency
- Uniform Information: Ensure that your Name, Address, and Phone number (NAP) are consistent across all citation platforms, including Super Pages.
- Standard Formatting: Use the same format for your address and phone number to improve search engine recognition.
2. Optimize Your Super Pages Business Listing
- Complete All Sections: Fill out every section of your Super Pages business listing with accurate and comprehensive information.
- Use Relevant Keywords: Incorporate keywords related to your services and location in your business description to enhance searchability.
3. Leverage High-Quality Visuals
- Professional Images: Use high-resolution images for your header and main images to present a professional image.
- Engaging Visuals: Choose visuals that accurately represent your business and resonate with your target audience.
4. Engage with Your Community
- Regular Updates: Post updates, news, and valuable content regularly on your Super Pages business page to keep your audience engaged.
- Respond to Reviews: Engage with customer reviews and feedback to build trust and improve your business’s reputation.
5. Utilize Tools for Efficiency
- Whitespark’s Local Citation Finder: Use this tool to identify and manage citation opportunities efficiently.
- Centralized Documentation: Maintain a centralized document with all your citation information to ensure consistency and ease of use.
Common Mistakes to Avoid When Building Super Pages Citations
Avoiding these common pitfalls can enhance the effectiveness of your Super Pages citations and improve your local SEO outcomes.
1. Incomplete Business Information
- Impact: Missing details can weaken your citation’s effectiveness and reduce search engine trust.
- Solution: Ensure all sections of your Super Pages business listing are fully completed with accurate information.
2. Ignoring Visual Branding
- Impact: Poor-quality images can detract from your business’s professionalism and deter potential customers.
- Solution: Always use high-resolution images that match your brand’s aesthetics and identity.
3. Neglecting to Link Other Assets
- Impact: Failing to link to your website and other social media profiles can limit your citation’s impact.
- Solution: Ensure all your online assets are interconnected through your Super Pages business listing.
4. Overlooking Regular Updates
- Impact: An inactive page can signal to search engines that your business is not engaged.
- Solution: Keep your Super Pages business page active by posting regular updates and engaging with your audience.
5. Not Monitoring Citation Consistency
- Impact: Inconsistent information across citation sources can confuse search engines and harm your SEO.
- Solution: Regularly audit your citation sources to ensure all information is consistent and up-to-date.
Frequently Asked Questions
Can I Use Super Pages as the Only Citation Source for My Business?
While Super Pages is a powerful citation source, it’s advisable to build citations across multiple platforms to maximize your SEO benefits and online visibility. Diversifying your citation sources helps establish your business’s credibility and ensures consistent NAP information across the web.
How Often Should I Update My Super Pages Citations?
Regularly review and update your Super Pages business page to reflect any changes in your business information, such as address, phone number, or services offered. Additionally, use tools like Whitespark to identify new citation opportunities and keep your online presence up-to-date.
Do Citations from Social Media Platforms Like Super Pages Directly Affect SEO?
Yes, citations from reputable platforms like Super Pages contribute to your local SEO efforts. They help search engines verify your business’s legitimacy and relevance within a specific geographic area, enhancing your visibility in local search results.
What If My Super Pages Page Isn’t Showing Up in Search Results?
- Solution:
- Ensure Page is Published: Make sure your Super Pages business page is published and not set to private.
- Complete All Information: Fully complete your page’s profile with accurate NAP information, services, and descriptions.
- Engage Regularly: Regular posts and interactions can improve your page’s visibility.
- Check Search Settings: Navigate to Settings and ensure that your page is discoverable by search engines.
How Can I Track Leads from Super Pages Citations?
- Use Tracking Software: Implement tracking tools like CallRail to assign unique phone numbers to your Super Pages citations, allowing you to monitor calls generated from your Super Pages business page.
- Google Analytics: Set up conversion goals in Google Analytics to track traffic and form submissions originating from your Super Pages business page.
Maximizing the Impact of Super Pages Citations
To fully leverage the benefits of building citations on Super Pages, integrate these strategies into your broader marketing and SEO efforts.
Align with Your Overall SEO Strategy
- Consistent NAP Information: Ensure that your Name, Address, and Phone number are consistent across all online platforms.
- Keyword Integration: Use relevant keywords in your Super Pages page’s description and services to enhance search engine visibility.
Utilize Data-Driven Insights
- Monitor Performance: Use Super Pages’ analytics tools to track engagement and the effectiveness of your citations.
- Refine Strategies: Adjust your citation-building efforts based on performance data to maximize effectiveness.
Integrate with Other Marketing Channels
- Social Media: Share updates from your Super Pages business page on other social media platforms to increase visibility.
- Email Marketing: Include links to your Super Pages page in your email signatures and newsletters to drive traffic and build citations.
Foster Team Collaboration
- Delegate Tasks: Assign team members to manage and update your Super Pages business page to ensure it remains active and up-to-date.
- Share Best Practices: Educate your team on the importance of citations and how to maintain consistency across platforms.
Enhance Customer Experience
- Engaging Content: Share valuable and engaging content on your Super Pages business page to attract and retain customers.
- Responsive Interaction: Actively respond to customer inquiries and feedback on your Super Pages business page to build trust and loyalty.
Conclusion
Building a citation on Super Pages is a strategic approach that enhances your local SEO efforts, increases online visibility, and establishes your business as a credible and trustworthy entity. By following this step-by-step guide and adhering to best practices, you can effectively manage your Super Pages citations and drive meaningful results for your business. Remember to maintain consistency, engage actively with your audience, and regularly update your citations to ensure long-term SEO success and business growth.
How to Boost Local SEO with a Citation on Manta

Citations play a pivotal role in enhancing your business’s online visibility and credibility. While many businesses focus on traditional citation sources like Google My Business and Yelp, leveraging platforms like Manta can significantly bolster your local SEO efforts. This comprehensive guide will walk you through the process of building a citation on Manta, utilizing tools like Whitespark’s Local Citation Finder to maximize your SEO benefits and ensure your business stands out in local search results.
Why Building Citations Matters for Your Business
Citations—mentions of your business’s Name, Address, and Phone number (NAP) across various online platforms—are fundamental components of local SEO. They help search engines verify your business’s legitimacy and relevance within a specific geographic area, ultimately improving your rankings in local search results.
Benefits of Building Citations
- Enhanced Local SEO: Citations are a key factor in Google’s local search algorithms, helping your business appear in relevant local searches.
- Increased Online Visibility: Being listed across multiple platforms increases the chances of potential customers finding your business.
- Credibility and Trust: Consistent citations establish your business as trustworthy and legitimate.
- Competitive Advantage: Building comprehensive citations sets you apart from competitors who may have fewer or inconsistent listings.
Step-by-Step Guide to Building a Citation on Manta
Follow these detailed steps to create and optimize your business listing on Manta, ensuring it contributes effectively to your local SEO strategy.
Step 1: Utilize Whitespark’s Local Citation Finder Tool
Before diving into Manta, it’s beneficial to identify all potential citation opportunities. Whitespark’s Local Citation Finder is a valuable tool that streamlines this process.
- Access Whitespark’s Local Citation Finder:
- Visit Whitespark’s Local Citation Finder and sign up for an account if you haven’t already.
- Run a Local Citation Scan:
- Enter your business details, including NAP information.
- Select Manta as one of the platforms to include in your citation search.
- Initiate the scan to identify potential citation opportunities on Manta and other platforms.
- Review Opportunities:
- Browse through the list of suggested citation sources.
- Prioritize adding your business to reputable directories and platforms to maximize SEO benefits.
Step 2: Register and Create a Business Listing on Manta
To use Manta effectively for citations, ensure your business listing is fully optimized with accurate information.
- Visit Manta.com:
- Open your web browser and navigate to Manta.
- Register an Account:
- Click on Claim Your Listing or Get Started.
- Enter your city and create a password.
- Note: Protect your login information and avoid sharing passwords publicly.
- Verify Your Email Address:
- Manta will send a verification email to the address you provided.
- Open the email and follow the verification link to confirm your account.
Step 3: Create and Optimize Your Business Listing
- Access Business Listings:
- Once logged in, click on your account icon in the top-right corner.
- Navigate to Business Listings from the dropdown menu.
- Start a Free Business Listing:
- Click on the green Start Your Free Business Listing button.
- This initiates the process of creating your business profile on Manta.
- Fill Out Business Information:
- Business Name: Enter your official business name (e.g., “Local Sync”).
- Category: Select the primary category that best describes your business (e.g., Advertising Agency).
- Address: Enter your complete business address, ensuring it matches the address listed on your Google Business Profile and other citation sources.
- Phone Number: Provide a business-specific phone number. If you use tracking software like CallRail, consider using a tracking number here.
- Website: Enter your official business website URL (e.g.,
https://www.localsync.com). - Short Description: Provide a concise description of your business (e.g., “We help Home Services businesses fix their digital marketing”).
- Long Description: Offer a more detailed description of your business, highlighting your services, mission, and unique selling points.
- Add Visual Elements:
- Header Image: Upload a high-quality header image that represents your business visually.
- Main Image: Upload your business logo or another relevant image to enhance your listing’s visual appeal.
- Complete Additional Information:
- Service Area: Define the geographical areas you serve. For example, if you operate in Las Vegas, Nevada, specify that.
- Operating Hours: Enter your business’s operating hours to provide accurate information to potential customers.
- Privacy and Legal Information: Add links to your privacy policy and any other relevant legal information.
- Save and Publish Your Listing:
- After filling out all the necessary information, click Save or Publish to make your business listing live on Manta.
Step 4: Add Your Manta Citation to Whitespark’s To-Do List
- Access Whitespark’s To-Do List:
- Log in to your Whitespark account.
- Navigate to your To-Do List where you manage your citation-building tasks.
- Mark Manta Citation as Done:
- Once your business listing on Manta is live, go back to Whitespark and mark the Manta citation as completed.
- Add the link to your Manta business listing for future reference and verification.
Step 5: Ensure Consistency Across All Citation Sources
Maintaining consistent information across all citation sources is crucial for effective local SEO.
- Verify NAP Consistency:
- Ensure that your Name, Address, and Phone number (NAP) are identical across all platforms, including Manta, Google My Business, Yelp, and your website.
- Use Tracking Numbers (Optional):
- If you use tracking software, assign unique phone numbers to specific citation sources to monitor lead sources effectively.
- Link to All Social Media Profiles:
- Ensure your Manta business listing links to all your other social media profiles (e.g., Facebook, Instagram, LinkedIn) to create a cohesive online presence.
Step 6: Monitor and Maintain Your Citations
Regularly updating and maintaining your citations ensures continued SEO benefits and accurate information across all platforms.
- Regular Audits:
- Periodically review your citation sources to ensure all information is up-to-date and consistent.
- Use Whitespark for Ongoing Citation Building:
- Continuously use tools like Whitespark to identify new citation opportunities and expand your online presence.
- Engage with Customers:
- Monitor reviews and feedback on Manta and other citation platforms to engage with customers and address any concerns promptly.
Best Practices for Building Citations on Manta
Implementing best practices ensures that your Manta citations are effective and contribute positively to your local SEO strategy.
1. Maintain NAP Consistency
- Uniform Information: Ensure that your Name, Address, and Phone number (NAP) are consistent across all citation platforms, including Manta.
- Standard Formatting: Use the same format for your address and phone number to improve search engine recognition.
2. Optimize Your Manta Business Listing
- Complete All Sections: Fill out every section of your Manta business listing with accurate and comprehensive information.
- Use Relevant Keywords: Incorporate keywords related to your services and location in your business description to enhance searchability.
3. Leverage High-Quality Visuals
- Professional Images: Use high-resolution images for your header and main images to present a professional image.
- Engaging Visuals: Choose visuals that accurately represent your business and resonate with your target audience.
4. Engage with Your Community
- Regular Updates: Post updates, news, and valuable content regularly on your Manta business page to keep your audience engaged.
- Respond to Reviews: Engage with customer reviews and feedback to build trust and improve your business’s reputation.
5. Utilize Tools for Efficiency
- Whitespark’s Local Citation Finder: Use this tool to identify and manage citation opportunities efficiently.
- Centralized Documentation: Maintain a centralized document with all your citation information to ensure consistency and ease of use.
Common Mistakes to Avoid When Building Manta Citations
Avoiding these common pitfalls can enhance the effectiveness of your Manta citations and improve your local SEO outcomes.
1. Incomplete Business Information
- Impact: Missing details can weaken your citation’s effectiveness and reduce search engine trust.
- Solution: Ensure all sections of your Manta business listing are fully completed with accurate information.
2. Ignoring Visual Branding
- Impact: Poor-quality images can detract from your business’s professionalism and deter potential customers.
- Solution: Always use high-resolution images that match your brand’s aesthetics and identity.
3. Neglecting to Link Other Assets
- Impact: Failing to link to your website and other social media profiles can limit your citation’s impact.
- Solution: Ensure all your online assets are interconnected through your Manta business listing.
4. Overlooking Regular Updates
- Impact: An inactive page can signal to search engines that your business is not engaged.
- Solution: Keep your Manta business page active by posting regular updates and engaging with your audience.
5. Not Monitoring Citation Consistency
- Impact: Inconsistent information across citation sources can confuse search engines and harm your SEO.
- Solution: Regularly audit your citation sources to ensure all information is consistent and up-to-date.
Frequently Asked Questions
Can I Use Manta as the Only Citation Source for My Business?
While Manta is a powerful citation source, it’s advisable to build citations across multiple platforms to maximize your SEO benefits and online visibility. Diversifying your citation sources helps establish your business’s credibility and ensures consistent NAP information across the web.
How Often Should I Update My Manta Citations?
Regularly review and update your Manta business page to reflect any changes in your business information, such as address, phone number, or services offered. Additionally, use tools like Whitespark to identify new citation opportunities and keep your online presence up-to-date.
Do Citations from Social Media Platforms Like Manta Directly Affect SEO?
Yes, citations from reputable platforms like Manta contribute to your local SEO efforts. They help search engines verify your business’s legitimacy and relevance within a specific geographic area, enhancing your visibility in local search results.
What If My Manta Page Isn’t Showing Up in Search Results?
- Solution:
- Ensure Page is Published: Make sure your Manta business page is published and not set to private.
- Complete All Information: Fully complete your page’s profile with accurate NAP information, services, and descriptions.
- Engage Regularly: Regular posts and interactions can improve your page’s visibility.
- Check Search Settings: Navigate to Settings and ensure that your page is discoverable by search engines.
How Can I Track Leads from Manta Citations?
- Use Tracking Software: Implement tracking tools like CallRail to assign unique phone numbers to your Manta citations, allowing you to monitor calls generated from your Manta business page.
- Google Analytics: Set up conversion goals in Google Analytics to track traffic and form submissions originating from your Manta business page.
Maximizing the Impact of Manta Citations
To fully leverage the benefits of building citations on Manta, integrate these strategies into your broader marketing and SEO efforts.
Align with Your Overall SEO Strategy
- Consistent NAP Information: Ensure that your Name, Address, and Phone number are consistent across all online platforms.
- Keyword Integration: Use relevant keywords in your Manta page’s description and services to enhance search engine visibility.
Utilize Data-Driven Insights
- Monitor Performance: Use Manta’s analytics tools to track engagement and the effectiveness of your citations.
- Refine Strategies: Adjust your citation-building efforts based on performance data to maximize effectiveness.
Integrate with Other Marketing Channels
- Social Media: Share updates from your Manta business page on other social media platforms to increase visibility.
- Email Marketing: Include links to your Manta page in your email signatures and newsletters to drive traffic and build citations.
Foster Team Collaboration
- Delegate Tasks: Assign team members to manage and update your Manta business page to ensure it remains active and up-to-date.
- Share Best Practices: Educate your team on the importance of citations and how to maintain consistency across platforms.
Enhance Customer Experience
- Engaging Content: Share valuable and engaging content on your Manta business page to attract and retain customers.
- Responsive Interaction: Actively respond to customer inquiries and feedback on your Manta business page to build trust and loyalty.
Conclusion
Building a citation on Manta is a strategic approach that enhances your local SEO efforts, increases online visibility, and establishes your business as a credible and trustworthy entity. By following this step-by-step guide and adhering to best practices, you can effectively manage your Manta citations and drive meaningful results for your business. Remember to maintain consistency, engage actively with your audience, and regularly update your citations to ensure long-term SEO success and business growth.
How to Boost Your Local SEO with a Patch Citation
Building robust citations is essential for enhancing your business’s online visibility and credibility. While many businesses focus on traditional citation sources like Google My Business and Yelp, leveraging social media platforms such as Patch can significantly bolster your local SEO efforts. This comprehensive guide will walk you through the process of using Patch as a citation source, utilizing tools like Whitespark’s Local Citation Finder to maximize your SEO benefits.
Why Use Patch for Building Citations?
Patch is a hyperlocal news and information platform that serves communities across the United States. By creating a business listing on Patch, you can establish a strong local presence, connect with your community, and enhance your local SEO through consistent and accurate citations.
Benefits of Using Patch for Citations
- Enhanced Local Visibility: Patch caters to specific neighborhoods and communities, allowing your business to appear prominently in local searches.
- Credible Backlinks: Patch provides high-quality backlinks to your website, improving your site’s authority and search engine rankings.
- Community Engagement: Engage with your local community through Patch’s platform, fostering trust and loyalty among potential customers.
- Comprehensive Information: Patch allows you to provide detailed business information, ensuring consistency across all citation sources.
Step-by-Step Guide to Using Patch as a Citation Source
Follow these detailed steps to create and optimize your business listing on Patch, ensuring it contributes effectively to your local SEO strategy.
Step 1: Utilize Whitespark’s Local Citation Finder Tool
Before diving into Patch, it’s beneficial to identify all potential citation opportunities. Whitespark’s Local Citation Finder is a valuable tool that streamlines this process.
- Access Whitespark’s Local Citation Finder:
- Visit Whitespark’s Local Citation Finder and sign up for an account if you haven’t already.
- Run a Local Citation Scan:
- Enter your business details, including Name, Address, and Phone number (NAP) information.
- Select Patch as one of the platforms to include in your citation search.
- Initiate the scan to identify potential citation opportunities on Patch and other platforms.
- Review Opportunities:
- Browse through the list of suggested citation sources.
- Prioritize adding your business to reputable directories and platforms to maximize SEO benefits.
Step 2: Register and Create a Business Listing on Patch
To use Patch effectively for citations, ensure your business listing is fully optimized with accurate information.
- Visit Patch.com:
- Open your web browser and navigate to Patch.
- Register an Account:
- Click on Register or Sign Up.
- Enter your city, password, and other required details.
- Note: Ensure you use a business-specific email address to maintain professionalism and consistency.
- Verify Your Email Address:
- After registering, Patch will send a verification email to your provided address.
- Open the email and follow the verification link to confirm your account.
Step 3: Create and Optimize Your Business Listing
- Access Business Listings:
- Once logged in, click on your account icon in the top-right corner.
- Navigate to Business Listings from the dropdown menu.
- Start a Free Business Listing:
- Click on the green Start Your Free Business Listing button.
- This initiates the process of creating your business profile on Patch.
- Fill Out Business Information:
- Business Name: Enter your official business name.
- Category: Select the primary category that best describes your business (e.g., Plumber, Electrician).
- Address: Enter your complete business address, ensuring it matches the address listed on your Google Business Profile and other citation sources.
- Phone Number: Provide a business-specific phone number. If you use tracking software like CallRail, consider using a tracking number here.
- Website: Enter your official business website URL.
- Short Description: Provide a concise description of your business (e.g., “We help Home Service businesses fix their digital marketing”).
- Long Description: Offer a more detailed description of your business, highlighting your services, mission, and unique selling points.
- Add Visual Elements:
- Header Image: Upload a high-quality header image that represents your business visually.
- Main Image: Upload your business logo or another relevant image to enhance your listing’s visual appeal.
- Complete Additional Information:
- Operating Hours: Enter your business’s operating hours to provide accurate information to potential customers.
- Privacy and Legal Info: Add links to your privacy policy and any other relevant legal information.
- Save and Publish Your Listing:
- After filling out all the necessary information, click Save or Publish to make your business listing live on Patch.
Step 4: Add Your Patch Citation to Whitespark’s To-Do List
- Access Whitespark’s To-Do List:
- Log in to your Whitespark account.
- Navigate to your To-Do List where you manage your citation-building tasks.
- Mark Patch Citation as Done:
- Once your business listing on Patch is live, go back to Whitespark and mark the Patch citation as completed.
- Add the link to your Patch business listing for future reference and verification.
Step 5: Ensure Consistency Across All Citation Sources
Maintaining consistent information across all citation sources is crucial for effective local SEO.
- Verify NAP Consistency:
- Ensure that your Name, Address, and Phone number (NAP) are identical across all platforms, including Patch, Google My Business, Yelp, and your website.
- Use Tracking Numbers (Optional):
- If you use tracking software, assign unique phone numbers to specific citation sources to monitor lead sources effectively.
- Link to All Social Media Profiles:
- Ensure your Patch business listing links to all your other social media profiles (e.g., Facebook, Instagram, LinkedIn) to create a cohesive online presence.
Step 6: Monitor and Maintain Your Citations
Regularly updating and maintaining your citations ensures continued SEO benefits and accurate information across all platforms.
- Regular Audits:
- Periodically review your citation sources to ensure all information is up-to-date and consistent.
- Use Whitespark for Ongoing Citation Building:
- Continuously use tools like Whitespark to identify new citation opportunities and expand your online presence.
- Engage with Customers:
- Monitor reviews and feedback on Patch and other citation platforms to engage with customers and address any concerns promptly.
Best Practices for Building Citations on Patch
Implementing best practices ensures that your Patch citations are effective and contribute positively to your local SEO strategy.
1. Maintain NAP Consistency
- Uniform Information: Ensure that your Name, Address, and Phone number (NAP) are consistent across all citation platforms, including Patch.
- Standard Formatting: Use the same format for your address and phone number to improve search engine recognition.
2. Optimize Your Patch Business Listing
- Complete All Sections: Fill out every section of your Patch business listing with accurate and comprehensive information.
- Use Relevant Keywords: Incorporate keywords related to your services and location in your business description to enhance searchability.
3. Leverage High-Quality Visuals
- Professional Images: Use high-resolution images for your header and main images to present a professional image.
- Engaging Visuals: Choose visuals that accurately represent your business and resonate with your target audience.
4. Engage with Your Community
- Regular Updates: Post updates, news, and valuable content regularly on your Patch business page to keep your audience engaged.
- Respond to Reviews: Engage with customer reviews and feedback to build trust and improve your business’s reputation.
5. Utilize Tools for Efficiency
- Whitespark’s Local Citation Finder: Use this tool to identify and manage citation opportunities efficiently.
- Centralized Documentation: Maintain a centralized document with all your citation information to ensure consistency and ease of use.
Common Mistakes to Avoid When Building Patch Citations
Avoiding these common pitfalls can enhance the effectiveness of your Patch citations and improve your local SEO outcomes.
1. Incomplete Business Information
- Impact: Missing details can weaken your citation’s effectiveness and reduce search engine trust.
- Solution: Ensure all sections of your Patch business listing are fully completed with accurate information.
2. Ignoring Visual Branding
- Impact: Poor-quality images can detract from your business’s professionalism and deter potential customers.
- Solution: Always use high-resolution images that match your brand’s aesthetics and identity.
3. Neglecting to Link Other Assets
- Impact: Failing to link to your website and other social media profiles can limit your citation’s impact.
- Solution: Ensure all your online assets are interconnected through your Patch business listing.
4. Overlooking Regular Updates
- Impact: An inactive page can signal to search engines that your business is not engaged.
- Solution: Keep your Patch business page active by posting regular updates and engaging with your audience.
5. Not Monitoring Citation Consistency
- Impact: Inconsistent information across citation sources can confuse search engines and harm your SEO.
- Solution: Regularly audit your citation sources to ensure all information is consistent and up-to-date.
Frequently Asked Questions
Can I Use Patch as the Only Citation Source for My Business?
While Patch is a powerful citation source, it’s advisable to build citations across multiple platforms to maximize your SEO benefits and online visibility. Diversifying your citation sources helps establish your business’s credibility and ensures consistent NAP information across the web.
How Often Should I Update My Patch Citations?
Regularly review and update your Patch business page to reflect any changes in your business information, such as address, phone number, or services offered. Additionally, use tools like Whitespark to identify new citation opportunities and keep your online presence up-to-date.
Do Citations from Social Media Platforms Like Patch Directly Affect SEO?
Yes, citations from reputable platforms like Patch contribute to your local SEO efforts. They help search engines verify your business’s legitimacy and relevance within a specific geographic area, enhancing your visibility in local search results.
What If My Patch Page Isn’t Showing Up in Search Results?
- Solution:
- Ensure Page is Published: Make sure your Patch business page is published and not set to private.
- Complete All Information: Fully complete your page’s profile with accurate NAP information, services, and descriptions.
- Engage Regularly: Regular posts and interactions can improve your page’s visibility.
- Check Search Settings: Navigate to Settings and ensure that your page is discoverable by search engines.
How Can I Track Leads from Patch Citations?
- Use Tracking Software: Implement tracking tools like CallRail to assign unique phone numbers to your Patch citations, allowing you to monitor calls generated from your Patch business page.
- Google Analytics: Set up conversion goals in Google Analytics to track traffic and form submissions originating from your Patch business page.
Maximizing the Impact of Patch Citations
To fully leverage the benefits of building citations on Patch, integrate these strategies into your broader marketing and SEO efforts.
Align with Your Overall SEO Strategy
- Consistent NAP Information: Ensure that your Name, Address, and Phone number are consistent across all online platforms.
- Keyword Integration: Use relevant keywords in your Patch page’s description and services to enhance search engine visibility.
Utilize Data-Driven Insights
- Monitor Performance: Use Patch’s analytics tools to track engagement and the effectiveness of your citations.
- Refine Strategies: Adjust your citation-building efforts based on performance data to maximize effectiveness.
Integrate with Other Marketing Channels
- Social Media: Share updates from your Patch business page on other social media platforms to increase visibility.
- Email Marketing: Include links to your Patch page in your email signatures and newsletters to drive traffic and build citations.
Foster Team Collaboration
- Delegate Tasks: Assign team members to manage and update your Patch business page to ensure it remains active and up-to-date.
- Share Best Practices: Educate your team on the importance of citations and how to maintain consistency across platforms.
Enhance Customer Experience
- Engaging Content: Share valuable and engaging content on your Patch business page to attract and retain customers.
- Responsive Interaction: Actively respond to customer inquiries and feedback on your Patch business page to build trust and loyalty.
Conclusion
Using Patch as a citation source is a strategic approach that enhances your local SEO efforts, increases online visibility, and establishes your business as a credible and trustworthy entity. By following this step-by-step guide and adhering to best practices, you can effectively manage your Patch citations and drive meaningful results for your business. Remember to maintain consistency, engage actively with your audience, and regularly update your citations to ensure long-term SEO success and business growth.
How to Boost Local SEO by Building a Citation on Instagram
In the competitive world of local SEO, building robust citations is essential for enhancing your online visibility and establishing credibility with search engines like Google. While many businesses focus on traditional citation sources like Google My Business, Yelp, and local directories, social media platforms such as Instagram are often overlooked as valuable citation sources. This comprehensive guide will walk you through how to use your Instagram business page as a citation, leveraging tools like Whitespark’s Local Citation Finder to maximize your local SEO efforts.
Why Use Instagram for Building Citations?
Instagram, a leading social media platform, is not only a hub for visual content but also a significant citation source that can bolster your local SEO strategy. By ensuring your Instagram business page is properly optimized, you can create a strong web of citations that signal to search engines that your business is legitimate and trustworthy.
Benefits of Using Instagram for Citations
- Enhanced Local SEO: Instagram citations contribute to your local search rankings by providing consistent Name, Address, and Phone number (NAP) information across a reputable platform.
- Increased Online Visibility: With millions of active users, Instagram offers extensive exposure, making it easier for potential customers to discover your business.
- Professional Credibility: A well-maintained Instagram page signals to both users and search engines that your business is active and reliable.
- User Engagement: Instagram allows for direct interaction with customers through posts, stories, and direct messages, fostering stronger relationships and trust.
Step-by-Step Guide to Using Instagram as a Citation
Follow these detailed steps to optimize your Instagram business page for citations, ensuring consistency and enhancing your local SEO.
Step 1: Utilize Whitespark’s Local Citation Finder Tool
Before diving into Instagram, it’s beneficial to identify all potential citation opportunities. Whitespark’s Local Citation Finder is a valuable tool that streamlines this process.
- Access Whitespark’s Local Citation Finder:
- Visit Whitespark’s Local Citation Finder and sign up for an account if you haven’t already.
- Run a Local Citation Scan:
- Enter your business details, including NAP information.
- Select Instagram as one of the platforms to include in your citation search.
- Initiate the scan to identify potential citation opportunities on Instagram and other platforms.
- Review Opportunities:
- Browse through the list of suggested citation sources.
- Prioritize adding your business to reputable directories and platforms to maximize SEO benefits.
Step 2: Access and Optimize Your Instagram Business Page
To use Instagram effectively for citations, ensure your business page is fully optimized with accurate information.
- Log In to Instagram:
- Open your web browser or mobile app and navigate to Instagram.
- Log in using your business account credentials. If you don’t have a business page, create one by switching your profile to a Business Account in the settings.
- Select Your Business Profile:
- From the home screen, click on your profile picture in the top-right corner.Select the business page you wish to optimize.
- Navigate to Edit Profile:
- Click on Edit Profile located next to your username.
Step 3: Fill Out Contact and Basic Info
Consistency in your business’s Name, Address, and Phone number (NAP) across all platforms is crucial for effective citations.
- Update Website URL:
- In the Website field, enter your business’s official website URL (e.g.,
https://www.yourbusiness.com). - Note: Instagram allows you to update the website URL only via the mobile app. Ensure you are signed in on your phone to make this change.
- In the Website field, enter your business’s official website URL (e.g.,
- Separate Personal and Business Accounts:
- If you have a personal Instagram account, ensure it links to your personal website, and your business account links to your business website.
- Avoid Cross-Linking: Keeping your personal and business assets separate prevents confusion and maintains professional integrity.
- Optimize Your Bio:
- In the Bio section, provide a concise description of your business. For example:bashCopy
We help local service businesses fix their digital marketing. - Consistency: Use the same bio across all citation sources for uniformity.
- In the Bio section, provide a concise description of your business. For example:bashCopy
- Set the Correct Category:
- In the Category section, select the primary category that best describes your business (e.g., Plumber, Electrician).Add Additional Categories: If applicable, add multiple categories to cover all your services.
- Enter Accurate NAP Information:
- Address: Enter your complete business address, ensuring it matches the address listed on your Google Business Profile and other citation sources.
- Phone Number: Provide a business-specific phone number. If you use tracking software like CallRail, consider using a tracking number here.
- Link to Other Social Media Profiles:
- In the Website or Contact sections, add links to your other social media profiles (e.g., LinkedIn, Facebook, YouTube) to create a cohesive online presence.
Step 4: Upload High-Quality Profile Picture and Stories Highlights
Visual elements play a significant role in branding and user perception.
- Profile Picture:
- Upload your business logo to maintain brand consistency.
- Ensure the image is high-resolution and properly cropped.
- Stories Highlights:
- Use Stories Highlights to showcase your services, customer testimonials, and other key aspects of your business.Organize Highlights into relevant categories for easy navigation.
Step 5: Consistently Update and Engage
Regular engagement and updates enhance your page’s visibility and credibility.
- Post Regularly:
- Share updates, promotions, and valuable content consistently to keep your audience engaged.
- Use relevant hashtags to increase the reach of your posts.
- Engage with Followers:
- Respond to comments and messages promptly to build relationships and trust with your audience.
- Encourage reviews and testimonials on your Instagram page.
- Monitor Insights:
- Use Instagram Insights to track engagement metrics and optimize your content strategy based on performance data.
Step 6: Maintain NAP Consistency Across All Citations
Consistency is key to building trust with search engines and improving your local SEO.
- Uniform Information:
- Ensure that your Name, Address, and Phone number are identical across all citation platforms, including Instagram.
- Standard Formatting: Use the same format for your address and phone number to improve search engine recognition.
- Regular Audits:
- Periodically review your citation sources to ensure all information is up-to-date and consistent.
Best Practices for Building Citations on Instagram
Implementing best practices ensures that your Instagram citations are effective and contribute positively to your local SEO strategy.
1. Maintain NAP Consistency
- Uniform Information: Ensure that your Name, Address, and Phone number are consistent across all citation platforms, including Instagram.
- Standard Formatting: Use the same format for your address and phone number to improve search engine recognition.
2. Optimize Your Instagram Business Page
- Complete All Sections: Fill out every section of your Instagram business page, including Bio, Contact Information, and Services.
- Use Relevant Keywords: Incorporate keywords related to your business and services in your bio and services to enhance searchability.
3. Leverage High-Quality Visuals
- Professional Images: Use high-resolution images for your profile picture and posts to present a professional image.
- Regular Updates: Refresh your visuals periodically to reflect any changes in branding or services.
4. Engage with Your Audience
- Post Regularly: Share updates, news, and valuable content consistently to keep your audience engaged.
- Respond to Interactions: Engage with comments and messages to build relationships and trust with your audience.
5. Utilize Tools for Efficiency
- Whitespark’s Local Citation Finder: Use this tool to identify and manage citation opportunities efficiently.
- Google Documents: Maintain a centralized document with all your citation information to ensure consistency and ease of use.
Common Mistakes to Avoid When Building Instagram Citations
Avoiding these common pitfalls can enhance the effectiveness of your Instagram citations and improve your local SEO outcomes.
1. Incomplete Page Information
- Impact: Missing details can weaken your citation’s effectiveness and reduce search engine trust.
- Solution: Ensure all sections of your Instagram business page are fully completed with accurate information.
2. Ignoring Visual Branding
- Impact: Poor-quality images can detract from your business’s professionalism and deter potential customers.
- Solution: Always use high-resolution images that match your brand’s aesthetics and identity.
3. Neglecting to Link Other Assets
- Impact: Failing to link to your website and other social media profiles can limit your citation’s impact.
- Solution: Ensure all your online assets are interconnected through your Instagram business page.
4. Overlooking Regular Updates
- Impact: An inactive page can signal to search engines that your business is not engaged.
- Solution: Keep your Instagram business page active by posting regular updates and engaging with your audience.
5. Not Monitoring Citation Consistency
- Impact: Inconsistent information across citation sources can confuse search engines and harm your SEO.
- Solution: Regularly audit your citation sources to ensure all information is consistent and up-to-date.
Frequently Asked Questions
Can I Use Instagram as the Only Citation Source for My Business?
While Instagram is a powerful citation source, it’s advisable to build citations across multiple platforms to maximize your SEO benefits and online visibility. Diversifying your citation sources helps establish your business’s credibility and ensures consistent NAP information across the web.
How Often Should I Update My Instagram Citations?
Regularly review and update your Instagram business page to reflect any changes in your business information, such as address, phone number, or services offered. Additionally, use tools like Whitespark to identify new citation opportunities and keep your online presence up-to-date.
Do Citations from Social Media Platforms Like Instagram Directly Affect SEO?
Yes, citations from reputable social media platforms like Instagram contribute to your local SEO efforts. They help search engines verify your business’s legitimacy and relevance within a specific geographic area, enhancing your visibility in local search results.
What If My Instagram Page Isn’t Showing Up in Search Results?
- Solution:
- Ensure Page is Published: Make sure your Instagram business page is published and not set to private.
- Complete All Information: Fully complete your page’s profile with accurate NAP information, services, and descriptions.
- Engage Regularly: Regular posts and interactions can improve your page’s visibility.
- Check Search Settings: Navigate to Settings > Privacy and Security and ensure that your page is discoverable by search engines.
How Can I Track Leads from Instagram Citations?
- Use Tracking Software: Implement tracking tools like CallRail to assign unique phone numbers to your Instagram citations, allowing you to monitor calls generated from your Instagram page.
- Google Analytics: Set up conversion goals in Google Analytics to track traffic and form submissions originating from your Instagram business page.
Maximizing the Impact of Instagram Citations
To fully leverage the benefits of building citations on Instagram, integrate these strategies into your broader marketing and SEO efforts.
Align with Your Overall SEO Strategy
- Consistent NAP Information: Ensure that your Name, Address, and Phone number are consistent across all online platforms.
- Keyword Integration: Use relevant keywords in your Instagram page’s bio and services to enhance search engine visibility.
Utilize Data-Driven Insights
- Monitor Performance: Use Instagram Insights and analytics tools to track engagement and the effectiveness of your citations.
- Refine Strategies: Adjust your citation-building efforts based on performance data to maximize effectiveness.
Integrate with Other Marketing Channels
- Social Media: Share updates from your Instagram business page on other social media platforms to increase visibility.
- Email Marketing: Include links to your Instagram page in your email signatures and newsletters to drive traffic and build citations.
Foster Team Collaboration
- Delegate Tasks: Assign team members to manage and update your Instagram business page to ensure it remains active and up-to-date.
- Share Best Practices: Educate your team on the importance of citations and how to maintain consistency across platforms.
Enhance Customer Experience
- Engaging Content: Share valuable and engaging content on your Instagram business page to attract and retain customers.
- Responsive Interaction: Actively respond to customer inquiries and feedback on your Instagram business page to build trust and loyalty.
Conclusion
Using your Instagram business page as a citation is a strategic approach that enhances your local SEO efforts, increases online visibility, and establishes your business as a credible and trustworthy entity. By following this step-by-step guide and adhering to best practices, you can effectively manage your citations and drive meaningful results for your business. Remember to maintain consistency, engage actively with your audience, and regularly update your citations to ensure long-term SEO success and business growth.
How to Build a Citation for Your Business on Facebook to Boost Local SEO
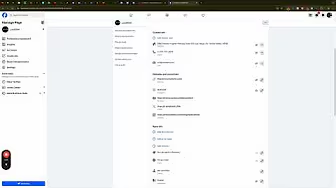
In the competitive landscape of local search engine optimization (SEO), building robust citations is essential for improving your business’s online visibility and credibility. Citations—mentions of your business’s Name, Address, and Phone number (NAP) across various online platforms—play a pivotal role in boosting your local search rankings. Among the myriad of citation sources, Facebook stands out as a powerful tool due to its extensive reach and integration with other social media platforms. This comprehensive guide will walk you through the process of using your Facebook page as a citation for your business, leveraging tools like Whitespark to maximize your SEO efforts.
Why Use Facebook for Building Citations?
Facebook is not just a social media platform; it serves as a significant citation source that can enhance your local SEO strategy. By ensuring your Facebook business page is properly optimized, you can create a strong web of citations that signal to search engines like Google that your business is legitimate and trustworthy.
Benefits of Using Facebook for Citations
- Enhanced Local SEO: Facebook citations contribute to your local search rankings by providing consistent NAP information across a reputable platform.
- Increased Online Visibility: With millions of active users, Facebook offers extensive exposure, making it easier for potential customers to find your business.
- Professional Credibility: A well-maintained Facebook page signals to both users and search engines that your business is active and reliable.
- User Engagement: Facebook allows for direct interaction with customers through reviews, messages, and posts, fostering stronger relationships and trust.
Step-by-Step Guide to Using Facebook as a Citation
Follow these detailed steps to optimize your Facebook business page for citations, ensuring consistency and enhancing your local SEO.
Step 1: Utilize Whitespark’s Local Citation Finder Tool
Before diving into Facebook, it’s beneficial to identify all potential citation opportunities. Whitespark’s Local Citation Finder is a valuable tool that streamlines this process.
- Access Whitespark’s Local Citation Finder:
- Visit Whitespark’s Local Citation Finder and sign up for an account if you haven’t already.
- Run a Local Citation Scan:
- Enter your business details, including NAP information.
- Select Facebook as one of the platforms to include in your citation search.
- Initiate the scan to identify potential citation opportunities on Facebook and other platforms.
- Review Opportunities:
- Browse through the list of suggested citation sources.
- Prioritize adding your business to reputable directories and platforms to maximize SEO benefits.
Step 2: Access and Optimize Your Facebook Business Page
To use Facebook effectively for citations, ensure your business page is fully optimized with accurate information.
- Log In to Facebook:
- Open your web browser and navigate to Facebook.
- Log in using your personal credentials. If you don’t have a business page, create one by clicking Create > Page.
- Select Your Business Page:
- From the top-right corner, click on the Pages icon.
- Select the business page you wish to optimize.
- Navigate to Page Settings:
- On your business page, click on Settings in the bottom-left corner.
Step 3: Fill Out Contact and Basic Info
Ensuring consistency in your business’s Name, Address, and Phone number (NAP) across all platforms is crucial for effective citations.
- Go to Page Details:
- In the Settings menu, click on Page Details under the Audience and Visibility section.
- Update Category:
- Under Page Details, find the Category section.
- Select the primary category that best describes your business (e.g., Plumber, Electrician).
- Enter Accurate NAP Information:
- Address: Enter your complete business address, ensuring it matches the address listed on your Google Business Profile and other citation sources.
- Phone Number: Provide a business-specific phone number. If you use tracking software like CallRail, consider using a tracking number here.
- Add Additional Categories (If Applicable):
- You can add multiple categories if your business offers a variety of services.
- Set the Correct Time Zone and Operating Hours:
- Ensure your time zone is accurately set to reflect your business’s location.Enter your business’s operating hours to provide accurate information to customers.
Step 4: Link to Your Website and Other Social Media Profiles
Creating a network of linked assets enhances your business’s credibility and SEO.
- Add Your Website URL:
- In the Contact Information section, enter your main website URL.
- Link to Other Social Media Profiles:
- Include links to your other social media profiles (e.g., Instagram, LinkedIn, YouTube) to create a cohesive online presence.
- Add a Tracking Number (Optional):
- If you use a tracking service, include the tracking number to monitor leads originating from Facebook.
Step 5: Upload a High-Quality Profile Picture and Cover Photo
Visual elements play a significant role in branding and user perception.
- Profile Picture:
- Upload your business logo to maintain brand consistency.
- Ensure the image is high-resolution and properly cropped.
- Cover Photo:
- Choose a visually appealing cover photo that represents your business.Update it periodically to reflect current promotions or seasonal themes.
Step 6: Complete Additional Page Details
Fill out all available sections to provide comprehensive information about your business.
- Mission and Vision:
- Add a brief description of your business’s mission and vision to communicate your values to customers.
- Privacy and Legal Information:
- Include links to your privacy policy and any other relevant legal information.
- Services:
- List the services you offer to give potential customers a clear understanding of what you provide.
- Additional Information:
- Fill out any other fields that can help improve your page’s visibility and credibility.
Step 7: Publish and Verify Your Page
- Save Changes:
- After updating all necessary information, click Save Changes to apply the updates to your Facebook business page.
- Verify Your Page:
- Ensure that your page is verified by Facebook to enhance trustworthiness. Go to Settings > General > Page Verification and follow the prompts if verification is available.
Step 8: Monitor and Maintain Your Citations
Regularly updating and maintaining your citations ensures continued SEO benefits and accurate information across all platforms.
- Regular Audits:
- Periodically review your citation sources to ensure all information is up-to-date and consistent.
- Use Whitespark for Ongoing Citation Building:
- Continuously use tools like Whitespark to identify new citation opportunities and expand your online presence.
Best Practices for Building Citations on Facebook
Implementing best practices ensures that your Facebook citations are effective and contribute positively to your local SEO strategy.
1. Maintain NAP Consistency
- Uniform Information: Ensure that your Name, Address, and Phone number are consistent across all citation platforms, including Facebook.
- Standard Formatting: Use the same format for your address and phone number to improve search engine recognition.
2. Optimize Your Facebook Business Page
- Complete All Sections: Fill out every section of your Facebook business page, including About, Services, and Contact Information.
- Use Relevant Keywords: Incorporate keywords related to your business and services in your page description and specialties to enhance searchability.
3. Leverage High-Quality Visuals
- Professional Images: Use high-resolution images for your profile and cover photos to present a professional image.
- Regular Updates: Refresh your visuals periodically to reflect any changes in branding or services.
4. Engage with Your Audience
- Post Regularly: Share updates, news, and valuable content regularly to keep your audience engaged.
- Respond to Interactions: Engage with comments and messages to build relationships and trust with your audience.
5. Utilize Tools for Efficiency
- Whitespark’s Local Citation Finder: Use this tool to identify and manage citation opportunities efficiently.
- Google Documents: Maintain a centralized document with all your citation information to ensure consistency and ease of use.
Common Mistakes to Avoid When Building Facebook Citations
Avoiding these common pitfalls can enhance the effectiveness of your Facebook citations and improve your local SEO outcomes.
1. Incomplete Page Information
- Impact: Missing details can weaken your citation’s effectiveness and reduce search engine trust.
- Solution: Ensure all sections of your Facebook business page are fully completed with accurate information.
2. Ignoring Visual Branding
- Impact: Poor-quality images can detract from your business’s professionalism.
- Solution: Always use high-resolution images that match your brand’s aesthetics and identity.
3. Neglecting to Link Other Assets
- Impact: Failing to link to your website and other social media profiles can limit your citation’s impact.
- Solution: Ensure all your online assets are interconnected through your Facebook business page.
4. Overlooking Regular Updates
- Impact: An inactive page can signal to search engines that your business is not engaged.
- Solution: Keep your Facebook business page active by posting regular updates and engaging with your audience.
5. Not Monitoring Citation Consistency
- Impact: Inconsistent information across citation sources can confuse search engines and harm your SEO.
- Solution: Regularly audit your citation sources to ensure all information is consistent and up-to-date.
Frequently Asked Questions
Can I Use Facebook as the Only Citation Source for My Business?
While Facebook is a powerful citation source, it’s advisable to build citations across multiple platforms to maximize your SEO benefits and online visibility. Diversifying your citation sources helps establish your business’s credibility and ensures consistent NAP information across the web.
How Often Should I Update My Facebook Citations?
Regularly review and update your Facebook business page to reflect any changes in your business information, such as address, phone number, or services offered. Additionally, use tools like Whitespark to identify new citation opportunities and keep your online presence up-to-date.
Do Citations from Social Media Platforms Like Facebook Directly Affect SEO?
Yes, citations from reputable social media platforms like Facebook contribute to your local SEO efforts. They help search engines verify your business’s legitimacy and relevance within a specific geographic area, enhancing your visibility in local search results.
What If My Facebook Page Isn’t Showing Up in Search Results?
- Solution:
- Ensure Page is Published: Make sure your Facebook business page is published and not set to private.
- Complete All Information: Fully complete your page’s profile with accurate NAP information, services, and descriptions.
- Engage Regularly: Regular posts and interactions can improve your page’s visibility.
- Check Search Settings: Navigate to Settings > General and ensure that Page Visibility is set to Page published and not hidden from search engines.
How Can I Track Leads from Facebook Citations?
- Use Tracking Software: Implement tracking tools like CallRail to assign unique phone numbers to your Facebook citations, allowing you to monitor calls generated from your Facebook page.
- Google Analytics: Set up conversion goals in Google Analytics to track traffic and form submissions originating from your Facebook business page.
Maximizing the Impact of Facebook Citations
To fully leverage the benefits of building citations on Facebook, integrate these strategies into your broader marketing and SEO efforts.
Align with Your Overall SEO Strategy
- Consistent NAP Information: Ensure that your Name, Address, and Phone number are consistent across all online platforms.
- Keyword Integration: Use relevant keywords in your Facebook page’s description and services to enhance search engine visibility.
Utilize Data-Driven Insights
- Monitor Performance: Use Facebook Insights and analytics tools to track engagement and the effectiveness of your citations.
- Refine Strategies: Adjust your citation-building efforts based on performance data to maximize effectiveness.
Integrate with Other Marketing Channels
- Social Media: Share updates from your Facebook business page on other social media platforms to increase visibility.
- Email Marketing: Include links to your Facebook page in your email signatures and newsletters to drive traffic and build citations.
Foster Team Collaboration
- Delegate Tasks: Assign team members to manage and update your Facebook business page to ensure it remains active and up-to-date.
- Share Best Practices: Educate your team on the importance of citations and how to maintain consistency across platforms.
Enhance Customer Experience
- Engaging Content: Share valuable and engaging content on your Facebook business page to attract and retain customers.
- Responsive Interaction: Actively respond to customer inquiries and feedback on your Facebook business page to build trust and loyalty.
Conclusion
Using your Facebook business page as a citation is a strategic approach that enhances your local SEO efforts, increases online visibility, and establishes your business as a credible and trustworthy entity. By following this step-by-step guide and adhering to best practices, you can effectively manage your citations and drive meaningful results for your business. Remember to maintain consistency, engage actively with your audience, and regularly update your citations to ensure long-term SEO success and business growth.
How to Change Your WordPress Site Title, Tagline, and Favicon

Establishing a strong online presence starts with a well-configured website. One of the first steps in personalizing your WordPress site involves customizing essential elements like the site title, tagline, and favicon. These elements not only define your brand identity but also enhance user experience and improve your website’s professionalism. This comprehensive guide will walk you through the process of changing your site title, tagline, and favicon on a WordPress website, ensuring your site accurately reflects your brand and stands out to visitors.
Why Customize Your Site Title, Tagline, and Favicon?
Customizing these elements is crucial for several reasons:
Benefits of Customization
- Brand Identity: Your site title and tagline communicate your brand’s mission and values.
- Professional Appearance: A unique favicon adds a professional touch and helps your site stand out in browser tabs.
- SEO Advantages: Relevant site titles and taglines can improve your website’s search engine optimization (SEO), making it easier for potential customers to find you.
- User Experience: Clear and consistent branding enhances user trust and engagement.
Step-by-Step Guide to Changing Site Title, Tagline, and Favicon
Follow these detailed steps to customize your WordPress website’s title, tagline, and favicon using the WordPress dashboard.
Step 1: Access Your WordPress Dashboard
- Log In to WordPress:
- Open your web browser and navigate to
yourwebsite.com/wp-admin.Enter your username and password, then click Log In to access your dashboard.
- Open your web browser and navigate to
Step 2: Navigate to General Settings
- Go to Settings:
- In the left-hand sidebar of your WordPress dashboard, hover over Settings and click on General.
Step 3: Change Site Title and Tagline
- Edit Site Title:
- In the General Settings page, locate the Site Title field.
- Enter your desired site title. This title appears in the header of your site and is often used by search engines.
- Edit Tagline:
- Below the site title, find the Tagline field.Enter a brief tagline that describes your website or business. The tagline typically appears below the site title and is used by search engines in snippets.
Step 4: Change the Favicon (Site Icon)
- Access Site Icon Settings:
- Scroll down to the Site Icon section within the General Settings page.
- The site icon appears in the browser tab, bookmark bar, and other places where your site is referenced.
- Upload a New Site Icon:
- Click on Select Site Icon.Upload an image that represents your brand. The recommended size is 512×512 pixels.Crop the image as needed and click Publish to set it as your new favicon.
- Confirm the Change:
- Once uploaded, your new favicon will be displayed in your browser tab. It may take some time to update across all browsers.
Step 5: Update the Administrator Email Address
- Edit Administrator Email:
- In the General Settings page, locate the Administration Email Address field.Enter the email address you want to use for administrative purposes. This email receives important notifications from WordPress.
- Save Changes:
- Scroll down and click Save Changes to apply the new email address.
Step 6: Set the Correct Time Zone and Date Format
- Select Time Zone:
- In the General Settings page, find the Time Zone dropdown menu.
- Select your appropriate time zone to ensure that all time-related data on your website is accurate.
- Customize Date Format:
- Below the time zone, locate the Date Format section.Choose a date format that suits your preference or enter a custom format. This setting affects how dates are displayed on your site.
- Save Changes:
- After making adjustments, click Save Changes to update your settings.
Step 7: Verify Your Changes
- Check Your Site:
- Visit your website to ensure that the site title, tagline, and favicon reflect the changes you made.Clear your browser cache if you don’t see the updates immediately.
- Test Email Notifications:
- If you changed the administrator email, ensure that you receive notifications correctly by performing a test action, such as submitting a form.
Best Practices for Customizing Site Title, Tagline, and Favicon
Implementing best practices ensures that your customizations are effective and contribute positively to your website’s performance and user experience.
1. Maintain Consistency with Your Brand
- Use Brand Colors and Fonts: Ensure that your site title, tagline, and favicon align with your brand’s color scheme and typography.
- Clear Messaging: Your tagline should succinctly communicate what your business does or its core values.
2. Optimize for SEO
- Relevant Keywords: Incorporate relevant keywords into your site title and tagline to improve search engine rankings.
- Avoid Keyword Stuffing: Keep your site title and tagline natural and easy to read without overloading with keywords.
3. Choose a Memorable Favicon
- Simplicity: Opt for a simple and recognizable design that scales well at smaller sizes.
- Distinctiveness: Ensure your favicon stands out and is easily distinguishable from others in browser tabs.
4. Keep Information Up-to-Date
- Regular Updates: Periodically review and update your site title, tagline, and favicon to reflect any changes in your business or branding strategy.
- Accurate Time Settings: Ensure your time zone and date format are always accurate to avoid discrepancies in scheduling and content publishing.
Common Mistakes to Avoid
Avoiding these common pitfalls can help you maintain an effective and professional website.
1. Not Saving Changes
- Issue: Forgetting to click Save Changes after making adjustments means your updates won’t take effect.
- Solution: Always double-check that you’ve saved your changes before exiting the settings page.
2. Using Low-Quality Images for Favicon
- Issue: Blurry or pixelated favicons can detract from your site’s professionalism.
- Solution: Use high-resolution images (512×512 pixels recommended) and ensure they are clear and recognizable when scaled down.
3. Overcomplicating the Tagline
- Issue: A lengthy or unclear tagline can confuse visitors and dilute your message.
- Solution: Keep your tagline concise, clear, and focused on your core message or value proposition.
4. Ignoring SEO Best Practices
- Issue: Neglecting SEO can hinder your website’s visibility in search engine results.
- Solution: Incorporate relevant keywords naturally into your site title and tagline, and avoid overusing keywords to prevent penalties.
5. Mismatched Branding Elements
- Issue: Inconsistent colors, fonts, or styles can weaken your brand identity.
- Solution: Ensure that all branding elements, including site title, tagline, and favicon, are harmonized with your overall brand guidelines.
Frequently Asked Questions
Can I Change My Site Title and Tagline Anytime?
Yes, you can update your site title and tagline as often as needed through the Settings > General section in your WordPress dashboard. Regular updates can reflect changes in your business focus or branding strategy.
What Should I Use for My Tagline?
Your tagline should succinctly describe your business’s purpose, mission, or unique selling proposition. It should be clear, memorable, and aligned with your brand identity. For example, “Quality Home Restoration Services” or “Innovative Solutions for Modern Problems.”
How Do I Create an Effective Favicon?
To create an effective favicon:
- Size: Use a 512×512 pixel image to ensure quality when scaled down.
- Format: Save your favicon in a compatible format like PNG or ICO.
- Design: Keep it simple and recognizable, focusing on your logo or a distinct element of your brand.
- Consistency: Ensure it matches the overall aesthetic and color scheme of your website.
Why Isn’t My Favicon Updating?
- Caching Issues: Browsers often cache favicons, causing delays in updates.
- Solution: Clear your browser cache or use a different browser to view the updated favicon. It may also take some time to propagate across all browsers.
Do Site Title and Tagline Affect SEO?
Yes, both the site title and tagline play roles in SEO:
- Site Title: Appears in search engine results and browser tabs, influencing click-through rates.
- Tagline: Provides additional context about your site’s content, helping search engines understand your site’s purpose.
How Do I Ensure My Site Title is SEO-Friendly?
- Include Relevant Keywords: Incorporate primary keywords related to your business.
- Keep It Concise: Limit the title to around 60 characters to prevent it from being cut off in search results.
- Avoid Keyword Stuffing: Use keywords naturally without overloading the title.
Conclusion
Customizing your WordPress website’s site title, tagline, and favicon is a simple yet impactful way to enhance your brand’s online presence and professionalism. By following this step-by-step guide, you can ensure that these elements accurately reflect your brand identity, improve your website’s SEO, and provide a better user experience for your visitors. Remember to maintain consistency, adhere to SEO best practices, and regularly update these settings to keep your website fresh and relevant.
Embrace the power of personalized branding elements to make your WordPress website stand out and effectively communicate your business’s values and offerings to your audience.
How to Make New WordPress Website Indexable by Search Engines

Launching a new WordPress website is an exciting milestone for any business or individual. However, one common issue many users face is their new site not appearing in Google search results. If you’ve set up a new website and it’s not showing up on Google, or you’ve attempted to index it using Google Search Console without success, the problem often lies within your WordPress settings. This comprehensive guide will walk you through the steps to make your WordPress website indexable by Google, ensuring your content reaches your intended audience effectively.
Why Your WordPress Website Might Not Be Indexed
When you create a new WordPress website, it defaults to settings that discourage search engines from indexing the site. This is a precautionary measure to prevent unpolished or under-construction sites from appearing in search results. While this is beneficial during the development phase, it can hinder your website’s visibility once you’re ready to go live.
Common Reasons for Indexing Issues
- Search Engine Visibility Setting: WordPress defaults to discourage search engines from indexing new sites.
- Lack of Content: Websites with minimal or no content are less likely to be indexed.
- Technical SEO Issues: Problems like slow loading times, broken links, or improper use of tags can affect indexing.
- Absence of Sitemap Submission: Not submitting your sitemap to Google Search Console can delay indexing.
Step-by-Step Guide to Make Your WordPress Site Indexable by Google
Follow these steps to ensure your WordPress website is properly indexed by Google:
Step 1: Access Your WordPress Dashboard
- Log In to WordPress:
- Open your web browser and navigate to
yourwebsite.com/wp-admin.Enter your username and password, then click Log In to access your dashboard.
- Open your web browser and navigate to
Step 2: Navigate to Reading Settings
- Go to Settings:
- In the left-hand sidebar of your WordPress dashboard, hover over Settings and click on Reading.
Step 3: Adjust Search Engine Visibility
- Locate Search Engine Visibility:
- Scroll down to the section labeled Search Engine Visibility.
- Uncheck the Discouragement Option:
- You will see a checkbox next to “Discourage search engines from indexing this site.”**Ensure this box is unchecked. This action allows search engines like Google to crawl and index your website.
- Save Changes:
- After unchecking the box, scroll down and click on Save Changes to apply the new settings.
Step 4: Verify and Optimize Your Website for SEO
- Install an SEO Plugin (Optional but Recommended):
- Plugins like Yoast SEO or Rank Math can help optimize your site for search engines.
- To install, go to Plugins > Add New, search for your preferred SEO plugin, click Install Now, and then Activate.
- Configure SEO Settings:
- Follow the plugin’s setup wizard to configure basic SEO settings, such as meta titles, descriptions, and XML sitemaps.
Step 5: Submit Your Sitemap to Google Search Console
- Access Google Search Console:
- Go to Google Search Console and log in with your Google account.
- Add Your Website:
- Click on “Add Property” and enter your website’s URL.
- Follow the verification steps to prove ownership of your website.
- Submit Your Sitemap:
- In the Google Search Console dashboard, navigate to Sitemaps under the Index section.Enter the URL of your sitemap (e.g.,
https://yourwebsite.com/sitemap.xml) and click Submit.
- In the Google Search Console dashboard, navigate to Sitemaps under the Index section.Enter the URL of your sitemap (e.g.,
Step 6: Use Instant Indexing Plugins (Optional)
- Install Rank Math Instant Indexing:
- To expedite the indexing process, consider using plugins like Rank Math’s Instant Indexing feature.Go to Plugins > Add New, search for Rank Math, click Install Now, and then Activate.Follow the plugin’s instructions to set up Instant Indexing.
Best Practices for Ensuring Successful Indexing
Implementing the following best practices can enhance the likelihood of your website being indexed efficiently and ranking well in search results:
1. Create High-Quality Content
- Relevance and Value: Ensure your content is relevant, valuable, and addresses the needs of your target audience.
- Regular Updates: Update your website regularly with fresh content to keep search engines interested.
2. Optimize Your Site’s Structure
- Clean URLs: Use descriptive and clean URLs that reflect the content of your pages.
- Internal Linking: Implement a strong internal linking strategy to help search engines navigate your site.
3. Improve Site Performance
- Speed Optimization: Use caching plugins, optimize images, and choose a reliable hosting provider to enhance your site’s loading speed.
- Mobile Responsiveness: Ensure your website is mobile-friendly, as Google prioritizes mobile-first indexing.
4. Utilize Meta Tags Effectively
- Meta Titles and Descriptions: Craft compelling meta titles and descriptions for each page to improve click-through rates from search results.
- Alt Text for Images: Add descriptive alt text to images to enhance SEO and accessibility.
5. Build Backlinks
- Quality Over Quantity: Focus on acquiring high-quality backlinks from reputable websites in your industry.
- Guest Posting: Contribute guest posts to authoritative blogs and websites to build backlinks and drive traffic.
Common Mistakes to Avoid
Avoiding these common mistakes can prevent indexing issues and improve your website’s SEO performance:
1. Leaving Search Engine Visibility Checked
- Impact: If the “Discourage search engines from indexing this site” box remains checked, search engines will ignore your website, preventing it from appearing in search results.
- Solution: Always ensure this box is unchecked once your site is ready to be indexed.
2. Using the Default Permalink Structure
- Impact: The default Plain permalink structure (
?p=123) is not SEO-friendly and can make URLs look unprofessional. - Solution: Change your permalink structure to Post name by navigating to Settings > Permalinks and selecting Post name.
3. Neglecting to Submit a Sitemap
- Impact: Without submitting a sitemap, search engines may take longer to discover and index your website’s pages.
- Solution: Always submit your sitemap to Google Search Console and other search engines to facilitate faster indexing.
4. Ignoring Mobile Optimization
- Impact: A non-mobile-friendly website can lead to poor user experience and lower rankings in mobile search results.
- Solution: Use responsive design principles and test your website on various devices to ensure optimal performance.
5. Overlooking Technical SEO Issues
- Impact: Technical issues like broken links, slow loading times, and improper use of tags can hinder indexing and negatively impact SEO.
- Solution: Regularly audit your website for technical SEO issues and address them promptly using tools like Google Search Console and SEO plugins.
Frequently Asked Questions
Can I Make My WordPress Website Indexed Immediately?
While you can’t force immediate indexing, taking the steps outlined in this guide—such as submitting your sitemap to Google Search Console and using instant indexing plugins—can significantly speed up the process. Typically, indexing can occur within a few hours to a few days.
What If My Website Still Isn’t Indexed After Following These Steps?
If your website isn’t indexed after a week, consider the following:
- Check for Noindex Tags: Ensure no pages have a
noindexmeta tag. - Review Robots.txt: Make sure your
robots.txtfile isn’t blocking search engines. - Improve Content Quality: High-quality, original content is more likely to be indexed.
- Seek Professional Help: Consider consulting an SEO expert to diagnose and fix underlying issues.
How Do I Remove a Page from Being Indexed by Google?
To prevent a specific page from being indexed:
- Edit the Page: Go to the page in WordPress and edit it with Elementor or the WordPress editor.
- Set Noindex Meta Tag: Use an SEO plugin to add a
noindexmeta tag to the page. - Update Robots.txt: Add a rule to disallow search engines from crawling the page.
Is It Necessary to Use an SEO Plugin for Indexing?
While not strictly necessary, SEO plugins like Yoast SEO or Rank Math simplify the process of optimizing your site for search engines. They provide tools for managing meta tags, sitemaps, and other SEO settings, making it easier to ensure your site is fully optimized and indexable.
How Often Should I Update My Sitemap?
Update your sitemap whenever you add or remove significant content, such as new pages or blog posts. SEO plugins typically handle this automatically, ensuring your sitemap is always current.
Conclusion
Ensuring that your new WordPress website is indexed by Google is a critical step in establishing a strong online presence. By adjusting your WordPress settings to allow indexing, optimizing your site’s structure and content, and leveraging tools like Google Search Console, you can enhance your website’s visibility and attract more visitors. Remember to adhere to best practices, avoid common mistakes, and continuously monitor your site’s performance to maintain and improve your search engine rankings.
Implementing these strategies not only helps your website get indexed but also lays the foundation for effective SEO, driving organic traffic and fostering business growth. Take the time to optimize your WordPress site’s settings and content, and watch as your online visibility and engagement soar.
How to Change Your Primary Domain on WordPress Engine
Establishing a professional online presence is crucial for any business, and one of the foundational steps in achieving this is ensuring your website uses your own custom domain. WordPress Engine, a popular managed WordPress hosting platform, assigns a default domain (yourwebsite.wpengine.com) to every new site. While this is convenient for initial setup, using a personalized domain enhances your brand’s credibility and makes it easier for customers to find and remember your website. This comprehensive guide will walk you through the process of changing your primary domain on WordPress Engine, ensuring your website reflects your brand identity effectively.
Why Use a Custom Primary Domain?
Using a custom primary domain instead of the default WordPress Engine domain offers several benefits:
Benefits of a Custom Primary Domain
- Brand Consistency: A personalized domain reinforces your brand identity and makes your business appear more professional.
- SEO Advantages: Custom domains are better optimized for search engines, improving your website’s visibility in search results.
- User Trust: Customers are more likely to trust and engage with a website that has a recognizable and relevant domain name.
- Memorability: A unique domain name is easier for customers to remember, increasing the likelihood of repeat visits.
Step-by-Step Guide to Changing Your Primary Domain on WordPress Engine
Follow these detailed steps to change your primary domain from the default WordPress Engine domain to your custom domain.
Step 1: Access Your WordPress Engine Dashboard
- Log In to WordPress Engine:
- Open your web browser and navigate to WordPress Engine.
- Click on Log In and enter your credentials to access your dashboard.
- Select the Correct Site:
- In the dashboard, locate the Sites section.Click on the site you wish to update to ensure you’re managing the correct website.
Step 2: Navigate to the Domains Section
- Go to Domains:
- In the left-hand sidebar of your WordPress Engine dashboard, click on Domains.This section displays all domains associated with your site, including the default WordPress Engine domain.
- Verify DNS and SSL:
- Ensure that the DNS settings and SSL certificates for your custom domain are verified.If they’re not verified, follow the prompts to complete the verification process. This step is crucial for ensuring your website is secure and accessible.
Step 3: Change the Primary Domain
- Select Your Custom Domain:
- In the Domains section, locate your custom domain (e.g.,
www.yourdomain.com).Click on the three vertical dots (options menu) next to your custom domain.
- In the Domains section, locate your custom domain (e.g.,
- Set as Primary Domain:
- From the dropdown menu, select Set as Primary Domain.A confirmation prompt will appear to ensure you want to proceed with changing the primary domain.
- Confirm the Change:
- Confirm your selection by clicking Set as Primary Domain.WordPress Engine will initiate a backup of your website to ensure no data is lost during the transition.The system will then switch the primary domain from the default to your custom domain.
Step 4: Verify the Change
- Monitor the Transition:
- The process may take a few moments as WordPress Engine updates the domain settings.
- Once completed, your website will be accessible via your custom primary domain.
- Check Your Website:
- Open a new browser tab and navigate to your custom domain (e.g.,
www.yourdomain.com).Ensure that your website loads correctly and that the SSL certificate is active (look for the secure padlock icon in the browser’s address bar).
- Open a new browser tab and navigate to your custom domain (e.g.,
Step 5: Update Internal Links and Settings
- Update WordPress Settings:
- In your WordPress dashboard, navigate to Settings > General.Ensure that both the WordPress Address (URL) and Site Address (URL) fields reflect your new primary domain.
- Update Internal Links:
- Review your website’s internal links to ensure they use the new domain.Update any hard-coded URLs within your content, menus, and widgets to prevent broken links and maintain SEO integrity.
- Resubmit Sitemaps:
- If you use tools like Google Search Console, resubmit your website’s sitemap to reflect the new domain.This helps search engines index your site correctly under the new domain.
Best Practices for Changing Your Primary Domain
Implementing best practices ensures a smooth transition and maintains your website’s performance and SEO rankings.
1. Backup Your Website
- Importance: Always create a complete backup of your website before making significant changes.
- How-To: Use WordPress Engine’s built-in backup tools or third-party plugins to perform a full backup of your site’s files and database.
2. Maintain Consistent NAP Information
- Name, Address, Phone (NAP): Ensure that your business’s NAP information is consistent across all online platforms.
- Benefit: Consistent NAP details enhance local SEO and improve your business’s credibility with search engines.
3. Update External Links and Citations
- Review External Links: Identify websites and directories that link to your old domain and update them with your new domain.
- Citations: Use tools like Whitespark’s Local Citation Finder to manage and update your business citations across various platforms.
4. Monitor SEO Performance
- Analytics Integration: Use Google Analytics and other SEO tools to monitor your website’s performance post-transition.
- Adjust Strategies: Make necessary adjustments based on the data to maintain or improve your search rankings.
5. Inform Your Audience
- Notify Customers: Inform your customers and audience about the domain change through newsletters, social media, and website announcements.
- Redirects: Set up 301 redirects from your old domain to the new one to ensure a seamless user experience and preserve SEO value.
Common Mistakes to Avoid
Avoiding common pitfalls can help ensure a successful domain transition without disrupting your website’s functionality or SEO performance.
1. Not Verifying DNS and SSL
- Impact: Unverified DNS and SSL settings can lead to website inaccessibility and security warnings.
- Solution: Ensure all DNS records are correctly configured and SSL certificates are active before making the domain switch.
2. Failing to Update Internal Links
- Impact: Broken links can frustrate users and harm your SEO rankings.
- Solution: Use search-and-replace tools or plugins to update all internal links to the new domain.
3. Overlooking External Backlinks
- Impact: Backlinks pointing to your old domain may result in lost referral traffic and diminished SEO authority.
- Solution: Reach out to webmasters of external sites to update backlinks to your new domain. Utilize 301 redirects as a fallback.
4. Ignoring SEO Tools Integration
- Impact: Disconnected SEO tools can lead to incomplete data tracking and hinder performance analysis.
- Solution: Resubmit sitemaps and update settings in SEO tools like Google Search Console and Bing Webmaster Tools to reflect the new domain.
5. Rushing the Process
- Impact: Hasty changes can lead to errors, site downtime, and loss of SEO rankings.
- Solution: Plan the transition carefully, follow the step-by-step guide, and allow ample time for DNS propagation and verification.
Frequently Asked Questions
Can I Change My Primary Domain More Than Once?
Yes, you can change your primary domain multiple times on WordPress Engine. However, each change requires updating DNS settings and verifying ownership, which can be time-consuming. It’s advisable to finalize your domain choice before making significant website changes to minimize disruptions.
What Happens to My Old Domain After Changing the Primary Domain?
After changing your primary domain, your old domain remains registered with your domain registrar unless you choose to transfer or cancel it. To maintain SEO value and user accessibility, set up 301 redirects from the old domain to the new one.
Do I Need to Update My SSL Certificate After Changing the Domain?
Yes, WordPress Engine automatically provisions a new SSL certificate for your new primary domain. Ensure that the SSL is active and properly configured by checking the secure padlock icon in your browser’s address bar.
How Long Does It Take for the Domain Change to Reflect?
The domain change can take anywhere from a few minutes to 24 hours, depending on DNS propagation times. Namecheap typically updates DNS records within a few hours, but full propagation across the internet may take longer.
Can I Use Both Domains Simultaneously?
Yes, you can keep both the old and new domains active. However, it’s recommended to set the new domain as primary and redirect the old domain to ensure all traffic is directed to the new domain, preserving SEO value and providing a seamless user experience.
Maximizing the Impact of Your Domain Change
To fully leverage the benefits of changing your primary domain, integrate these strategies into your broader marketing and operational plans.
Align with Your Marketing Goals
- Define Clear Objectives: Identify what you aim to achieve with your website, such as increasing leads, boosting online sales, or enhancing brand awareness.
- Tailor Content: Ensure your website content aligns with your marketing goals and resonates with your target audience.
Use Data to Optimize Strategies
- Analytics Integration: Integrate Google Analytics with your WordPress Engine site to monitor website performance and user behavior.
- Conversion Tracking: Set up conversion tracking to measure the effectiveness of your marketing campaigns and optimize accordingly.
Integrate with Other Marketing Tools
- CRM Systems: Connect your website with Customer Relationship Management (CRM) systems to streamline lead management and follow-up processes.
- Email Marketing: Utilize email marketing tools to engage with your audience and drive traffic back to your website.
Foster Team Collaboration
- Share Responsibilities: Delegate tasks such as content creation, SEO optimization, and website maintenance to team members to enhance productivity and creativity.
- Regular Meetings: Hold regular team meetings to discuss website performance, analyze data, and brainstorm new strategies.
Enhance Customer Experience
- Optimize User Interface: Ensure your website is user-friendly, with intuitive navigation and a responsive design that works well on all devices.
- Provide Value: Focus on delivering valuable content and resources that address your audience’s needs and interests.
Conclusion
Changing your primary domain on WordPress Engine from the default domain to your custom domain is a strategic move that significantly enhances your online presence and brand credibility. By following this step-by-step guide and adhering to best practices, you can ensure a smooth transition that maintains your website’s performance and SEO integrity. Remember to backup your site, maintain consistent NAP information, update internal and external links, and monitor your website’s performance post-transition. Embrace the power of a custom domain to strengthen your brand identity and drive your business forward in the digital landscape.
How to Connect Google Tag Manager, Google Ads, Google Analytics, & More Using the Site Kit Plugin
In today’s digital landscape, effectively managing and tracking your website’s performance is crucial for business success. Google offers a suite of tools—Google Tag Manager (GTM), Google Ads, and Google Analytics—that provide invaluable insights into your website’s traffic, user behavior, and advertising effectiveness. However, integrating these tools manually can be time-consuming and technically challenging, especially for business owners who prefer to focus on their core operations. Enter the Google Site Kit plugin for WordPress, a powerful tool that simplifies the process of connecting your website to Google’s suite of services. This comprehensive guide will walk you through how to use the Google Site Kit plugin to seamlessly integrate GTM, Google Ads conversion actions, and Google Analytics with your WordPress website.
Why Use Google Site Kit?
Google Site Kit is an official WordPress plugin developed by Google, designed to help you manage and understand your website’s performance data directly from your WordPress dashboard. It provides an easy and unified interface to connect various Google services, eliminating the need for manual code insertion and reducing the complexity of managing multiple integrations.
Benefits of Using Google Site Kit
- Simplified Integration: Easily connect Google services without delving into code.
- Unified Dashboard: Access insights from Analytics, Ads, and Search Console in one place.
- Automatic Updates: Receive real-time data and updates without manual intervention.
- Enhanced Performance: Optimize your website based on actionable insights from integrated tools.
- Official Support: Benefit from a plugin developed and supported by Google, ensuring reliability and compatibility.
Step-by-Step Guide to Connecting Google Tag Manager, Google Ads, and Analytics Using Google Site Kit
Follow these detailed steps to set up and connect Google Tag Manager, Google Ads conversion actions, and Google Analytics to your WordPress website using the Google Site Kit plugin.
Step 1: Access Your WordPress Dashboard
- Log In to WordPress:
- Open your web browser and navigate to
yourwebsite.com/wp-admin. - Enter your WordPress username and password, then click Log In.
- Open your web browser and navigate to
- Navigate to Plugins:
- In the left-hand sidebar, click on Plugins.
- Click on Add New at the top of the Plugins page.
Step 2: Install and Activate the Google Site Kit Plugin
- Search for Site Kit:
- In the Add Plugins page, use the search bar on the top right to type “Site Kit”.
- Install the Plugin:
- Locate Site Kit by Google in the search results. It typically has a high number of active installations and is developed by Google.
- Click Install Now next to the plugin.
- Activate the Plugin:
- Once the installation is complete, click Activate to enable the plugin on your website.
Step 3: Set Up Site Kit and Connect Your Google Services
- Access Site Kit Dashboard:
- After activation, you’ll see a new Site Kit option in your WordPress dashboard sidebar. Click on Site Kit.
- Start the Setup Process:
- Click on the Start Setup button to begin connecting your Google services.
- Sign In with Google:
- You’ll be prompted to sign in with your Google account. Ensure you use the Google account associated with your Google Tag Manager, Google Ads, and Google Analytics.
- Verify Site Ownership:
- Google Site Kit will automatically verify your site ownership through your WordPress setup. Follow the on-screen instructions to complete the verification process.
Step 4: Connect Google Analytics
- Connect Analytics:
- In the Site Kit setup wizard, you’ll see an option to Connect Service for Google Analytics. Check the box next to Google Analytics and click Set up Analytics.
- Select Your Analytics Account:
- Choose the Google Analytics account you wish to connect. If you don’t have one, you can create a new Analytics account.
- Authorize Access:
- Grant the necessary permissions to Site Kit to access your Analytics data.
- Complete Setup:
- Click Complete Setup to finalize the connection.
Step 5: Connect Google Tag Manager
- Navigate to Settings:
- After completing the Analytics setup, go to the Settings tab within Site Kit.
- Connect Tag Manager:
- Under Connected Services, find Google Tag Manager and click Connect Service.
- Select Your Tag Manager Account:
- Choose the appropriate Tag Manager account and container associated with your website.
- Authorize Access:
- Grant the necessary permissions to Site Kit to manage your Tag Manager settings.
- Complete Setup:
- Click Complete Setup to finalize the connection.
Step 6: Connect Google Ads Conversion Actions
- Navigate to Settings:
- In the Site Kit dashboard, go back to the Settings tab.
- Connect Ads:
- Under Connected Services, locate Google Ads and click Connect Service.
- Select Your Ads Account:
- Choose the Google Ads account you want to connect. Ensure it’s the same account you use for running your advertising campaigns.
- Authorize Access:
- Grant the necessary permissions to Site Kit to access and manage your Ads data.
- Complete Setup:
- Click Complete Setup to finalize the connection.
Step 7: Verify All Connections
- Check Connected Services:
- In the Settings tab, ensure that Google Analytics, Google Tag Manager, and Google Ads are all listed under Connected Services.
- Review Data Integration:
- Go to the Dashboard tab to see integrated data from Analytics, Ads, and Search Console.
- Test Functionality:
- Verify that data is being pulled correctly by checking real-time Analytics and conversion tracking.
Best Practices for Using Google Site Kit
Implementing best practices ensures that your integrations are effective, secure, and optimized for your business needs.
1. Keep Your Google Account Secure
- Enable Two-Factor Authentication (2FA): Add an extra layer of security to your Google account to protect against unauthorized access.
- Manage Permissions: Regularly review and manage permissions granted to Site Kit and other connected services.
2. Regularly Monitor Your Dashboard
- Check Insights: Use the Site Kit dashboard to monitor website performance, traffic sources, and conversion metrics regularly.
- Identify Trends: Look for patterns in your data to inform marketing and optimization strategies.
3. Utilize All Connected Services
- Leverage Tag Manager: Use Google Tag Manager for advanced tracking and to deploy additional tags without modifying your website’s code.
- Optimize Ads: Use the integration with Google Ads to track conversions and optimize your advertising campaigns based on real data.
4. Keep Plugins Updated
- Update Site Kit: Ensure that the Google Site Kit plugin is always up to date to benefit from the latest features and security patches.
- Maintain WordPress: Keep your WordPress installation and all plugins updated to ensure compatibility and security.
5. Backup Your Website
- Regular Backups: Regularly back up your website to prevent data loss in case of issues during the setup or integration process.
Common Mistakes to Avoid
Avoiding these common pitfalls can enhance the effectiveness and reliability of your Google Site Kit setup.
1. Using Multiple Google Accounts
- Issue: Connecting multiple Google accounts can lead to data discrepancies and management confusion.
- Solution: Use a single Google account for all integrations to maintain consistency and simplify management.
2. Ignoring Data Privacy
- Issue: Not managing user data privacy settings can lead to compliance issues.
- Solution: Ensure that your data collection practices comply with relevant privacy laws and regulations.
3. Overlooking Site Ownership Verification
- Issue: Failing to verify site ownership can prevent proper integration of Google services.
- Solution: Follow the verification steps carefully during the Site Kit setup to ensure all services are correctly linked.
4. Neglecting to Configure Tag Manager Properly
- Issue: Improper Tag Manager setup can lead to inaccurate data tracking.
- Solution: Follow best practices for Tag Manager configuration, including setting up triggers and variables accurately.
5. Not Testing Conversions
- Issue: Without testing, you can’t be sure that your conversion actions are tracking correctly.
- Solution: Use test conversions to verify that Google Ads and Analytics are accurately tracking user actions on your website.
Frequently Asked Questions
Can I Use Google Site Kit with Any WordPress Theme?
Yes, Google Site Kit is compatible with most WordPress themes. However, some highly customized or minimalistic themes might require additional configuration to ensure seamless integration. If you encounter issues, consult the Site Kit documentation or seek support from the plugin’s support team.
Do I Need Technical Skills to Use Google Site Kit?
No, Google Site Kit is designed to be user-friendly and accessible to users with varying levels of technical expertise. The plugin guides you through the setup process with intuitive prompts and clear instructions. However, a basic understanding of Google’s suite of tools can help you make the most of the integrations.
How Does Google Site Kit Compare to Manual Integration?
Google Site Kit simplifies the integration process by providing a unified interface to connect multiple Google services, eliminating the need for manual code insertion. While manual integration offers more control and customization, Site Kit offers convenience and efficiency, especially for users who prefer a streamlined setup process.
Can I Disconnect a Service in Google Site Kit?
Yes, you can disconnect individual services from Site Kit at any time:
- Go to the Settings tab in Site Kit.
- Under Connected Services, find the service you want to disconnect.
- Click Disconnect next to the service and confirm your choice.
Will Site Kit Affect My Website’s Performance?
No, Google Site Kit is optimized for performance and should not negatively impact your website’s load times. In fact, by managing tags through GTM, you can optimize tag loading, potentially enhancing your site’s overall performance.
Can I Use Google Site Kit with Other Analytics Plugins?
Yes, you can use Google Site Kit alongside other analytics plugins. However, to avoid data discrepancies and conflicts, it’s advisable to minimize overlapping functionalities. For instance, if you’re using Site Kit for Google Analytics, consider disabling similar tracking features in other plugins.
Maximizing the Impact of Google Site Kit
To fully leverage the benefits of Google Site Kit, integrate these strategies into your broader marketing and operational plans.
Align with Your Marketing Goals
- Define Clear Objectives: Identify what you want to achieve with your website and Google integrations, such as increasing leads, improving user engagement, or optimizing ad spend.
- Tailor Your Setup: Ensure that your Site Kit configurations support your marketing objectives by focusing on relevant metrics and tracking essential conversion actions.
Use Data to Optimize Strategies
- Analyze Performance Metrics: Regularly review data from Google Analytics and Ads to understand user behavior and campaign effectiveness.
- Refine Marketing Efforts: Use insights from Site Kit to adjust your marketing strategies, focusing on high-performing channels and optimizing underperforming areas.
Integrate with Other Marketing Tools
- Connect with CRM Systems: Integrate your Analytics data with Customer Relationship Management (CRM) tools to streamline lead management and follow-up processes.
- Leverage Marketing Automation: Use marketing automation platforms in conjunction with Google Analytics data to create personalized and targeted marketing campaigns.
Foster Team Collaboration
- Share Insights: Regularly share performance data and insights with your team to inform collective marketing strategies and objectives.
- Provide Training: Ensure that team members understand how to interpret data from Site Kit and utilize it to enhance their respective roles.
Enhance Customer Experience
- Optimize Landing Pages: Use insights from Google Analytics to refine landing pages, ensuring they are tailored to convert traffic driven by your marketing efforts.
- Personalize User Interactions: Leverage data to personalize customer interactions, addressing their specific needs and preferences effectively.
Conclusion
Connecting your domain on Namecheap to your WordPress Engine website and integrating Google Tag Manager, Google Ads, and Google Analytics through the Google Site Kit plugin is a strategic move that can significantly enhance your website’s performance and your understanding of your audience. By following this step-by-step guide, you can ensure a seamless and efficient setup process, allowing you to focus on what matters most—growing your business and serving your customers. Embrace the power of Google Site Kit to streamline your tag management, gain valuable insights, and drive informed marketing decisions that propel your business forward.
How to Point a NameCheap Domain to WPEngine
Establishing a strong online presence is essential for any business, and having a professional website is a critical component of that presence. WordPress Engine offers a robust platform for hosting your WordPress website, providing enhanced performance, security, and scalability. However, to make your website accessible to the world, you need to point your domain to your WordPress Engine site. This guide will walk you through the process of pointing your domain from Namecheap to your WordPress Engine website, ensuring a seamless and efficient setup.
Why Point Your Domain to WordPress Engine?
Pointing your domain to WordPress Engine allows you to leverage the platform’s advanced features while maintaining your unique brand identity through a custom domain. This integration ensures that visitors can access your website using a memorable and professional URL, enhancing your business’s credibility and online visibility.
Benefits of Using WordPress Engine
- Enhanced Performance: WordPress Engine optimizes your website for speed and reliability, ensuring a smooth user experience.
- Robust Security: Benefit from advanced security measures that protect your website from threats and vulnerabilities.
- Scalability: Easily scale your website as your business grows, accommodating increased traffic and expanding content needs.
- Expert Support: Access dedicated support from WordPress Engine experts who can assist with technical issues and optimizations.
Step-by-Step Guide to Pointing Your Domain from Namecheap to WordPress Engine
Follow these detailed steps to successfully point your domain from Namecheap to your WordPress Engine website.
Step 1: Access Your WordPress Engine Dashboard
- Log In to WordPress Engine:
- Open your web browser and navigate to WordPress Engine.
- Click on Log In and enter your credentials to access your dashboard.
- Select the Correct Site:
- In the dashboard, select the site you want to point your new domain to. This ensures that the domain is correctly associated with the intended website.
Step 2: Log In to Your Namecheap Account
- Access Namecheap:
- Open a new tab and go to Namecheap.
- Click on Sign In and enter your Namecheap account credentials.
- Navigate to Domain Dashboard:
- Once logged in, click on Dashboard from the left-hand sidebar.
- If you have multiple domains, scroll down to find the domain you wish to point to WordPress Engine.
- Manage Your Domain:
- Locate the desired domain and click on the Manage button next to it.
Step 3: Configure Advanced DNS Settings in Namecheap
- Go to Advanced DNS:
- In the domain management page, click on the Advanced DNS tab. This section allows you to manage DNS records for your domain.
- Prepare to Add DNS Records:
- You will need to add either A Records or CNAME Records to point your domain to WordPress Engine. For simplicity, this guide focuses on using CNAME Records.
Step 4: Add Your Domain in WordPress Engine
- Access Domain Settings:
- Return to your WordPress Engine dashboard.
- In the left-hand sidebar, click on Domains.
- Add a New Domain:
- Click on the Add a Domain button.
- Enter your domain name, including the www prefix (e.g., www.yourdomain.com), and set it as the primary domain if desired.
- Check the box that says “Also add the other domain” to include the non-www version.
- Configure Edge Full Page Cache (Optional):
- Decide whether to enable Edge Full Page Cache based on your website’s performance needs. This feature can improve load times by caching content closer to your visitors.
- Obtain DNS Records:
- After adding the domain, WordPress Engine will provide you with the DNS records needed to point your domain correctly. Note these down as you will need them in the next steps.
Step 5: Add CNAME Records in Namecheap
- Return to Namecheap’s Advanced DNS:
- Go back to the Advanced DNS tab in your Namecheap domain dashboard.
- Add CNAME Record for WWW:
- Click on Add New Record.
- Select CNAME Record from the dropdown menu.
- Host: Enter
www. - Value: Enter
wordpressenginepower.com. - TTL: Set to
Automaticor the default value. - Click the Checkmark to save the record.
- Add CNAME Record for @ (Root Domain):
- Click on Add New Record again.
- Select CNAME Record.
- Host: Enter
@. - Value: Enter
wordpressenginepower.com. - TTL: Set to
Automatic. - Click the Checkmark to save the record.
Step 6: Verify DNS Changes in WordPress Engine
- Confirm DNS Setup:
- Return to your WordPress Engine dashboard.
- Click on I’ve done this to notify WordPress Engine that you’ve added the necessary DNS records.
- Wait for DNS Propagation:
- DNS changes can take anywhere from a few minutes to 24 hours to propagate fully. However, Namecheap typically updates DNS records within a few hours.
- Check Verification Status:
- Monitor the verification status in WordPress Engine. Once the DNS records are correctly pointing to WordPress Engine, you will see a green checkmark indicating successful verification.
Step 7: Finalize and Test Your Setup
- Access Your Website:
- Once verification is complete, visit your domain (e.g., www.yourdomain.com) to ensure it correctly points to your WordPress Engine-hosted website.
- SSL Certificate:
- WordPress Engine automatically provisions an SSL certificate for your domain. Ensure that the SSL is active by checking for the secure padlock icon in the browser’s address bar.
- Update Any Additional Settings:
- If you have any specific configurations, such as redirects or additional DNS records, make sure to update them accordingly in both Namecheap and WordPress Engine.
Best Practices for Pointing Your Domain
Implementing best practices ensures a smooth and efficient domain pointing process, minimizing downtime and optimizing performance.
1. Double-Check DNS Records
- Accuracy: Ensure that all DNS records are entered correctly to prevent misdirection.
- No Typos: Double-check for any typos in the hostnames or values to avoid errors.
2. Use CNAME Records for Flexibility
- Easier Management: CNAME records are easier to manage, especially if you plan to switch hosting providers in the future.
- Consistency: Ensure both
wwwand root domains point to the same target for consistency.
3. Monitor DNS Propagation
- Timeframe: Be aware that DNS changes can take up to 24 hours to propagate fully, although it usually happens faster with Namecheap.
- Patience: Allow sufficient time before troubleshooting, as delays are common.
4. Enable SSL for Security
- Automatic Provisioning: WordPress Engine typically handles SSL setup automatically, but always verify its activation.
- Manual Intervention: If SSL is not active, contact WordPress Engine support to resolve the issue promptly.
5. Maintain NAP Consistency
- Name, Address, Phone: Ensure that your business’s Name, Address, and Phone number (NAP) are consistent across all online platforms to boost local SEO.
Common Mistakes to Avoid
Avoiding these common pitfalls can help ensure a successful domain pointing process.
1. Incorrect DNS Records
- Impact: Misconfigured DNS records can lead to website downtime or misdirection.
- Solution: Carefully follow the DNS record setup instructions provided by WordPress Engine and double-check entries.
2. Not Waiting for Propagation
- Impact: Attempting to access your website before DNS propagation is complete can result in errors or a “site not found” message.
- Solution: Wait for DNS propagation to finish before testing your website.
3. Overlooking SSL Activation
- Impact: Without an active SSL certificate, your website may appear insecure to visitors, negatively impacting trust and SEO.
- Solution: Verify SSL activation in your WordPress Engine dashboard and ensure it’s functioning correctly.
4. Using Personal Contact Information
- Impact: Using personal phone numbers or addresses in your domain settings can lead to privacy issues and inconsistencies.
- Solution: Always use business-specific contact information to maintain professionalism and accuracy.
5. Ignoring Support Resources
- Impact: Struggling with setup issues without seeking help can lead to prolonged downtime.
- Solution: Utilize WordPress Engine’s support resources or contact their support team if you encounter any challenges during the setup process.
Frequently Asked Questions
Can I Use A Records Instead of CNAME Records?
Yes, you can use A Records instead of CNAME Records to point your domain to WordPress Engine. A Records directly map your domain to an IP address, whereas CNAME Records alias your domain to another domain name. Choose the method that best fits your management preferences.
How Long Does DNS Propagation Take?
DNS propagation can take anywhere from a few minutes to 24 hours, depending on various factors such as your domain registrar and the TTL (Time to Live) settings of your DNS records. Namecheap typically updates DNS records within a few hours.
Do I Need to Update DNS Settings for Subdomains?
Yes, if you have subdomains (e.g., blog.yourdomain.com), you will need to configure DNS settings for each subdomain separately, either by adding additional CNAME or A Records as required.
What If My Domain Isn’t Verifying?
If your domain isn’t verifying after 24 hours:
- Double-Check DNS Records: Ensure that all entries are correct and free of typos.
- Clear DNS Cache: Sometimes clearing your local DNS cache can help.
- Contact Support: Reach out to WordPress Engine support for assistance in troubleshooting the verification issue.
Can I Point Multiple Domains to One WordPress Engine Site?
Yes, WordPress Engine allows you to point multiple domains to a single site. This can be useful for managing different variations of your domain name or catering to different geographic regions.
Maximizing the Impact of Pointing Your Domain
To fully leverage the benefits of pointing your domain to WordPress Engine, integrate these strategies into your broader marketing and operational plans.
Align with Your Marketing Goals
- Define Objectives: Clearly outline what you aim to achieve with your website, such as increasing leads, boosting online sales, or enhancing brand awareness.
- Tailor Content: Ensure your website content aligns with your marketing goals and resonates with your target audience.
Use Data to Optimize Strategies
- Analytics Integration: Integrate Google Analytics with your WordPress Engine site to monitor website performance and user behavior.
- Conversion Tracking: Set up conversion tracking to measure the effectiveness of your marketing campaigns and optimize accordingly.
Integrate with Other Marketing Tools
- CRM Systems: Connect your website with Customer Relationship Management (CRM) systems to streamline lead management and follow-up processes.
- Email Marketing: Utilize email marketing tools to engage with your audience and drive traffic back to your website.
Foster Team Collaboration
- Share Responsibilities: Delegate tasks such as content creation, SEO optimization, and website maintenance to team members to enhance productivity and creativity.
- Regular Meetings: Hold regular team meetings to discuss website performance, analyze data, and brainstorm new strategies.
Enhance Customer Experience
- Optimize User Interface: Ensure your website is user-friendly, with intuitive navigation and a responsive design that works well on all devices.
- Provide Value: Focus on delivering valuable content and resources that address your audience’s needs and interests.
Conclusion
Pointing your domain from Namecheap to your WordPress Engine website is a strategic step that enhances your online presence, leverages WordPress Engine’s robust features, and ensures your website is accessible through a professional and memorable URL. By following this step-by-step guide, implementing best practices, and avoiding common mistakes, you can ensure a seamless domain pointing process that supports your business goals and drives growth. Embrace the power of WordPress Engine to optimize your website’s performance, security, and scalability, and watch your business thrive in the digital landscape.