
Tag: WordPress Tips
How to Bulk Change Authors on WordPress Blog Posts
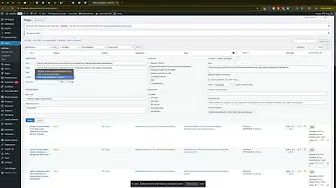
Knowing how to make bulk changes to a bunch of posts on your WordPress website can significantly streamline your website management tasks. Whether you’re dealing with incorrect authors, misplaced categories, inaccurate tags, or just general organizational improvements, bulk editing allows you to quickly apply necessary changes without the tediousness of modifying posts individually.
In this comprehensive guide, we’ll walk through the simple yet powerful process of bulk editing your WordPress posts. By the end of this guide, you’ll be able to efficiently manage your content, saving substantial amounts of time and effort.
Understanding Bulk Editing in WordPress
WordPress provides a built-in feature known as bulk editing, enabling you to edit multiple posts simultaneously. This feature mirrors the quick-edit option but on a larger scale, allowing you to apply consistent changes across numerous posts with just a few clicks.
Bulk editing can help in several scenarios:
- Changing the author of multiple posts.
- Modifying tags and categories.
- Updating publication status.
- Adjusting comments and pings.
- Editing post formats.
By mastering this feature, you significantly boost your content management productivity.
Step-by-Step Guide to Bulk Editing Posts
Here’s a clear and practical walkthrough to help you bulk edit posts on your WordPress site:
Step 1: Selecting the Posts
First, navigate to your WordPress dashboard and go to the ‘Posts’ section. Here you’ll see a list of all your posts. Begin by selecting the posts you want to modify. You have two options:
- Manually select specific posts by checking the boxes next to each title.
- Select all posts displayed on the current page by clicking the checkbox at the top.
Choose the method that fits your needs best.
Step 2: Applying Bulk Actions
Once your posts are selected:
- Locate the ‘Bulk actions’ dropdown menu at the top of the post list.
- Click the dropdown and select ‘Edit’ from the list of options.
- Click ‘Apply’ to proceed to the bulk editing interface.
Step 3: Editing Multiple Posts at Once
After clicking ‘Apply,’ a bulk edit interface will appear, similar to the quick-edit screen, but designed for bulk actions. Here you can make several modifications:
- Author: Easily switch authors for all selected posts.
- Categories: Add or remove categories.
- Tags: Adjust tags efficiently.
- Status: Publish, draft, or change the status of posts.
Make your required changes in the provided fields. For instance, to change the author, select a new author from the dropdown menu labeled ‘Author.’
Step 4: Finalizing Your Bulk Edits
After setting your preferences, confirm your changes by clicking ‘Update.’ WordPress will process the adjustments across all chosen posts. When completed, you’ll receive a confirmation, and your edits will reflect immediately across your selected posts.
Verifying Your Changes
It’s essential to verify that your bulk changes have been successfully applied. To do this quickly:
- Go back to your post list.
- Hover over individual posts and select ‘Quick Edit.’
- Ensure the changes reflect correctly, such as updated author names, adjusted categories, or modified tags.
Taking a moment to verify ensures your site remains accurate and professional-looking.
Common Use-Cases and Benefits
Bulk editing posts is beneficial in numerous scenarios:
- Site Management: Swiftly handle author changes when reassigning content after team member changes.
- SEO Improvements: Quickly adjust tags and categories to enhance SEO performance.
- Content Organization: Rapidly reorganize your content structure for better readability and navigation.
In short, the bulk editing tool is indispensable for efficiently maintaining a polished, well-managed website.
Additional Tips for Efficient Bulk Editing
Here are extra tips to make the most of bulk editing:
- Always double-check selected posts to avoid accidental changes.
- Plan bulk changes strategically to minimize disruptions.
- Regularly utilize bulk editing to maintain consistent formatting and categorization across your content.
Conclusion
Knowing how to make bulk changes to a bunch of posts on your WordPress website simplifies content management, reduces repetitive tasks, and ensures consistency across your website. Mastering bulk editing empowers you to keep your site organized and optimized with minimal effort.
Take advantage of this powerful WordPress feature to enhance your productivity and website effectiveness today.
How to Schedule a WordPress Blog Post
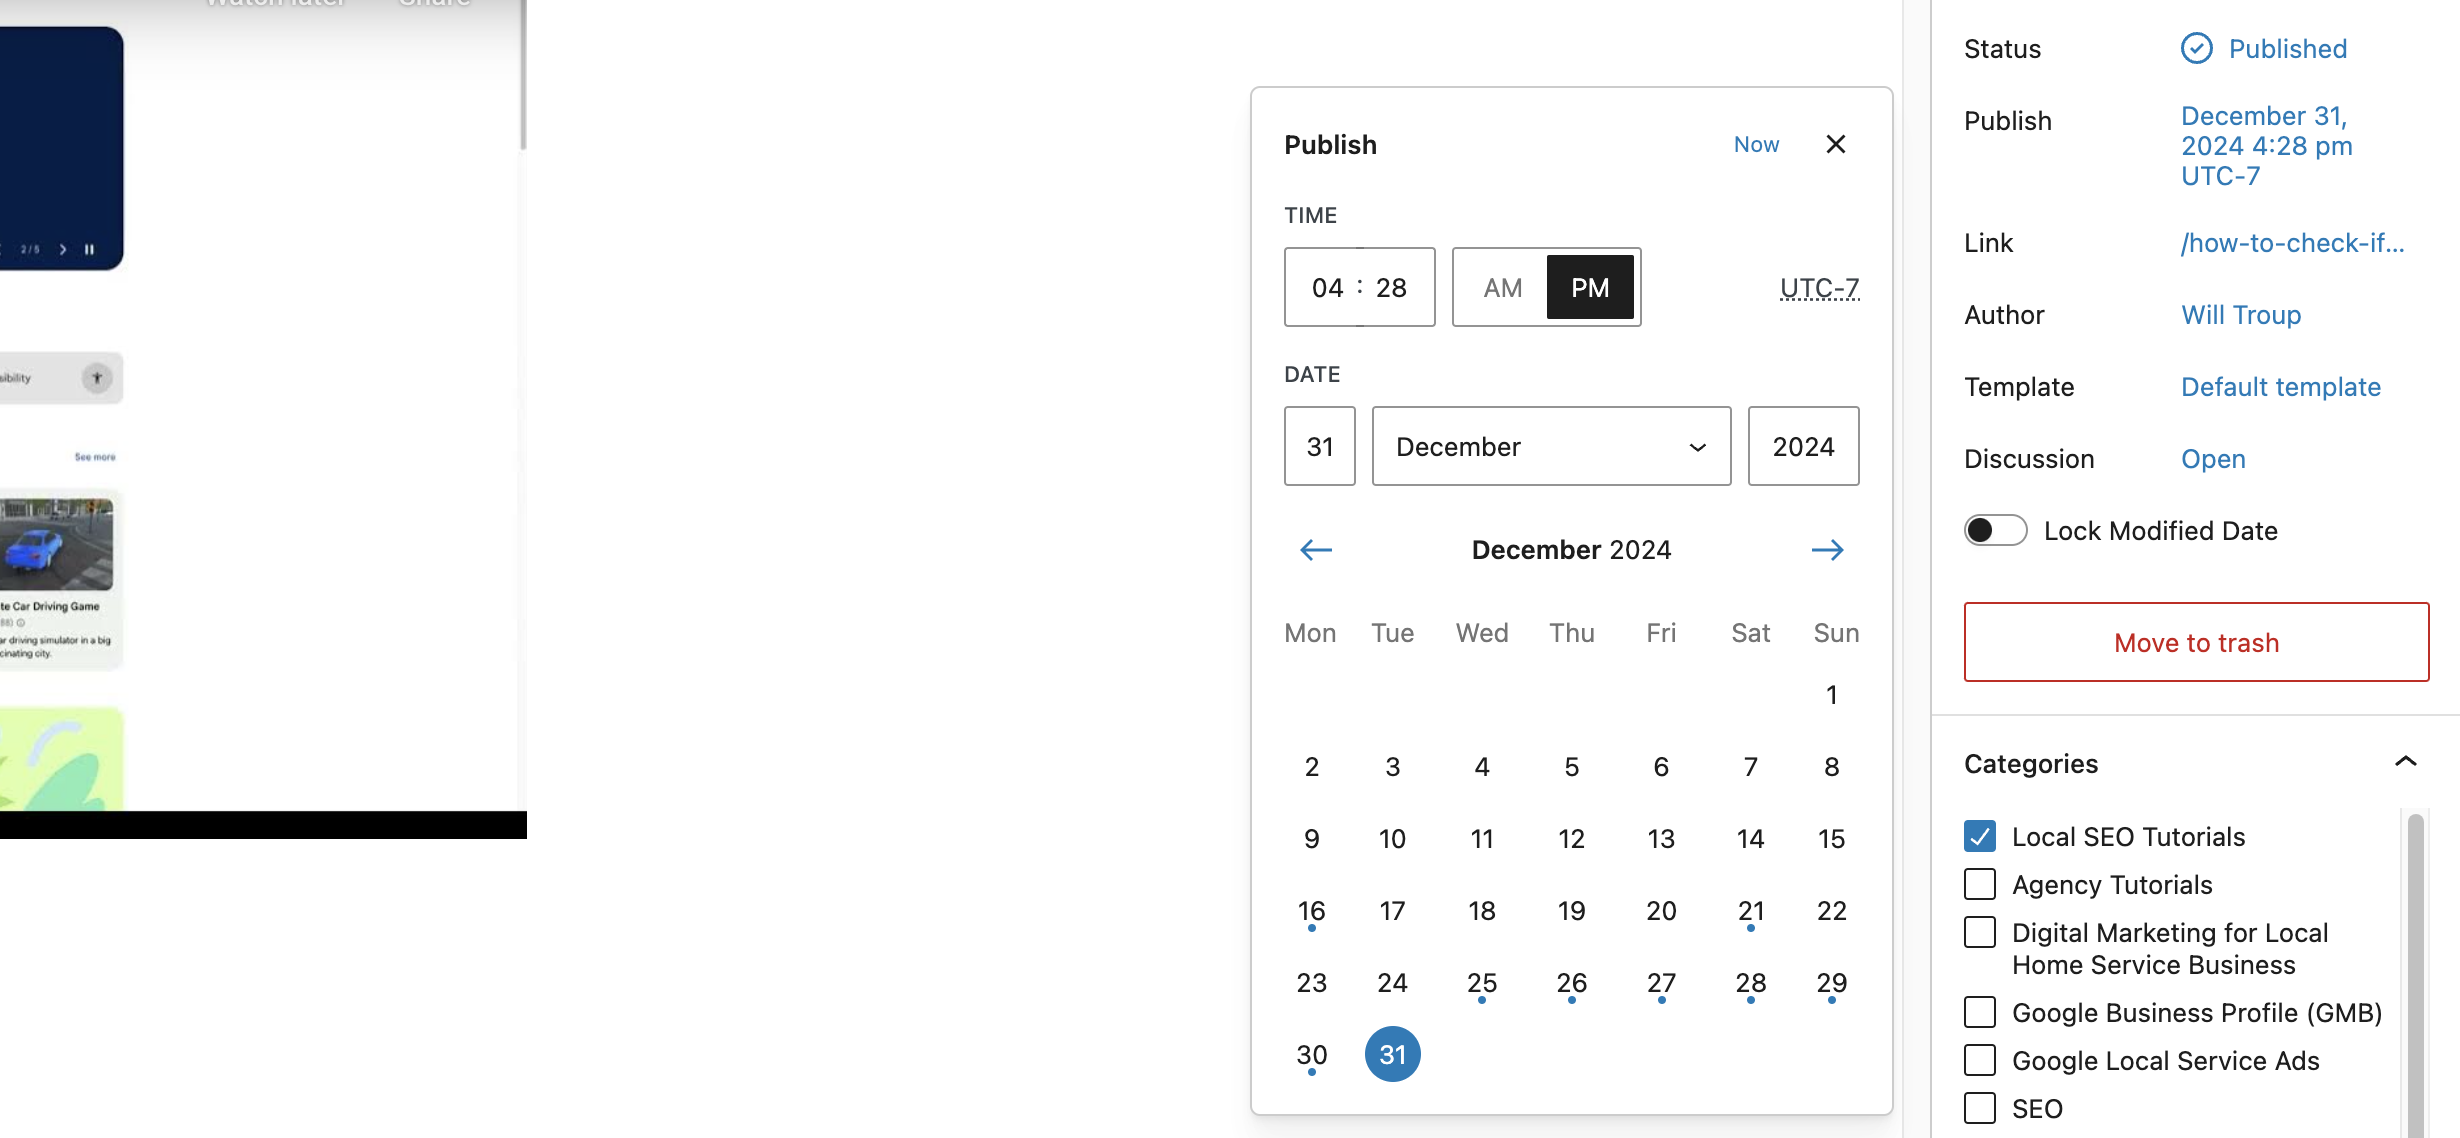
Consistently publishing blog posts is essential for maintaining an active online presence, engaging your audience, and boosting your website’s SEO. Scheduling blog posts in WordPress allows you to plan and automate your content distribution, ensuring that your blog remains fresh and active even when you’re busy with other tasks. In the “How to Schedule a WordPress Blog Post” video, you learn a straightforward method to schedule your posts for future publication. This comprehensive guide will expand on those instructions, providing you with detailed steps, best practices, and additional insights to effectively schedule your WordPress blog posts.
Why Scheduling Blog Posts Matters
Scheduling your blog posts offers numerous benefits that can enhance your content strategy and overall website performance.
Consistent Content Publishing
Regularly publishing content helps keep your audience engaged and signals to search engines that your website is active, which can improve your SEO rankings. Scheduling ensures that you maintain a steady flow of content without the need to publish manually each time.
Time Management
By scheduling posts in advance, you can better manage your time and allocate resources more efficiently. This allows you to focus on creating high-quality content rather than worrying about when to publish it.
Strategic Content Planning
Scheduling enables you to plan your content around key dates, events, or marketing campaigns. This strategic approach ensures that your content aligns with your business goals and maximizes its impact.
Improved Workflow
Automating the publication process through scheduling streamlines your workflow, reducing the chances of missing important posting dates and allowing you to maintain a consistent posting schedule.
Step-by-Step Guide to Scheduling a WordPress Blog Post
Follow these steps to schedule your blog posts in WordPress effectively, ensuring that your content is published at the optimal time for your audience.
Step 1: Access Your WordPress Dashboard
- Sign In to Your WordPress Account
- Navigate to your WordPress login page (e.g.,
https://yourwebsite.com/wp-admin) and enter your credentials to access the dashboard.
- Navigate to your WordPress login page (e.g.,
- Navigate to the Posts Section
- In the left-hand menu, click on Posts and then select Add New to create a new blog post.
Step 2: Create Your Blog Post
- Enter Your Post Title and Content
- Add a compelling title for your blog post in the Add Title field.
- Write your content in the main editor area. You can use the block editor (Gutenberg) to add various types of content blocks, such as paragraphs, images, headings, and more.
- Optimize Your Post for SEO
- Use SEO plugins like Yoast SEO or Rank Math to optimize your post with relevant keywords, meta descriptions, and readability scores.
Step 3: Set the Publication Date and Time
- Locate the Publish Section
- In the Publish meta box on the right side of the editor, you will see the Publish immediately option by default.
- Change the Publication Date
- Click on the Edit link next to Publish immediately.A calendar and time picker will appear. Select the desired date and time you want your post to be published.
- Confirm the Scheduled Date and Time
- After setting the date and time, the Publish button will change to Schedule.
- Click Schedule to finalize the scheduling of your post.
Step 4: Verify Your Scheduled Post
- View Scheduled Posts
- Navigate to Posts > All Posts in the WordPress dashboard.
- Click on the Scheduled filter to view all posts that are scheduled for future publication.
- Edit Scheduled Posts (If Needed)
- To make changes to a scheduled post, hover over the post title and click Edit. You can modify the content, title, or publication date as needed.
Step 5: Manage Time Zones
- Set the Correct Time Zone
- To ensure that your scheduled posts are published at the correct time, it’s crucial to set your WordPress time zone accurately.Navigate to Settings > General in the WordPress dashboard.Scroll down to the Time Zone section and select your local time zone from the dropdown menu.
- Save Changes
- After selecting the correct time zone, scroll down and click Save Changes to update your settings.
Best Practices for Scheduling WordPress Blog Posts
Implementing best practices ensures that your scheduled posts are optimized for maximum impact and efficiency.
Plan Your Content Calendar
- Create a Content Calendar: Develop a content calendar to organize your blog posts around key dates, events, and marketing campaigns. This helps in maintaining a consistent publishing schedule and ensures that your content aligns with your business objectives.
- Batch Create Content: Write and prepare multiple blog posts in advance, allowing you to schedule them over a period. This approach saves time and reduces the pressure of creating content on a tight schedule.
Optimize Post Timing
- Analyze Audience Behavior: Use analytics tools like Google Analytics to understand when your audience is most active. Schedule your posts to publish during peak traffic times to maximize visibility and engagement.
- Consider Global Audiences: If your audience spans multiple time zones, consider scheduling posts at times that cater to the majority of your visitors.
Maintain High-Quality Content
- Focus on Quality Over Quantity: While scheduling helps maintain consistency, prioritize creating high-quality, valuable content that resonates with your audience.
- Proofread and Edit: Ensure that your scheduled posts are free from grammatical errors and typos. Use tools like Grammarly or Hemingway Editor to enhance your writing quality.
Utilize SEO Best Practices
- Keyword Optimization: Incorporate relevant keywords naturally into your post titles, headings, and content to improve search engine rankings.
- Internal Linking: Link to other relevant posts on your website to enhance SEO and keep readers engaged with your content.
- Meta Descriptions: Write compelling meta descriptions that encourage click-throughs from search engine results pages (SERPs).
Promote Your Scheduled Posts
- Social Media Sharing: Schedule social media posts to promote your blog content across various platforms. Tools like Buffer or Hootsuite can help automate this process.
- Email Newsletters: Include links to your scheduled blog posts in your email newsletters to drive traffic and engage your subscribers.
Common Mistakes to Avoid
Avoiding these common pitfalls can ensure that your blog scheduling process is smooth and effective.
Incorrect Time Zone Settings
- Impact: Incorrect time zone settings can result in posts being published at unintended times, disrupting your content strategy.
- Solution: Always verify and set the correct time zone in Settings > General to align with your local time.
Overloading with Too Many Scheduled Posts
- Impact: Scheduling too many posts in a short period can overwhelm your audience and lead to decreased engagement.
- Solution: Space out your posts evenly and prioritize quality over quantity. Aim for a manageable posting frequency that your audience can keep up with.
Ignoring Post Reviews
- Impact: Scheduling posts without thorough reviews can lead to the publication of content with errors or inaccuracies.
- Solution: Always review and edit your posts before scheduling to ensure they meet your quality standards.
Not Updating Scheduled Posts
- Impact: Business changes or new information may render some scheduled posts outdated or irrelevant.
- Solution: Periodically review your scheduled posts and update them as needed to ensure they remain accurate and relevant.
Lack of Promotion Strategy
- Impact: Simply scheduling posts without a promotion plan can limit their reach and impact.
- Solution: Develop a comprehensive promotion strategy that includes social media, email marketing, and other channels to maximize the visibility of your scheduled posts.
Frequently Asked Questions
Can I Schedule Posts in WordPress Without a Plugin?
Yes, WordPress has a built-in scheduling feature that allows you to schedule posts without the need for additional plugins. Simply use the Publish meta box to set your desired publication date and time.
How Far in Advance Can I Schedule a Post?
You can schedule posts as far in advance as you like. WordPress does not impose a specific limit, allowing you to plan your content calendar months ahead.
Can I Schedule Posts in Bulk?
While WordPress doesn’t offer a native bulk scheduling feature, you can use plugins like Editorial Calendar or WP Scheduled Posts to manage and schedule multiple posts at once.
What Happens If My Website Goes Down When a Post is Scheduled?
If your website is down at the scheduled publication time, the post will not be published until the site is back online. To avoid this, ensure your website is stable and monitor its uptime regularly.
Can I Edit a Scheduled Post After It Has Been Scheduled?
Yes, you can edit a scheduled post at any time before it is published. Navigate to Posts > All Posts, find the scheduled post, hover over it, and click Edit to make changes. After editing, you can reschedule the post if needed.
Maximizing the Impact of Scheduled Blog Posts
To fully leverage the benefits of scheduling blog posts, integrate these strategies into your broader content marketing and operational plans.
Align with Marketing Campaigns
- Seasonal Content: Schedule posts around seasonal events, holidays, or industry-specific dates to capitalize on increased interest and relevance.
- Product Launches: Coordinate blog post scheduling with product launches or new service offerings to provide timely and relevant information to your audience.
Use Automation Tools
- Content Management Tools: Utilize tools like Buffer, Hootsuite, or CoSchedule to automate social media promotion of your scheduled posts, ensuring consistent cross-channel marketing.
- Email Marketing Automation: Integrate your blog scheduling with email marketing platforms like Mailchimp or ConvertKit to automatically include new posts in your newsletters.
Analyze and Adjust
- Performance Tracking: Use analytics tools to monitor the performance of your scheduled posts. Track metrics like page views, time on page, and conversion rates to assess effectiveness.
- Refine Content Strategy: Use insights from performance data to refine your content strategy, focusing on topics and formats that resonate most with your audience.
Foster Team Collaboration
- Content Planning Meetings: Hold regular meetings with your team to plan and schedule upcoming blog posts, ensuring alignment with overall marketing goals.
- Shared Calendars: Use shared content calendars (e.g., Google Calendar, Trello) to coordinate scheduling and track the status of each post.
Enhance User Engagement
- Interactive Content: Incorporate interactive elements like polls, quizzes, or comment sections in your blog posts to engage readers and encourage participation.
- Calls to Action: Include clear and compelling calls to action (CTAs) in your posts to guide readers towards desired actions, such as subscribing to newsletters or contacting your business.
Conclusion
Scheduling blog posts in WordPress is a powerful strategy for maintaining a consistent content publishing schedule, optimizing your time management, and enhancing your website’s SEO performance. By following the step-by-step guide provided in this post, implementing best practices, and avoiding common mistakes, you can ensure that your blog remains active and engaging, even when you’re occupied with other tasks. Regularly plan, schedule, and review your content to stay aligned with your marketing goals and deliver valuable information to your audience consistently. Embrace the automation and strategic advantages of scheduling to drive sustained growth and success in your digital marketing efforts.