
Category: Digital Marketing for Local Home Service Business
How to Add reCAPTCHA to GravityForms on WordPress Website Stop Spam Submissions
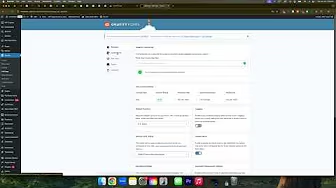
Adding reCAPTCHA to Gravity Forms on your WordPress website is essential for combating spam submissions. Spam can clutter your inbox and obscure genuine inquiries, making it challenging to manage your online communications effectively. Fortunately, setting up reCAPTCHA is straightforward.
Why Use reCAPTCHA with Gravity Forms?
reCAPTCHA helps distinguish human users from automated bots, significantly reducing spam submissions. This ensures cleaner, more reliable form entries and a better user experience for legitimate visitors.
Step-by-Step Guide to Add reCAPTCHA to Gravity Forms
Follow these easy steps to integrate reCAPTCHA on your Gravity Forms:
Step 1: Obtain reCAPTCHA Keys from Google
- Visit the Google reCAPTCHA website.
- Click the “Get Started” button.
- Enter a label (e.g., your website name).
- Choose reCAPTCHA v3 (recommended) for minimal user disruption.
- Enter your domain without “www” or “https://” (e.g., yoursite.com).
- Click “Submit.”
After submission, you will receive a Site Key and Secret Key. Copy these keys and store them safely.
Step 2: Configure Gravity Forms with reCAPTCHA Keys
- Log into your WordPress dashboard.
- Navigate to Forms > Settings.
- Click on the reCAPTCHA tab.
- Paste your copied Site Key and Secret Key into the corresponding fields.
- Select “Invisible” for reCAPTCHA v3.
- Click Save Settings.
Step 3: Verify reCAPTCHA Integration
After saving your settings:
- Visit your website and navigate to a page containing a Gravity Form.
- Look for the reCAPTCHA icon (usually located at the bottom-right corner).
This icon confirms successful integration.
Choosing Between reCAPTCHA v2 and v3
- reCAPTCHA v2 (Checkbox): Users must explicitly confirm they’re not robots.
- reCAPTCHA v3 (Invisible): Monitors user behavior in the background without requiring manual checks, offering a seamless user experience.
We recommend v3 for its unobtrusive and user-friendly design.
Troubleshooting Common Issues
If you encounter any issues:
- Ensure correct key entries.
- Clear your website cache and browser cache.
- Confirm compatibility with your current theme and plugins.
Benefits of Using reCAPTCHA
- Reduces Spam: Dramatically cuts down on automated spam submissions.
- Enhances Security: Protects forms from automated attacks.
- Improves User Experience: Minimizes manual verification tasks.
Conclusion
Implementing reCAPTCHA on Gravity Forms is a simple yet powerful step to maintain clean, spam-free communications through your WordPress website. Follow these steps to ensure smooth and secure form submissions.
Fastest & Easiest Way to Fix Elementor Sidebar Not Loading (Stuck Loading)
Experiencing Elementor sidebar not loading and getting stuck can disrupt your workflow significantly. While Elementor is a powerful page builder for WordPress, this loading issue is common and can be frustrating. Thankfully, there’s a quick workaround to immediately get back to editing your site.
Why the Elementor Sidebar Gets Stuck Loading
Several underlying issues can cause the Elementor sidebar to become stuck:
- Plugin conflicts
- Theme incompatibilities
- Insufficient PHP memory
- Caching problems
Addressing these can take significant troubleshooting, but there’s a fast, temporary solution to continue editing immediately.
Quick Fix Using Stylebot Chrome Extension
Here is the quickest and easiest method to temporarily bypass the Elementor sidebar loading issue:
Step 1: Install Stylebot Chrome Extension
- Go to the Chrome Web Store.
- Search for “Stylebot.”
- Select the Stylebot extension (with approximately 1.6K ratings).
- Click “Add to Chrome” to install it.
Step 2: Refresh Your Elementor Editor Page
Before using Stylebot:
- Refresh the Elementor editor page that’s experiencing the sidebar loading issue.
Step 3: Use Stylebot to Bypass the Issue
- Click the Stylebot icon in your Chrome extension toolbar.
- Select “Open Stylebot.”
- Paste the provided CSS code snippet (typically found in the video description or accompanying post).
- Once pasted, you can immediately begin editing within Elementor.
Step 4: Publish Your Changes
After applying the Stylebot workaround:
- Make the necessary edits in Elementor.
- Click “Publish” to save your changes.
Understanding the Temporary Nature of This Fix
This solution addresses the immediate symptom (sidebar loading indefinitely) but does not resolve the underlying problem. Consider this a temporary fix that lets you continue working without delays.
How to Troubleshoot the Root Cause
To identify and permanently fix the underlying issue:
- Increase PHP Memory Limit: Adjust your website’s PHP memory settings through your hosting provider.
- Deactivate Plugins: Disable plugins one-by-one to identify conflicts.
- Change Themes: Temporarily switch to a default theme like Twenty Twenty-Three to rule out theme issues.
- Clear Cache: Clear cache from your hosting provider or any caching plugins used.
Preventing Future Sidebar Loading Issues
To minimize recurring issues:
- Regularly update Elementor, plugins, and themes.
- Monitor PHP memory usage regularly.
- Use a reliable and well-coded theme.
Conclusion
While experiencing the Elementor sidebar stuck on loading is highly inconvenient, the Stylebot extension offers a rapid, effective workaround. Always aim to resolve the underlying issues through thorough troubleshooting, ensuring smoother performance for the future.
How to Fix the White Screen of Death in WordPress Elementor

Encountering the “White Screen of Death” in WordPress Elementor can be a daunting and frustrating experience. This common WordPress issue causes your website to display nothing but a white, blank screen, rendering your site inaccessible to visitors and administrators alike. Thankfully, troubleshooting and fixing this issue is manageable with a structured approach.
What Causes the White Screen of Death?
The White Screen of Death typically occurs due to:
- Plugin conflicts or corrupted plugins
- Theme issues or corrupted files
- PHP errors or memory exhaustion
- Caching issues
Identifying the exact cause involves systematically troubleshooting potential issues.
Step-by-Step Guide to Fixing the White Screen of Death
Follow these proven troubleshooting steps to resolve the White Screen of Death quickly and effectively:
Step 1: Clear Website Cache
Caching problems frequently cause display errors. Start by:
- Logging into your hosting platform (e.g., WP Engine, SiteGround, Bluehost).
- Navigating to your website’s cache settings.
- Clearing or purging all caches.
This simple step resolves many display and performance issues.
Step 2: Deactivate All Plugins
Plugin conflicts are a common culprit:
- Access your WordPress dashboard.
- Navigate to “Plugins” > “Installed Plugins.”
- Deactivate all plugins simultaneously.
Check your website after deactivating plugins. If the white screen disappears, reactivate plugins one-by-one, identifying the problematic plugin through a process of elimination.
Step 3: Change Your Active Theme
If deactivating plugins doesn’t resolve the issue:
- Navigate to “Appearance” > “Themes.”
- Switch your current theme to a default WordPress theme like “Twenty Twenty-Three.”
- Click “Install” if the theme isn’t already present, then “Activate.”
If your website becomes accessible, the issue lies with your original theme.
Additional Troubleshooting Tips
- Check Memory Limits: Ensure your website has sufficient PHP memory allocated, as low memory can trigger white screens.
- Review PHP Errors: Activate WordPress debugging to reveal specific errors in your
wp-config.phpfile. - Contact Hosting Support: Your hosting provider can offer insights or assist in recovery.
Preventing Future White Screen Issues
To avoid similar future issues, consider the following best practices:
- Regularly update plugins, themes, and WordPress core files.
- Regularly backup your site before making significant changes.
- Maintain minimal, reliable plugins and themes.
Conclusion
Resolving the White Screen of Death in WordPress Elementor involves methodical troubleshooting. By systematically clearing cache, checking plugins, and testing themes, you can quickly restore your website functionality.
How to Change or Add New Hold Music in RingCentral (Custom Hold Audio)
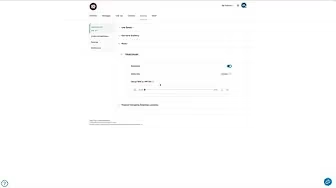
Knowing how to change or add new hold music in RingCentral custom hold audio can significantly enhance your customer’s phone experience. Customizing hold music provides a personalized touch and can help maintain caller satisfaction while they wait.
Step-by-Step Guide to Changing Hold Music in RingCentral
Follow these simple steps to successfully update or add custom hold music in RingCentral:
Step 1: Log into the Admin Portal
Begin by accessing your RingCentral admin account:
- Navigate to the RingCentral admin portal.
- Ensure you are logged in with admin credentials.
Step 2: Access Your Extension Settings
After logging in:
- Click on the profile or admin icon located at the top right corner.
- Select the option labeled “My Extension.”
Step 3: Navigate to Phone Settings
From your extension:
- Click on “Settings.”
- Select the “Phone” tab from the available options.
Step 4: Locate Hold Music Section
Scroll down until you find the “Hold Music” section. By default, this might be set to generic music.
Step 5: Upload Custom Hold Music
To use your custom audio:
- Select the “Custom” option.
- Drag and drop your chosen
.wavor.mp3audio file into the upload area. - Your file will automatically upload and save, requiring no additional actions.
Step 6: Verify Your New Hold Music
Always ensure your new hold music meets your expectations:
- Click the play button provided.
- Listen carefully to confirm audio quality and appropriateness for your callers.
Tips for Selecting Effective Hold Music
When choosing hold music, consider:
- Professional Tone: Ensure your music aligns with your brand’s professionalism.
- Customer Preference: Choose music genres likely appealing to your customer base.
- Audio Quality: High-quality audio prevents customer frustration and enhances caller experience.
Benefits of Custom Hold Music
Customizing your hold music can:
- Improve customer satisfaction by making wait times feel shorter.
- Reinforce brand identity through auditory branding.
- Reduce hang-up rates, leading to better customer retention.
Troubleshooting Common Issues
If your custom hold music isn’t playing correctly:
- Check the file format (MP3 or WAV).
- Re-upload the file if needed.
- Verify settings are correctly saved by playing the uploaded track.
Conclusion
Changing or adding new hold music in RingCentral is straightforward and can greatly enhance your customer interaction. Follow these clear steps to quickly update your RingCentral custom hold audio, boosting your business’s professional image and customer satisfaction.
How to Delete Canva Page When Delete Button Isn’t Showing Up

Knowing how to delete a Canva page when the delete button isn’t showing up can save you significant time and frustration during the design process. Although Canva is generally intuitive and user-friendly, occasionally you might encounter issues, particularly when managing locked pages.
Why the Delete Button Disappears in Canva
In Canva, pages can sometimes become locked intentionally or unintentionally. When a page is locked, the delete button might disappear, preventing you from removing unwanted pages from your design. Understanding the cause of this issue can help streamline your workflow.
Steps to Delete a Canva Page Without a Delete Button
Follow these simple, step-by-step instructions to delete a Canva page when the delete button isn’t visible:
Step 1: Unlock the Page
First, ensure the page isn’t locked:
- Click on the three dots located at the top right corner of the page you want to delete.
- Select the option “Unlock Page.”
Once unlocked, the delete button should reappear.
Step 2: Troubleshoot the Locking Bug
If unlocking the page doesn’t immediately bring back the delete button, Canva might be experiencing a minor bug. Here’s a quick fix:
- Click the three dots again.
- Choose “Lock Page” to re-lock it.
- Immediately click the three dots again and select “Unlock Page.”
After performing this quick toggle, the delete button should appear, allowing you to delete the page.
Tips to Avoid Page Deletion Issues in Canva
To prevent encountering issues in the future, follow these best practices:
- Regularly verify the lock status of your pages, especially when collaborating with others.
- Clearly communicate the lock settings with team members or collaborators.
- Familiarize yourself with Canva’s page and element locking features to use them effectively.
When to Use the Page Locking Feature in Canva
Page locking can be beneficial when:
- You want to preserve a specific page layout or content.
- You share templates with others and want to avoid accidental modifications.
- You have completed sections of a design that you don’t want to alter unintentionally.
Additional Canva Features to Enhance Your Workflow
Now that you’ve solved the deletion issue, consider exploring other valuable Canva features:
- Duplicating Pages: Quickly create similar pages without starting from scratch.
- Version Control: Review and revert to earlier versions of your designs easily.
- Magic Resize: Quickly adapt your designs for various platforms or purposes.
Conclusion
Learning how to delete a Canva page when the delete button isn’t showing up is a straightforward but essential skill. By following these simple steps and troubleshooting tips, you’ll maintain efficiency and clarity in your Canva projects.
How to Unlock a Locked Item in Canva

Learning how to unlock a locked item in Canva can quickly relieve frustration when editing designs. Whether you’ve accidentally locked an element yourself or received a Canva design from someone else that you can’t edit, understanding how to unlock these items is essential.
Why Items Get Locked in Canva
Canva includes a feature allowing users to lock elements or even entire pages. This function helps maintain consistency and prevents accidental edits. However, if you’re not aware that an item or page has been locked, it can seem impossible to move or modify elements, causing significant frustration.
Steps to Unlock a Locked Item in Canva
If you’re struggling to edit or move a locked item in Canva, follow these clear, step-by-step instructions:
Step 1: Check If the Entire Page is Locked
Before attempting to unlock individual elements, ensure the page itself isn’t locked:
- Navigate to the page you wish to edit.
- Click on the three dots located at the top right corner of the Canva page.
- Select the option “Unlock Page.”
After unlocking the page, you’ll typically regain full editing capability for all elements within that page.
Step 2: Unlock Individual Items
If the page isn’t locked but individual items still can’t be edited, here’s what you should do:
- Click directly on the locked item.
- Look for a lock icon or the message indicating that the item is locked.
- Click the “Unlock” button visible near the selected item.
After clicking unlock, you should regain editing functionality immediately.
Step 3: Troubleshooting Persistent Lock Issues
Sometimes, clicking unlock once doesn’t resolve the issue completely. If the item or page still appears locked, try the following:
- Click the lock button again, effectively relocking the item or page.
- Immediately unlock it once more.
This quick double-action typically resolves lingering locking issues, restoring your ability to move and edit elements freely.
Tips for Avoiding Unintentional Locks
To prevent future frustration, follow these tips:
- Double-check if any items or pages are locked before sharing designs with others.
- Use the locking feature intentionally, clearly communicating with team members about locked elements to avoid confusion.
- Regularly familiarize yourself and your team with Canva’s features, including locking and unlocking functions, to streamline collaboration.
When Locking Items in Canva is Useful
Understanding when and why to lock elements can improve your workflow:
- Prevent accidental changes: Lock items to keep critical elements consistent.
- Streamline group collaboration: Clearly differentiate editable areas from fixed ones.
- Simplify complex designs: Lock elements that you don’t want disturbed while focusing on other parts of your design.
Additional Features in Canva to Explore
If you’ve mastered unlocking items, consider exploring other helpful features in Canva:
- Grouping Elements: Keep elements together for easy movement and adjustment.
- Version History: Recover earlier design versions easily.
- Templates: Save time by starting with professional, customizable templates.
How to Install a Podium Widget Using Google Tag Manager
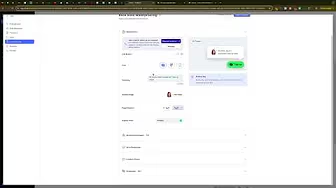
Integrating a live chat widget on your website is an effective way to engage visitors and boost conversions. In this guide, we’ll walk you through installing the Podium chat widget using Google Tag Manager (GTM) on your website. Podium’s chat widget is designed to help you capture leads, answer customer queries, and drive more conversions through real-time interactions. If you’re running a home service business or any business that relies on quick customer communication, adding this widget can be a game changer.
Why Use the Podium Chat Widget?
Podium is a powerful tool that offers an array of features to help businesses improve customer engagement and increase conversions. With the chat widget installed on your website, you can:
- Capture More Leads: Engage website visitors instantly and convert them into potential customers.
- Enhance Customer Support: Provide real-time support, answer questions, and resolve issues quickly.
- Boost Conversions: Directly interact with visitors during their decision-making process, leading to increased sales.
- Customize User Experience: Tailor the widget’s appearance and behavior to match your brand identity and specific business needs.
Using Google Tag Manager to install the Podium widget streamlines the process, allowing you to manage and update tracking codes without modifying your website’s source code.
Overview of the Installation Process
This guide explains how to install the Podium chat widget using GTM. We will cover the following key steps:
- Setting Up in Podium: How to access your Podium account and get the widget code.
- Configuring Google Tag Manager: How to add a new tag in GTM and paste the widget code.
- Deploying the Tag: How to trigger the widget on all pages of your website.
- Verifying the Installation: Testing your setup to ensure the widget appears correctly.
Step 1: Retrieve the Podium Chat Widget Code
Before you can add the widget via GTM, you need to access the Podium chat widget code from your Podium account.
Access Your Podium Account
- Sign In to Podium:
- Log in to your Podium account using your credentials.
- Ensure that you select the correct location if you manage multiple businesses or have several locations.
- Navigate to Lead Sources:
- Once logged in, go to the Lead Sources section in your Podium dashboard.
- Select Web Chat to access the chat widget options.
- Get Your Widget Code:
- Click on Widget Options (often represented by three dots in the upper right corner).
- Locate the widget code and click Copy to copy it to your clipboard.
Step 2: Configure Google Tag Manager
With your Podium widget code copied, the next step is to set up a new tag in Google Tag Manager (GTM) to deploy the widget.
Log In to Google Tag Manager
- Access GTM:
- Open your browser and go to Google Tag Manager.
- Log in with the correct account credentials. Make sure you’re in the right GTM account for the website you want to modify.
- Select the Correct Container:
- From the GTM dashboard, select the container associated with your website. This ensures that any changes you make will only affect the intended site.
Create a New Tag for Podium
- Go to Workspace and Tags:
- In your GTM account, click on Workspace from the top left menu.
- Then, select Tags in the left-hand sidebar.
- Add a New Tag:
- Click on the New button in the top right corner to create a new tag.
- Name your tag (for example, “Podium Chat Widget – 1”).
- Configure the Tag:
- Under Tag Configuration, select Custom HTML.
- Paste the Podium chat widget code you copied from your Podium account into the HTML field.
- Ensure the code is pasted correctly; this script is what will load the chat widget on your website.
Set Up Tag Triggering
- Choose Your Trigger:
- In the Triggering section, select All Pages. This will ensure the Podium chat widget loads on every page of your website, making it accessible to all visitors.
- Save Your Tag:
- Once the tag configuration and trigger settings are complete, click Save to finalize the tag setup.
Step 3: Deploy and Verify Your Podium Chat Widget
With your new tag created in GTM, it’s time to deploy it on your website and verify that it works correctly.
Publish Your Changes in GTM
- Submit Your Container:
- Click the Submit button in GTM to publish your changes.
- Optionally, add a version name or description (e.g., “Installed Podium Chat Widget”) to help keep track of updates.
- Confirm the Deployment:
- Once submitted, your GTM container will update, and the Podium chat widget should now be live on your website.
Test the Widget on Your Website
- Visit Your Website:
- Open your website in a new browser tab and navigate through a few pages.
- Look for the Podium chat widget—typically a chat box icon—on the pages.
- Perform a Test Submission:
- Interact with the widget to ensure it functions correctly.
- Check if the widget loads as expected and if its appearance matches any customizations you’ve set up in Podium.
- Debug if Necessary:
- If the widget does not appear, return to GTM and use the Preview mode to debug the tag.
- Verify that the correct code is pasted and that the trigger is set to All Pages.
Customizing the Podium Chat Widget
While the installation process using GTM gets the widget live, Podium also offers options to customize its appearance and functionality. Customizations can include:
Appearance Settings
- Theme and Colors: Adjust the color scheme of the chat widget to match your website’s branding.
- Layout Options: Configure the size and position of the widget on the page.
- Custom Greetings: Set up personalized greetings or messages that appear when a visitor interacts with the widget.
Advanced Functionality
- Automated Responses: Configure autoresponders to engage visitors immediately after they initiate a chat.
- Lead Collection: Integrate lead capture forms within the chat widget to collect visitor information.
- Analytics Integration: Connect the widget with your analytics tools to track conversions and interactions effectively.
For detailed customizations, refer to Podium’s own documentation or explore additional videos on our channel that dive into these advanced features.
Best Practices for Implementing Chat Widgets
Implementing a chat widget is not just about installation—it’s also about ensuring it enhances user experience and drives conversions. Here are some best practices:
1. Ensure Responsive Design
- Mobile-Friendly: Make sure the chat widget is optimized for mobile devices, as a significant portion of your traffic may come from smartphones and tablets.
- Fast Loading: Optimize the widget to load quickly without affecting the overall performance of your website.
2. Maintain Consistent Branding
- Visual Consistency: Use colors, fonts, and imagery that align with your brand identity.
- Professional Tone: Ensure that any automated messages or responses are written in a tone that reflects your brand’s personality.
3. Monitor and Analyze Performance
- Track Engagement: Use tools like Google Analytics and GTM to monitor how users interact with your chat widget.
- Adjust Strategies: Based on performance data, fine-tune the widget’s settings and messages to improve conversion rates.
4. Provide Clear Calls-to-Action
- Encourage Interaction: Use clear and compelling calls-to-action (CTAs) to prompt visitors to engage with the chat widget.
- Follow-Up Mechanisms: Implement a system to follow up on leads captured through the chat widget promptly.
5. Regularly Update and Test
- Ongoing Testing: Periodically test the chat widget to ensure it remains functional and effective.
- Stay Current: Update the widget’s customizations as needed to reflect changes in your branding or marketing strategies.
Common Pitfalls and How to Avoid Them
Even with the best tools, some common issues can arise during the installation and use of chat widgets. Here are a few pitfalls and how to avoid them:
1. Incorrect Code Pasting
- Impact: A misplaced or incomplete script can prevent the widget from loading.
- Solution: Double-check the Podium code in GTM to ensure it’s correctly pasted without any modifications.
2. Wrong Trigger Settings
- Impact: If the tag trigger isn’t set to All Pages, the widget may not appear on every page of your website.
- Solution: Verify the trigger settings in GTM and test the widget on multiple pages.
3. Conflicts with Other Scripts
- Impact: Other scripts or plugins might conflict with the Podium widget, causing it to malfunction.
- Solution: Use GTM’s preview mode to test for conflicts and adjust the tag sequencing if necessary.
4. Delayed Widget Loading
- Impact: Slow widget loading can negatively affect user experience and engagement.
- Solution: Ensure that your GTM container is published correctly and that your website’s performance isn’t compromised by excessive script loading.
5. Lack of Customization
- Impact: A generic widget that doesn’t reflect your brand may fail to engage users.
- Solution: Take advantage of Podium’s customization options to tailor the widget’s appearance and functionality to your specific needs.
Frequently Asked Questions
How Do I Know if the Podium Chat Widget is Working?
After publishing your GTM container, visit your website and check for the presence of the chat widget. Interact with it to ensure that it loads correctly and that automated responses or lead capture functions are working as expected.
Can I Customize the Appearance of the Podium Chat Widget?
Yes, Podium provides several customization options, including color schemes, layouts, and custom greetings. You can adjust these settings within your Podium account under Widget Options.
What Should I Do if the Widget Doesn’t Load?
If the widget fails to load, use GTM’s Preview mode to troubleshoot the tag. Verify that the correct code is pasted, that the trigger is set to All Pages, and that there are no conflicts with other scripts on your website.
Is It Necessary to Use Google Tag Manager to Install Podium?
While there are multiple methods to install Podium, using Google Tag Manager offers a centralized and efficient way to manage your tracking scripts. It also simplifies updates and troubleshooting, especially if you manage multiple tags on your site.
How Can I Track the Effectiveness of My Chat Widget?
Integrate your chat widget with analytics tools like Google Analytics and GTM. Set up conversion tracking to monitor how many leads the widget generates and use this data to optimize your marketing strategy.
Conclusion
Installing the Podium chat widget on your website using Google Tag Manager is an effective way to boost customer engagement and improve conversion rates. By following the steps outlined in this guide, you can seamlessly integrate the widget into your website and customize its functionality to align with your brand. Remember to regularly test and update the widget to ensure optimal performance and to track its impact on your marketing efforts.
Leveraging tools like GTM not only simplifies the installation process but also provides the flexibility to manage various tracking codes in one place. Whether you’re a home service business or any other type of business looking to enhance online interactions, the Podium chat widget can be a valuable addition to your digital marketing strategy.
How to Fix White Space to the Right of Mobile View on WordPress Elementor Website

When viewing your WordPress website on mobile devices or via developer tools, an annoying giant white space on the side can disrupt user experience. In this guide, we’ll walk you through a simple fix using additional CSS in the WordPress Customizer. This solution is especially useful if you’re working with WordPress Engine and need to clear caches to see the changes immediately.
Why This White Space Issue Matters
Excess white space on your mobile site can:
- Hinder User Experience: It may force users to scroll horizontally or miss important content.
- Affect Site Appearance: A cluttered layout can make your site look unprofessional.
- Reduce Engagement: Users might leave if they find the site difficult to navigate.
Step-by-Step Guide to Removing White Space
Access Your WordPress Dashboard
- Log in to Your Dashboard:
Navigate toyourwebsite.com/wp-adminand log in with your credentials. - Navigate to Appearance > Customize:
Once logged in, go to Appearance in the sidebar and select Customize. This will open the WordPress Customizer where you can make live changes to your site’s design.
Add Custom CSS to Remove White Space
- Go to Additional CSS:
In the Customizer, find and click on Additional CSS. - Paste This CSS Code:
html, body {
max-width: 100% !important;
overflow-x: hidden !important;
} - Publish Your Changes:
Once you’ve pasted the code, click Publish at the top to save your changes.
Clear Your Cache
Sometimes, changes won’t appear immediately because of cached data. If you’re using WordPress Engine:
- Access Your Hosting Environment:
Navigate to the environment where your site is hosted. - Clear All Caches:
Locate the cache management section and click Clear All Caches. This will force your site to update and reflect the new CSS changes.
Verify the Fix
After clearing your cache, refresh your website on a mobile device or use developer tools to confirm that the white space issue has been resolved. If the problem persists, double-check the CSS code for any errors and ensure that it has been published correctly.
Conclusion
Fixing the white space issue on your mobile WordPress site is a simple yet effective way to improve user experience and ensure your site looks professional. By using the Additional CSS feature in WordPress and clearing your cache in WordPress Engine, you can quickly eliminate those annoying gaps. Regular maintenance and testing can keep your site optimized and user-friendly.
How to Install Podium Webchat Widget on WordPress Website Using WordPress Plugin
Integrating a live chat widget into your website can greatly enhance customer engagement and drive conversions. In this guide, we’ll walk you through installing the Podium web chat widget on your WordPress site. While there are various methods available for different website builders, this tutorial focuses specifically on WordPress—making it ideal for home service businesses and others looking to boost their online communication without overloading their site with extra plugins.
Why Use the Podium Web Chat Widget?
Podium’s web chat widget offers a dynamic way to connect with visitors in real time. By enabling live chat on your site, you can:
- Increase Conversions: Capture leads directly by engaging visitors instantly.
- Enhance Customer Support: Provide immediate answers to questions, improving overall customer satisfaction.
- Customize Engagement: Tailor the appearance and behavior of the chat widget to match your brand.
Step-by-Step Guide to Installing Podium on WordPress
Follow these steps to install and activate the Podium web chat widget on your WordPress website.
Step 1: Install the Podium Plugin
- Log in to Your WordPress Dashboard:
- Navigate to
yourwebsite.com/wp-adminand enter your login credentials.
- Navigate to
- Add a New Plugin:
- In the left-hand sidebar, click on Plugins.
- Click Add New at the top left of the Plugins page.
- In the search bar, type Podium.
- Install and Activate:
- Locate the Podium plugin in the search results and click Install Now.
- Once installed, click Activate. If you don’t see the activation button immediately, go to your Plugins list and activate it from there.
Step 2: Configure Podium Settings
- Access the Podium Dashboard:
- Once the plugin is activated, a new Podium menu will appear at the top of your WordPress dashboard. Click on it.
- Enable the Web Chat Widget:
- In the Podium settings, you’ll be prompted to choose whether your Podium web chat is enabled or disabled. Select Enabled.
- Get Your Widget Code:
- Sign in to your Podium account (make sure you’re in the correct business or location if you manage multiple accounts).
- Click on your name in the bottom left, then select View Profile.
- Navigate to Lead Sources, and then click on Web Chat.
- Locate the Widget Options button (typically found at the top right) and click Copy to copy the widget code.
- Paste the Widget Code:
- Return to the Podium settings in WordPress.
- Paste the copied widget code into the designated field.
- Click Save Changes to confirm your settings.
Step 3: Verify and Test the Widget
- Test the Installation:
- Visit your website and navigate to a page where the widget should appear.
- Confirm that the Podium chat widget loads correctly.
- If you encounter any issues, double-check the copied code and ensure that you’re signed in with the correct Podium account.
- Customize Further (Optional):
- Explore additional settings in Podium to adjust the widget’s appearance, automated responses, and other features. For advanced users, there’s also an option to install the widget via Google Tag Manager, which can reduce the number of plugins on your site.
Best Practices for Using the Podium Web Chat Widget
Implementing the chat widget effectively is key to maximizing its benefits. Consider these best practices:
1. Maintain a Clean and Responsive Design
- Brand Consistency: Customize the widget’s colors and layout to match your website’s branding.
- Mobile Optimization: Ensure the widget functions seamlessly on mobile devices, as many visitors access your site via smartphones.
2. Monitor and Optimize Engagement
- Track Conversions: Use analytics tools to measure the effectiveness of your chat widget in generating leads.
- Adjust Settings: Regularly update the widget’s automated responses and appearance based on customer feedback and engagement metrics.
3. Keep Plugin Usage Minimal
- Streamline Your Site: As an agency or business owner, consider managing the Podium script via Google Tag Manager if you want to reduce the number of active plugins on your website.
Common Mistakes to Avoid
Avoid these pitfalls to ensure a smooth installation and optimal performance of your Podium chat widget:
- Incorrect Account Selection: Make sure you’re signed in to the correct Podium account, especially if you manage multiple businesses or locations.
- Incomplete Code Copy: Verify that you have copied the entire widget code correctly from your Podium dashboard.
- Neglecting Testing: Always test the widget after installation to confirm it’s functioning as expected on various pages and devices.
- Overloading Your Website: If you’re an agency or business owner, consider using Google Tag Manager for a cleaner integration rather than installing multiple plugins.
Conclusion
Installing the Podium web chat widget on your WordPress site is a powerful way to boost customer engagement and increase conversions. By following this step-by-step guide, you can easily add the widget via the Podium plugin and configure it to meet your specific business needs. Remember to customize the widget to align with your brand, test its functionality thoroughly, and consider more streamlined solutions like Google Tag Manager for a cleaner website setup.
How to Fix “optimizations for shops not available” Error in Facebook Ads

Running Facebook Ads is a powerful way to boost your business’s online presence and drive sales. However, encountering issues during the ad creation process can be frustrating, especially when Facebook displays error messages like “Optimizations for shops not available”. This issue often arises due to specific settings related to your ad’s destination type. Fortunately, there’s a straightforward fix that can get your ads up and running smoothly. This comprehensive guide will walk you through resolving this issue, ensuring your Facebook Ads perform optimally.
Why Does the “Optimizations for Shops Not Available” Error Occur?
Facebook uses various optimization settings to help your ads reach the right audience and achieve your business goals. The error message “Optimizations for shops not available” typically appears when there’s a mismatch between your ad’s destination type and the selected optimization settings. This can hinder your ability to effectively track conversions and optimize your ads for better performance.
Step-by-Step Guide to Fix the “Optimizations for Shops Not Available” Issue
Follow these detailed steps to resolve the error and ensure your Facebook Ads are optimized for your shop:
Step 1: Access Your Facebook Ads Manager
- Log In to Facebook:
- Open your web browser and navigate to Facebook Ads Manager.Enter your username and password, then click Log In.
Step 2: Navigate to Your Ad Campaign
- Select the Correct Campaign:
- In Ads Manager, locate the campaign that’s displaying the error.Click on the campaign to open its details.
Step 3: Modify the Ad’s Destination Type
- Edit the Ad:
- Within the campaign, go to the Ad Set level.
- Select the ad set experiencing the issue and click Edit.
- Change Destination Type to Shop Automatic:
- In the ad set settings, locate the Destination Type option.Change the destination type to Shop Automatic. This setting ensures that your ads are optimized for shop-related actions.
Step 4: Re-upload Your Media
- Remove Existing Media:
- In the ad creation interface, locate the media section where your images or videos are uploaded.Click on Remove Media to delete the current media files.
- Add New Media:
- Click on Add Media or Upload Image.Select the image or video you wish to use for your ad from your computer.Ensure the media is properly optimized and meets Facebook’s ad specifications.
- Confirm and Save:
- After uploading the new media, confirm the details such as text, links, and other settings.Click Next or Save to apply the changes.
Step 5: Publish Your Ad
- Review Your Changes:
- Double-check all settings to ensure everything is correctly configured.
- Ensure that the Destination Type is set to Shop Automatic and that the media has been successfully re-uploaded.
- Publish the Ad:
- Click on Publish to submit your ad for review.Monitor the ad status to ensure it gets approved without further issues.
Step 6: Verify the Fix
- Check for Errors:
- After publishing, verify that the “Optimizations for shops not available” error no longer appears.Ensure that your ad is now processing correctly and optimizing for shop-related actions.
Best Practices for Optimizing Facebook Ads for Shops
Implementing these best practices can enhance the performance of your Facebook Ads and ensure seamless optimization for shop-related actions:
1. Maintain High-Quality Media
- Use High-Resolution Images: Ensure your images are clear, high-resolution, and relevant to your products or services.
- Optimize Video Content: Videos should be engaging, concise, and properly formatted to meet Facebook’s ad specifications.
2. Consistent Branding
- Brand Elements: Use consistent logos, color schemes, and messaging across all your ads to reinforce brand identity.
- Clear Call-to-Action (CTA): Include a strong CTA that directs users to take the desired action, such as Shop Now or Learn More.
3. Accurate Targeting
- Audience Segmentation: Use Facebook’s targeting options to reach the most relevant audience based on demographics, interests, and behaviors.
- Retargeting Campaigns: Implement retargeting strategies to engage users who have previously interacted with your shop.
4. Monitor and Adjust
- Regular Monitoring: Keep an eye on your ad performance metrics to identify areas for improvement.
- A/B Testing: Experiment with different ad creatives, headlines, and CTAs to determine what resonates best with your audience.
Common Mistakes to Avoid
Avoiding these common mistakes can help you optimize your Facebook Ads effectively and prevent recurring issues:
1. Ignoring Destination Type Settings
- Impact: Incorrect destination type settings can hinder ad optimization and performance.
- Solution: Always ensure the Destination Type is appropriately set based on your campaign goals.
2. Using Low-Quality Media
- Impact: Poor-quality images or videos can negatively affect user engagement and ad performance.
- Solution: Invest in high-quality visuals that accurately represent your products or services.
3. Overcomplicating Ad Settings
- Impact: Excessive settings can confuse the optimization process, leading to subpar ad performance.
- Solution: Keep your ad settings straightforward and aligned with your primary objectives.
4. Neglecting to Test Ads
- Impact: Failing to test different ad variations can result in missed opportunities for optimization.
- Solution: Conduct A/B testing to identify the most effective ad creatives and settings.
5. Not Monitoring Ad Performance
- Impact: Without regular monitoring, you won’t be able to identify and address performance issues promptly.
- Solution: Use Facebook Ads Manager to track and analyze your ad performance continuously.
Frequently Asked Questions
Can I Change the Destination Type After Creating an Ad?
Yes, you can edit the destination type of your ad after its creation. Navigate to the ad in Ads Manager, click Edit, and update the Destination Type as needed.
Why Does Re-uploading Media Fix the Optimization Issue?
Re-uploading media can resolve underlying issues related to file corruption or compatibility that may prevent Facebook from properly optimizing your ad for shop-related actions.
How Long Does It Take for Facebook Ads to Process After Changes?
Typically, once you make the necessary changes and publish your ad, processing can take a few minutes to a few hours. However, it may vary based on Facebook’s current review times and ad volume.
Will Changing the Destination Type Affect My Ad’s Performance?
Changing the destination type to Shop Automatic aligns your ad with shop-specific optimizations, which can enhance performance by targeting relevant actions and audiences.
Do I Need to Use Whitespark’s Local Citation Finder for Facebook Ads?
No, using Whitespark’s Local Citation Finder is optional. While it can help identify additional citation opportunities, the primary fix for the optimization issue involves adjusting your ad’s destination type and re-uploading media.
Maximizing the Impact of Your Facebook Ads
To fully leverage the benefits of Facebook Ads, integrate these strategies into your broader marketing and SEO efforts:
1. Align with Your Marketing Goals
- Define Clear Objectives: Establish what you aim to achieve with your ads, such as increasing sales, generating leads, or boosting brand awareness.
- Tailor Ad Creatives: Design ad creatives that resonate with your target audience and align with your marketing objectives.
2. Utilize Data to Optimize Strategies
- Analyze Performance Metrics: Regularly review metrics like click-through rates (CTR), conversion rates, and return on ad spend (ROAS) to gauge ad effectiveness.
- Refine Targeting: Adjust your audience targeting based on performance data to reach the most responsive segments.
3. Integrate with Other Marketing Channels
- Social Media Integration: Promote your Facebook Ads across other social media platforms to increase reach and engagement.
- Email Marketing: Use insights from Facebook Ads to inform your email marketing campaigns and personalize your outreach.
4. Foster Team Collaboration
- Share Insights: Collaborate with your marketing team to share data and insights from your ad campaigns.
- Provide Training: Ensure team members are trained on using Facebook Ads Manager and understanding ad performance metrics.
5. Enhance Customer Experience
- Consistent Branding: Maintain a consistent brand message and visual identity across all touchpoints to build trust and recognition.
- Responsive Interaction: Engage with customers who interact with your ads by responding to comments and messages promptly.
Conclusion
Encountering the “Optimizations for shops not available” error in Facebook Ads can be frustrating, but with the right adjustments, you can quickly resolve the issue and enhance your ad performance. By changing the destination type to Shop Automatic and re-uploading your media, you ensure that your ads are properly optimized for shop-related actions, improving your local SEO and driving better results.
Remember to follow best practices, avoid common mistakes, and continuously monitor your ad performance to maximize the effectiveness of your Facebook Ads. With these strategies in place, you can leverage Facebook’s powerful advertising platform to boost your business’s online presence and achieve your marketing goals.