
Category: Digital Marketing for Local Home Service Business
How to Setup Email Notifications When Someone Submits a Lead Form with Elementor

Capturing leads through contact forms is a fundamental strategy for businesses looking to grow their customer base and enhance engagement. However, without timely notifications, valuable leads can go unnoticed, leading to missed opportunities and reduced conversion rates. If you’re using Elementor on your WordPress website, setting up email notifications for form submissions is a straightforward process that ensures you never miss a lead. This comprehensive guide will walk you through the steps to configure email notifications for Elementor forms, helping you stay responsive and capitalize on every opportunity.
Why Email Notifications for Form Submissions Matter
Email notifications play a crucial role in managing and responding to leads effectively. Here’s why setting up email alerts for your Elementor forms is essential:
Benefits of Email Notifications
- Immediate Awareness: Receive instant alerts when a visitor submits a form, allowing you to respond promptly.
- Enhanced Customer Engagement: Timely responses to inquiries can significantly improve customer satisfaction and increase the likelihood of conversions.
- Efficient Lead Management: Keep track of all form submissions in real-time, ensuring that no leads are overlooked.
- Optimized Marketing Efforts: Monitor the effectiveness of your forms and marketing campaigns by analyzing the volume and quality of submissions.
Step-by-Step Guide to Setting Up Email Notifications in Elementor
Follow these detailed steps to configure email notifications for your Elementor forms, ensuring you stay informed about every lead submission.
Step 1: Access Your WordPress Dashboard
- Log In to WordPress:
- Open your web browser and navigate to
yourwebsite.com/wp-admin.Enter your username and password, then click Log In to access your dashboard.
- Open your web browser and navigate to
Step 2: Navigate to the Page with Your Elementor Form
- Go to Pages:
- In the left-hand sidebar, click on Pages.Select the page that contains the Elementor form you want to modify and click Edit with Elementor.
Step 3: Select and Configure the Form Widget
- Locate the Form:
- In the Elementor editor, scroll to the section containing your form.
- Click on the form to select the Form Widget.
- Access Form Settings:
- Once the form is selected, the Form settings panel will appear on the left side of the screen.
Step 4: Add Email Action After Submit
- Go to Content Tab:
- In the Form settings panel, ensure you are in the Content tab.
- Configure Actions After Submit:
- Scroll down to the Actions After Submit section.By default, you might see actions like Collect Submissions and Email.If Email is not listed, click on the Add Action dropdown and select Email.
Step 5: Customize Email Notification Settings
- Email Content Configuration:
- Under the Email tab, you can customize various aspects of the email notification:
- To: Enter the email addresses where you want to receive form submissions. Separate multiple emails with commas (e.g.,
[email protected], [email protected]).From Name: Set the name that will appear as the sender of the email.From Email: Specify the email address that will appear as the sender. It’s recommended to use an email associated with your domain to improve deliverability.Reply-To: Optionally, set a reply-to email address where responses can be sent.Subject: Customize the subject line to make it easily identifiable (e.g., “New Lead Submission from Your Website”).Message: Configure the email content. Use the Insert dropdown to add form fields dynamically, ensuring all relevant information is included.
- To: Enter the email addresses where you want to receive form submissions. Separate multiple emails with commas (e.g.,
- Under the Email tab, you can customize various aspects of the email notification:
- Ensure All Fields are Included:
- To capture all necessary information from the form, ensure that your message template includes all relevant fields.
Step 6: Add a Redirect Action (Optional)
- Add Redirect Action:
- In the Actions After Submit section, click on the Add Action dropdown and select Redirect.This action allows you to send users to a thank-you page after they submit the form, enhancing the user experience and enabling better tracking.
- Configure Redirect Settings:
- Enter the URL of your thank-you page.
- Click Update to save the redirect settings.
Step 7: Save and Test Your Form
- Save Changes:
- Click the Update button at the bottom of the Elementor panel to save all your changes.
- Test the Form:
- Visit the page containing the form on your website.Submit a test entry to ensure that you receive the email notification as configured.Check Spam Folder: If the test email doesn’t appear in your inbox, check your spam folder and mark it as “Not Spam” to improve future deliverability.
Step 8: Monitor and Optimize
- Ensure Reliability:
- Regularly test your form to confirm that email notifications are working correctly.
- Monitor your email deliverability and make adjustments as needed (e.g., using a transactional email service like SendGrid or Mailgun for better reliability).
- Enhance Tracking:
- Integrate with tools like Google Tag Manager and Google Analytics to track form submissions and optimize your marketing campaigns based on conversion data.
Best Practices for Managing Email Notifications
Implementing best practices ensures that your email notifications are effective, reliable, and contribute positively to your lead management strategy.
1. Use a Professional From Email Address
- Domain-Related Email: Use an email address associated with your domain (e.g.,
[email protected]) to improve deliverability and avoid being marked as spam.
2. Customize Subject Lines
- Clarity: Ensure subject lines clearly indicate the purpose of the email (e.g., “New Contact Form Submission”).
- Relevance: Include relevant information such as the source of the submission or the page it was submitted from.
3. Include All Relevant Form Fields
- Comprehensive Information: Ensure that all necessary form fields are included in the email content to provide a complete overview of the lead.
4. Set Up Multiple Recipients
- Team Collaboration: Add multiple email addresses to the To field to ensure that relevant team members receive the notifications and can follow up promptly.
5. Avoid Overloading with Notifications
- Filter Emails: Use email filtering rules to manage incoming form notifications efficiently, preventing your inbox from becoming cluttered.
Common Mistakes to Avoid
Avoiding these common pitfalls can enhance the effectiveness of your email notifications and ensure you never miss a valuable lead.
1. Leaving the Email Field Empty
- Issue: Not specifying an email address in the To field means you won’t receive any form submissions.
- Solution: Always enter at least one valid email address in the To field when configuring email actions.
2. Using Generic Subject Lines
- Issue: Generic or unclear subject lines can make it difficult to identify the purpose of the email quickly.
- Solution: Customize subject lines to be specific and descriptive, indicating the form’s purpose or the source of the submission.
3. Ignoring Spam Folder Issues
- Issue: Form submission emails may end up in the spam folder, causing you to miss important leads.
- Solution: Regularly check your spam folder during testing and mark emails as “Not Spam” to improve future deliverability.
4. Not Testing After Configuration
- Issue: Failing to test the form after setting up email notifications can leave you unaware of potential issues.
- Solution: Always perform test submissions to ensure that email notifications are functioning as expected.
5. Overcomplicating Email Content
- Issue: Including too much information or unnecessary fields can make emails cluttered and hard to read.
- Solution: Focus on essential information and organize the email content for clarity and ease of use.
Frequently Asked Questions
Can I Use Multiple Email Actions in Elementor Forms?
Yes, Elementor allows you to add multiple email actions. You can send notifications to different email addresses or customize emails for different purposes by adding multiple Email actions in the Actions After Submit section.
How Can I Improve Email Deliverability for Form Notifications?
- Use a Reliable SMTP Service: Consider using SMTP plugins like WP Mail SMTP to ensure your emails are sent reliably.
- Authenticate Your Email: Set up SPF, DKIM, and DMARC records for your domain to improve email authentication and reduce the likelihood of emails being marked as spam.
- Avoid Spam Trigger Words: Ensure your email content doesn’t include words or phrases commonly associated with spam.
Is It Possible to Customize the Email Template?
Yes, you can customize the email template by editing the Message section in the Email action. Use Elementor’s dynamic tags to include form fields and format the content to suit your needs.
Can I Redirect Users to Different Pages Based on Form Inputs?
Yes, using conditional logic in Elementor Pro, you can set up different redirect URLs based on user inputs. This requires more advanced configurations but allows for personalized user experiences.
How Do I Handle Form Submissions if Emails Fail to Send?
- Backup Methods: Consider integrating form submissions with CRM systems or using third-party form handling services as a backup.
- Monitor Notifications: Regularly monitor your email deliverability and address any issues promptly to ensure you receive all form submissions.
Maximizing the Impact of Email Notifications
To fully leverage the benefits of email notifications for Elementor forms, integrate these strategies into your broader lead management and marketing efforts.
1. Integrate with CRM Systems
- Seamless Lead Management: Connect your form submissions with Customer Relationship Management (CRM) systems like HubSpot or Salesforce to streamline lead tracking and follow-up processes.
- Automated Workflows: Set up automated workflows to nurture leads based on their form submissions, improving conversion rates.
2. Enhance Follow-Up Strategies
- Timely Responses: Respond to form submissions promptly to increase the chances of converting leads into customers.
- Personalized Communication: Use the information collected from the form to personalize your follow-up emails and interactions.
3. Analyze Form Performance
- Track Conversion Rates: Use analytics tools to monitor the performance of your forms, identifying which forms are generating the most leads.
- Optimize Form Fields: Analyze which form fields are most frequently filled out and optimize them for better user engagement and higher submission rates.
4. Utilize A/B Testing
- Test Different Configurations: Experiment with different email templates, subject lines, and form designs to determine what works best for your audience.
- Measure Effectiveness: Use A/B testing results to refine your forms and email notifications for optimal performance.
5. Ensure Mobile Responsiveness
- Optimize for Mobile Users: Ensure that your forms are responsive and function correctly on all devices, as a significant portion of users access websites via mobile devices.
- Test Across Devices: Regularly test your forms on various devices and screen sizes to ensure a seamless user experience.
Conclusion
Setting up email notifications for your Elementor forms on WordPress is a simple yet powerful way to ensure you capture every lead and respond promptly. By following this step-by-step guide, you can configure your forms to send customized email alerts, enhancing your lead management and marketing efforts. Remember to implement best practices, avoid common mistakes, and continuously monitor and optimize your forms to maximize their effectiveness. With reliable email notifications in place, you can focus on nurturing leads and growing your business with confidence.
How to Fix Website URL/Slug Not Showing Up Properly Fix Page ID Issue on WordPress

Having clean, user-friendly URLs is essential for both search engine optimization (SEO) and providing a seamless user experience on your website. However, many WordPress users encounter an issue where their website URLs display as page IDs (e.g., ?p=123) instead of the desired page titles or slugs. This can make your site look unprofessional and hinder your SEO efforts. In this comprehensive guide, we will walk you through the steps to fix your WordPress URLs so that your slugs accurately reflect your page titles.
Why Clean URLs Matter
Clean and descriptive URLs play a crucial role in how users and search engines perceive your website. Here’s why they are important:
Benefits of Clean URLs
- Improved SEO: Search engines favor URLs that include relevant keywords, making it easier for your pages to rank higher in search results.
- Better User Experience: Descriptive URLs are easier for users to understand and remember, enhancing navigation and credibility.
- Enhanced Shareability: Clean URLs are more attractive and shareable across social media platforms and other channels.
- Professional Appearance: A well-structured URL contributes to a professional and trustworthy image of your website.
Step-by-Step Guide to Fixing WordPress URLs
Follow these detailed steps to change your WordPress permalink structure, ensuring your URLs match your page titles.
Step 1: Access Your WordPress Dashboard
- Log In to WordPress:
- Open your web browser and navigate to
yourwebsite.com/wp-admin. - Enter your username and password, then click Log In to access your dashboard.
- Open your web browser and navigate to
- Navigate to Settings:
- In the left-hand sidebar, hover over Settings and click on Permalinks.
Step 2: Choose the Correct Permalink Structure
- Understand Permalink Options:
- WordPress offers several permalink structures. The default option is Plain, which uses page IDs (e.g.,
?p=123).
- WordPress offers several permalink structures. The default option is Plain, which uses page IDs (e.g.,
- Select “Post Name”:
- To make your URLs match your page titles, select the Post name option. This structure uses the title of your post or page as the URL slug (e.g.,
yourwebsite.com/sample-page).
- To make your URLs match your page titles, select the Post name option. This structure uses the title of your post or page as the URL slug (e.g.,
- Save Changes:
- After selecting Post name, scroll down and click the Save Changes button. This will update your permalink structure immediately.
Step 3: Verify the Changes
- Check Your Pages:
- Navigate to Pages > All Pages in your dashboard.
- Click on a page to edit and ensure the URL slug reflects the page title.
- View the Page:
- Visit the page on your website to confirm that the URL now displays the desired slug instead of the page ID.
Step 4: Update Internal Links (If Necessary)
- Review Internal Links:
- After changing your permalink structure, ensure that all internal links within your content point to the new URLs.
- WordPress should automatically handle most of these changes, but it’s good practice to verify.
- Use Plugins for Bulk Updates:
- Consider using plugins like Better Search Replace to update URLs across your database efficiently.
Step 5: Resubmit Sitemaps to Search Engines
- Google Search Console:
- Log in to your Google Search Console.Navigate to your website property and go to Sitemaps.Remove the old sitemap and submit the new one to ensure search engines index your updated URLs.
- Bing Webmaster Tools:
- Similarly, update your sitemap in Bing Webmaster Tools.
Best Practices for Permalink Structures
Implementing best practices for your permalink structure ensures optimal performance and SEO benefits.
1. Use Descriptive Slugs
- Be Clear and Concise: Use clear and concise words that describe the content of the page.
- Include Keywords: Incorporate relevant keywords to improve SEO without overstuffing.
2. Keep URLs Short
- Avoid Lengthy URLs: Shorter URLs are easier to read, remember, and share.
- Eliminate Unnecessary Words: Remove stop words like “and,” “the,” or “of” unless they add significant value.
3. Use Hyphens to Separate Words
- Hyphens vs. Underscores: Always use hyphens (
-) to separate words in URLs. Underscores (_) are not recognized as word separators by search engines.
4. Avoid Special Characters
- Stick to Alphanumeric Characters: Use only letters and numbers in your URLs to prevent encoding issues and ensure readability.
5. Implement a Consistent Structure
- Uniform Format: Maintain a consistent format across all pages to enhance user experience and SEO.
Common Mistakes to Avoid
Avoiding these common mistakes can help you maintain an effective and SEO-friendly URL structure.
1. Changing Permalinks Frequently
- Impact: Frequent changes can confuse search engines and users, leading to broken links and loss of SEO value.
- Solution: Choose a permalink structure early on and stick with it to maintain consistency.
2. Using Dynamic Parameters
- Impact: URLs with dynamic parameters (e.g.,
?id=123) are less user-friendly and can negatively impact SEO. - Solution: Opt for static, descriptive URLs that clearly indicate the page’s content.
3. Ignoring SEO Best Practices
- Impact: Poorly structured URLs can hinder your site’s SEO performance.
- Solution: Follow SEO best practices by using relevant keywords, maintaining clarity, and ensuring consistency in your URL structure.
4. Not Redirecting Old URLs
- Impact: If you change your permalink structure, old URLs may lead to 404 errors, harming user experience and SEO.
- Solution: Implement 301 redirects from old URLs to new ones to preserve SEO value and ensure seamless user navigation.
Frequently Asked Questions
Can I Change the Permalink Structure After Publishing Pages?
Yes, you can change the permalink structure at any time. However, it’s best to decide on a permalink structure before publishing content to avoid complications. If you do change it later, ensure that you set up 301 redirects to maintain SEO value and user experience.
What Is the Default Permalink Structure in WordPress?
The default permalink structure in WordPress is Plain, which uses page IDs (e.g., ?p=123). This structure is not SEO-friendly and is generally not recommended for professional websites.
How Do I Create a Custom Permalink Structure?
- Access Permalink Settings: Go to Settings > Permalinks in your WordPress dashboard.
- Select Custom Structure: Choose the Custom Structure option.
- Define the Structure: Enter the desired structure using available tags (e.g.,
/blog/%postname%/). - Save Changes: Click Save Changes to apply the new structure.
Will Changing Permalinks Affect My SEO?
Yes, changing permalinks can impact your SEO if not handled correctly. Properly implementing 301 redirects from old URLs to new ones helps preserve your SEO rankings and prevents broken links.
How Do I Implement 301 Redirects in WordPress?
You can implement 301 redirects using plugins like Redirection or by adding code to your .htaccess file. Using a plugin is recommended for ease of use and flexibility.
Conclusion
Ensuring that your WordPress website’s URLs are clean, descriptive, and aligned with your page titles is a fundamental aspect of maintaining a professional online presence and optimizing for search engines. By following this step-by-step guide to change your permalink structure from the default plain setting to a more SEO-friendly format like Post name, you can significantly enhance your website’s usability and SEO performance. Remember to adhere to best practices, avoid common mistakes, and implement necessary redirects to maintain your site’s integrity and search engine rankings. Taking these steps will not only improve your website’s appearance but also contribute to a better user experience and increased organic traffic.
How to Add a Redirect to Specific Page After Form Submission on WordPress Elementor Form

Optimizing your website for conversions is crucial in today’s competitive digital landscape. One effective way to enhance conversion tracking and improve your marketing strategies is by adding a redirect after a form submission on your WordPress Elementor site. This ensures that visitors are directed to a specific thank-you page, allowing you to track conversions accurately and optimize your ad campaigns effectively. This comprehensive guide will walk you through the process of adding a redirect after form submission in Elementor, ensuring seamless user experience and precise conversion tracking.
Why Add a Redirect After Form Submission?
Implementing a redirect after form submission offers several advantages that can significantly impact your website’s performance and your marketing efforts:
Benefits of Adding a Redirect
- Enhanced Conversion Tracking: Redirects allow you to track form submissions as conversions in analytics and advertising platforms like Google Ads.
- Improved User Experience: Directing users to a thank-you page provides immediate feedback, confirming their action and enhancing their experience.
- Opportunity for Further Engagement: A thank-you page can be used to offer additional information, promotions, or calls-to-action, encouraging further interaction.
- Optimized Ad Campaigns: Accurate conversion data helps in optimizing ad spend and targeting strategies, ensuring better ROI.
Step-by-Step Guide to Adding a Redirect After Form Submission in Elementor
Follow these detailed steps to implement a redirect after a form submission using Elementor on your WordPress site.
Step 1: Access Your Elementor Page
- Log In to WordPress:
- Open your web browser and navigate to
yourwebsite.com/wp-admin. - Enter your WordPress username and password, then click Log In.
- Open your web browser and navigate to
- Navigate to the Page with the Form:
- In the left-hand sidebar, click on Pages.Select the page containing the form you want to modify and click Edit with Elementor.
Step 2: Select the Form Widget
- Locate the Form:
- In the Elementor editor, scroll to the section containing your form.
- Click on the form to select the Form Widget.
- Access Form Settings:
- Once the form is selected, the Form settings panel will appear on the left side of the screen.
Step 3: Add Redirect Action
- Go to Content Tab:
- In the Form settings panel, ensure you are in the Content tab.
- Configure Actions After Submit:
- Scroll down to the Actions After Submit section.By default, you might see actions like Collect Submissions and Email.Click on the Add Action dropdown and select Redirect.
Step 4: Set Up Redirect URL
- Configure Redirect Settings:
- After adding the Redirect action, a new Redirect section will appear below.
- Enter the URL of the thank-you page where you want users to be redirected after submitting the form (e.g.,
https://yourwebsite.com/thank-you).
- Save Your Changes:
- Click the Update button at the bottom of the Elementor panel to save your changes.
Step 5: Create a Thank-You Page (If Not Already Created)
- Add a New Page:
- In your WordPress dashboard, go to Pages > Add New.
- Title the page Thank You or something similar.
- Design the Thank-You Page:
- Click Edit with Elementor.Design a simple and clear thank-you message, confirming the form submission and providing any additional information or next steps.
- Publish the Page:
- Once you’re satisfied with the design, click Publish.
Step 6: Test the Redirect
- Visit the Form Page:
- Open a new browser tab and navigate to the page containing your form.
- Submit the Form:
- Fill out the form with test data and submit it.
- Verify Redirect:
- Ensure that after submission, you are redirected to the thank-you page you set up.Confirm that the thank-you page displays correctly and any additional elements function as intended.
Best Practices for Implementing Redirects After Form Submission
Implementing best practices ensures that your redirects are effective and contribute positively to user experience and conversion tracking.
1. Keep the Thank-You Page Simple and Clear
- Purpose: The thank-you page should clearly confirm the form submission and outline the next steps.
- Design: Use a clean and uncluttered design to avoid confusing the user.
2. Use Analytics to Track Conversions
- Integration: Ensure that your thank-you page is integrated with Google Analytics or other analytics platforms.
- Tracking: Set up goals or conversion events to monitor form submissions accurately.
3. Provide Additional Value on the Thank-You Page
- Engagement: Offer additional resources, such as downloadable content, links to other services, or special offers.
- Calls-to-Action: Encourage users to follow your social media profiles, subscribe to newsletters, or explore other areas of your website.
4. Optimize for Mobile Devices
- Responsiveness: Ensure that both the form and the thank-you page are mobile-friendly.
- User Experience: Test the form submission and redirect process on various devices to ensure seamless functionality.
5. Maintain Consistent Branding
- Visuals: Use consistent colors, fonts, and imagery on the thank-you page to align with your brand identity.
- Messaging: Ensure that the tone and messaging on the thank-you page match the rest of your website.
Common Mistakes to Avoid
Avoiding these common pitfalls can help you ensure that your redirect implementation is smooth and effective.
1. Forgetting to Create a Thank-You Page
- Impact: Without a thank-you page, users might be unsure if their form submission was successful.
- Solution: Always create a dedicated thank-you page and set it as the redirect destination.
2. Incorrect Redirect URL
- Impact: Redirecting to an incorrect or non-existent URL can lead to user frustration and lost conversions.
- Solution: Double-check the redirect URL to ensure it points to the correct thank-you page.
3. Not Testing the Redirect
- Impact: Unverified redirects can result in broken links or failed submissions, harming user experience.
- Solution: Always perform thorough testing after setting up redirects to confirm they work as intended.
4. Overcomplicating the Thank-You Page
- Impact: A cluttered thank-you page can confuse users and dilute the confirmation message.
- Solution: Keep the thank-you page simple, focusing on confirming the submission and providing clear next steps.
5. Ignoring Analytics Integration
- Impact: Without proper analytics integration, tracking form submissions and conversions becomes challenging.
- Solution: Ensure that your thank-you page is correctly linked to your analytics tools for accurate tracking.
Frequently Asked Questions
Can I Use Custom Scripts for Redirects in Elementor?
Yes, besides using Elementor’s built-in redirect options, you can implement custom JavaScript or use additional plugins to manage redirects. However, using Elementor’s native features is recommended for simplicity and reliability.
What If I Don’t Have a Thank-You Page?
If you don’t have a thank-you page, you can create a simple one using Elementor. Alternatively, you can redirect users to another relevant page on your site, but having a dedicated thank-you page is best practice for clear communication and effective tracking.
How Do I Track Redirect-Based Conversions in Google Ads?
To track conversions from redirects in Google Ads:
- Set Up a Conversion Action: In your Google Ads account, create a new conversion action for form submissions.
- Add Tracking Code: Ensure the Google Ads conversion tracking code is placed on your thank-you page.
- Verify Tracking: Test form submissions to confirm that conversions are being recorded accurately in Google Ads.
Can I Redirect Users to Different Pages Based on Form Inputs?
Yes, with advanced form configurations and conditional logic, you can set up redirects to different pages based on user inputs. This requires more complex setups and possibly additional plugins or custom code.
Does Adding a Redirect Affect SEO?
Adding a redirect after form submission does not negatively impact your SEO as long as the redirect is correctly implemented. Ensure that the thank-you page is optimized and provides valuable content to maintain positive user engagement and SEO benefits.
Conclusion
Adding a redirect after form submission on your WordPress Elementor site is a straightforward yet powerful way to enhance conversion tracking, improve user experience, and optimize your marketing efforts. By following this step-by-step guide and adhering to best practices, you can ensure that your forms not only capture valuable leads but also provide a seamless journey for your visitors. Remember to create a clear and engaging thank-you page, integrate analytics for precise tracking, and regularly test your redirects to maintain optimal functionality.
How to Create a Manual Backups & Restore Previous Backups in WPEngine
Ensuring the safety and integrity of your WordPress website is paramount, especially before making significant changes like adding new plugins or updating themes. WordPress Engine offers robust backup solutions to protect your website from unexpected issues. While daily automated backups are a great safety net, creating a manual backup gives you additional peace of mind when performing critical updates or modifications. This comprehensive guide will walk you through the process of creating a manual backup on your WordPress website using WordPress Engine, ensuring your progress is saved and your website remains secure.
Why Creating Manual Backups is Important
Manual backups serve as an essential precautionary measure for any website owner. They provide an immediate snapshot of your website’s current state, allowing you to revert to a previous version if something goes wrong during updates or changes. Here are some key reasons why manual backups are crucial:
Benefits of Manual Backups
- Prevents Data Loss: Safeguard your website’s content, settings, and configurations against accidental deletions or errors.
- Facilitates Troubleshooting: Quickly restore your website to a functional state if new plugins or updates cause issues.
- Enhances Security: Protect your website from potential security breaches by having a recent backup available.
- Peace of Mind: Operate with confidence knowing that your website’s data is securely backed up before making changes.
Step-by-Step Guide to Creating a Manual Backup on WordPress Engine
Follow these detailed steps to create a manual backup of your WordPress website using WordPress Engine’s intuitive dashboard.
Step 1: Access Your WordPress Engine Dashboard
- Log In to WordPress Engine:
- Open your web browser and navigate to your WordPress Engine login page.
- Enter your username and password, then click Log In to access your dashboard.
- Select the Correct Site:
- Once logged in, locate the Sites tab in the left-hand sidebar.Click on Sites to view all your hosted websites.Select the website you want to back up by clicking on its name (e.g., “LocalSync”).
Step 2: Navigate to the Backups Section
- Go to Backups:
- In the selected site’s dashboard, find the Backups tab in the left-hand sidebar.Click on Backups to access the backup management interface.
Step 3: Create a Manual Backup
- Initiate Backup Creation:
- In the Backups section, click on the Create Backup button. This action will start the backup process for your website.
- Add Backup Description (Optional):
- A prompt will appear asking for a description of the backup.Enter a meaningful description to help you identify the backup later (e.g., “Test Backup Before Plugin Installation”).Click Create Backup to proceed.
- Notification Settings:
- You can choose to send a notification email to specific addresses once the backup is complete.
- Enter the desired email addresses in the Notification Emails field.
- Click Create Backup to start the process.
- Monitor Backup Progress:
- The backup process will begin, and you’ll see a progress indicator.Wait until the backup is completed. WordPress Engine typically completes backups quickly, often within a few minutes.
Step 4: Verify Backup Completion
- Check Backup Status:
- Once the backup is complete, its status will update to Completed.If you opted for email notifications, you’ll receive an email confirming the successful backup.
- Review Backup Details:
- Click on the backup entry to view detailed information, including the date and time it was created.
- Ensure that the backup includes all necessary components of your website.
Step 5: Restore from a Backup (If Needed)
- Access Backup Options:
- In the Backups section, locate the backup you wish to restore.Click on the three vertical dots (options menu) next to the backup entry.
- Initiate Restore:
- Select Restore from the dropdown menu.Confirm your choice in the prompt that appears to begin the restoration process.
- Wait for Restoration:
- The restoration process may take a few minutes.Once completed, your website will revert to the state captured in the backup.
Best Practices for Managing Backups
Implementing best practices ensures that your backups are effective, secure, and readily available when needed.
1. Regularly Schedule Backups
- Frequency: Create backups regularly, especially before making significant changes like installing new plugins or updating themes.
- Automated Backups: While manual backups are crucial, ensure that automated daily backups are enabled for continuous protection.
2. Store Backups Securely
- Offsite Storage: Save backups in secure, offsite locations such as cloud storage services or external hard drives to prevent data loss from server issues.
- Multiple Copies: Maintain multiple copies of backups to ensure redundancy.
3. Test Backup Restorations
- Verification: Periodically test restoring backups to ensure they function correctly and contain all necessary data.
- Identify Issues: Testing helps identify any potential issues with the backup process before an actual restoration is needed.
4. Document Backup Procedures
- Maintain Records: Keep detailed records of your backup procedures, including the frequency, storage locations, and steps for restoration.
- Team Training: Ensure that team members are familiar with the backup and restoration processes to facilitate quick responses in case of emergencies.
5. Keep Backup Software Updated
- Plugin Updates: Regularly update backup plugins and WordPress Engine to benefit from the latest features and security improvements.
- Compatibility Checks: Ensure that your backup tools are compatible with your current WordPress version and other installed plugins.
Common Mistakes to Avoid
Avoiding these common pitfalls can enhance the effectiveness of your backup strategy and ensure your website remains secure.
1. Neglecting to Create Backups Before Changes
- Impact: Making changes without a backup can lead to irreversible data loss if something goes wrong.
- Solution: Always create a manual backup before installing new plugins, updating themes, or making significant modifications to your website.
2. Storing Backups Only Locally
- Impact: Relying solely on local backups can result in data loss due to hardware failures or other local issues.
- Solution: Store backups in multiple locations, including offsite and cloud storage, to ensure redundancy and accessibility.
3. Ignoring Backup Notifications
- Impact: Missing backup notifications can leave you unaware of failed or incomplete backups.
- Solution: Regularly check your email and WordPress Engine dashboard for backup status updates and address any issues promptly.
4. Overlooking Backup Restoration Procedures
- Impact: Not knowing how to restore a backup can leave you helpless during emergencies.
- Solution: Familiarize yourself with the restoration process and conduct regular tests to ensure you can restore backups effectively when needed.
5. Using Inconsistent Backup Naming Conventions
- Impact: Difficulty in identifying specific backups can lead to confusion and delays during restoration.
- Solution: Use clear and consistent naming conventions for your backups, including dates and descriptions of changes made before the backup.
Frequently Asked Questions
Can I Schedule Automatic Backups in WordPress Engine?
Yes, WordPress Engine offers automated daily backups by default. However, for additional safety, creating manual backups before significant changes is recommended.
How Long Are Backups Stored on WordPress Engine?
WordPress Engine retains backups for a specific period based on your hosting plan. It’s advisable to download and store important backups in secure locations for long-term retention.
Do Manual Backups Consume More Resources?
Manual backups typically use the same resources as automated backups. However, performing frequent manual backups may require additional storage space depending on your hosting plan.
What If My Website Becomes Unresponsive After Adding a Plugin?
If your website becomes unresponsive after adding a plugin, you can restore your site to the previous state using the manual backup you created. Access the Backups section in your WordPress Engine dashboard and follow the restoration steps.
Is It Possible to Exclude Certain Files from the Backup?
WordPress Engine’s backup system generally includes all website files and databases. For advanced exclusions, consider using specialized backup plugins that offer more granular control over the backup content.
Maximizing the Impact of Your Manual Backups
To fully leverage the benefits of manual backups, integrate these strategies into your broader website management and security plans.
Align with Your Website Maintenance Schedule
- Routine Backups: Incorporate manual backups into your regular website maintenance schedule, ensuring backups are created before and after updates.
- Maintenance Windows: Schedule backups during low-traffic periods to minimize any potential impact on website performance.
Use Backups for Development and Testing
- Staging Environments: Use backups to create staging environments for testing new features or updates before deploying them to your live site.
- Safe Testing: Experiment with new plugins or design changes on a backup copy to prevent disruptions to your live website.
Integrate with Security Measures
- Regular Scans: Combine your backup strategy with regular security scans to identify and address vulnerabilities.
- Incident Response: Have a clear incident response plan that includes restoring from backups in case of security breaches or data loss.
Educate Your Team
- Training: Ensure that all team members understand the importance of backups and are trained in creating and restoring them.
- Documentation: Maintain comprehensive documentation of your backup procedures and ensure it’s accessible to relevant team members.
Utilize Backup Reports
- Monitor Activity: Review backup reports to stay informed about backup status and identify any issues that need attention.
- Audit Trails: Use reports to maintain an audit trail of your website’s backup history, aiding in compliance and accountability.
Conclusion
Creating manual backups on your WordPress website using WordPress Engine is a straightforward yet vital process that safeguards your website’s data and ensures smooth operations during updates and changes. By following this step-by-step guide and adhering to best practices, you can confidently manage your website’s backups, minimizing the risk of data loss and maintaining a reliable online presence. Remember to regularly create backups, store them securely, and familiarize yourself with the restoration process to ensure your website remains resilient against unforeseen issues.
How to Cancel Yelp Ads, Verified License, Nearby Jobs, & Upgrade Package

Navigating online advertising platforms can sometimes be a frustrating experience, especially when it comes to canceling subscriptions or ads. Yelp Ads are a popular choice for businesses looking to enhance their local visibility and attract more customers. However, if you find that Yelp Ads no longer align with your marketing goals or budget, knowing how to effectively cancel them is essential. This comprehensive guide will walk you through the process of canceling Yelp Ads, ensuring a smooth and hassle-free experience.
Why Cancel Yelp Ads?
Before diving into the cancellation process, it’s important to understand why you might consider discontinuing Yelp Ads:
Common Reasons to Cancel Yelp Ads
- Budget Constraints: Allocating funds to other marketing channels that yield better ROI.
- Lack of Results: Not seeing the desired increase in leads or customer engagement.
- Changing Marketing Strategies: Shifting focus to different platforms or strategies that better suit your business needs.
- Service Dissatisfaction: Experiencing issues with Yelp’s advertising services or customer support.
Understanding your reasons can help you make informed decisions and potentially adjust your strategy before canceling.
Step-by-Step Guide to Cancel Yelp Ads
Canceling Yelp Ads involves a few specific steps to ensure all subscriptions and services are properly terminated. Follow this guide to navigate the process efficiently.
Step 1: Access Your Yelp Ads Account
- Log In to Yelp Ads:
- Open your web browser and go to the Yelp Ads login page.
- Enter your email and password associated with your Yelp Ads account.
- Click Sign In to access your dashboard.
Step 2: Navigate to the Billing Section
- Go to Billing:
- Once logged in, locate the Billing tab in the left-hand sidebar.
- Click on Billing to view all active subscriptions and payment details.
Step 3: Review Your Active Subscriptions
- Identify Active Services:
- In the Billing section, you’ll see a list of all active Yelp Ads services and subscriptions, such as:
- Yelp Ads Campaigns
- Upgrade Packages
- Verified License Services
- Nearby Jobs
- In the Billing section, you’ll see a list of all active Yelp Ads services and subscriptions, such as:
Step 4: Cancel Each Subscription Individually
- Cancel Yelp Ads Campaigns:
- Find the Yelp Ads Campaigns section.
- Click on Pause or Cancel next to each active campaign.
- Follow the prompts to confirm cancellation.
- Cancel Upgrade Packages:
- Locate the Upgrade Packages section.
- Click on Cancel next to each package.
- When prompted for a restart date, leave it blank or uncheck any options to avoid reactivation.
- Click Continue to Cancel and confirm your decision.
- Remove Verified Licenses:
- Scroll to the Verified License section.
- Click on Cancel or Remove Verified License.
- Confirm the cancellation when prompted.
- Cancel Nearby Jobs:
- Find the Nearby Jobs section.
- Click on Cancel next to any active nearby jobs subscriptions.
- Confirm the cancellation through the prompts.
Step 5: Confirm All Cancellations
- Verify Cancellation Status:
- After canceling each service, ensure that all subscriptions show a status of Canceled or Inactive.
- Refresh the Billing page to confirm that no active subscriptions remain.
Step 6: Monitor Your Account
- Check for Confirmation Emails:
- Yelp typically sends confirmation emails for each cancellation. Ensure you receive these emails as proof of cancellation.
- Wait for DNS Updates (If Applicable):
- If you have integrated any domain services or DNS settings related to Yelp Ads, make sure to update or remove them as necessary.
Best Practices Before Canceling Yelp Ads
Before finalizing the cancellation, consider the following best practices to ensure you make the most informed decision:
1. Evaluate Your Ad Performance
- Analyze Metrics: Review your Yelp Ads performance metrics to understand why you’re considering cancellation.
- Identify Improvements: Determine if there are optimizations that could enhance ad performance instead of canceling.
2. Consider Alternative Strategies
- Diversify Marketing Channels: Explore other advertising platforms like Google Ads, Facebook Ads, or local directories to replace Yelp Ads.
- Leverage Organic SEO: Focus on improving your website’s SEO to attract customers organically.
3. Reach Out to Yelp Support
- Seek Assistance: Contact Yelp’s customer support to discuss your concerns. They might offer solutions or adjustments that could better meet your needs.
- Explore Promotions: Inquire about any ongoing promotions or discounts that could make continuing Yelp Ads more viable.
Common Mistakes to Avoid When Canceling Yelp Ads
Avoiding these common mistakes can help you ensure a smooth cancellation process without unintended consequences.
1. Not Canceling All Subscriptions
- Impact: Leaving active subscriptions can continue to incur charges even after canceling specific services.
- Solution: Ensure you cancel every active subscription listed in the Billing section.
2. Ignoring Confirmation Emails
- Impact: Without confirmation emails, you might not have proof of cancellation, leading to potential disputes over charges.
- Solution: Always check your email for cancellation confirmations and save them for your records.
3. Not Updating DNS or Domain Settings
- Impact: If you have DNS settings pointing to Yelp Ads services, failing to update them can lead to website errors.
- Solution: Review and update any domain or DNS settings related to Yelp Ads to prevent disruptions.
4. Overlooking Associated Services
- Impact: Additional services like Verified License or Nearby Jobs may continue to charge if not canceled separately.
- Solution: Review and cancel each associated service individually.
5. Rushing the Cancellation Process
- Impact: Hasty cancellations without understanding the process can lead to incomplete termination of services.
- Solution: Follow the step-by-step guide carefully to ensure all services are properly canceled.
Frequently Asked Questions
Can I Reactivate Yelp Ads After Cancellation?
Yes, you can reactivate Yelp Ads after canceling. Simply log back into your Yelp Ads account and set up new campaigns or subscriptions as needed. Keep in mind that reactivation might involve setting up new billing information.
Will I Receive a Refund After Canceling Yelp Ads?
Generally, Yelp does not offer refunds for already incurred charges. Cancellation stops future billing, but past payments are typically non-refundable. It’s advisable to review Yelp’s refund policy or contact their support for specific inquiries.
How Long Does It Take to Cancel Yelp Ads?
Cancellation is usually instantaneous once you complete the process through the Billing section. However, it may take up to 24 hours for all services to reflect the cancellation status.
What Happens to My Data After Canceling Yelp Ads?
Your business data remains on Yelp’s platform even after canceling ads. If you wish to remove your business information entirely, you may need to follow additional steps or contact Yelp support directly.
Can I Cancel Only Certain Yelp Ads Services?
Yes, you can choose to cancel specific Yelp Ads services while keeping others active. For example, you can cancel Yelp Ads Campaigns but retain your Verified License if it still benefits your business.
Conclusion
Canceling Yelp Ads can be a straightforward process if you follow the correct steps and ensure all subscriptions are properly terminated. While Yelp Ads offer valuable local visibility, circumstances may arise where discontinuing the service is the best decision for your business. By carefully navigating the cancellation process, avoiding common mistakes, and considering alternative marketing strategies, you can manage your advertising efforts effectively and continue to drive growth for your business.
How to Change the Colors of a WordPress Elementor Contact Form Background Color, Text, Buttons, & More
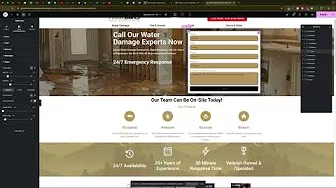
Customizing the appearance of your WordPress forms is essential for maintaining brand consistency and enhancing user experience. Elementor, a popular WordPress page builder, offers powerful tools to design and modify forms. However, changing the colors of different form elements can sometimes be tricky. This comprehensive guide will walk you through the process of changing the colors on an Elementor form, ensuring your forms are both visually appealing and aligned with your brand identity.
Why Customize Form Colors?
The colors you choose for your forms play a significant role in how users perceive your brand and interact with your website. Proper color customization can:
Benefits of Customizing Form Colors
- Brand Consistency: Align form colors with your brand palette to reinforce brand identity.
- Enhanced User Experience: Use colors strategically to guide users’ attention and improve form usability.
- Increased Conversions: Visually appealing forms can encourage more users to complete and submit them.
- Professional Appearance: Well-designed forms contribute to the overall professionalism of your website.
Step-by-Step Guide to Changing Form Colors in Elementor
Follow these detailed steps to customize the colors of various elements in your Elementor form, ensuring a cohesive and attractive design.
Step 1: Access Your WordPress Dashboard
- Log In to WordPress:
- Open your web browser and navigate to
yourwebsite.com/wp-admin. - Enter your WordPress username and password, then click Log In.
- Open your web browser and navigate to
- Navigate to Pages:
- In the left-hand sidebar, click on Pages.
- Select the page containing the form you want to customize and click Edit with Elementor.
Step 2: Select the Form Widget
- Locate the Form:
- In the Elementor editor, scroll to the section containing your form.
- Click on the form to select the Form Widget.
- Access Form Settings:
- Once the form is selected, the Form settings panel will appear on the left side of the screen.
Step 3: Customize Text Colors
- Change Label Text Color:
- In the Style tab, click on Label.
- Under Text Color, click the color picker and choose your desired color.
- Change Input Text Color:
- Still under the Style tab, click on Input.
- Under Text Color, select the color that complements your form’s design.
Step 4: Customize Background Colors
- Change Input Background Color:
- In the Style tab, under Input, find the Background Color option.
- Click the color picker and choose a background color that enhances readability and matches your brand.
- Change Button Background Color:
- Click on Button under the Style tab.
- Under Background Color, select the desired color for your submit button.
- Change Button Text Color:
- Under Button, find Text Color.
- Choose a color that ensures the text is easily readable against the button’s background.
Step 5: Customize Border Colors
- Change Input Border Color:
- In the Style tab, under Input, locate the Border Color option.
- Select a border color that defines the input fields without being too overpowering.
- Change Button Border Color:
- Under Button, find Border Color.
- Choose a color that complements the button’s background and enhances its visibility.
Step 6: Adjust Hover and Focus States
- Hover State for Inputs:
- Still under Input, go to the Hover tab.
- Change the Background Color, Text Color, and Border Color to provide visual feedback when users hover over input fields.
- Hover State for Buttons:
- Under Button, switch to the Hover tab.
- Modify the Background Color, Text Color, and Border Color to create an interactive experience when users hover over the submit button.
Step 7: Save and Publish Your Changes
- Preview Your Form:
- Click the Preview icon to see how your customized form looks on the live site.
- Publish Changes:
- If satisfied with the customization, click Update to save and publish your changes.
Best Practices for Customizing Form Colors
Implementing best practices ensures that your form colors not only look good but also enhance functionality and user experience.
1. Maintain Brand Consistency
- Use Brand Colors: Incorporate your brand’s primary and secondary colors to maintain a consistent look across your website.
- Limit Color Palette: Stick to a limited color palette to avoid overwhelming users and to keep the form design clean and professional.
2. Ensure Readability and Accessibility
- Contrast: Ensure sufficient contrast between text and background colors to enhance readability.
- Accessible Colors: Choose colors that are accessible to all users, including those with color vision deficiencies. Tools like WebAIM Contrast Checker can help verify color contrast ratios.
3. Highlight Important Elements
- Call-to-Action (CTA) Buttons: Use a distinct color for your submit button to make it stand out and encourage user interaction.
- Focus States: Clearly indicate when an input field is focused to guide users through the form.
4. Test Across Devices
- Responsive Design: Ensure that your form looks and functions well on all devices, including desktops, tablets, and smartphones.
- Cross-Browser Compatibility: Test your form in different browsers to ensure consistent appearance and functionality.
5. Optimize for Speed
- Image Optimization: Use optimized images for backgrounds to ensure fast loading times.
- Minimal Use of Heavy Scripts: Avoid using excessive scripts that can slow down form performance.
Common Mistakes to Avoid
Avoiding common pitfalls can help you create effective and visually appealing forms that enhance user experience and drive conversions.
1. Overcomplicating the Design
- Issue: Adding too many colors and design elements can make the form look cluttered and distract users.
- Solution: Keep the design simple and focus on essential elements. Use colors strategically to guide user attention.
2. Ignoring Mobile Users
- Issue: Forms that don’t display well on mobile devices can frustrate users and reduce conversions.
- Solution: Ensure your form is responsive and looks great on all screen sizes. Test the form on various devices to identify and fix any display issues.
3. Poor Contrast and Readability
- Issue: Low contrast between text and background colors can make the form difficult to read.
- Solution: Choose colors with high contrast to enhance readability. Use tools like WebAIM Contrast Checker to ensure compliance with accessibility standards.
4. Neglecting to Highlight CTAs
- Issue: If the submit button doesn’t stand out, users may overlook it, reducing form submissions.
- Solution: Use a distinct and contrasting color for your submit button. Ensure it’s easily noticeable and inviting.
5. Inconsistent Styling
- Issue: Inconsistent use of colors and styles can make the form look unprofessional.
- Solution: Maintain consistency in color usage and styling across all form elements to create a cohesive and professional appearance.
Frequently Asked Questions
Can I Use Custom Colors Outside of Elementor’s Color Picker?
Yes, you can use custom colors by entering the specific HEX, RGB, or HSL color codes in Elementor’s color settings. This allows for precise color matching to your brand’s palette.
How Do I Reset to Default Colors if I Make a Mistake?
- Solution: In the Elementor editor, select the form widget, navigate to the Style tab, and manually revert each color setting to its default state. Alternatively, you can duplicate the form before making changes, allowing you to restore it if needed.
Can I Change Colors for Individual Fields?
Yes, Elementor allows you to customize colors for individual fields by selecting each field and adjusting its style settings separately. This provides greater control over the form’s appearance.
How Do I Ensure My Form is Accessible?
- Solution: Use high-contrast colors for text and backgrounds, add descriptive alt text to images, and ensure that the form is navigable via keyboard. Regularly test your form using accessibility tools to identify and address any issues.
Is It Possible to Animate Color Changes on Hover?
Yes, Elementor supports animations and transitions. You can add hover effects to buttons and other form elements by navigating to the Advanced tab and configuring the Motion Effects settings.
Maximizing the Impact of Your Customized Form
To fully leverage the benefits of a customized form, integrate these strategies into your broader marketing and user experience efforts.
Align with Your Marketing Goals
- Lead Generation: Ensure your form captures the necessary information to generate quality leads.
- User Engagement: Use engaging colors and interactive elements to enhance user interaction with the form.
Use Data to Optimize Form Performance
- Analytics Integration: Connect your form to Google Analytics to track submissions and user behavior.
- A/B Testing: Experiment with different color schemes and styles to determine which combinations yield the highest conversion rates.
Integrate with Other Marketing Tools
- CRM Systems: Connect your form to Customer Relationship Management (CRM) tools to streamline lead management and follow-up processes.
- Email Marketing: Integrate with email marketing platforms to automate responses and nurture leads captured through the form.
Foster Team Collaboration
- Share Design Guidelines: Ensure that your team understands the color schemes and design principles to maintain consistency across all forms and marketing materials.
- Provide Training: Train team members on using Elementor’s form customization features to empower them to make effective design changes independently.
Enhance Customer Experience
- Responsive Design: Ensure that your form is mobile-friendly, providing a seamless experience for users on all devices.
- User-Friendly Layout: Organize form fields logically and ensure that the form is easy to navigate, reducing the likelihood of user frustration and abandonment.
Conclusion
Changing the colors of your WordPress Elementor forms is a straightforward process that can significantly enhance your website’s aesthetics and user experience. By following this step-by-step guide and adhering to best practices, you can create visually appealing forms that align with your brand identity, improve readability, and drive higher conversion rates. Remember to maintain consistency, prioritize accessibility, and regularly update your forms to keep them engaging and effective.
How to Add or Change Profile Picture on Google Business Profile
Your Google Business Profile (GBP) serves as a critical touchpoint between your business and potential customers. One of the most impactful elements of your GBP is the profile picture, which often forms the first impression for those searching for your services. Whether you’re establishing a new online presence or updating your brand’s image, knowing how to add or change your profile picture on Google Business Profile is essential for maintaining a professional and engaging storefront. This comprehensive guide will walk you through the steps to add or change your GBP profile picture, ensuring your business stands out effectively.
Why Your Google Business Profile Picture Matters
Your profile picture is more than just an image; it’s a visual representation of your brand that can influence a customer’s decision to engage with your business. A well-chosen profile picture can:
Benefits of a Strong Profile Picture
- Enhanced Professionalism: A clear and high-quality profile picture portrays your business as credible and trustworthy.
- Brand Recognition: Consistent use of your logo or branded imagery reinforces brand identity across various platforms.
- Increased Engagement: Attractive visuals can capture attention, encouraging potential customers to explore your offerings further.
- Improved SEO: A complete and visually appealing GBP can positively impact your local search rankings, making your business more discoverable.
Step-by-Step Guide to Adding or Changing Your Google Business Profile Picture
Follow these detailed steps to add or update your profile picture on Google Business Profile, ensuring that your business maintains a strong and professional online presence.
Step 1: Sign In to Your Google Business Profile
- Access Google Business Profile:
- Open your web browser and navigate to Google Business Profile.
- Sign In:
- Click on the Sign In button located at the top-right corner of the page.
- Enter the Google account credentials associated with your business profile and click Next.
Step 2: Select the Correct Business Profile
- View All Profiles:
- Once signed in, you’ll be directed to your dashboard.
- If you manage multiple business profiles, click on View all business profiles to see a list of your locations.
- Choose the Relevant Profile:
- Click on the business profile you wish to update to open its management interface.
Step 3: Navigate to the Photos Section
- Access Photos:
- In the left-hand sidebar, click on Photos. This section allows you to manage all visual elements of your business profile, including your logo, cover photo, and other images.
- Identify Profile Picture Area:
- Locate the Logo section within the Photos tab. The logo serves as your profile picture on GBP.
Step 4: Add a New Profile Picture
- Add a Logo:
- If you haven’t added a profile picture yet, you’ll see an Add a logo button.
- Click on Add a logo to upload your desired image.
- Choose an Image:
- Select an image from your computer that represents your business. It’s recommended to use your official logo for consistency.
- Format: JPEG or PNG
- Size: At least 720 x 720 pixels
- Aspect Ratio: 1:1 (square)
- File Size: Up to 5MB
- Upload and Save:
- After selecting the image, click Save.
- Google will review the image to ensure it meets their guidelines. This process typically takes a few minutes but can take up to 24 hours.
Step 5: Change an Existing Profile Picture
- Locate the Existing Logo:
- If you already have a profile picture and wish to update it, find your current logo in the Logo section.
- Edit the Logo:
- Click on the existing logo to open the editing options.
- Select Change logo.
- Upload a New Image:
- Choose a new image from your computer following the same Image Guidelines mentioned above.
- Save and Update:
- Click Save to upload the new image.
- Google will process the update, and the new profile picture will appear once approved.
Step 6: Verify the Update
- Check Your Profile:
- After saving, refresh your Google Business Profile page to see the updated profile picture.
- Await Approval:
- If the new image doesn’t appear immediately, allow some time for Google to approve and reflect the changes.
Best Practices for Choosing a Google Business Profile Picture
Selecting the right profile picture is crucial for making a positive impression. Here are some best practices to consider:
1. Use Your Official Logo
- Consistency: Ensure that your profile picture matches your branding across all platforms.
- Professionalism: A clean and high-quality logo conveys credibility.
2. Ensure High Quality
- Resolution: Use high-resolution images to avoid pixelation.
- Clarity: The image should be clear and easily recognizable, even when displayed as a small icon.
3. Follow Google’s Guidelines
- No Promotional Content: Avoid adding text, watermarks, or promotional messages directly on the logo.
- Appropriate Content: Ensure the image is appropriate and represents your business accurately.
4. Keep It Simple
- Minimalism: A simple design ensures that your logo remains legible and impactful at various sizes.
- Focus: Avoid overly complex images that can be distracting or hard to identify.
Common Mistakes to Avoid
Avoiding common pitfalls can help maintain a professional and effective Google Business Profile.
1. Using Low-Quality Images
- Impact: Blurry or pixelated images can make your business appear unprofessional.
- Solution: Always use high-resolution images that meet Google’s specifications.
2. Ignoring Image Guidelines
- Impact: Non-compliant images can be rejected by Google, delaying your profile update.
- Solution: Adhere to Google’s image requirements regarding format, size, and content.
3. Overcomplicating the Logo
- Impact: Complex logos can lose detail when scaled down, making them hard to recognize.
- Solution: Opt for a simple, clean design that remains identifiable at smaller sizes.
4. Neglecting to Update the Logo
- Impact: An outdated logo can misrepresent your current brand identity.
- Solution: Regularly review and update your profile picture to reflect any branding changes.
Frequently Asked Questions
Can I Use Any Image as My Google Business Profile Picture?
While you can technically upload any image, it’s best to use a clear and professional logo that represents your business accurately. Google has specific guidelines regarding image quality and content, so ensure your image adheres to these standards to avoid rejection.
How Long Does It Take for the Profile Picture to Update?
Once you upload or change your profile picture, Google typically processes the update within a few minutes. However, it can take up to 24 hours for the new image to appear on your Google Business Profile.
What Are the Image Size Requirements for Google Business Profile Pictures?
- Format: JPEG or PNG
- Dimensions: At least 720 x 720 pixels
- Aspect Ratio: 1:1 (square)
- File Size: Up to 5MB
Can I Add Multiple Profile Pictures to My Google Business Profile?
No, Google Business Profile allows only one profile picture (logo) at a time. However, you can upload additional photos under different categories to showcase various aspects of your business.
How Do I Remove a Profile Picture from My Google Business Profile?
To remove a profile picture, navigate to the Photos section in your Google Business Profile, locate the logo, click on it, and select the option to delete or remove the image. Keep in mind that removing the logo will leave your profile without a primary image until you upload a new one.
Maximizing the Impact of Your Google Business Profile Picture
To fully leverage the benefits of your Google Business Profile picture, integrate these strategies into your broader marketing and branding efforts.
Align with Your Brand Identity
- Consistency Across Platforms: Ensure that your profile picture matches your branding on other platforms like your website, social media, and marketing materials.
- Reinforce Branding: Use colors, fonts, and design elements in your logo that align with your overall brand identity.
Optimize for SEO
- Alt Text: While Google Business Profile doesn’t allow you to add alt text directly, having a well-optimized logo and profile can indirectly benefit your SEO.
- Local SEO: A complete and visually appealing GBP, including a strong profile picture, can enhance your local search rankings.
Engage with Customers
- Update Regularly: Keep your profile picture current to reflect any rebranding or updates to your business.
- Highlight Promotions: If appropriate, update your profile picture during special promotions or seasonal campaigns to attract attention.
Utilize Additional Photos
- Showcase Your Business: In addition to your logo, upload photos of your storefront, team, products, and services to provide a comprehensive view of your business.
- Encourage Customer Photos: Allow customers to upload their own photos, which can enhance trust and provide social proof.
Conclusion
Adding or changing the profile picture on your Google Business Profile is a simple yet powerful way to enhance your business’s online presence. By following this step-by-step guide and adhering to best practices, you can ensure that your profile picture accurately represents your brand, attracts potential customers, and contributes positively to your local SEO efforts. Regularly updating and maintaining your profile picture, along with other visual elements, will help your business stand out in search results and leave a lasting impression on visitors.
How to Create a Google Tag Manager Account

Effectively managing and tracking your website’s performance is crucial for business success. Google Tag Manager (GTM) is an indispensable tool that simplifies the process of adding and managing various tracking codes and scripts on your website without the need for constant code modifications. Whether you’re a home service business owner or managing any other type of website, setting up GTM correctly ensures you can monitor and optimize your marketing efforts seamlessly. This comprehensive guide will walk you through the process of creating a Google Tag Manager account from start to finish, including adding tracking numbers to everything, to help you make the most out of your online presence.
Why Use Google Tag Manager?
Google Tag Manager is a powerful tool that acts as a central hub for managing all your website tags—snippets of code that track user interactions and gather data. Instead of manually inserting each tag into your website’s code, GTM allows you to handle everything through an intuitive interface, saving time and reducing the risk of errors.
Benefits of Using Google Tag Manager
- Ease of Use: Manage all your tracking codes from a single dashboard without needing to alter your website’s code.
- Flexibility: Add, edit, or remove tags quickly to respond to changing marketing needs.
- Efficiency: Streamline your tag management process, reducing dependency on web developers for routine updates.
- Error Reduction: Utilize built-in debugging tools to ensure tags are firing correctly, minimizing tracking issues.
- Enhanced Performance: Optimize tag loading to improve website speed and user experience.
Step-by-Step Guide to Creating a Google Tag Manager Account
Follow these detailed steps to set up your Google Tag Manager account, add tracking numbers, and integrate various tags to enhance your website’s tracking capabilities.
Step 1: Sign Up for Google Tag Manager
- Access Google Tag Manager:
- Open your web browser and navigate to Google Tag Manager.
- Sign Up or Sign In:
- If you don’t have a GTM account, click on Create Account.
- If you already have an account, click Sign In and enter your Google credentials.
Step 2: Create a New Account and Container
- Account Setup:
- Account Name: Enter your business name (e.g., “Paul Davis Restoration”).
- Country: Select your country from the dropdown menu.
- Container Setup:
- Container Name: Typically, use your website’s URL (e.g., “pauldavisrestoration.com”).
- Where to Use Container: Select Web for standard websites.
- Agree to Terms:
- Read and accept the Google Tag Manager Terms of Service.
- Create Container:
- Click Create to finalize the setup.
Step 3: Install the Google Tag Manager Code on Your Website
Google Tag Manager provides you with two snippets of code—one for the <head> section and one immediately after the opening <body> tag of your website’s HTML. These are essential for GTM to function correctly.
- Copy the Code Snippets:
- After creating your container, GTM will display the code snippets.
- Head Code: Copy the first snippet and paste it into the
<head>section of your website. - Body Code: Copy the second snippet and paste it immediately after the opening
<body>tag.
- Using WordPress SiteKit Plugin (Recommended for WordPress Users):
- Install SiteKit:
- In your WordPress dashboard, navigate to Plugins > Add New.
- Search for Site Kit by Google and install it.
- Activate the plugin.
- Connect GTM via SiteKit:
- Go to Site Kit > Settings.
- Click on Connect Service and select Tag Manager.
- Follow the prompts to authenticate and connect your GTM account.
- Install SiteKit:
- Manual Installation (For Non-WordPress Users or Custom Websites):
- Access Website Files:
- Use an FTP client or your hosting provider’s file manager to access your website’s HTML files.
- Edit HTML Files:
- Open the
header.php(or equivalent) file and paste the Head Code snippet within the<head>section. - Open the
index.php(or equivalent) file and paste the Body Code snippet immediately after the<body>tag.
- Open the
- Save and Upload:
- Save the changes and upload the modified files back to your server.
- Access Website Files:
- Verify Installation:
- Use the Google Tag Assistant Chrome extension to verify that GTM is correctly installed on your website.
Step 4: Add Tracking Numbers and Set Up Tags
Once GTM is installed, you can begin adding various tracking codes and scripts to monitor different aspects of your website’s performance.
1. Creating a Google Ads Conversion Tracking Tag
Tracking conversions from Google Ads is essential for measuring the effectiveness of your advertising campaigns.
- Create a New Tag:
- In GTM, navigate to Tags > New.
- Name your tag (e.g., “Google Ads Conversion Tracking”).
- Configure Tag:
- Click on Tag Configuration and select Google Ads Conversion Tracking.
- Enter your Conversion ID and Conversion Label from your Google Ads account.
- Set Up Triggering:
- Click on Triggering and select the appropriate trigger (e.g., form submission, thank-you page view).
- Save and Publish:
- Click Save, then Submit, and Publish your container to activate the tag.
2. Setting Up the Conversion Linker Tag
The Conversion Linker tag helps in attributing conversions accurately by linking ad clicks to conversions.
- Create a New Tag:
- Navigate to Tags > New.
- Name the tag “Conversion Linker”.
- Configure Tag:
- Click on Tag Configuration and select Conversion Linker.
- Set Up Triggering:
- Choose All Pages as the trigger.
- Save and Publish:
- Click Save, then Submit, and Publish your container.
3. Adding a Google Analytics Tag
Integrating Google Analytics provides comprehensive insights into your website traffic and user behavior.
- Create a New Tag:
- Go to Tags > New.
- Name the tag “Google Analytics”.
- Configure Tag:
- Click on Tag Configuration and select Google Analytics: Universal Analytics or Google Analytics 4 based on your setup.
- Enter your Tracking ID or Measurement ID.
- Set Up Triggering:
- Select All Pages as the trigger.
- Save and Publish:
- Click Save, then Submit, and Publish your container.
4. Embedding a Facebook Pixel via Custom HTML Tag
Tracking Facebook ad performance is vital for optimizing your social media marketing efforts.
- Create a New Tag:
- Navigate to Tags > New.
- Name the tag “Facebook Pixel”.
- Configure Tag:
- Click on Tag Configuration and select Custom HTML.
- Paste your Facebook Pixel code into the HTML field.
- Set Up Triggering:
- Choose All Pages as the trigger.
- Save and Publish:
- Click Save, then Submit, and Publish your container.
5. Adding Other Tracking Scripts (e.g., Hotjar, CallRail)
Google Tag Manager allows you to add virtually any tracking script to your website.
- Create a New Tag:
- Go to Tags > New.
- Name the tag based on the script you’re adding (e.g., “Hotjar Tracking”).
- Configure Tag:
- Click on Tag Configuration and select Custom HTML.
- Paste the tracking script provided by the service.
- Set Up Triggering:
- Select All Pages as the trigger.
- Save and Publish:
- Click Save, then Submit, and Publish your container.
Step 5: Maintain Ownership of Your Assets
It’s crucial to retain ownership and control over your Google Tag Manager account and other digital assets.
- Avoid Granting Ownership to Agencies: While it’s common to collaborate with marketing agencies, never grant them full ownership of your GTM account. Instead, assign appropriate user roles with limited permissions.
- Regularly Review User Access: Periodically check who has access to your GTM account and adjust permissions as necessary to maintain security.
Best Practices for Using Google Tag Manager
Implementing best practices ensures that your GTM setup is efficient, secure, and optimized for your business needs.
1. Define Clear Tracking Goals
- Identify Objectives: Determine what you want to track, such as conversions, user behavior, or ad performance.
- Plan Your Tags: Map out the tags you need to achieve your tracking goals before setting them up in GTM.
2. Use Descriptive Naming Conventions
- Tag Names: Use clear and descriptive names for your tags (e.g., “Google Ads Conversion – Contact Form”).
- Folder Organization: Utilize folders within GTM to categorize tags based on their purpose or marketing channel.
3. Regularly Test and Debug Tags
- Preview Mode: Always use GTM’s Preview Mode to test tags before publishing them.
- Tag Assistant: Utilize the Google Tag Assistant extension to verify that tags are firing correctly on your website.
4. Keep GTM Updated
- Regular Audits: Periodically review your GTM setup to remove outdated tags and update existing ones.
- Stay Informed: Keep up with the latest GTM features and updates to leverage new functionalities.
5. Secure Your GTM Account
- Enable Two-Factor Authentication (2FA): Add an extra layer of security to your GTM account.
- Limit User Access: Grant access only to trusted team members and assign roles based on their responsibilities.
Common Mistakes to Avoid
Avoiding these common pitfalls can enhance the effectiveness and reliability of your GTM setup.
1. Overcomplicating Tag Management
- Issue: Adding too many tags can clutter your GTM workspace and slow down your website.
- Solution: Only add necessary tags and regularly audit your GTM setup to remove redundant ones.
2. Incorrect Tag Configuration
- Issue: Misconfigured tags can lead to inaccurate data collection and tracking issues.
- Solution: Double-check all tag settings and use GTM’s debugging tools to ensure tags are set up correctly.
3. Ignoring Trigger Conditions
- Issue: Failing to set appropriate triggers can result in tags not firing or firing unnecessarily.
- Solution: Carefully define trigger conditions based on your tracking objectives and test them thoroughly.
4. Not Testing Tags Before Publishing
- Issue: Unverified tags may not function as intended, leading to data discrepancies.
- Solution: Always test tags in Preview Mode before publishing to ensure they are working correctly.
5. Sharing Full Access with Third Parties
- Issue: Granting full access to agencies or third parties can compromise your tracking setup.
- Solution: Assign limited permissions to external collaborators and regularly review user access.
Frequently Asked Questions
Can I Use Google Tag Manager for Multiple Websites?
Yes, Google Tag Manager allows you to manage multiple websites from a single GTM account by creating separate containers for each website. This makes it easier to organize and manage your tracking setups across different domains.
How Do I Find My Google Ads Conversion ID and Label?
- Access Google Ads:
- Log in to your Google Ads account.
- Navigate to Conversions:
- Click on Tools & Settings (wrench icon) in the top-right corner.
- Under Measurement, select Conversions.
- Select Conversion Action:
- Click on the specific conversion action you want to track.
- Your Conversion ID and Conversion Label will be displayed in the tag setup instructions.
What Is the Difference Between Google Analytics and Google Ads Tags?
Google Analytics tags track overall website performance, user behavior, and engagement metrics, while Google Ads tags specifically track conversions and the effectiveness of your advertising campaigns. Both tags provide complementary data that can enhance your marketing strategies when used together.
Do I Need Technical Skills to Use Google Tag Manager?
While some basic technical knowledge is helpful, Google Tag Manager is designed to be user-friendly. Following step-by-step guides and utilizing GTM’s intuitive interface allows even non-technical users to manage their website tags effectively. However, for more complex tracking setups, some familiarity with web development concepts may be beneficial.
Can I Integrate CallRail with Google Tag Manager?
Yes, CallRail can be integrated with Google Tag Manager by adding CallRail’s JavaScript snippets through GTM’s Custom HTML tags. This allows you to dynamically track calls and gather detailed insights into your call interactions.
Maximizing the Impact of Google Tag Manager
To fully leverage the benefits of Google Tag Manager, integrate these strategies into your broader marketing and operational plans.
Align with Your Marketing Goals
- Define Objectives: Clearly outline what you aim to achieve with your tags, such as tracking conversions, monitoring user behavior, or optimizing ad performance.
- Tailor Tagging Strategy: Ensure that your tagging setup aligns with your marketing objectives by focusing on the most relevant metrics and actions.
Use Data to Optimize Strategies
- Analyze Collected Data: Regularly review the data collected through GTM to gain insights into your website’s performance and user interactions.
- Refine Marketing Efforts: Use the insights gained to adjust your marketing strategies, optimize ad campaigns, and improve user experience.
Integrate with Other Marketing Tools
- Connect with CRM Systems: Integrate GTM with Customer Relationship Management (CRM) tools to streamline lead management and enhance customer interactions.
- Leverage Marketing Automation: Use GTM in conjunction with marketing automation platforms to create personalized and targeted marketing campaigns based on user behavior.
Foster Team Collaboration
- Share Insights: Regularly share data insights with your team to inform collective marketing strategies and objectives.
- Provide Training: Ensure that team members understand how to use GTM effectively and interpret the data it collects to maximize the tool’s potential.
Enhance Customer Experience
- Optimize Landing Pages: Use tracking data to refine landing pages, ensuring they are tailored to convert traffic driven by your marketing efforts.
- Personalize User Interactions: Leverage data collected through GTM to personalize customer interactions, addressing their specific needs and preferences effectively.
Conclusion
Creating a Google Tag Manager account and setting it up correctly is a strategic move that can significantly enhance your website’s tracking capabilities and marketing effectiveness. By following this comprehensive guide, you can ensure that all your tracking needs are met efficiently, allowing you to focus on what matters most—growing your business and serving your customers. Embrace the power of Google Tag Manager to streamline your tag management process, gain valuable insights, and drive informed marketing decisions that propel your business forward.
How to Set the Correct Budget & Bidding Strategy in Google Local Services Ads
Navigating the complexities of online advertising can be daunting, especially when it comes to optimizing your budget and bidding strategies to maximize return on investment (ROI). Google Local Services Ads (LSA) offer a powerful platform for local businesses to connect with potential customers actively seeking their services. However, setting the correct budget and choosing the right bidding strategy is crucial to ensure your ads perform effectively without overspending. This guide will walk you through the best practices for setting your budget and bidding strategy in Google Local Services Ads, helping you attract high-quality leads and grow your business.
Why Budget and Bidding Strategy Matter in Google Local Services Ads
Your budget and bidding strategy are foundational elements that determine the success of your Google LSA campaigns. They influence how often your ads are displayed, the quality of leads you receive, and ultimately, your overall marketing effectiveness.
Benefits of Proper Budget and Bidding Management
- Maximized ROI: Efficient budget allocation ensures that every dollar spent contributes to generating valuable leads.
- Competitive Edge: A well-structured bidding strategy allows you to compete effectively in saturated markets.
- Lead Quality: Proper bidding can help attract higher-quality leads, increasing the likelihood of conversions.
- Scalability: A flexible budget and bidding approach enable your campaigns to scale as your business grows.
Understanding Budget and Bidding Options in Google Local Services Ads
Google Local Services Ads offer two primary bidding strategies: Automated Bidding and Manual Bidding. Understanding the differences between these strategies is essential for selecting the one that best aligns with your business goals.
Automated Bidding
Automated Bidding allows Google to manage your bids based on your set budget. Google optimizes your bids to get the most leads possible within your budget constraints.
- Pros:
- Simplifies campaign management.
- Automatically adjusts bids for optimal performance.
- Ideal for businesses with limited time to manage bids manually.
- Cons:
- Less control over individual bid amounts.
- May not be ideal for highly competitive or niche markets.
Manual Bidding
Manual Bidding gives you complete control over how much you’re willing to pay per lead. This strategy is particularly beneficial for businesses operating in high-ticket industries where each lead has significant value.
- Pros:
- Greater control over bid amounts.
- Ability to allocate higher bids to more valuable leads.
- Useful for testing and optimizing bid strategies.
- Cons:
- Requires more time and expertise to manage.
- Risk of overspending if not monitored closely.
Step-by-Step Guide to Setting Your Budget and Bidding Strategy
Step 1: Determine Your Weekly Budget
A common recommendation is to set your weekly budget to three times what you spent in the previous week. This approach provides room for growth and signals to Google that you’re prepared to invest more in acquiring leads.
- Example: If you spent $100 last week, set your current week’s budget to $300.
Step 2: Choose Your Bidding Strategy
Option 1: Start with Automated Bidding
- Log into Your Google Local Services Ads Account:
- Navigate to Google Local Services Ads and sign in with your credentials.
- Access Bidding Settings:
- Click on the Settings tab in the left-hand menu.
- Select Budget & Bidding.
- Select Automated Bidding:
- Choose Automated Bidding as your strategy.
- Set your weekly budget based on the recommendation (three times last week’s spend).
- Save your settings.
Option 2: Switch to Manual Bidding (If Necessary)
If you’re operating in a highly competitive market or not receiving sufficient leads with Automated Bidding, consider switching to Manual Bidding.
- Navigate to Bidding Settings:
- Within the Budget & Bidding section, select Manual Bidding.
- Set Maximum Per Lead Budget:
- Determine the maximum amount you’re willing to pay for each lead (e.g., $500 for high-ticket services).
- Enter this amount in the Max Per Lead field.
- Save Your Settings:
- Confirm and save your Manual Bidding strategy.
Step 3: Monitor and Adjust Your Strategy
After setting your initial budget and bidding strategy, it’s essential to monitor the performance of your campaigns regularly.
If Not Getting Enough Leads:
- Switch to Manual Bidding:
- Change your strategy from Automated to Manual Bidding.
- Set a higher Max Per Lead budget to compete more effectively.
- Increase Your Weekly Budget:
- If switching to Manual Bidding doesn’t yield results, consider increasing your weekly budget further to outbid competitors.
- Allow Time for Adjustment:
- Give your campaigns at least a week to adjust and reflect the changes before making further modifications.
If Receiving Excessive Leads:
- Evaluate Lead Quality:
- Listen to call recordings to assess the quality of leads.
- Adjust your bidding strategy to focus on high-quality leads.
- Optimize Your Budget:
- Ensure you’re not overspending by setting a reasonable budget that aligns with your lead acquisition goals.
Step 4: Addressing Competition and Budget Constraints
In competitive markets, businesses often struggle to achieve desired lead volumes due to high bid amounts from competitors. Here’s how to navigate this challenge:
- Increase Your Budget:
- Demonstrate to Google that you’re willing to spend more to acquire leads.
- A higher budget can help your ads appear more frequently and at better positions.
- Optimize Your Bidding:
- Focus your budget on high-performing keywords and services.
- Use CallRail’s insights to identify and allocate funds to the most effective channels.
- Leverage Call Tracking Insights:
- Utilize CallRail to monitor call sources and adjust your strategy based on real-time data.
Best Practices for Budget and Bidding in Google Local Services Ads
Implementing best practices ensures that your budget and bidding strategies are both effective and sustainable.
1. Regularly Review and Adjust Your Budget
- Weekly Assessments: Each week, evaluate your spending and lead acquisition.
- Flexible Adjustments: Be prepared to increase or decrease your budget based on performance metrics.
2. Focus on High-Value Leads
- Set Appropriate Bid Amounts: Allocate higher bids to leads that are more likely to convert or have higher lifetime value.
- Monitor Lead Quality: Regularly listen to call recordings to assess and improve lead quality.
3. Utilize CallRail for Enhanced Tracking
- Integrate CallRail: Use CallRail to gain deeper insights into call sources and lead quality.
- Dynamic Number Insertion: Implement dynamic number insertion to accurately track calls from different marketing channels.
4. Stay Informed About Market Trends
- Competitive Analysis: Keep an eye on competitor activities and adjust your bidding strategy accordingly.
- Adapt to Changes: Be ready to pivot your strategy in response to market shifts or changes in consumer behavior.
5. Maintain Consistent NAP Information
- Name, Address, Phone (NAP): Ensure that your NAP information is consistent across all platforms to improve local SEO and ad performance.
Common Mistakes to Avoid
Avoiding these common pitfalls can enhance the effectiveness of your Google Local Services Ads campaigns.
1. Setting an Inadequate Budget
- Impact: A low budget can limit your ad visibility and lead acquisition.
- Solution: Start with a budget three times your previous spend and adjust based on performance.
2. Ignoring Bid Adjustments
- Impact: Not adjusting bids based on lead quality can result in low ROI.
- Solution: Regularly review lead quality and adjust bids to focus on high-value leads.
3. Overlooking Competition
- Impact: High competition can make it challenging to secure leads.
- Solution: Increase your budget and optimize your bidding strategy to stay competitive.
4. Failing to Monitor Campaign Performance
- Impact: Without regular monitoring, you can’t identify or address underperforming areas.
- Solution: Use tools like CallRail and Google Ads analytics to track and optimize your campaigns.
5. Not Utilizing Call Tracking Insights
- Impact: Missing out on valuable data that can inform your marketing strategy.
- Solution: Integrate CallRail to gain comprehensive insights into call sources and lead quality.
Frequently Asked Questions
Can I Change My Bidding Strategy After Setting It?
Yes, you can switch between Automated and Manual Bidding at any time based on your campaign performance and business needs. Regularly assess your strategy to ensure it aligns with your lead acquisition goals.
How Often Should I Review My Budget and Bidding Strategy?
It’s recommended to review your budget and bidding strategy weekly to monitor performance, make necessary adjustments, and respond to market changes promptly.
What Is the Best Starting Budget for Google Local Services Ads?
A good starting point is to set your weekly budget to three times your previous week’s spend. This approach provides flexibility and allows your campaigns to scale effectively.
How Can CallRail Help Improve My Bidding Strategy?
CallRail provides detailed insights into where your calls are coming from, the quality of leads, and how your customer service representatives are performing. This data allows you to make informed decisions about budget allocation and bidding adjustments to maximize ROI.
Should I Use Manual Bidding for All Campaigns?
Manual Bidding is ideal for high-ticket industries where each lead has significant value. For most other campaigns, Automated Bidding is sufficient and less time-consuming. However, you can experiment with both strategies to determine which works best for your specific needs.
Maximizing the Impact of Your Budget & Bidding Strategy
To fully leverage the benefits of setting the correct budget and bidding strategy in Google Local Services Ads, integrate these strategies into your broader marketing and operational plans.
Align with Your Marketing Goals
- Define Clear Objectives: Identify what you want to achieve with your ads, such as increasing leads, boosting brand awareness, or enhancing customer service.
- Tailor Your Strategy: Ensure your budget and bidding strategies support your marketing objectives by focusing on the most effective channels and campaigns.
Use Data to Optimize Strategies
- Analyze Performance Metrics: Regularly review data from Google Ads and CallRail to understand campaign effectiveness.
- Refine Campaigns: Adjust your marketing strategies based on data insights to improve lead quality and conversion rates.
Integrate with Other Marketing Tools
- Connect with CRM Systems: Integrate your call tracking data with Customer Relationship Management (CRM) systems to streamline lead management and follow-up processes.
- Leverage Google Analytics: Combine Google Ads data with Google Analytics to gain a comprehensive view of user behavior and campaign performance.
Foster Team Collaboration
- Share Insights: Regularly share call tracking insights with your team to inform collective marketing strategies and objectives.
- Provide Training: Ensure that team members understand how to use CallRail and interpret call data to maximize the effectiveness of your tracking setup.
Enhance Customer Experience
- Optimize Landing Pages: Use insights from call tracking to refine landing pages, ensuring they are tailored to convert traffic driven by your ads.
- Personalize Interactions: Leverage call data to personalize customer interactions, addressing their specific needs and preferences effectively.
Conclusion
Setting the correct budget and bidding strategy in Google Local Services Ads is a strategic move that can significantly enhance your lead generation efforts and overall marketing performance. By following the step-by-step guide outlined in this post, implementing best practices, and avoiding common mistakes, you can ensure that your campaigns are both effective and efficient. Remember to regularly monitor and adjust your strategies based on performance data and market conditions to maintain a competitive edge and maximize your ROI.
How to Setup a CallRail Account from Start to Finish (Add Tracking Numbers to EVERYTHING)

Understanding where your phone calls originate is crucial for optimizing marketing strategies, enhancing customer service, and maximizing return on investment (ROI). CallRail offers a comprehensive solution for tracking phone calls from various sources, including Google Business Profile, Organic website traffic, Google Ads, and more. This guide provides a full rundown on setting up a CallRail account from start to finish, ensuring that every call is tracked effectively to provide valuable insights into your business operations.
Why Use CallRail for Call Tracking?
CallRail is a versatile call tracking platform designed to help businesses monitor and analyze their phone interactions. By integrating CallRail with your marketing channels, you can gain deep insights into call quality, lead sources, and customer behavior, enabling you to make informed decisions that drive business growth.
Benefits of CallRail
- Comprehensive Tracking: Monitor calls from multiple sources, including Google Business Profile, Google Ads, organic traffic, and more.
- Quality Assurance: Listen to call recordings to assess lead quality and CSR performance.
- Dynamic Number Insertion: Use swap targets to dynamically replace phone numbers on landing pages, ensuring accurate call attribution.
- Centralized Management: Manage all tracking numbers and call data from a single dashboard.
- Integration Capabilities: Seamlessly integrate with tools like Google Tag Manager, CRM systems, and more for enhanced functionality.
Step-by-Step Guide to Setting Up a CallRail Account
Follow these detailed steps to set up your CallRail account, add tracking numbers to all relevant channels, and ensure seamless call tracking across your marketing efforts.
Step 1: Create and Configure Your CallRail Account
- Sign Up for CallRail:
- Visit CallRail and click on the Sign Up button.
- Enter your business email and create a password to register for an account.
- Take advantage of the 14-day free trial to explore CallRail’s features before committing.
- Access the Dashboard:
- Once registered, log in to your CallRail dashboard.
- Familiarize yourself with the interface, where you’ll manage your tracking numbers, call recordings, and integrations.
Step 2: Add Tracking Numbers for Google Business Profile
- Navigate to Settings:
- In the dashboard, click on Settings in the left-hand sidebar.
- Create a New Tracking Number:
- Click on the Create Number button.
- Select Google Business Profile as the source.
- Choose a tracking number within your specific area code (e.g., 406).
- Configure Number Routing:
- Enter your main office phone number in the Number Routing section.
- Enable Inbound Call Recording to capture and review calls for quality assurance.
- Click on Activate Tracking Number to finalize the setup.
- Update Google Business Profile:
- Go to your Google Business Profile and sign in.
- Navigate to the Edit Profile tab.
- Replace your primary phone number with the new CallRail tracking number.
- Submit the changes and wait for Google to approve the update.
Step 3: Add Tracking Numbers for Google Ads Call Extensions
- Create a Google Ads Tracking Number:
- In CallRail, go back to Settings and click on Create Number.
- Select Google Ads Assets as the source.
- Choose a tracking number in your specific area code (e.g., 360).
- Name this number appropriately (e.g., “Google Ads Call Extension”).
- Configure Number Routing:
- Enter your main office phone number.
- Enable Inbound Call Recording.
- Activate the tracking number.
- Update Google Ads:
- Log in to your Google Ads account.
- Navigate to Assets > Assets > Call Extensions.
- Edit your existing call extension to use the new CallRail tracking number.
- Assign this number as a conversion action to track call performance.
- Disable Other Static Numbers:
- Ensure that all other static phone numbers are disabled in your Google Ads call extensions to maintain accurate tracking through CallRail.
Step 4: Set Up Website Pools with Dynamic Number Insertion
- Create a Website Pool:
- In CallRail, navigate to Settings > Numbers > Create Number.
- Select Website Calls, Keywords, and Web Sessions.
- Choose to track Visitors from Google Ads.
- Enter the Swap Target, which is the phone number currently displayed on your landing pages (e.g., 406-898-4696).
- Assign a Tracking Number:
- Select a tracking number in your specific area code (e.g., 360).
- Name this pool appropriately (e.g., “Google Ads Website Pool”).
- Configure Number Routing to direct calls to your main office phone number.
- Enable Inbound Call Recording.
- Activate the tracking number.
- Implement Dynamic Number Insertion via Google Tag Manager:
- Access Google Tag Manager:
- Log in to your Google Tag Manager account.
- Select the container associated with your website.
- Create a New Tag:
- Click on Tags in the left-hand sidebar, then New.
- Name your tag (e.g., “CallRail JS Snippet”).
- Click on Tag Configuration and select Custom HTML.
- Paste the CallRail JavaScript snippet provided in your CallRail dashboard.
- Set Up Triggering:
- Click on Triggering and select All Pages to ensure the snippet fires on every page.
- Save and Publish:
- Click Save, then Submit and Publish to apply the changes.
- Use GTM’s Preview Mode to verify that the tag is firing correctly.
- Access Google Tag Manager:
- Verify Dynamic Number Insertion:
- Visit your website through a Google Ads campaign to ensure that the phone number on the landing page swaps with the CallRail tracking number.
- Confirm that calls made through this number are being tracked in your CallRail dashboard.
Step 5: Optimize and Manage Your CallRail Setup
- Monitor Call Data:
- Regularly review call recordings and analytics in CallRail to assess lead quality and CSR performance.
- Identify which marketing channels are generating the most valuable leads.
- Add Additional Tracking Numbers:
- For comprehensive tracking, add tracking numbers for other platforms like Facebook Ads, Yelp, and more.
- Follow similar steps to create and configure these numbers, ensuring each has a unique identifier for accurate attribution.
- Maintain Consistent NAP Information:
- Ensure that your Name, Address, and Phone (NAP) information remains consistent across all platforms and citations to enhance local SEO.
- Use tracking numbers to keep your primary phone number consistent while still tracking call sources effectively.
Best Practices for Using CallRail
Implementing best practices ensures that your CallRail setup is both effective and secure, providing accurate data to inform your marketing strategies.
Define Clear Tracking Goals
- Identify Objectives: Determine what you want to achieve with call tracking, such as increasing lead generation, improving customer service, or optimizing ad campaigns.
- Set Up Relevant Tracking Numbers: Assign specific tracking numbers to different marketing channels to accurately attribute calls and measure performance.
Use Descriptive Naming Conventions
- Tag Names: Clearly name your tracking numbers based on their source (e.g., “Google Ads Call Extension,” “Facebook Ads Pool”) to easily identify their purpose.
- Organization: Maintain an organized structure in your CallRail dashboard for efficient management and troubleshooting.
Regularly Review and Optimize
- Analyze Call Data: Utilize CallRail’s analytics to understand call patterns, peak call times, and lead sources.
- Optimize Campaigns: Adjust your marketing strategies based on the insights gained from call data to enhance effectiveness and ROI.
Maintain Security
- Enable Two-Factor Authentication (2FA): Add an extra layer of security to your CallRail account to protect against unauthorized access.
- Monitor Access: Regularly review user access permissions to ensure that only authorized personnel have access to sensitive call data.
Common Mistakes to Avoid
Avoiding these common pitfalls can enhance the effectiveness and security of your CallRail setup.
Inconsistent Tracking Numbers
- Impact: Using different tracking numbers inconsistently can lead to inaccurate call attribution and fragmented data.
- Solution: Assign unique tracking numbers to each marketing channel and ensure they are consistently used across campaigns.
Not Updating Google Business Profile
- Impact: Failing to update your Google Business Profile with the new tracking number can result in missed tracking opportunities.
- Solution: Always replace your primary phone number with the CallRail tracking number in your Google Business Profile to ensure all calls are tracked.
Overlooking Dynamic Number Insertion
- Impact: Without dynamic number insertion, calls from different sources may not be accurately attributed.
- Solution: Implement dynamic number insertion via Google Tag Manager to automatically swap phone numbers on landing pages based on the traffic source.
Ignoring Call Recordings
- Impact: Not reviewing call recordings can lead to missed opportunities for improving customer service and lead quality.
- Solution: Regularly listen to call recordings to assess CSR performance and identify areas for training and improvement.
Neglecting Integration Features
- Impact: Underutilizing integration features can limit the potential of your call tracking setup.
- Solution: Explore and implement integrations with CRM systems, Google Analytics, and other marketing tools to enhance data synchronization and reporting.
Frequently Asked Questions
Can I Use CallRail with Multiple Google Business Profiles?
Yes, CallRail allows you to set up tracking numbers for multiple Google Business Profiles. Assign unique tracking numbers to each profile to accurately attribute calls to specific locations or services.
How Do I Change a Tracking Number in CallRail?
- Log In to CallRail: Access your CallRail account.
- Navigate to Numbers: Click on the Numbers tab.
- Select the Number: Choose the tracking number you wish to change.
- Edit Routing: Update the call routing settings or replace the number as needed.
- Save Changes: Confirm and save your updates to ensure the new settings take effect.
Will Changing the Phone Number on Google Business Profile Affect My Local SEO?
No, as long as your new tracking number is local to your business area, changing the phone number on your Google Business Profile will not negatively impact your local SEO. Google prioritizes NAP consistency by matching the business name and address over the phone number.
Can I Track Calls from Other Advertising Platforms with CallRail?
Yes, CallRail supports tracking calls from various advertising platforms, including Facebook Ads, Bing Ads, and more. Create separate tracking numbers for each platform to accurately attribute and analyze call sources.
Do I Need Technical Skills to Set Up CallRail?
While some basic technical knowledge is helpful, CallRail is designed to be user-friendly. Following this step-by-step guide should enable most users to set up call tracking without advanced technical skills. If you encounter issues, CallRail’s support team is available to assist you.
Maximizing the Impact of Call Tracking with CallRail
To fully leverage the benefits of CallRail, integrate these strategies into your broader marketing and operational plans.
Align with Your Marketing Goals
- Define Clear Objectives: Determine what you want to achieve with call tracking, such as increasing lead generation, improving customer service, or optimizing ad campaigns.
- Tailor Tracking to Goals: Assign tracking numbers to specific marketing channels to measure their effectiveness and optimize accordingly.
Use Data to Optimize Strategies
- Analyze Call Data: Regularly review call analytics to understand which campaigns are driving the most calls and conversions.
- Refine Marketing Strategies: Use insights from CallRail to adjust your marketing strategies, focusing on high-performing channels and improving underperforming ones.
Integrate with Other Marketing Tools
- Connect with CRM Systems: Integrate CallRail with your Customer Relationship Management (CRM) system to streamline lead management and follow-up processes.
- Leverage Google Analytics: Combine CallRail data with Google Analytics to gain a comprehensive view of user behavior and campaign performance.
Leverage Advanced CallRail Features
- Dynamic Number Insertion (DNI): Use DNI to display unique phone numbers to visitors from different traffic sources, enhancing call attribution.
- Call Recording and Transcription: Utilize CallRail’s call recording and transcription features to gain deeper insights into customer interactions and improve service quality.
Foster Team Collaboration
- Regular Reporting: Generate and share regular call reports with your team to keep everyone informed about campaign performance and lead quality.
- Training and Education: Ensure that your team members are trained on using CallRail effectively, understanding how to interpret call data and act on insights.
Enhance Customer Experience
- Prompt Lead Follow-Up: Use CallRail’s call tracking data to ensure that leads are followed up promptly, increasing the likelihood of conversions.
- Personalize Interactions: Leverage call data to personalize customer interactions, addressing their specific needs and preferences effectively.
Conclusion
Setting up a CallRail account from start to finish and adding tracking numbers to all relevant channels is a strategic move that can significantly enhance your ability to track, analyze, and optimize your marketing efforts. By following this comprehensive guide, you can ensure that every call is accurately attributed, providing valuable insights into your lead sources and customer interactions. Proper call tracking not only improves your ability to measure campaign performance but also empowers you to make data-driven decisions that drive business growth and success in the competitive digital landscape.