
Category: Digital Marketing for Local Home Service Business
How to Set Up a Google Ads Tag on Your Website with Google Tag Manager

Effective tracking of your Google Ads campaigns is crucial for measuring performance, optimizing your marketing strategies, and maximizing your return on investment (ROI). By setting up a Google Ads tag on your website using Google Tag Manager (GTM), you can streamline the tracking process, ensure accurate data collection, and manage your tags efficiently without modifying your website’s code directly. This comprehensive guide will walk you through the steps to set up a Google Ads tag using GTM the right way, ensuring seamless integration and optimal campaign tracking.
Why Use Google Tag Manager for Google Ads Tracking?
Google Tag Manager is a powerful tool that simplifies the process of managing and deploying marketing tags on your website. By leveraging GTM for Google Ads tracking, you can:
Benefits of Using Google Tag Manager
- Ease of Implementation: Deploy and manage tags without needing to alter your website’s codebase.
- Centralized Tag Management: Organize all your tracking codes in one place, simplifying updates and maintenance.
- Enhanced Flexibility: Quickly add, modify, or remove tags as your tracking needs evolve.
- Improved Site Performance: Optimize tag loading to enhance website speed and user experience.
- Error Reduction: Utilize GTM’s built-in validation and debugging tools to minimize the risk of tag-related errors.
Step-by-Step Guide to Setting Up a Google Ads Tag with Google Tag Manager
Follow these detailed steps to set up a Google Ads tag on your website using Google Tag Manager, ensuring accurate tracking and seamless integration.
Step 1: Sign In to Your Google Tag Manager Account
- Access Google Tag Manager:
- Open your web browser and navigate to Google Tag Manager.
- Click on the Sign In button and enter your Google account credentials associated with GTM.
- Select the Appropriate Container:
- Once signed in, select the container linked to the website where you want to install the Google Ads tag.
- If you don’t have a container set up yet, click on Create Account, follow the prompts to set up a new container, and install the GTM code on your website.
Step 2: Create a New Tag in Google Tag Manager
- Navigate to Tags:
- In the GTM dashboard, click on Tags in the left-hand sidebar.
- Create a New Tag:
- Click on the New button to create a new tag.
- Click on the Tag Configuration box to choose the type of tag you want to set up.
- Select Google Ads Tag:
- From the list of tag types, select Google Ads.
- Choose Google Ads Conversion Tracking if you want to track conversions or Google Ads Remarketing for remarketing purposes.
Step 3: Configure the Google Ads Tag
- Enter Tag Details:
- Tag Name: Enter a descriptive name for your tag, such as “Google Ads Conversion Tracking”.
- Conversion ID: Locate your Google Ads Conversion ID in your Google Ads account under Tools & Settings > Measurement > Conversions. Click on the specific conversion action to find the Conversion ID.
- Conversion Label: Copy the Conversion Label provided for the specific conversion action you are tracking.
- Paste the Conversion ID and Label:
- Enter the Conversion ID and Conversion Label into the respective fields in GTM.
- Set Up Triggering:
- Click on Triggering and choose when you want the tag to fire. For conversion tracking, select the trigger that corresponds to the conversion event (e.g., form submission, purchase confirmation).
- If you’re setting up a general conversion tracking tag, you might use a Page View trigger on a thank-you page.
Step 4: Save and Publish Your Tag
- Save the Tag:
- After configuring the tag and setting up the appropriate trigger, click Save.
- Submit and Publish:
- In the top-right corner of the GTM dashboard, click on Submit.
- Add a descriptive version name and description (e.g., “Added Google Ads Conversion Tracking Tag”).
- Click Publish to apply the changes to your website.
Step 5: Verify the Tag Installation
- Use Tag Assistant:
- Install the Google Tag Assistant browser extension if you haven’t already.
- Enable Tag Assistant and reload your website to ensure the Google Ads tag is firing correctly.
- Check in Google Ads:
- In your Google Ads account, navigate to Tools & Settings > Measurement > Conversions.
- Confirm that the conversion actions are receiving data by checking the status and recent activity.
- Debug with GTM Preview Mode:
- In GTM, click on Preview to enter debug mode.
- Visit your website in the debug window to ensure that the Google Ads tag is firing as intended during the specified events.
Best Practices for Managing Google Ads Tags with GTM
Implementing best practices ensures that your Google Ads tracking setup is both effective and secure, providing accurate data to inform your marketing strategies.
Use Descriptive Naming Conventions
- Tag Names: Clearly name your tags (e.g., “Google Ads Purchase Conversion”) to easily identify their purpose within GTM.
- Version Control: Document changes with version names and descriptions to track updates and modifications over time.
Keep Tags Organized
- Folders: Use folders within GTM to categorize tags based on their function or marketing channel.
- Consistent Structure: Maintain a consistent tagging structure to simplify management and troubleshooting.
Minimize Third-Party Integrations
- Selective Integration: Only integrate essential third-party scripts to reduce potential conflicts and maintain site performance.
- Regular Audits: Periodically review and clean up unused tags to keep your GTM container streamlined.
Monitor Tag Performance
- Regular Checks: Continuously monitor your Google Ads tags to ensure they are firing correctly and collecting accurate data.
- Analytics Integration: Integrate Google Ads data with Google Analytics to gain deeper insights into campaign performance and user behavior.
Maintain Security
- Access Control: Limit GTM access to trusted team members and use strong authentication methods.
- Secure Scripts: Ensure that all scripts, including the Google Ads tag, are securely implemented to prevent vulnerabilities.
Common Mistakes to Avoid
Avoiding these common pitfalls can enhance the effectiveness of your Google Ads tracking setup and ensure accurate data collection.
Incorrect Tag Configuration
- Impact: Misconfigured tags can lead to inaccurate tracking data, affecting your campaign analysis and optimization.
- Solution: Double-check all tag settings, including Conversion ID and Label, to ensure they are entered correctly.
Failing to Set Up Proper Triggers
- Impact: Incorrect or missing triggers can prevent tags from firing, resulting in lost conversion data.
- Solution: Carefully select and configure triggers that accurately represent the conversion events you want to track.
Not Testing the Tags
- Impact: Unverified tags may not function as intended, leading to incomplete or inaccurate data.
- Solution: Use GTM’s Preview Mode and Tag Assistant to thoroughly test your tags before publishing.
Overloading GTM with Unnecessary Tags
- Impact: Too many tags can slow down your website and complicate tag management.
- Solution: Only add necessary tags and regularly review and remove any that are no longer needed.
Ignoring Google Ads Analytics
- Impact: Without analyzing the data collected by your Google Ads tags, you miss opportunities to optimize your campaigns.
- Solution: Regularly review your Google Ads and Google Analytics data to inform your marketing strategies and improve ROI.
Frequently Asked Questions
Can I Use Google Tag Manager for Multiple Google Ads Accounts?
Yes, Google Tag Manager allows you to manage tags for multiple Google Ads accounts within a single container. Simply configure separate tags for each account, ensuring that each tag has the correct Conversion ID and Label.
How Do I Find My Google Ads Conversion ID and Label?
- Access Google Ads:
- Log in to your Google Ads account.
- Navigate to Tools & Settings > Measurement > Conversions.
- Locate the Conversion Action:
- Click on the specific conversion action you want to track.
- The Conversion ID and Conversion Label will be displayed in the tag setup instructions.
What If My Google Ads Tag Isn’t Firing Correctly?
- Check Tag Configuration: Ensure that the Conversion ID and Label are entered correctly.
- Verify Triggers: Confirm that the correct triggers are assigned to the tag.
- Use Debugging Tools: Utilize GTM’s Preview Mode and Google Tag Assistant to identify and resolve issues.
- Contact Support: If problems persist, reach out to Google Ads or GTM support for assistance.
Can I Schedule Tags to Fire at Specific Times?
Google Tag Manager doesn’t support scheduling tags to fire at specific times. However, you can control when tags fire based on user interactions or specific conditions set within your triggers.
Do I Need to Use Both Google Analytics and Google Ads Tags?
While not mandatory, using both Google Analytics and Google Ads tags can provide a more comprehensive understanding of your website’s performance and user behavior, enhancing your ability to optimize marketing strategies effectively.
Maximizing the Impact of Your Google Ads Tag Setup
To fully leverage the benefits of setting up a Google Ads tag with Google Tag Manager, integrate these strategies into your broader marketing and operational plans.
Align with Your Marketing Goals
- Define Objectives: Clearly outline what you aim to achieve with your Google Ads campaigns, such as increasing sales, generating leads, or boosting brand awareness.
- Tailor Tagging Strategy: Ensure that your tagging setup aligns with your marketing objectives, tracking the most relevant conversion actions.
Use Data to Optimize Strategies
- Analyze Conversion Data: Regularly review the data collected by your Google Ads tags to identify trends, measure campaign effectiveness, and make informed decisions.
- Refine Campaigns: Use insights from conversion data to adjust your ad targeting, budgets, and creative strategies for better performance.
Integrate with Other Marketing Tools
- Connect with CRM Systems: Integrate Google Ads data with your Customer Relationship Management (CRM) system to streamline lead management and enhance customer interactions.
- Leverage Marketing Automation: Use marketing automation tools in conjunction with Google Ads data to create personalized and targeted marketing campaigns.
Leverage Advanced Google Tag Manager Features
- Dynamic Tagging: Utilize GTM’s dynamic tagging capabilities to create more responsive and context-aware tracking setups.
- Custom Variables and Triggers: Implement custom variables and triggers to track more specific user interactions and behaviors on your website.
Foster Team Collaboration
- Share Insights: Regularly share Google Ads performance data with your team to inform collective marketing strategies and objectives.
- Provide Training: Ensure that team members are trained on using GTM and understanding Google Ads data to maximize the effectiveness of your tracking setup.
Enhance Customer Experience
- Optimize Landing Pages: Use the insights from Google Ads tracking to optimize your landing pages, ensuring they are tailored to convert the traffic driven by your ads.
- Personalize User Interactions: Leverage conversion data to personalize user experiences, enhancing satisfaction and increasing the likelihood of conversions.
Conclusion
Setting up a Google Ads tag on your website using Google Tag Manager is a strategic move that can significantly enhance your ability to track, measure, and optimize your advertising campaigns. By following this step-by-step guide, implementing best practices, and avoiding common mistakes, you can ensure that your Google Ads tracking is accurate, efficient, and aligned with your marketing goals. Proper tag management not only improves your campaign performance but also empowers you to make data-driven decisions that drive business growth and success in the competitive digital landscape.
How to Change the Phone Number on Your Google Local Services Ads Account And Speed Up Onboarding Process
Managing your online presence effectively is crucial for attracting and converting potential customers. Google Local Services Ads (LSA) are a powerful tool for local businesses to showcase their services directly to consumers searching for them. However, there might be instances where you need to change the phone number associated with your LSA account or expedite the onboarding process. This comprehensive guide will walk you through the steps to change your phone number on your Google Local Services Ads account and provide tips to speed up the onboarding process, ensuring your business remains accessible and competitive.
Why Changing Your Phone Number Matters
Your business phone number is often the first point of contact for potential customers. Ensuring that this number is accurate and consistently tracked is vital for maintaining trust and capturing valuable leads. Whether you’re rebranding, switching service providers, or optimizing your call tracking strategies, updating your phone number in your Google Local Services Ads account is essential for seamless customer interactions and accurate performance metrics.
Benefits of Updating Your Phone Number
- Accurate Lead Tracking: Ensures that all incoming calls are correctly attributed to your marketing efforts, providing reliable data for performance analysis.
- Improved Customer Experience: Prevents missed or misdirected calls, enhancing customer satisfaction and trust.
- Seamless Marketing Integration: Maintains consistency across all marketing channels, supporting cohesive branding and communication strategies.
- Enhanced Security: Reduces the risk of unauthorized access by updating contact information promptly.
Step-by-Step Guide to Changing the Phone Number on Your Google Local Services Ads Account
Changing the phone number on your Google LSA account involves accessing your account settings and updating the relevant information. Follow these detailed steps to ensure a smooth transition.
Step 1: Sign In to Your Google Local Services Ads Account
- Access Google Local Services Ads:
- Open your web browser and navigate to Google Local Services Ads.
- Click on the Sign In button located at the top-right corner of the page.
- Enter Credentials:
- Input your Google account email and password associated with your LSA account.
- Click Sign In to access your dashboard.
Step 2: Navigate to Account Settings
- Access Account Menu:
- Once logged in, locate the Three-Line Menu (≡) in the top-left corner of the dashboard.
- Click on it to open the navigation menu.
- Select Settings:
- From the dropdown, select Settings to access your account configuration options.
Step 3: Update Your Phone Number
- Find Contact Information:
- In the Settings menu, locate the Contact Information section.
- Here, you will see the current phone number associated with your LSA account.
- Edit Phone Number:
- Click on the Edit icon (usually represented by a pencil) next to the phone number.
- Enter your new phone number in the designated field.
- Ensure the phone number is entered in the correct format to avoid any discrepancies.
- Save Changes:
- After updating the phone number, click Save to apply the changes.
- Google may prompt you to verify the new number to ensure its validity.
Step 4: Verify Your New Phone Number
- Receive Verification Code:
- Google will send a verification code to the new phone number you provided.
- Enter this code in the verification field to confirm the update.
- Complete Verification:
- Click Verify to finalize the phone number change.
- Once verified, the new phone number will be active on your LSA account.
Speeding Up Onboarding and Resolving Issues
Efficient onboarding and prompt resolution of issues are essential for maximizing the effectiveness of your Google Local Services Ads. Here’s how to expedite the process and ensure smooth operations.
Step 1: Utilize the Dedicated LSA Support Hotline
Google provides a dedicated support hotline for Local Services Ads users, offering assistance with account setup, verification, insurance, licenses, and more.
- Access the Support Number:
- From your LSA dashboard, click on the Three-Line Menu (≡) in the top-left corner.
- Scroll down to find the Need Help? Call Us section.
- The support number is 1-844-263-9884.
- Prepare Necessary Information:
- Customer ID: Have your Google Local Services Ads customer ID ready. This helps the support team locate your account quickly.
- Associated Email: Use the admin email associated with your LSA account for verification purposes.
- Contact Support:
- Call the support number and follow the automated prompts.
- Select the appropriate option for your needs (e.g., account setup, phone number change).
- Provide the required information to connect with a support representative.
Step 2: Expedite Verification Processes
Verification processes can sometimes delay the activation of your LSA account. Here’s how to speed things up:
- Submit Complete Documentation:
- Ensure that all required documents, such as business licenses and insurance certificates, are submitted accurately and completely.
- Double-check for any errors or missing information before submission.
- Follow Up with Support:
- After submitting your documents, contact the support hotline to inquire about the status of your verification.
- Politely request expedited processing if possible, explaining any urgent needs.
- Monitor Email Communications:
- Regularly check your email for any requests for additional information from Google.
- Respond promptly to any such requests to avoid further delays.
Step 3: Maintain Clear Communication
Effective communication with your support representatives can significantly reduce onboarding time and resolve issues swiftly.
- Be Clear and Concise:
- Clearly explain the issue or request when speaking with support.
- Provide all necessary details without unnecessary information.
- Ask Specific Questions:
- Inquire about the status of your account, expected timelines, and any additional steps you need to take.
- Seek clarification on any instructions or feedback provided by the support team.
- Document Interactions:
- Keep a record of your support interactions, including dates, times, and the names of representatives you spoke with.
- This information can be useful for future reference or if you need to escalate an issue.
Best Practices for Managing Your Google Local Services Ads Account
Implementing best practices ensures that your Google Local Services Ads account remains effective, secure, and aligned with your business goals.
Define Clear Roles and Responsibilities
- Assess Team Needs: Determine who in your team needs access to the LSA account and what level of permissions they require.
- Assign Appropriate Roles: Use the Delegate Access feature to assign roles such as Manager or Administrator based on responsibilities.
Maintain Accurate Contact Information
- Regular Updates: Periodically review and update your contact information to ensure it remains current and accurate.
- Consistent Communication: Ensure that all team members have access to the updated contact details for seamless coordination.
Optimize Your LSA Profile
- Complete Your Profile: Ensure that your Google Business Profile is fully completed with accurate information, high-quality images, and detailed service descriptions.
- Encourage Reviews: Prompt satisfied customers to leave positive reviews, enhancing your profile’s credibility and attractiveness.
Monitor Performance Metrics
- Track Call Data: Use CallRail or similar call tracking tools to monitor incoming calls and analyze their sources.
- Adjust Campaigns: Based on performance data, adjust your Google Ads campaigns to focus on high-performing keywords and strategies.
Ensure Compliance with Google Policies
- Adhere to Guidelines: Familiarize yourself with Google’s policies for Local Services Ads to ensure compliance and avoid account suspension.
- Regular Audits: Conduct regular audits of your LSA account to identify and rectify any compliance issues.
Common Mistakes to Avoid
Avoiding common pitfalls can help maintain the integrity and effectiveness of your Google Local Services Ads account.
Providing Inaccurate Information
- Impact: Inaccurate phone numbers or business details can lead to missed calls and loss of trust among potential customers.
- Solution: Double-check all information before submitting changes and regularly update your contact details.
Neglecting Follow-Up
- Impact: Failing to follow up on verification processes or support requests can delay account activation and hinder your advertising efforts.
- Solution: Stay proactive by regularly checking the status of your account and maintaining open communication with support representatives.
Ignoring Performance Data
- Impact: Overlooking call tracking data can result in ineffective marketing strategies and wasted advertising spend.
- Solution: Regularly review and analyze performance metrics to make informed decisions and optimize your campaigns.
Overcomplicating Account Settings
- Impact: Overcomplicating settings can lead to confusion, mismanagement, and potential compliance issues.
- Solution: Keep your account settings straightforward and aligned with your business needs, avoiding unnecessary configurations.
Failing to Utilize Support Resources
- Impact: Not leveraging the available support resources can leave you struggling to resolve issues independently, leading to prolonged downtime.
- Solution: Utilize Google’s dedicated support hotline and resources to address any challenges promptly and effectively.
Frequently Asked Questions
Can I Change My Phone Number Without Contacting Support?
Yes, you can change your phone number directly through the Google Local Services Ads dashboard by navigating to Settings > Contact Information and updating your phone number. However, if you encounter issues or need assistance, contacting support can help expedite the process.
How Long Does It Take to Change the Phone Number on LSA?
Changing your phone number on Google Local Services Ads typically takes a few minutes to update. However, verification processes may take longer, especially if you need to contact support to expedite onboarding.
What Should I Do If My New Phone Number Isn’t Updating?
If your new phone number isn’t updating after following the steps, try the following:
- Clear Cache: Clear your browser cache and attempt the update again.
- Verify Details: Ensure that the phone number is entered correctly and follows the required format.
- Contact Support: Reach out to the LSA support hotline for assistance in resolving the issue.
Can I Have Multiple Phone Numbers on My LSA Account?
Yes, you can manage multiple phone numbers on your Google Local Services Ads account. Utilize call tracking tools like CallRail to assign unique tracking numbers to different marketing campaigns or locations for accurate call attribution.
How Do I Ensure Compliance with Google’s Phone Number Policies?
To ensure compliance:
- Use Verified Numbers: Only use phone numbers that are verified and associated with your business.
- Avoid Tracking Number Misuse: Ensure that tracking numbers are correctly routed to your business phone lines to prevent policy violations.
- Regularly Review Policies: Stay updated with Google’s policies for Local Services Ads to ensure ongoing compliance.
Maximizing the Impact of Changing Your Phone Number and Speeding Up Onboarding
To fully leverage the benefits of updating your phone number and expediting the onboarding process, integrate these strategies into your broader marketing and operational plans.
Align with Your Marketing Goals
- Define Objectives: Clearly outline what you aim to achieve by updating your phone number and speeding up onboarding, such as increasing lead generation or improving customer service.
- Tailor Communication: Ensure that all marketing materials reflect the updated phone number to maintain consistency and avoid confusion.
Use Data to Optimize Strategies
- Analyze Call Data: Utilize call tracking tools to monitor the impact of the phone number change on your lead generation and campaign performance.
- Refine Campaigns: Adjust your Google Ads campaigns based on the insights gained from call data to enhance effectiveness and ROI.
Integrate with Other Marketing Tools
- Connect with CRM Systems: Integrate your updated phone number with your Customer Relationship Management (CRM) system to streamline lead management and follow-up processes.
- Leverage Email Marketing: Update your contact information in your email marketing campaigns to ensure seamless communication with your audience.
Leverage Advanced Call Tracking Features
- Dynamic Number Insertion (DNI): Use DNI to display unique phone numbers to visitors from different traffic sources, enhancing call attribution and tracking accuracy.
- Call Recording and Transcription: Utilize call recording and transcription features to gain deeper insights into customer interactions and improve service quality.
Foster Team Collaboration
- Share Insights: Regularly share call tracking insights with your team to inform product development, customer service improvements, and marketing strategies.
- Encourage Review Responses: Assign team members to respond to customer reviews and feedback, enhancing engagement and satisfaction.
Enhance Customer Experience
- Prompt Lead Follow-Up: Ensure that calls are promptly attended to, increasing the likelihood of converting leads into customers.
- Personalize Interactions: Use call data to tailor customer interactions, addressing their specific needs and preferences effectively.
Conclusion
Changing the phone number on your Google Local Services Ads account and speeding up the onboarding process are strategic actions that can significantly enhance your business’s accessibility, credibility, and marketing effectiveness. By following the step-by-step guide outlined in this post, you can ensure that your phone number updates are handled smoothly and that your onboarding process is expedited efficiently. Implementing best practices for account management and leveraging support resources will help you maintain a robust and responsive online presence, ultimately driving business growth and success in the competitive digital marketplace.
How to Track Phone Calls for Website Visitors From Google Ads Using CallRail
Understanding where your phone calls originate is essential for optimizing your marketing strategies and improving customer interactions. By tracking phone calls from website visitors who come through Google Ads, you can gain valuable insights into which campaigns are driving the most leads and how effectively your marketing budget is being utilized. CallRail offers a robust solution for tracking these calls, allowing you to attribute phone interactions to specific marketing efforts seamlessly. This comprehensive guide will walk you through the process of setting up a website pool in CallRail to track phone calls from Google Ads website visitors, ensuring accurate call attribution and enhanced marketing analytics.
Why Track Phone Calls from Google Ads?
Tracking phone calls from Google Ads is crucial for businesses that rely on phone inquiries to generate leads and sales. By attributing phone calls to specific ads, keywords, or campaigns, you can measure the effectiveness of your advertising efforts, optimize your campaigns for better performance, and ensure that your marketing spend is delivering a positive return on investment (ROI).
Benefits of Tracking Phone Calls
- Accurate Attribution: Identify which Google Ads campaigns and keywords are driving the most phone calls, enabling precise attribution of leads.
- Enhanced Analytics: Gain deeper insights into customer behavior and preferences by analyzing call data alongside other marketing metrics.
- Improved ROI: Optimize your marketing budget by focusing on high-performing campaigns and eliminating underperforming ones.
- Better Customer Insights: Understand the reasons behind customer calls, helping you tailor your services and improve customer satisfaction.
- Streamlined Marketing Efforts: Integrate call tracking data with your CRM and other marketing tools to create a cohesive marketing strategy.
Step-by-Step Guide to Tracking Phone Calls from Google Ads Using CallRail
Follow these detailed steps to set up a website pool in CallRail that tracks phone calls from visitors originating from Google Ads, ensuring accurate call attribution and comprehensive tracking.
Step 1: Sign In to Your CallRail Account
- Access CallRail:
- Open your web browser and navigate to CallRail.
- Click on the Sign In button located at the top-right corner of the homepage.
- Enter Credentials:
- Input your CallRail account email and password.
- Click Sign In to access your CallRail dashboard.
Step 2: Navigate to the Call Tracking Settings
- Access Settings:
- Once logged in, locate the Settings icon (typically represented by a gear) in the left-hand sidebar.
- Click on Settings to open the settings menu.
- Select Integrations:
- In the Settings menu, click on Integrations.
- Select JavaScript Snippet to access your call tracking scripts.
Step 3: Create a New Tracking Number
- Add a New Number:
- In the CallRail dashboard, click on the Numbers tab.
- Select Add Number to create a new tracking number.
- Choose the Number Type:
- Destination Type: Choose Other instead of Google My Business to maintain minimal third-party integrations and avoid potential account suspension issues.
- Local Number Selection: Select a phone number local to your business area to ensure consistency in your Name, Address, Phone (NAP) citations.
- Name Your Tracking Number:
- Assign a descriptive name to your tracking number, such as
Google Ads Pool, to easily identify its purpose and associated campaigns.
- Assign a descriptive name to your tracking number, such as
Step 4: Configure Number Routing and Settings
- Set Up Number Routing:
- In the Number Routing section, enter your main office phone number where you want the calls to be forwarded.
- Enable Call Recording (Optional):
- Toggle on Inbound Call Recording if you wish to record calls for quality assurance and training purposes.
- Activate Whisper Message (Optional):
- Enable Whisper Message to inform your team members that the call is being tracked, helping them provide better service.
- Finalize and Activate:
- Click Activate Tracking Number to finalize the setup. Your new tracking number is now ready to be used.
Step 5: Integrate the Tracking Number with Google Ads
- Access Google Ads:
- Open a new tab and navigate to Google Ads.
- Sign in with your Google account credentials associated with your Google Ads campaigns.
- Navigate to Campaigns:
- In the Google Ads dashboard, click on Campaigns in the left-hand sidebar.
- Select the specific campaign you want to track calls for.
- Edit Ad Group:
- Click on one of the ad groups within the selected campaign to access its settings.
- Modify Ad Settings:
- Click on Edit Campaign and then navigate to the Ads & Extensions section.
- Locate the ad you want to add the tracking number to and click Edit.
- Add Tracking Number:
- In the ad editing interface, look for the Call Extensions option.
- Click Add Call Extension and enter the CallRail tracking number you created (e.g.,
360-XXX-XXXX).
- Set Up URL Parameters:
- Ensure that your website’s landing pages are equipped with CallRail’s swap targets to dynamically replace phone numbers with tracking numbers.
Step 6: Configure Swap Targets on Your Website
- Access Your Website’s Code:
- Log in to your website’s Content Management System (CMS) or access the website’s codebase directly.
- Locate Phone Numbers:
- Identify the phone numbers on your website that visitors will call.
- Implement Swap Targets:
- Replace the static phone numbers with CallRail’s swap targets to enable dynamic number insertion. This ensures that calls from Google Ads visitors are attributed correctly.
- Save and Deploy Changes:
- After updating the phone numbers with swap targets, save your changes and deploy them to your live website.
Step 7: Verify and Monitor Call Tracking
- Test the Tracking Number:
- Click on your Google Ads ad and initiate a call to ensure that the call is being tracked correctly in CallRail.
- Monitor Call Data:
- Log in to your CallRail dashboard to review call analytics, including call sources, durations, and outcomes.
- Ensure that calls from Google Ads are attributed to the correct campaigns and keywords.
- Adjust Settings as Needed:
- Based on your call tracking data, make necessary adjustments to your Google Ads campaigns and CallRail settings to optimize performance.
Best Practices for Tracking Phone Calls with CallRail
Implementing best practices ensures that your call tracking setup is both effective and secure, providing accurate data to inform your marketing strategies.
Use Unique Tracking Numbers for Different Campaigns
- Why: Assigning unique tracking numbers to different marketing campaigns allows for precise attribution and better understanding of each campaign’s performance.
- How: Create separate tracking numbers in CallRail for each Google Ads campaign, ad group, or keyword you want to monitor.
Regularly Review Call Analytics
- Why: Regular analysis of call data helps identify trends, measure campaign effectiveness, and make informed decisions to optimize your marketing efforts.
- How: Use CallRail’s reporting tools to generate insights on call sources, durations, and outcomes. Integrate these reports with your Google Ads data for comprehensive analysis.
Integrate CallRail with Other Marketing Tools
- Why: Integration with tools like Customer Relationship Management (CRM) systems and Google Analytics provides a holistic view of your marketing performance and customer interactions.
- How: Connect CallRail with your CRM and Google Analytics through CallRail’s integration settings to synchronize data and enhance reporting capabilities.
Maintain Consistent NAP Information
- Why: Consistency in Name, Address, and Phone (NAP) information across all platforms improves local SEO and ensures accurate call tracking.
- How: Ensure that your business information is consistent on your website, Google Business Profile, and other online listings.
Implement Two-Factor Authentication (2FA)
- Why: Enhancing account security protects your call tracking data from unauthorized access and potential misuse.
- How: Enable 2FA on both your CallRail and Google Ads accounts to add an extra layer of security.
Common Mistakes to Avoid
Avoiding these common pitfalls can enhance the effectiveness of your call tracking setup and ensure accurate call attribution.
Using Non-Local Tracking Numbers
- Impact: Using tracking numbers from different area codes can disrupt your NAP citations, negatively affecting local SEO and call tracking accuracy.
- Solution: Always choose tracking numbers that are local to your business location to maintain consistency and improve call attribution.
Failing to Implement Swap Targets Correctly
- Impact: Incorrect implementation of swap targets can prevent accurate call tracking, leading to missed or misattributed calls.
- Solution: Carefully follow CallRail’s instructions for implementing swap targets on your website to ensure that tracking numbers replace the correct phone numbers.
Not Testing the Tracking Setup
- Impact: Without testing, you won’t know if the tracking numbers are functioning correctly, leading to incomplete or inaccurate call data.
- Solution: Perform thorough testing by clicking on your ads and making test calls to verify that calls are being tracked and attributed correctly in CallRail.
Overcomplicating the Setup
- Impact: Adding too many tracking numbers or configuring complex routing can make management difficult and lead to errors.
- Solution: Keep your call tracking setup simple by assigning tracking numbers to key campaigns and maintaining organized tracking pools.
Ignoring Call Analytics Insights
- Impact: Failing to analyze call data means missing out on valuable insights that could optimize your marketing strategies and improve ROI.
- Solution: Regularly review and act upon the insights provided by CallRail’s analytics to refine your marketing efforts and enhance campaign performance.
Frequently Asked Questions
Can I Use CallRail with Multiple Google Ads Accounts?
Yes, you can use CallRail to track phone calls from multiple Google Ads accounts. Assign unique tracking numbers to each Google Ads account or campaign to ensure accurate call attribution and comprehensive tracking across all your advertising efforts.
Will Using CallRail Affect My Google Ads Performance?
No, using CallRail will not negatively impact your Google Ads performance. In fact, it can enhance your campaign optimization by providing detailed call tracking data that helps you understand which ads and keywords are driving the most valuable leads.
How Long Does It Take for CallRail to Start Tracking Calls?
Once you have set up the tracking number and implemented the swap targets on your website, CallRail begins tracking calls almost immediately. However, it may take a few minutes for the changes to propagate and for calls to appear in your CallRail dashboard.
Can I Customize Call Routing in CallRail?
Yes, CallRail allows you to customize call routing settings based on your business needs. You can route calls to different team members, set up business hours for call forwarding, and configure call recording options to capture valuable call data.
Do I Need Technical Skills to Set Up CallRail with Google Ads?
While some basic technical knowledge is helpful, CallRail’s integration with Google Ads and Google Tag Manager is designed to be user-friendly. Following this step-by-step guide should enable most users to set up call tracking without advanced technical skills. If you encounter issues, CallRail’s support team is available to assist you.
Maximizing the Impact of Call Tracking on Google Ads
To fully leverage the benefits of tracking phone calls from Google Ads using CallRail, integrate these strategies into your broader marketing and operational plans.
Align with Your Marketing Goals
- Define Clear Objectives: Determine what you want to achieve with call tracking, such as increasing lead generation, improving customer service, or optimizing ad campaigns.
- Tailor Tracking to Goals: Set up specific tracking numbers for different marketing channels to attribute calls accurately and measure campaign effectiveness.
Use Data to Optimize Strategies
- Analyze Call Data: Regularly review call analytics to understand which campaigns are driving the most calls and conversions.
- Refine Marketing Strategies: Use insights from CallRail to adjust your marketing strategies, focusing on high-performing channels and improving underperforming ones.
Integrate with Other Marketing Tools
- Connect with CRM Systems: Integrate CallRail with your Customer Relationship Management (CRM) system to streamline lead management and follow-up processes.
- Leverage Google Analytics: Combine CallRail data with Google Analytics to gain a comprehensive view of user behavior and campaign performance.
Leverage Advanced CallRail Features
- Dynamic Number Insertion (DNI): Use DNI to display unique phone numbers to visitors from different traffic sources, enhancing call attribution.
- Call Recording and Transcription: Utilize CallRail’s call recording and transcription features to gain deeper insights into customer interactions and improve service quality.
Foster Team Collaboration
- Regular Reporting: Generate and share regular call reports with your team to keep everyone informed about campaign performance and lead quality.
- Training and Education: Ensure that your team members are trained on using CallRail effectively, understanding how to interpret call data and act on insights.
Enhance Customer Experience
- Prompt Lead Follow-Up: Use CallRail’s call tracking data to ensure that leads are followed up promptly, increasing the likelihood of conversions.
- Personalize Interactions: Leverage call data to personalize customer interactions, addressing their specific needs and preferences effectively.
Conclusion
Tracking phone calls from Google Ads website visitors using CallRail is a strategic move that can significantly enhance your understanding of your marketing efforts and customer interactions. By following this step-by-step guide, implementing best practices, and avoiding common mistakes, you can ensure that your call tracking setup is both accurate and efficient. Proper call tracking not only improves your ability to measure campaign performance but also empowers you to make data-driven decisions that drive business growth and success in the competitive digital landscape.
How to Install a CallRail JavaScript Snippet on Website Using Google Tag Manager
Effective call tracking is essential for businesses aiming to understand their customer interactions and optimize their marketing strategies. CallRail provides a robust solution for tracking phone calls, allowing you to gain insights into where your calls are coming from and how your marketing efforts are performing. Integrating CallRail with your website using Google Tag Manager (GTM) streamlines the installation process and ensures accurate tracking without the need for direct code modifications. This comprehensive guide will walk you through the steps to install the CallRail JavaScript snippet on your website using Google Tag Manager, ensuring seamless integration and optimal call tracking.
Why Install the CallRail JavaScript Snippet Using Google Tag Manager?
Google Tag Manager is a powerful tool that simplifies the process of managing and deploying marketing tags (snippets of code) on your website without requiring direct code edits. By using GTM to install the CallRail JavaScript snippet, you can efficiently manage your call tracking setup, reduce the risk of errors, and maintain better control over your website’s tagging infrastructure.
Benefits of Using Google Tag Manager for CallRail Integration
- Ease of Implementation: Deploy the CallRail snippet without modifying your website’s code directly.
- Centralized Tag Management: Manage all your tracking codes in one place, simplifying updates and maintenance.
- Enhanced Flexibility: Easily add, remove, or update tags as your tracking needs evolve.
- Improved Site Performance: Optimize tag loading to enhance website speed and user experience.
- Error Reduction: Minimize the risk of code conflicts and errors by using GTM’s built-in validation and debugging tools.
Step-by-Step Guide to Installing the CallRail JavaScript Snippet Using Google Tag Manager
Follow these detailed steps to install the CallRail JavaScript snippet on your website using Google Tag Manager, ensuring accurate call tracking and seamless integration.
Step 1: Sign In to Your CallRail Account
- Access CallRail:
- Open your web browser and navigate to CallRail.
- Click on the Sign In button located at the top-right corner of the homepage.
- Enter Credentials:
- Input your CallRail account email and password.
- Click Sign In to access your CallRail dashboard.
Step 2: Obtain Your CallRail JavaScript Snippet
- Navigate to Integrations:

- In the CallRail dashboard, click on the Settings icon (typically represented by a gear).
- Select Integrations from the dropdown menu.
- Access JavaScript Snippet:
- Click on JavaScript Snippet.If you have previously added the snippet, it will show as active. To install a new snippet, ensure you have the correct script copied.Copy the JavaScript Snippet: Highlight the entire script and copy it to your clipboard.
Step 3: Sign In to Your Google Tag Manager Account
- Access Google Tag Manager:
- Open a new tab and navigate to Google Tag Manager.
- Enter Credentials:
- Sign in with your Google account credentials associated with your GTM container.
- Select the Appropriate Container:
- Choose the container linked to the website where you want to install the CallRail snippet.
Step 4: Create a New Tag in Google Tag Manager
- Navigate to Tags:
- In the GTM dashboard, click on Tags in the left-hand sidebar.
- Create a New Tag:
- Click on the New button to create a new tag.
- Configure the Tag:
- Name Your Tag: Enter a descriptive name, such as
CallRail JavaScript Snippet.Choose Tag Type: Click on Tag Configuration and select Custom HTML from the list of tag types.Paste the JavaScript Snippet: In the HTML field, paste the CallRail JavaScript snippet you copied earlier.
- Name Your Tag: Enter a descriptive name, such as
- Set Triggering:
- Click on Triggering and select All Pages to ensure the snippet loads on every page of your website.
Step 5: Save and Publish Your Tag
- Save the Tag:
- After configuring the tag and setting the trigger, click Save to finalize the tag setup.
- Submit Changes:
- Click on the Submit button in the top-right corner of the GTM dashboard.
- Publish the Container:
- Add a version name and description (optional) for your changes.Click Publish to apply the new tag to your website.
Step 6: Verify the Installation
- Test the Tag:
- Use GTM’s Preview Mode to ensure the CallRail snippet is firing correctly on your website.
- Click on Preview in GTM and enter your website URL to start the debug session.
- Check CallRail Dashboard:
- Make a test call to your tracking number and verify that the call appears in your CallRail dashboard.
- Use Tag Assistant:
- Optionally, use Google’s Tag Assistant browser extension to verify that the CallRail tag is correctly installed and firing on your website.
Best Practices for Installing CallRail with Google Tag Manager
Implementing best practices ensures that your CallRail installation is both effective and secure, providing accurate data without disrupting your website’s performance.
Use Descriptive Naming Conventions
- Tag Names: Clearly name your tags (e.g.,
CallRail JavaScript Snippet) to easily identify their purpose within GTM. - Version Control: Document changes with version names and descriptions to track updates and modifications over time.
Keep Tags Organized
- Folders: Use folders within GTM to categorize tags based on their function or marketing channel.
- Consistent Structure: Maintain a consistent tagging structure to simplify management and troubleshooting.
Minimize Third-Party Integrations
- Selective Integration: Only integrate essential third-party scripts to reduce potential conflicts and maintain site performance.
- Regular Audits: Periodically review and clean up unused tags to keep your GTM container streamlined.
Monitor Tag Performance
- Regular Checks: Continuously monitor your CallRail tags to ensure they are firing correctly and collecting accurate data.
- Analytics Integration: Integrate CallRail with Google Analytics to gain deeper insights into call performance and user behavior.
Maintain Security
- Access Control: Limit GTM access to trusted team members and use strong authentication methods.
- Secure Scripts: Ensure that all scripts, including the CallRail snippet, are securely implemented to prevent vulnerabilities.
Common Mistakes to Avoid
Avoiding these common pitfalls can enhance the effectiveness of your CallRail installation and ensure accurate call tracking.
Incorrect Snippet Placement
- Impact: Placing the CallRail snippet in the wrong location can prevent it from functioning correctly.
- Solution: Always place the snippet within a Custom HTML tag in GTM and ensure it is set to fire on all pages.
Failing to Publish Changes
- Impact: Changes made in GTM won’t take effect until the container is published.
- Solution: After configuring and saving your tags, always remember to submit and publish the container to apply the changes.
Not Testing the Implementation
- Impact: Without testing, you won’t know if the snippet is working correctly, leading to missed call data.
- Solution: Use GTM’s Preview Mode and perform test calls to verify that the snippet is firing and tracking calls as intended.
Overloading the Tag Manager
- Impact: Adding too many tags can slow down your website and complicate tag management.
- Solution: Keep your GTM container clean by only adding necessary tags and regularly reviewing and removing unused ones.
Ignoring Call Analytics
- Impact: Failing to analyze call data means missing out on valuable insights to optimize your marketing strategies.
- Solution: Regularly review your CallRail dashboard and integrate data with your analytics tools to make informed decisions.
Frequently Asked Questions
Can I Install the CallRail JavaScript Snippet Without Google Tag Manager?
Yes, you can manually install the CallRail JavaScript snippet by adding it directly to your website’s HTML, typically within the <head> section. However, using Google Tag Manager simplifies the process, especially if you plan to manage multiple tags or require frequent updates.
Will Using Google Tag Manager Affect My Website’s Performance?
Properly implemented tags through GTM should have minimal impact on your website’s performance. It’s important to regularly audit and optimize your tags to ensure they load efficiently and do not slow down your site.
How Do I Update the CallRail Snippet in Google Tag Manager?
- Access GTM: Log in to your Google Tag Manager account.
- Navigate to Tags: Click on Tags in the left sidebar.
- Select the CallRail Tag: Find and click on the
CallRail JavaScript Snippettag. - Update the Snippet: Modify the Custom HTML with the new CallRail snippet as provided in your CallRail account.
- Save and Publish: Click Save, then Submit and Publish to apply the changes.
Can I Use CallRail with Multiple Websites in One GTM Account?
Yes, you can use CallRail with multiple websites by creating separate containers for each website in Google Tag Manager or by managing multiple tags within a single container, depending on your organization’s structure and needs.
Do I Need a CallRail Account to Use Their JavaScript Snippet?
Yes, you need an active CallRail account to generate and utilize the JavaScript snippet for call tracking on your website.
Maximizing the Impact of CallRail on Your Website
To fully leverage the benefits of CallRail, integrate these strategies into your broader marketing and operational plans.
Align with Your Marketing Goals
- Define Clear Objectives: Determine what you want to achieve with call tracking, such as increasing lead generation, improving customer service, or optimizing ad campaigns.
- Tailor Tracking to Goals: Set up specific tracking numbers for different marketing channels to attribute calls accurately and measure campaign effectiveness.
Use Data to Optimize Strategies
- Analyze Call Data: Regularly review call analytics to understand which campaigns are driving the most calls and conversions.
- Refine Marketing Strategies: Use insights from CallRail to adjust your marketing strategies, focusing on high-performing channels and improving underperforming ones.
Integrate with Other Marketing Tools
- Connect with CRM Systems: Integrate CallRail with your Customer Relationship Management (CRM) system to streamline lead management and follow-up processes.
- Leverage Google Analytics: Combine CallRail data with Google Analytics to gain a comprehensive view of user behavior and campaign performance.
Leverage Advanced CallRail Features
- Dynamic Number Insertion (DNI): Use DNI to display unique phone numbers to visitors from different traffic sources, enhancing call attribution.
- Call Recording and Transcription: Utilize CallRail’s call recording and transcription features to gain deeper insights into customer interactions and improve service quality.
Foster Team Collaboration
- Regular Reporting: Generate and share regular call reports with your team to keep everyone informed about campaign performance and lead quality.
- Training and Education: Ensure that your team members are trained on using CallRail effectively, understanding how to interpret call data and act on insights.
Enhance Customer Experience
- Prompt Lead Follow-Up: Use CallRail’s call tracking data to ensure that leads are followed up promptly, increasing the likelihood of conversions.
- Personalize Interactions: Leverage call data to personalize customer interactions, addressing their specific needs and preferences effectively.
How to Install the CallRail JavaScript Snippet on Your WordPress Website Using the Plugin

Tracking phone calls effectively is essential for understanding your marketing efforts and optimizing your business strategies. CallRail offers robust call tracking solutions that help you monitor and analyze phone interactions, providing valuable insights into your customer behavior and campaign performance. Installing the CallRail JavaScript snippet on your WordPress website is a straightforward process, especially when using a dedicated plugin. In the “How to Install the CallRail JavaScript Snippet on Your WordPress Website Using the Plugin” video, you learn a step-by-step method to integrate CallRail seamlessly with your WordPress site. This comprehensive guide will expand on those instructions, offering detailed steps, best practices, and additional insights to ensure a smooth and successful installation.
Why Install the CallRail JavaScript Snippet on Your WordPress Website?
Integrating CallRail with your WordPress website allows you to track phone calls generated from your site, attribute them to specific marketing campaigns, and gain deeper insights into your lead generation efforts. This integration is crucial for businesses aiming to measure the effectiveness of their online marketing and improve customer engagement.
Benefits of Installing the CallRail JavaScript Snippet
- Accurate Call Tracking: Monitor incoming calls from different marketing channels, such as PPC, SEO, and social media, to determine which strategies are driving the most leads.
- Enhanced Analytics: Gain access to detailed call analytics, including call duration, caller location, and call outcomes, to better understand customer behavior.
- Improved ROI: Allocate your marketing budget more effectively by identifying high-performing campaigns and optimizing underperforming ones.
- Seamless Integration: Easily integrate CallRail with other tools like CRM systems, Google Analytics, and marketing platforms to streamline your workflow and data management.
Step-by-Step Guide to Installing the CallRail JavaScript Snippet Using the Plugin
Follow these detailed steps to install the CallRail JavaScript snippet on your WordPress website using the CallRail plugin, ensuring that your call tracking is set up correctly and efficiently.
Step 1: Sign In to Your CallRail Account
- Access CallRail:
- Open your web browser and navigate to CallRail.
- Click on the Sign In button located at the top-right corner.
- Enter your CallRail account credentials to log in.
- Navigate to Account Settings:
- Once logged in, click on your profile icon or account name in the top-right corner.
- Select Account Settings from the dropdown menu.
Step 2: Obtain Your CallRail JavaScript Snippet
- Access Tracking Settings:
- In the Account Settings, navigate to the Tracking or Integrations section.
- Copy the JavaScript Snippet:
- Locate the JavaScript snippet provided by CallRail.Click on Copy to Clipboard to copy the snippet for later use.
Step 3: Install the CallRail Plugin on Your WordPress Website
- Log In to Your WordPress Dashboard:
- Open a new tab and navigate to your WordPress login page, typically found at your website /wp-admin
- Enter your WordPress username and password to access the dashboard.
- Navigate to Plugins:
- In the left-hand sidebar, hover over Plugins and click on Add New.
- Search for the CallRail Plugin:
- In the search bar, type CallRail.Locate the CallRail Phone Tracking plugin from the search results.
- Install and Activate the Plugin:
- Click on the Install Now button next to the CallRail plugin.After installation, click Activate to enable the plugin on your website.
Step 4: Configure the CallRail Plugin
- Access Plugin Settings:
- In the left-hand sidebar, hover over Settings and click on CallRail.
- Enter Your CallRail Plugin Key:
- Locate the field labeled CallRail Plugin Key.Return to your CallRail account, where you previously copied the JavaScript snippet.Extract the plugin key from the snippet or from your CallRail account settings.Paste the plugin key into the designated field in the WordPress plugin settings.
- Save Changes:
- After entering the plugin key, click on Save Changes to apply the settings.
Step 5: Verify the Installation
- Test the Snippet:
- Visit your website and perform a test call to ensure that CallRail is tracking the call correctly.
- Check your CallRail dashboard to verify that the test call appears in your call logs.
- Troubleshoot if Necessary:
- If the call does not appear, revisit the plugin settings to ensure that the plugin key is entered correctly.Ensure that the plugin is activated and that no other plugins are conflicting with CallRail.
Step 6: Optimize Call Tracking Settings
- Set Up Tracking Numbers:
- In your CallRail account, configure tracking numbers for different marketing channels to attribute calls accurately.
- Integrate with Other Tools:
- Connect CallRail with your CRM, Google Analytics, or other marketing platforms to enhance data synchronization and reporting.
- Customize Call Handling:
- Configure call routing, voicemail settings, and automated responses to optimize the caller experience.
Best Practices for Installing the CallRail JavaScript Snippet
Implementing best practices ensures that your CallRail installation is secure, efficient, and provides accurate tracking data.
Use a Dedicated Plugin
- Why: Using the official CallRail plugin simplifies the installation process, ensures compatibility with WordPress updates, and provides easy access to plugin settings.
- How: Always use the latest version of the CallRail plugin from the WordPress repository to benefit from the latest features and security updates.
Secure Your Plugin Key
- Why: The plugin key is essential for authenticating your WordPress site with CallRail. Keeping it secure prevents unauthorized access to your call tracking data.
- How: Do not share your plugin key publicly. Store it securely and restrict access to trusted team members.
Regularly Update Plugins and WordPress
- Why: Keeping your WordPress installation and plugins up-to-date ensures compatibility, enhances security, and improves performance.
- How: Regularly check for updates in your WordPress dashboard under Dashboard > Updates and apply them promptly.
Monitor Call Tracking Data
- Why: Regular monitoring helps you identify trends, optimize marketing strategies, and ensure that your call tracking is functioning correctly.
- How: Use CallRail’s analytics and reporting features to review call data, track conversions, and adjust your campaigns based on insights.
Integrate with Other Marketing Tools
- Why: Integration with tools like Google Analytics and your CRM provides a comprehensive view of your marketing performance and customer interactions.
- How: Utilize CallRail’s integration options to connect with your existing marketing stack, enhancing data synchronization and reporting capabilities.
Common Mistakes to Avoid
Avoiding these common pitfalls can enhance the effectiveness and accuracy of your CallRail installation on WordPress.
Incorrect Plugin Key Entry
- Impact: An incorrect plugin key can prevent the CallRail snippet from functioning, leading to missing call data.
- Solution: Double-check the plugin key entered in the plugin settings. Ensure there are no extra spaces or characters.
Not Verifying the Installation
- Impact: Failing to verify the installation may result in undetected issues, leading to inaccurate call tracking.
- Solution: Perform regular tests by making test calls and verifying their appearance in the CallRail dashboard.
Overlapping Plugins
- Impact: Using multiple plugins for the same purpose can cause conflicts and disrupt call tracking.
- Solution: Use only the CallRail plugin for call tracking. Disable or remove any other plugins that perform similar functions.
Ignoring Call Routing Settings
- Impact: Improper call routing can lead to missed calls or unprofessional handling of customer inquiries.
- Solution: Configure call routing settings in CallRail to ensure that calls are directed to the appropriate team members or departments.
Neglecting Security Measures
- Impact: Inadequate security can expose your website and call tracking data to potential threats.
- Solution: Implement security best practices, such as using strong passwords, enabling two-factor authentication (2FA), and keeping your WordPress site and plugins updated.
Frequently Asked Questions
Can I Install the CallRail JavaScript Snippet Without a Plugin?
Yes, you can manually install the JavaScript snippet by adding it to your WordPress theme’s header.php file or using a code injection plugin. However, using the official CallRail plugin is recommended for ease of installation, automatic updates, and enhanced compatibility.
What Should I Do If Call Tracking Isn’t Working?
- Check Plugin Activation: Ensure that the CallRail plugin is activated in your WordPress dashboard.
- Verify Plugin Key: Double-check that the correct plugin key is entered in the plugin settings.
- Test the Snippet: Make a test call and check if it appears in your CallRail dashboard.
- Consult Support: If issues persist, contact CallRail support for assistance.
How Do I Update the CallRail JavaScript Snippet?
If you need to update the JavaScript snippet, the CallRail plugin typically handles updates automatically. Ensure that the plugin is up-to-date in your WordPress dashboard. If you installed the snippet manually, replace the old snippet with the new one provided by CallRail.
Can I Use CallRail with Multiple WordPress Sites?
Yes, you can use CallRail with multiple WordPress sites by installing the CallRail plugin on each site and using unique plugin keys for each account. This allows you to track calls separately for each website.
How Do I Remove the CallRail JavaScript Snippet?
- Using the Plugin: Deactivate or delete the CallRail plugin from your WordPress dashboard under Plugins > Installed Plugins.
- Manual Removal: If you installed the snippet manually, remove the JavaScript code from your theme’s
header.phpfile or the code injection plugin you used.
Maximizing the Impact of CallRail on Your WordPress Website
To fully leverage the benefits of CallRail, integrate these strategies into your broader marketing and operational plans.
Align with Your Marketing Goals
- Define Clear Objectives: Identify what you want to achieve with call tracking, such as increasing lead generation, improving customer service, or optimizing ad campaigns.
- Tailor Tracking to Goals: Set up specific tracking numbers for different marketing channels to attribute calls accurately and measure campaign effectiveness.
Use Data to Optimize Campaigns
- Analyze Call Data: Regularly review call analytics to understand which campaigns are driving the most calls and conversions.
- Refine Marketing Strategies: Use insights from CallRail to adjust your marketing strategies, focusing on high-performing channels and improving underperforming ones.
Integrate with Other Marketing Tools
- Connect with CRM Systems: Integrate CallRail with your CRM to streamline lead management and follow-up processes.
- Leverage Google Analytics: Combine CallRail data with Google Analytics to gain a comprehensive view of user behavior and campaign performance.
Leverage Advanced CallRail Features
- Dynamic Number Insertion (DNI): Use DNI to display unique phone numbers to visitors from different traffic sources, enhancing call attribution.
- Call Recording and Transcription: Utilize CallRail’s call recording and transcription features to gain deeper insights into customer interactions and improve service quality.
Foster Team Collaboration
- Regular Reporting: Generate and share regular call reports with your team to keep everyone informed about campaign performance and lead quality.
- Training and Education: Ensure that your team members are trained on using CallRail effectively, understanding how to interpret call data and act on insights.
Enhance Customer Experience
- Prompt Lead Follow-Up: Use CallRail’s call tracking data to ensure that leads are followed up promptly, increasing the likelihood of conversions.
- Personalize Interactions: Leverage call data to personalize customer interactions, addressing their specific needs and preferences effectively.
Conclusion
Installing the CallRail JavaScript snippet on your WordPress website using the CallRail plugin is a strategic move that can significantly enhance your call tracking capabilities, providing valuable insights into your marketing efforts and customer interactions. By following the step-by-step guide provided in this post, implementing best practices, and avoiding common mistakes, you can ensure a seamless and effective CallRail integration. Proper call tracking not only improves your ability to measure campaign performance but also empowers you to make data-driven decisions that drive business growth and success in the competitive digital landscape.
Should You Buy Google Reviews or Not?

When it comes to building trust and credibility for your business, Google Reviews are crucial—but should you buy Google Reviews to boost your reputation? Positive reviews can improve your online reputation, attract more customers, and even boost your local search rankings. However, some business owners are tempted to take a shortcut by buying Google Reviews. While this might sound like an easy way to gain instant credibility, it’s a dangerous gamble that can do more harm than good. Let’s explore the pros, cons, and real-life horror stories of buying Google Reviews.
The Temptation to Buy Google Reviews
Businesses struggling to get reviews organically may feel frustrated by slow progress. Buying reviews seems like a quick fix to:
- Boost Star Ratings: Appear more trustworthy with a higher overall score.
- Attract More Customers: Positive reviews can influence buying decisions.
- Improve Search Rankings: Google’s algorithm factors in the number and quality of reviews.
But while these benefits might sound appealing, they come with significant risks that far outweigh the potential gains.
The Risks of Buying Google Reviews
Here’s why buying Google Reviews is a bad idea:
1. Violation of Google’s Policies
Buying reviews directly violates Google’s policies. If Google detects fake reviews, they’ll likely remove them and may penalize your business by:
- Suspending your Google Business Profile.
- Lowering your search rankings.
- Permanently damaging your online reputation.

2. Lack of Authenticity
Fake reviews are often generic, poorly written, or unrelated to your business. Savvy customers can spot them, and once they do, your credibility will be in question.

3. Legal Consequences
Buying fake reviews could expose you to legal action. The Federal Trade Commission (FTC) actively monitors deceptive advertising practices, including fake reviews, and has fined businesses for this behavior.
4. Nightmare Scenarios: Blackmail and Extortion
One of the most horrifying risks of buying reviews is falling victim to the people you bought them from. Some unethical sellers use blackmail tactics, threatening to:
- Convert all their 5-star reviews to 1-star reviews.
- Post fake negative reviews unless you pay them more money.
Imagine losing your hard-earned reputation overnight because of fake reviews—a nightmare no business owner wants to face.
Real-Life Horror Stories
Case Study 1: The 5-Star Turned 1-Star Disaster
A small business owner decided to purchase 50 five-star reviews from an online vendor. At first, everything seemed fine, and the business enjoyed a temporary boost in visibility. But within weeks, the vendor demanded additional payments. When the owner refused, all the five-star reviews were turned into one-star reviews, tanking the business’s reputation.
Case Study 2: Google Suspends a Profile
Another business owner bought reviews to compete with a local rival. Unfortunately, Google flagged the activity, removed the fake reviews, and suspended the business’s Google profile. It took months to appeal the suspension, during which the business lost significant revenue.
Why Organic Reviews Are Worth the Effort
Instead of buying reviews, focus on earning genuine feedback from your customers. Here’s how:
- Provide Exceptional Service: Deliver an experience worth talking about.
- Ask for Reviews: Politely request reviews from satisfied customers via email, SMS, or in person.
- Make It Easy: Share direct links to your Google Review page.
- Respond to Reviews: Engage with both positive and negative reviews to show you value feedback.
Building an authentic reputation takes time, but it’s the only sustainable way to grow your business.
Conclusion: Don’t Buy Google Reviews
While buying Google Reviews might seem like a shortcut, it’s a risky and unethical strategy that can backfire spectacularly. From Google penalties to blackmail threats, the potential consequences far outweigh any temporary benefits. Instead, focus on earning honest reviews by providing excellent service and encouraging genuine customer feedback.
Your reputation is one of your most valuable assets—don’t gamble it away with fake reviews.
Have you encountered businesses with suspicious reviews? Share your thoughts in the comments below!
5 Things You Need to Know Before Hiring a Marketing Agency for Your Home-Service Business
Hiring a marketing agency can be a game-changer for your home-service business—but choosing the wrong one can cost you time, money, and results. Before signing on the dotted line, here are 5 critical things you need to know to make the right decision.
1. Beware of “Proprietary Software”
If an agency pitches their “proprietary software” as the magic bullet for your marketing success, consider it a major red flag. Here’s why: proprietary software often locks you into systems that you can’t own or control. If you decide to leave the agency, you may lose access to the tools, data, and campaigns you paid to build.
Instead, your marketing should be built on widely recognized, transparent tools that allow you to maintain ownership. Think platforms like Google Ads, WordPress, or HubSpot—solutions that you can control, even if you switch providers.
Pro Tip: Always ask, “Can I access and keep the assets we create together?” If the answer is unclear or “no,” RUN!
2. Ask About Ownership of Marketing Assets
Ownership of your marketing assets is non-negotiable. Whether it’s your website, ad accounts, or content, you need to ensure that YOU are the rightful owner. Unfortunately, some agencies retain ownership as a way to keep you tied to their services.
Imagine investing thousands into a website only to realize the agency owns it, and you’ll lose it if you leave—that’s a nightmare no business owner wants.
Before signing any agreements, clarify:
- Who owns the website and its content?
- Will you have full access to your Google Ads, Facebook Ads, and analytics accounts?
Rule of Thumb: If an agency hesitates or says you won’t own what they create, don’t walk away—RUN!
3. Demand Transparency Upfront
When evaluating an agency, transparency is key. On a sales call, ask them to walk you through their strategy via a screen share. They should be able to show you their approach, tools, and processes clearly.
Here’s where many agencies fall short: instead of presenting concrete strategies, they rely on vague promises and sales scripts. If they dodge the question or can’t share specifics, you’re likely dealing with a salesperson—not a strategist.
Questions to Ask:
- “Can you show me what your plan would look like?”
- “How will you measure success and share results with me?”
An honest agency will welcome tough questions and provide clear answers.
4. Watch Out for Long-Term Contracts
Lengthy contracts might sound professional, but they’re often designed to lock you in—not help you grow. A reputable agency will prove their value month after month without needing a 12- or 24-month commitment.
If an agency pushes for a long-term contract, proceed with caution. Ask yourself:
- Do I feel confident in their ability to deliver results?
- What happens if I’m unhappy with their performance?
Many agencies will let you opt for shorter terms or month-to-month agreements. That way, you can hold them accountable for delivering consistent value.
Bottom Line: If a long contract feels like a trap, trust your instincts.
5. Find Out Their Specialty
No agency can truly be great at everything—and that’s okay. The best agencies know their strengths and focus on what they do best. Whether it’s Google Ads, SEO, direct mail, or social media, you should expect to work with different experts for each specialty.
When evaluating agencies, ask:
- What industries do you specialize in?
- What services are you BEST at delivering?
- Where do you refer clients who need services outside your expertise?
A great agency will have the confidence to say, “We’re not the best fit for that, but here’s someone who can help.” That kind of honesty speaks volumes.
The Final Word
Choosing the right marketing agency for your home-service business is one of the most important decisions you’ll make. By asking the tough questions about ownership, transparency, contracts, and expertise, you can avoid costly mistakes and find a partner that delivers real value.
Remember: If something feels off, it probably is. Trust your gut, do your research, and don’t settle for less than what your business deserves.
Ready to start your search? Ask the right questions, hold agencies accountable, and make an informed choice—your success depends on it!
How to DOUBLE Leads for Your Restoration Company in ONE WEEK With Google Local Services Ads
If you’re a restoration company with a Google Local Services Ads account, you might be tired of not seeing the amount of leads you were hoping for. You might be frustrated hearing other companies in your area getting handed hundreds of LSA leads each month on a silver platter, while you’re lucky if you even get 1 or 2 leads in a month!
It’s so darn frustrating! The good news is that you aren’t alone.
Now, imagine looking at your LSA dashboard and seeing more leads than you can handle, at a cost per lead that you CAN handle!
Here’s a step-by-step guide for managing your Google Local Services Ads (LSA) and Google Business Profile (GBP) for your water damage restoration company:
1. Optimize for “Restoration Service Near Me” Searches:
- Ensure proper category setup: Your LSA and GBP should be categorized under “Water Damage Restoration” or similar relevant services.
- Use keywords in review replies: Include phrases like “restoration service near me” or “water damage repair” when responding to reviews to help boost your local SEO.
- Service area accuracy: Clearly define the areas you serve, and exclude areas where your services aren’t available to avoid irrelevant leads.
2. Weekly GBP Updates:
- Post updates weekly: Highlight recent water damage restoration jobs, customer testimonials, or safety tips on water damage prevention.
- Use restoration-related keywords like “water damage repair,” “emergency flood response,” or “mold remediation” to improve relevance for search queries.
3. Reply to All Reviews:
- Respond promptly to all reviews: Thank customers for positive feedback and offer solutions to any negative reviews to demonstrate responsiveness and professionalism.
- Incorporate service keywords into replies to strengthen your SEO ranking for restoration-related searches.
4. Add Plenty of Pictures:
- Upload new images regularly: Include before-and-after photos of water damage restoration projects, photos of your team working, branded vehicles, and restoration equipment in action.
- Keep images updated weekly to keep your profile dynamic and relevant.
5. Lead Management:
- Clear the “New,” “Active,” and “Booked” tabs regularly: Mark leads as “completed” or “archived” as soon as they’re handled to keep your lead flow optimal.
- Daily review of lead statuses will help ensure you’re staying on top of incoming requests and maximizing your lead potential.
6. Insurance Verification:
- Check insurance status regularly: Ensure your insurance details are up-to-date to avoid account suspension. Set up reminders to review insurance details every 30 days.
7. Service Areas and Exclusion List:
- Clearly mark service areas: Ensure all service areas are correctly marked, and exclude areas where you do not provide water damage restoration services to prevent irrelevant leads.
- Review service areas periodically to ensure accuracy.
8. Policy Manager Tab:
- Monitor weekly for policy violations: Check the Policy Manager tab regularly to avoid any issues or violations that could affect your LSA status.
9. Budget Management:
- Set to ‘Automated Bidding (maximize leads)’: This ensures that Google is optimizing your ad spend for the highest number of leads.
- Adjust your budget weekly: Aim to set your weekly budget to three times the prior week’s spend to maximize lead generation without overspending.
10. Business Bio and Details:
- Choose enticing business bio options like “Free in-home estimate” or “100% satisfaction guarantee” to make your listing more attractive to potential customers.
- Ensure the correct phone number and website are listed to avoid any disruptions in communication.
11. Business Hours or Ad Schedule:
- Align business hours with phone availability: Make sure the business hours listed on your LSA profile match the times when someone can answer the phone. If necessary, adjust the ad schedule to ensure you’re only running ads during times when you’re available to take calls.
Regular Monitoring:
- Weekly Review Checklist:
- Post new GBP updates.
- Respond to all reviews.
- Upload fresh photos.
- Mark leads as completed or archived.
- Check insurance status to ensure it’s up to date.
- Update service areas and exclusions as needed.
- Monitor the Policy Manager tab for violations.
- Adjust budget based on the previous week’s spend.
This system will help ensure that your water damage restoration company’s LSA and GBP are optimized for visibility, lead generation, and smooth management of your online presence.
If this all sounds like too much, you might want to find a digital marketing agency that offers Google Local Services Ads Management– or…
Tired of Waiting for Local Services Ads Results for Your Restoration Company?
We can help! LocalSink is a digital marketing agency for restoration contractors like you!
In fact, we’ll do the same thing we did for ARS Restoration, the best water damage restoration contractor in Portland, OR!
We check all the boxes above, and more! We handle all aspects of your digital marketing, so that you can focus on what you do best- building your business. Don’t hesitate to contact us if you think we could help!
How to Find a Digital Marketing Agency for Your Plumbing Company (and not get burned)
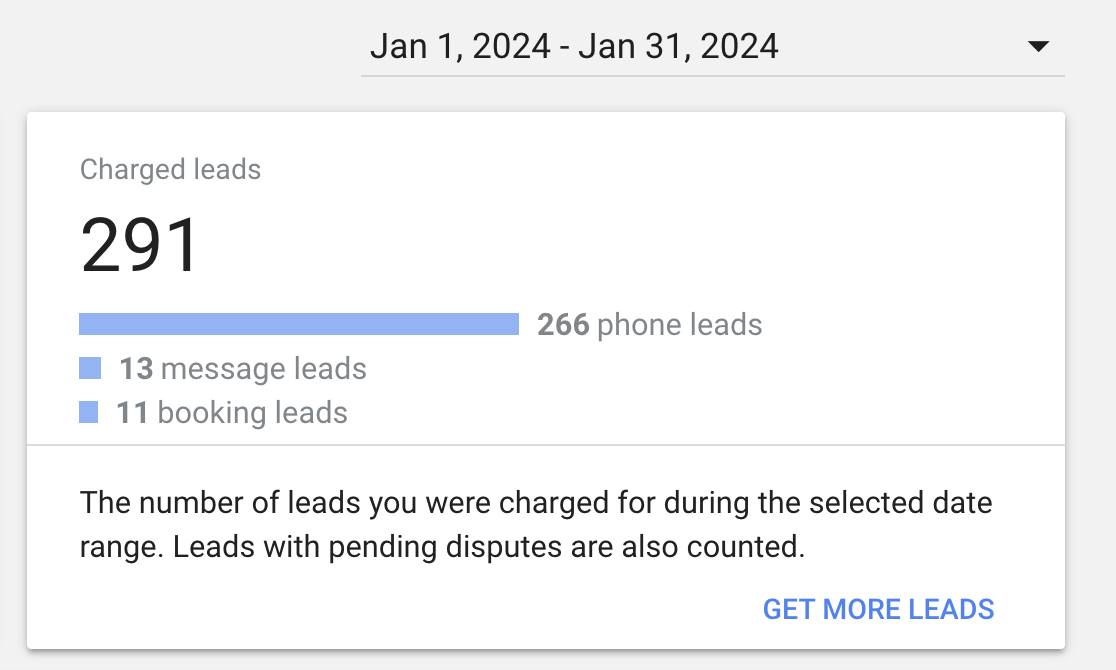
If you’re tired of looking for a good marketing agency for your plumbing business, you aren’t alone. You might feel tired of running around, trying to run your business, not having the time to juggle the both the business and the digital marketing. At the same time, the marketing agencies you’ve hired aren’t making the darn phone ring!
We know how frustrating this can be, but don’t throw in the towel just yet.
Imagine how you would feel if you knew how simple it was to find an agency that meets your needs. Even better, you could find the right agency in less than an hour. Well, we made this guide for you!
Here’s a step-by-step approach to finding the right agency for your plumbing company:
1. Define Your Goals and Budget
- Clearly outline what you want to achieve with your digital marketing efforts. For a plumbing company, this might include increasing phone calls, getting more service requests, or boosting local visibility.
- Determine your budget. Knowing how much you’re willing to invest can help you find agencies that fit within your financial parameters.
2. Research Agencies with Proven Experience
- Look for an agency that specialize in digital marketing for local service businesses, particularly in plumbing or similar trades.
- Check their case studies, client testimonials, and reviews on platforms like Google, Yelp, or Clutch.co. This will give you an idea of their past performance and client satisfaction.
3. Ask for Referrals and Recommendations
- Reach out to your professional network or other business owners in your industry. Personal recommendations can be very valuable and often point you to agencies that have delivered results for others.
4. Evaluate Their Transparency and Communication
- Choose an agency that is upfront about its pricing, services, and the expected timeline for results. Avoid those that make unrealistic promises.
- During your initial consultation, pay attention to how they communicate. Are they clear, concise, and willing to explain their strategies? Transparency is key to a trustworthy partnership.
5. Inquire About Their Services and Expertise
- Ensure the agency can handle all your digital marketing needs, including Google Business Profile management, Google Ads Management, Google Local Services Ads Management, Local SEO, social media, and more.
- Ask them about their approach to each of these services and how they tailor their strategies to specific industries like plumbing.
6. Request a Customized Proposal
- A reputable agency will provide a proposal tailored to your business, detailing the strategies they recommend and the expected outcomes.
- They should explain how their efforts will directly contribute to making your phone ring and generating more leads.
7. Look for Transparency in Reporting and Results
- Ensure the agency offers regular, detailed reports that clearly show what they’re doing, the progress being made, and the return on investment (ROI).
- Ask how they measure success and what KPIs (Key Performance Indicators) they focus on for plumbing companies.
8. Check Their Contract Terms
- Be cautious of agencies that lock you into long-term contracts without a clear exit clause. A good agency should offer flexibility and be confident in their ability to deliver results, not force you into lengthy commitments. If possible, try to find an agency that doesn’t require a contract for plumbers.
9. Start Small with a Trial Period
- If possible, start with a smaller project or a trial period to gauge the agency’s performance before committing to a long-term partnership.
By following these steps, you can find a reliable digital marketing agency that focuses on delivering tangible results, like making your phone ring and increasing your customer base. The right agency will act as a partner, helping you grow your plumbing business while you focus on running it.
Need Help With Digital Marketing for Your Plumbing Company?
At LocalSink, we believe digital marketing should be an added benefit to your local home service business, and not add more problems to your plate. We do not use contracts with our clients, since we believe that if our services are good, you’ll stay! We track everything to make sure results are measured, and make sure that clients get regular face-to-face interaction with our team.
If you are looking for an agency that checks all the boxes above, consider contacting us!
How to DOUBLE Leads for Your Pest Control Company in ONE WEEK With Google Local Services Ads
If you’re a pest control company with a Google Local Services Ads account, you might be tired of not seeing the amount of leads you were hoping for. You might be frustrated hearing other companies in your area getting handed hundreds of LSA leads each month on a silver platter, while you’re lucky if you even get 1 or 2 leads in a month!
It’s so darn frustrating! The good news is that you aren’t alone.
Now, imagine looking at your LSA dashboard and seeing more leads than you can handle, at a cost per lead that you CAN handle!
Here’s a step-by-step guide for managing your Google Local Services Ads (LSA) and Google Business Profile (GBP) for your pest control company:
1. Optimize for “Pest Control Near Me” Searches:
- Ensure proper category setup: Your LSA and GBP should be categorized under “Pest Control Services.”
- Use relevant keywords in review replies: Naturally include phrases like “pest control near me” in review responses to boost local SEO.
- Define service areas: Accurately list the service areas you cover and exclude any areas where you don’t provide pest control services.
2. Weekly GBP Updates:
- Post updates weekly: Share tips on seasonal pest prevention, recent projects, or customer testimonials. Highlight common pest control services like termite treatments, rodent control, and bed bug extermination.
- Incorporate pest control-related keywords such as “ant extermination,” “termite control,” or “mosquito treatment” to increase local relevance.
3. Reply to All Reviews:
- Respond to every review: Be appreciative in responses to positive reviews and professional in negative ones, offering solutions if needed.
- Use pest-related terms in your replies to improve rankings for specific pest control services.
4. Add Plenty of Pictures:
- Regularly upload photos showcasing:
- Your team handling pest control equipment.
- Before and after pest treatment results.
- Branded trucks and equipment.
- Specific tools used for pest control (like traps or sprayers).
- Update pictures weekly to keep your GBP visually appealing.
5. Lead Management:
- Clear the “New,” “Active,” and “Booked” tabs quickly: Mark leads as “completed” or “archived” as soon as they’re dealt with to encourage more leads.
- Daily lead review: Ensure someone is responsible for updating lead statuses daily to maintain a smooth lead flow.
6. Insurance Verification:
- Check insurance status regularly: Make sure your insurance details are always current to avoid LSA account suspensions. Set monthly reminders to review insurance details.
7. Service Areas and Exclusion List:
- Ensure service areas are clearly marked: Include all relevant areas where your pest control company operates and exclude areas where you don’t.
- Review this list periodically to reflect any changes in your coverage.
8. Policy Manager Tab:
- Monitor for policy violations: Check the “Policy Manager” tab weekly to ensure there are no violations or warnings that could disrupt your LSA performance.
9. Budget Management:
- Set to ‘Automated Bidding (maximize leads)’: This ensures Google maximizes your lead volume within your allocated budget.
- Adjust budget weekly: Set the budget to three times the previous week’s spend to maintain a balance between lead generation and cost efficiency.
10. Business Bio and Details:
- Select enticing options such as “Free in-home estimate” or “100% satisfaction guarantee” to stand out to potential customers.
- Ensure phone number and website are correct: Double-check that your business’s contact details are correctly listed on both your LSA and GBP profiles.
11. Business Hours or Ad Schedule:
- Align hours with phone answering availability: Make sure your business hours reflect when someone is available to answer phone calls. If needed, adjust the ad schedule to custom hours when phone calls can be handled.
Regular Monitoring:
- Weekly Review Checklist:
- Post new GBP updates.
- Respond to all reviews.
- Add fresh pictures.
- Mark leads as completed or archived.
- Review insurance status for updates.
- Update service areas and exclusions as needed.
- Monitor the Policy Manager tab for violations.
- Adjust budget based on the previous week’s spend.
This guide will help you ensure your pest control company’s LSA and GBP remain optimized for increased visibility and lead generation.
If this all sounds like too much, you might want to find a digital marketing agency that offers Google Local Services Ads Management– or…
Tired of Waiting for Local Services Ads Results for Your Pest Control Company?
We can help! LocalSink is a digital marketing agency for pest control companies like you!
In fact, we’ll do the same thing we did for EcoCare Pest Control, the best pest control company in Portland, OR!
We check all the boxes above, and more! We handle all aspects of your digital marketing, so that you can focus on what you do best- building your business. Don’t hesitate to contact us if you think we could help!