
Category: Agency Tutorials
How to Fix Tag Not Firing After Form Submission in Google Tag Manager

Setting up conversion tracking is critical to knowing whether leads generated from your website are being accurately recorded. However, you may encounter a situation where the Google Tag doesn’t fire when a user completes a form and is redirected to a thank you page. In this guide, we’ll show you how we solved that problem by changing the page URL and reconfiguring triggers, even though the exact underlying cause remained unclear.
Symptoms of the Issue
- Form Submission Not Tracked
The user completes a form, and although they land on a thank you page, your Google Tag isn’t registering the conversion in Google Tag Manager or Google Analytics. - Other Tags Work
Phone call click tags or other triggers might still work correctly, isolating the problem to the thank you page for form submissions. - “Not Secure” or HTTP / HTTPS Mismatch
You might notice that the original thank you page isn’t loading over HTTPS or shows “Not Secure” in the browser.
Step-by-Step Troubleshooting & Fix
1. Verify Your Tag Setup
- Open Google Tag Manager (GTM):
Ensure that you’ve set up a trigger tied to the correct page URL, e.g.,/thank-youor a custom event if you’re using form triggers. - Check GTM Preview Mode:
Click on Preview in GTM, enter the page URL, and try the form submission to see if the tag fires. If not, GTM won’t show the tag as activated.
2. Note the Problematic Thank You Page
- HTTP vs. HTTPS:
Sometimes a mismatch (or old page settings) can prevent the correct trigger. If your page isn’t loading over HTTPS, the tag may fail. - Potentially Corrupted Page:
Even rebuilding the same exact page with the same slug (e.g.,/thank-you) might still cause issues.
3. Create a New Thank You Page with a Different URL
- Rename or Create a Page with a New URL:
Instead ofexample.com/thank-you, try something likeexample.com/submission-receivedor/thank-you-2. - Replace Old Links:
Update the form’s redirect setting to this new page.
4. Test the New Page in GTM Preview
- Refresh GTM Preview:
Enter the new page URL in Preview mode. - Complete the Form Again:
Fill out the form, click submit, and ensure you land on the newly named page. - Confirm Tag Fires:
In the GTM debug panel, the conversion tag (e.g., “Form Submission Thank You”) should now appear as fired.
5. Confirm HTTPS and Security
- Use HTTPS:
Make sure the new thank you page is loading with a valid SSL certificate (i.e., it shows “https://” in the address bar). - Cache Clear (Optional):
If changes aren’t immediately reflected, clear your site cache or use an incognito window to ensure you’re seeing the most recent version.
Possible Reasons for This Fix
- Page-Specific Configurations:
The original thank you page may have had leftover scripts or settings from a previous setup. - SSL / Mixed Content Issues:
Attempting to load tracking code over HTTP or a mismatch in site settings can cause tags to fail. - URL Conflicts or Corruption:
Even brand-new pages with the same slug sometimes carry over older metadata, leading to unexpected behavior.
Best Practices for Thank You Page Tracking
- Unique, Descriptive Slug:
Use a unique URL (e.g.,/submission-received) to avoid conflicts with older page data. - Consistent SSL Configuration:
Force HTTPS across your entire site to prevent “Not Secure” warnings and possible tag failures. - Regularly Test Conversions:
Re-run GTM preview and test form submissions after site updates to catch any breaks in triggers. - Document Changes:
Keep notes on form settings, triggers, or page URLs so you can quickly revert if issues arise.
Final Thoughts
While the exact root cause of a non-firing tag may remain unclear, creating a fresh thank you page with a new URL often solves the problem. If your old page slug was causing issues—whether due to HTTP/HTTPS mismatch, leftover scripts, or page corruption—switching to a unique slug and updating your triggers can restore accurate conversion tracking.
If you still can’t get your tag to fire after these steps, consider re-examining your GTM triggers, re-checking your page’s SSL status, or contacting technical support for additional help.
How to Publish/Schedule a Podcast on Buzzsprout the Right Way
Launching a podcast is an exciting endeavor that allows you to share your expertise, stories, and insights with a global audience. Buzzsprout is a user-friendly podcast hosting platform that simplifies the process of publishing and scheduling your podcast episodes, ensuring that your content reaches listeners seamlessly. Whether you’re a seasoned podcaster or just starting out, understanding the right way to publish and schedule your podcast on Buzzsprout can significantly enhance your podcasting experience and audience engagement. This comprehensive guide will walk you through the steps to publish and schedule your podcast effectively using Buzzsprout, ensuring a smooth and professional podcasting journey.
Why Use Buzzsprout for Podcast Publishing and Scheduling?
Buzzsprout stands out as a top choice for podcast hosting due to its intuitive interface, robust features, and excellent customer support. Here are some compelling reasons to choose Buzzsprout for your podcasting needs:
Benefits of Using Buzzsprout
- Ease of Use: Buzzsprout’s simple dashboard makes uploading, publishing, and managing episodes straightforward, even for beginners.
- Scheduling Flexibility: Plan and schedule your episodes in advance, ensuring consistent content delivery without the need for manual uploads.
- Comprehensive Analytics: Gain insights into your podcast’s performance with detailed analytics, helping you understand your audience and optimize your content.
- Wide Distribution: Automatically distribute your podcast to major platforms like Apple Podcasts, Spotify, Google Podcasts, and more, expanding your reach effortlessly.
- Professional Features: Utilize features like dynamic content insertion, transcription services, and customizable podcast players to enhance your podcast’s professionalism and accessibility.
Step-by-Step Guide to Publishing and Scheduling Your Podcast on Buzzsprout
Publishing and scheduling your podcast episodes on Buzzsprout involves a series of straightforward steps. Follow this guide to ensure that your podcast is published correctly and reaches your audience effectively.
Step 1: Sign Up and Set Up Your Buzzsprout Account
- Create an Account:
- Visit Buzzsprout and click on the Sign Up button.
- Enter your email address and choose a password, or sign up using your Google or Facebook account.
- Set Up Your Podcast:
- After signing up, you’ll be prompted to create a new podcast.
- Enter your podcast title, tagline, and select the appropriate category that best describes your podcast’s content.
- Upload your podcast cover art, ensuring it meets Buzzsprout’s recommended specifications for optimal display across platforms.
- Customize Podcast Settings:
- Configure your podcast’s language, region, and other relevant settings.
- Review Buzzsprout’s terms of service and privacy policy, then proceed to set up your account.
Step 2: Upload Your Podcast Episode
- Navigate to the Dashboard:
- Once your account is set up, you’ll be directed to your Buzzsprout dashboard.
- Click on the Upload an Episode button to begin the publishing process.
- Upload Your Audio File:
- Click on the Choose File button and select the audio file (MP3 or WAV) you wish to upload from your computer.
- Buzzsprout recommends uploading files with a bitrate of 128 kbps or higher for optimal audio quality.
- Enter Episode Details:
- Episode Title: Provide a clear and descriptive title for your episode.
- Episode Description: Write a detailed description that outlines the content of the episode, including any key points, guest information, or resources mentioned.
- Episode Number: Assign an episode number to help organize your podcast and make it easier for listeners to navigate.
- Add Episode Metadata:
- Publication Date: Set the date and time you want the episode to be published.
- Explicit Content: Indicate whether your episode contains explicit content, ensuring compliance with platform guidelines.
Step 3: Schedule Your Podcast Episode
- Set Publication Date:
- In the Publication Date section, choose the date and time you want your episode to go live.
- Scheduling episodes in advance helps maintain a consistent release schedule, which is crucial for building and retaining your audience.
- Enable Automatic Publication:
- Buzzsprout allows you to schedule episodes up to 90 days in advance.
- Enable the Automatic Publication feature to ensure your episode is published at the designated time without manual intervention.
- Review and Confirm:
- Double-check all the details you’ve entered to ensure accuracy.
- Click on the Schedule Episode button to finalize the scheduling process.
Step 4: Embed Your Podcast Episode on Your Website
Embedding your podcast episodes on your website can enhance engagement and provide an additional platform for your audience to listen to your content. Here’s how to embed a podcast episode using Buzzsprout:
- Access the Embed Code:
- In your Buzzsprout dashboard, navigate to the specific episode you want to embed.
- Click on the Embed button to generate the HTML code for the episode player.
- Copy the Embed Code:
- Buzzsprout will provide you with a customizable embed code.
- Click on the Copy button to copy the code to your clipboard.
- Add the Embed Code to Your Website:
- Log in to your website’s Content Management System (CMS) or access the website’s codebase directly.
- Navigate to the page or post where you want to display the podcast episode.
- If you’re using WordPress, click on the Add Block button and select Custom HTML.
- Paste the copied embed code into the HTML block.
- Click Preview to ensure the player appears correctly, then Publish or Update your page.
Step 5: Distribute Your Podcast to Major Platforms
Buzzsprout simplifies the distribution process by automatically submitting your podcast to major platforms. However, it’s good practice to verify the distribution settings:
- Check Distribution Settings:
- In your Buzzsprout dashboard, go to the Directories tab.
- Ensure that all desired platforms (e.g., Apple Podcasts, Spotify, Google Podcasts) are enabled for distribution.
- Manually Submit if Necessary:
- If a platform isn’t listed, you can manually submit your podcast RSS feed provided by Buzzsprout.
- Follow the submission guidelines of each platform to ensure your podcast is listed correctly.
Step 6: Monitor Your Podcast Performance
Keeping track of your podcast’s performance helps you understand your audience and optimize your content strategy.
- Access Analytics:
- In the Buzzsprout dashboard, navigate to the Stats tab.
- Review metrics such as downloads, listener locations, and device usage.
- Adjust Strategies:
- Use the insights gained from analytics to refine your podcast topics, publishing schedule, and marketing efforts.
Best Practices for Publishing and Scheduling Your Podcast on Buzzsprout
Implementing best practices ensures that your podcast is published smoothly and reaches your intended audience effectively.
Maintain a Consistent Release Schedule
- Why: Consistency helps build and retain your audience, as listeners know when to expect new episodes.
- How: Use Buzzsprout’s scheduling feature to plan and release episodes at regular intervals (e.g., weekly, bi-weekly).
Optimize Episode Titles and Descriptions
- Why: Clear and descriptive titles improve searchability and attract potential listeners.
- How: Include relevant keywords in your episode titles and write comprehensive descriptions that provide value and context.
Leverage Social Media and Marketing
- Why: Promoting your episodes on social media platforms increases visibility and attracts new listeners.
- How: Share embedded players, episode links, and highlight key points from your episodes across your social media channels.
Engage with Your Audience
- Why: Building a community around your podcast fosters loyalty and encourages word-of-mouth promotion.
- How: Encourage listeners to leave reviews, participate in discussions, and provide feedback to improve your content.
Utilize Buzzsprout’s Advanced Features
- Dynamic Content Insertion: Add special offers, ads, or announcements to your episodes without re-uploading them.
- Transcription Services: Improve accessibility and SEO by adding transcriptions of your episodes.
Common Mistakes to Avoid
Avoiding these common pitfalls can enhance the effectiveness of your podcast publishing and scheduling efforts.
Inconsistent Publishing Schedule
- Impact: Irregular releases can confuse listeners and lead to a loss of audience interest.
- Solution: Plan and schedule your episodes in advance using Buzzsprout’s scheduling tools to maintain consistency.
Poor Audio Quality
- Impact: Low-quality audio can deter listeners and reflect poorly on your professionalism.
- Solution: Invest in a good microphone, use soundproofing, and edit your episodes to ensure clear and crisp audio.
Neglecting SEO Optimization
- Impact: Without proper SEO, your podcast may not reach its full potential audience.
- Solution: Optimize your episode titles, descriptions, and transcripts with relevant keywords to improve search engine visibility.
Overlooking Audience Engagement
- Impact: Failing to engage with your audience can result in lower listener retention and limited growth.
- Solution: Actively interact with your listeners through social media, emails, and by incorporating their feedback into your episodes.
Ignoring Analytics
- Impact: Not monitoring your podcast’s performance can lead to missed opportunities for improvement and growth.
- Solution: Regularly review Buzzsprout’s analytics to understand your audience better and refine your content strategy accordingly.
Frequently Asked Questions
Can I Schedule Multiple Episodes at Once on Buzzsprout?
Yes, Buzzsprout allows you to schedule multiple episodes in advance. This feature is particularly useful for maintaining a consistent release schedule and managing your podcast efficiently.
How Do I Change the Publication Date of a Scheduled Episode?
To change the publication date:
- Navigate to the Episodes tab in your Buzzsprout dashboard.
- Click on the episode you want to reschedule.
- Edit the Publication Date and time.
- Save the changes to update the schedule.
Is It Possible to Automatically Publish Episodes as Soon as They’re Uploaded?
Yes, when uploading an episode, you can choose to Publish Immediately or Schedule it for a later date. Selecting Publish Immediately will make the episode live as soon as the upload completes.
Can I Track the Performance of Specific Episodes?
Absolutely. Buzzsprout’s analytics provide detailed insights into each episode’s performance, including download counts, listener locations, and device usage. Use this data to understand what resonates with your audience and tailor future content accordingly.
Do I Need Technical Skills to Use Buzzsprout?
No, Buzzsprout is designed to be user-friendly, catering to podcasters of all technical levels. Its intuitive interface simplifies the process of uploading, scheduling, and managing your podcast episodes.
Maximizing the Impact of Your Podcast on Buzzsprout
To fully leverage the benefits of publishing and scheduling your podcast on Buzzsprout, integrate these strategies into your broader podcasting and marketing efforts.
Align with Your Marketing Goals
- Define Objectives: Clearly outline what you want to achieve with your podcast, such as brand awareness, lead generation, or establishing authority in your niche.
- Tailor Content: Ensure your podcast content aligns with your marketing goals and resonates with your target audience.
Use Data to Optimize Strategies
- Analyze Listener Data: Utilize Buzzsprout’s analytics to gain insights into listener demographics and preferences.
- Refine Content: Use data-driven insights to refine your podcast topics, episode formats, and release schedules for better engagement.
Integrate with Other Marketing Tools
- Connect with CRM Systems: Integrate your podcast with Customer Relationship Management (CRM) tools to streamline lead management and track interactions.
- Leverage Email Marketing: Use email marketing to promote your episodes and engage with your subscribers effectively.
Foster Team Collaboration
- Share Responsibilities: Delegate tasks such as editing, marketing, and episode planning to team members to enhance productivity and creativity.
- Regular Meetings: Hold regular team meetings to discuss podcast progress, analyze performance data, and brainstorm new ideas.
Enhance Customer Experience
- Provide Value: Focus on delivering valuable and engaging content that addresses your audience’s needs and interests.
- Engage with Listeners: Encourage listener interaction through Q&A sessions, feedback requests, and by addressing their comments in your episodes.
Conclusion
Publishing and scheduling your podcast on Buzzsprout the right way is a strategic approach that can significantly enhance your podcast’s reach, engagement, and overall success. By following this step-by-step guide, implementing best practices, and avoiding common mistakes, you can ensure a seamless podcasting experience that resonates with your audience and supports your business goals. Embrace the tools and features Buzzsprout offers to optimize your podcasting efforts, and watch your podcast thrive in the competitive digital landscape.
How to Embed a Podcast Episode on Your Website Buzzsprout or Other RSS Feed

Launching a podcast can be an exciting venture, offering a platform to share your ideas, expertise, and stories with a global audience. Buzzsprout is a popular podcast hosting service that simplifies the process of publishing, scheduling, and managing your podcast episodes. Whether you’re a seasoned podcaster or just starting out, understanding the right way to publish and schedule your podcast on Buzzsprout can significantly enhance your podcasting experience and reach. This comprehensive guide will walk you through the essential steps to publish and schedule your podcast effectively using Buzzsprout, ensuring a smooth and professional podcasting journey.
Why Use Buzzsprout for Podcast Publishing and Scheduling?
Buzzsprout stands out as a user-friendly podcast hosting platform that caters to both beginners and experienced podcasters. Here are some compelling reasons to choose Buzzsprout for your podcasting needs:
Benefits of Using Buzzsprout
- Ease of Use: Buzzsprout’s intuitive interface makes it easy to upload, publish, and manage your podcast episodes without any technical expertise.
- Scheduling Flexibility: Plan and schedule your episodes in advance, ensuring consistent content delivery to your audience.
- Comprehensive Analytics: Gain insights into your podcast’s performance with detailed analytics, helping you understand your audience and optimize your content.
- Wide Distribution: Automatically distribute your podcast to major platforms like Apple Podcasts, Spotify, Google Podcasts, and more, expanding your reach effortlessly.
- Professional Features: Utilize features like dynamic content insertion, transcription services, and customizable podcast players to enhance your podcast’s professionalism and accessibility.
Step-by-Step Guide to Publishing and Scheduling Your Podcast on Buzzsprout
Publishing and scheduling your podcast episodes on Buzzsprout involves a series of straightforward steps. Follow this guide to ensure that your podcast is published correctly and reaches your audience effectively.
Step 1: Sign Up and Set Up Your Buzzsprout Account
- Create an Account:
- Visit Buzzsprout and click on the Sign Up button.
- Enter your email address and choose a password, or sign up using your Google or Facebook account.
- Set Up Your Podcast:
- After signing up, you’ll be prompted to create a new podcast.
- Enter your podcast title, tagline, and select the appropriate category that best describes your podcast’s content.
- Upload your podcast cover art, ensuring it meets Buzzsprout’s recommended specifications for optimal display across platforms.
- Customize Podcast Settings:
- Configure your podcast’s language, region, and other relevant settings.
- Review Buzzsprout’s terms of service and privacy policy, then proceed to set up your account.
Step 2: Upload Your Podcast Episode
- Navigate to the Dashboard:
- Once your account is set up, you’ll be directed to your Buzzsprout dashboard.
- Click on the Upload an Episode button to begin the publishing process.
- Upload Your Audio File:
- Click on the Choose File button and select the audio file (MP3 or WAV) you wish to upload from your computer.
- Buzzsprout recommends uploading files with a bitrate of 128 kbps or higher for optimal audio quality.
- Enter Episode Details:
- Episode Title: Provide a clear and descriptive title for your episode.
- Episode Description: Write a detailed description that outlines the content of the episode, including any key points, guest information, or resources mentioned.
- Episode Number: Assign an episode number to help organize your podcast and make it easier for listeners to navigate.
- Add Episode Metadata:
- Publication Date: Set the date and time you want the episode to be published.
- Explicit Content: Indicate whether your episode contains explicit content, ensuring compliance with platform guidelines.
Step 3: Schedule Your Podcast Episode
- Set Publication Date:
- In the Publication Date section, choose the date and time you want your episode to go live.
- Scheduling episodes in advance helps maintain a consistent release schedule, which is crucial for building and retaining your audience.
- Enable Automatic Publication:
- Buzzsprout allows you to schedule episodes up to 90 days in advance.
- Enable the Automatic Publication feature to ensure your episode is published at the designated time without manual intervention.
- Review and Confirm:
- Double-check all the details you’ve entered to ensure accuracy.
- Click on the Schedule Episode button to finalize the scheduling process.
Step 4: Embed Your Podcast Episode on Your Website
Embedding your podcast episodes on your website can enhance engagement and provide an additional platform for your audience to listen to your content. Here’s how to embed a podcast episode using Buzzsprout:
- Access the Embed Code:
- In your Buzzsprout dashboard, navigate to the specific episode you want to embed.
- Click on the Embed button to generate the HTML code for the episode player.
- Copy the Embed Code:
- Buzzsprout will provide you with a customizable embed code.
- Click on the Copy button to copy the code to your clipboard.
- Add the Embed Code to Your Website:
- Log in to your website’s Content Management System (CMS) or access the website’s codebase directly.
- Navigate to the page or post where you want to display the podcast episode.
- If you’re using WordPress, click on the Add Block button and select Custom HTML.
- Paste the copied embed code into the HTML block.
- Click Preview to ensure the player appears correctly, then Publish or Update your page.
Step 5: Distribute Your Podcast to Major Platforms
Buzzsprout simplifies the distribution process by automatically submitting your podcast to major platforms. However, it’s good practice to verify the distribution settings:
- Check Distribution Settings:
- In your Buzzsprout dashboard, go to the Directories tab.
- Ensure that all desired platforms (e.g., Apple Podcasts, Spotify, Google Podcasts) are enabled for distribution.
- Manually Submit if Necessary:
- If a platform isn’t listed, you can manually submit your podcast RSS feed provided by Buzzsprout.
- Follow the submission guidelines of each platform to ensure your podcast is listed correctly.
Step 6: Monitor Your Podcast Performance
Keeping track of your podcast’s performance helps you understand your audience and optimize your content strategy.
- Access Analytics:
- In the Buzzsprout dashboard, navigate to the Stats tab.
- Review metrics such as downloads, listener locations, and device usage.
- Adjust Strategies:
- Use the insights gained from analytics to refine your podcast topics, publishing schedule, and marketing efforts.
Best Practices for Publishing and Scheduling Your Podcast on Buzzsprout
Implementing best practices ensures that your podcast is published smoothly and reaches your intended audience effectively.
Maintain a Consistent Release Schedule
- Why: Consistency helps build and retain your audience, as listeners know when to expect new episodes.
- How: Use Buzzsprout’s scheduling feature to plan and release episodes at regular intervals (e.g., weekly, bi-weekly).
Optimize Episode Titles and Descriptions
- Why: Clear and descriptive titles improve searchability and attract potential listeners.
- How: Include relevant keywords in your episode titles and write comprehensive descriptions that provide value and context.
Leverage Social Media and Marketing
- Why: Promoting your episodes on social media platforms increases visibility and attracts new listeners.
- How: Share embedded players, episode links, and highlight key points from your episodes across your social media channels.
Engage with Your Audience
- Why: Building a community around your podcast fosters loyalty and encourages word-of-mouth promotion.
- How: Encourage listeners to leave reviews, participate in discussions, and provide feedback to improve your content.
Utilize Buzzsprout’s Advanced Features
- Dynamic Content Insertion: Add special offers, ads, or announcements to your episodes without re-uploading them.
- Transcription Services: Improve accessibility and SEO by adding transcriptions of your episodes.
Common Mistakes to Avoid
Avoiding these common pitfalls can enhance the effectiveness of your podcast publishing and scheduling efforts.
Inconsistent Publishing Schedule
- Impact: Irregular releases can confuse listeners and lead to a loss of audience interest.
- Solution: Plan and schedule your episodes in advance using Buzzsprout’s scheduling tools to maintain consistency.
Poor Audio Quality
- Impact: Low-quality audio can deter listeners and reflect poorly on your professionalism.
- Solution: Invest in a good microphone, use soundproofing, and edit your episodes to ensure clear and crisp audio.
Neglecting SEO Optimization
- Impact: Without proper SEO, your podcast may not reach its full potential audience.
- Solution: Optimize your episode titles, descriptions, and transcripts with relevant keywords to improve search engine visibility.
Overlooking Audience Engagement
- Impact: Failing to engage with your audience can result in lower listener retention and limited growth.
- Solution: Actively interact with your listeners through social media, emails, and by incorporating their feedback into your episodes.
Ignoring Analytics
- Impact: Not monitoring your podcast’s performance can lead to missed opportunities for improvement and growth.
- Solution: Regularly review Buzzsprout’s analytics to understand your audience better and refine your content strategy accordingly.
Frequently Asked Questions
Can I Schedule Multiple Episodes at Once on Buzzsprout?
Yes, Buzzsprout allows you to schedule multiple episodes in advance. This feature is particularly useful for maintaining a consistent release schedule and managing your podcast efficiently.
How Do I Change the Publication Date of a Scheduled Episode?
To change the publication date:
- Navigate to the Episodes tab in your Buzzsprout dashboard.
- Click on the episode you want to reschedule.
- Edit the Publication Date and time.
- Save the changes to update the schedule.
Is It Possible to Automatically Publish Episodes as Soon as They’re Uploaded?
Yes, when uploading an episode, you can choose to Publish Immediately or Schedule it for a later date. Selecting Publish Immediately will make the episode live as soon as the upload completes.
Can I Track the Performance of Specific Episodes?
Absolutely. Buzzsprout’s analytics provide detailed insights into each episode’s performance, including download counts, listener locations, and device usage. Use this data to understand what resonates with your audience and tailor future content accordingly.
Do I Need Technical Skills to Use Buzzsprout?
No, Buzzsprout is designed to be user-friendly, catering to podcasters of all technical levels. Its intuitive interface simplifies the process of uploading, scheduling, and managing your podcast episodes.
Maximizing the Impact of Your Podcast on Buzzsprout
To fully leverage the benefits of publishing and scheduling your podcast on Buzzsprout, integrate these strategies into your broader podcasting and marketing efforts.
Align with Your Marketing Goals
- Define Objectives: Clearly outline what you want to achieve with your podcast, such as brand awareness, lead generation, or establishing authority in your niche.
- Tailor Content: Ensure your podcast content aligns with your marketing goals and resonates with your target audience.
Use Data to Optimize Strategies
- Analyze Listener Data: Utilize Buzzsprout’s analytics to gain insights into listener demographics and preferences.
- Refine Content: Use data-driven insights to refine your podcast topics, episode formats, and release schedules for better engagement.
Integrate with Other Marketing Tools
- Connect with CRM Systems: Integrate your podcast with Customer Relationship Management (CRM) tools to streamline lead management and track interactions.
- Leverage Social Media: Promote your episodes on social media platforms to increase visibility and attract new listeners.
Foster Team Collaboration
- Share Responsibilities: Delegate tasks such as editing, marketing, and episode planning to team members to enhance productivity and creativity.
- Regular Meetings: Hold regular team meetings to discuss podcast progress, analyze performance data, and brainstorm new ideas.
Enhance Customer Experience
- Provide Value: Focus on delivering valuable and engaging content that addresses your audience’s needs and interests.
- Engage with Listeners: Encourage listener interaction through Q&A sessions, feedback requests, and by addressing their comments in your episodes.
Conclusion
Publishing and scheduling your podcast on Buzzsprout the right way is a strategic approach that can significantly enhance your podcast’s reach, engagement, and overall success. By following this step-by-step guide, implementing best practices, and avoiding common mistakes, you can ensure a seamless podcasting experience that resonates with your audience and supports your business goals. Embrace the tools and features Buzzsprout offers to optimize your podcasting efforts, and watch your podcast thrive in the competitive digital landscape.
How to Forward Emails to a New Email in Google Workspace Admin
Managing email communication efficiently is crucial for maintaining productivity and ensuring that important messages are never missed. Whether you’re transitioning to a new domain, consolidating email accounts, or simply wanting to streamline your communication channels, forwarding emails from one address to another in Google Workspace Admin can be immensely helpful. This guide will walk you through the process of setting up email forwarding in Google Workspace Admin, ensuring a seamless transition and uninterrupted email flow.
Why Forward Emails in Google Workspace?
Forwarding emails within Google Workspace offers several benefits that can enhance your business operations:
Benefits of Email Forwarding
- Seamless Transition: Easily transition from an old email address to a new one without losing important communications.
- Centralized Communication: Consolidate multiple email accounts into a single address for easier management.
- Enhanced Productivity: Ensure that all team members receive necessary emails without the need to check multiple inboxes.
- Improved Customer Service: Maintain consistent communication with clients and customers even if email addresses change.
Step-by-Step Guide to Forward Emails in Google Workspace Admin
Follow these detailed steps to set up email forwarding in Google Workspace Admin, ensuring that all emails sent to your old address are automatically forwarded to your new one.
Step 1: Log In to Google Workspace Admin Console
- Access the Admin Console:
- Open your web browser and navigate to admin.google.com.
- Enter your Google Workspace administrator credentials (email and password).
- Navigate to Gmail Settings:
- Once logged in, locate the Apps section in the left-hand sidebar.
- Click on Google Workspace and then select Gmail to access Gmail settings.
Step 2: Configure Email Routing
- Access Routing Settings:
- In the Gmail settings page, scroll down to the bottom.
- Click on Routing to open the email routing configuration.
- Set Up Recipient Address Mapping:
- Look for Email Forwarding Using Recipient Address Map.
- Click on Configure to start setting up forwarding rules.
- Enter a Description:
- Provide a short description for the forwarding rule (e.g., “Forward old email to new email”).
- Add a New Routing Rule:
- Click on the blue Add button to create a new routing rule.
- Specify the Forwarding Details:
- Address: Enter the email address you want to forward from (e.g., [email protected]).
- Map to Address: Enter the new email address you want to forward to (e.g., [email protected]).
- Set Conditions for Forwarding:
- Only External Incoming Messages: Select this option if you want to forward only emails from external sources, excluding internal communications.
- All Incoming Messages: Select this to forward all emails, regardless of the sender.
- Finalize the Routing Rule:
- Review your settings to ensure accuracy.
- Click Save to apply the routing rule.
Step 3: Review and Save Changes
- Confirm the Forwarding Rule:
- After saving, ensure that your new forwarding rule appears in the list of routing settings.
- Allow Time for Changes to Take Effect:
- Email forwarding may take up to 24 hours to become fully operational. Typically, changes are reflected much sooner.
Step 4: Test the Forwarding Setup
- Send a Test Email:
- From an external email account, send a test email to your old email address.
- Verify Forwarding:
- Check your new email address to confirm that the test email has been successfully forwarded.
- Adjust Settings if Necessary:
- If forwarding doesn’t work as expected, revisit the routing settings to ensure all details are correct.
Best Practices for Email Forwarding in Google Workspace
Implementing best practices ensures that your email forwarding setup is secure, efficient, and aligns with your business needs.
Define Clear Forwarding Rules
- Specificity: Clearly define which emails should be forwarded to avoid missing critical communications.
- Consistent Monitoring: Regularly review forwarding rules to ensure they remain relevant and functional.
Maintain Security
- Secure Access: Ensure that only authorized personnel have access to modify email routing settings.
- Monitor Forwarded Emails: Regularly check forwarded emails for any unauthorized or suspicious activity.
Optimize Email Management
- Consolidate Inboxes: If forwarding multiple email accounts, consider consolidating them into a single inbox for easier management.
- Utilize Filters: Use Gmail filters in conjunction with forwarding rules to organize incoming emails effectively.
Common Mistakes to Avoid
Avoiding common pitfalls can help maintain the integrity and effectiveness of your email forwarding setup.
Incorrect Email Addresses
- Impact: Forwarding to the wrong email address can lead to missed or misdirected emails.
- Solution: Double-check all email addresses entered in the routing settings for accuracy.
Overlooking Internal Communications
- Impact: Forwarding internal emails can lead to cluttered inboxes and potential security risks.
- Solution: Use the Only External Incoming Messages option to exclude internal communications from being forwarded.
Not Testing the Setup
- Impact: Unverified forwarding rules can result in undelivered emails.
- Solution: Always send test emails to ensure that forwarding rules are functioning correctly.
Ignoring Forwarding Limits
- Impact: Exceeding forwarding limits can disrupt email flow and impact business operations.
- Solution: Be aware of any limitations or quotas associated with your Google Workspace plan and adjust forwarding rules accordingly.
Frequently Asked Questions
Can I Forward Emails from Multiple Accounts to a Single Email?
Yes, you can set up forwarding rules for multiple email accounts to forward to a single email address. Repeat the forwarding setup process for each account you wish to forward.
How Do I Stop Forwarding Emails?
To stop forwarding emails, navigate back to the Routing settings in the Gmail section of the Admin Console, locate the forwarding rule you want to remove, and delete it.
Will Forwarded Emails Retain Original Sender Information?
Yes, forwarded emails will retain the original sender’s information, allowing you to see who sent the email even after it’s been forwarded to a new address.
Can I Forward Emails Automatically Without Using Routing Rules?
While routing rules are the most efficient way to set up automatic email forwarding in Google Workspace, individual users can also set up forwarding within their Gmail settings. However, using routing rules provides centralized control and is recommended for administrators managing multiple accounts.
What Happens to Emails After Forwarding?
Forwarded emails are delivered to the specified address while remaining in the original inbox, unless you configure additional settings to delete or archive them.
Maximizing the Impact of Email Forwarding
To fully leverage the benefits of email forwarding in Google Workspace, integrate these strategies into your broader communication and operational plans.
Align with Your Communication Goals
- Centralize Communications: Use email forwarding to centralize all business communications into a single inbox for easier management.
- Enhance Collaboration: Ensure that team members receive necessary communications by forwarding relevant emails to their addresses.
Use Data to Optimize Communication
- Analyze Email Traffic: Monitor forwarded emails to understand communication patterns and identify areas for improvement.
- Refine Forwarding Rules: Adjust forwarding rules based on insights gained from email traffic analysis to enhance efficiency.
Integrate with Other Tools
- Connect with CRM Systems: Integrate your email forwarding setup with Customer Relationship Management (CRM) tools to streamline lead management and follow-up processes.
- Leverage Automation Tools: Use automation tools like Zapier in conjunction with email forwarding to trigger actions based on incoming emails.
Foster Team Collaboration
- Share Access Wisely: Ensure that only necessary team members have access to forwarded emails to maintain security and confidentiality.
- Encourage Feedback: Gather feedback from team members on the effectiveness of email forwarding and make adjustments as needed.
Enhance Customer Experience
- Prompt Responses: Use forwarded emails to ensure that customer inquiries are addressed promptly, enhancing customer satisfaction.
- Personalize Interactions: Leverage information from forwarded emails to personalize customer interactions and improve service quality.
Conclusion
Forwarding emails to a new email address in Google Workspace Admin is a straightforward yet powerful tool for managing your business communications effectively. By following this step-by-step guide and implementing best practices, you can ensure that your email forwarding setup is secure, efficient, and aligned with your business goals. Proper email forwarding not only streamlines communication but also enhances productivity and supports your overall operational efficiency.
How to Link a Google Ads Manager Account to a Sub Account
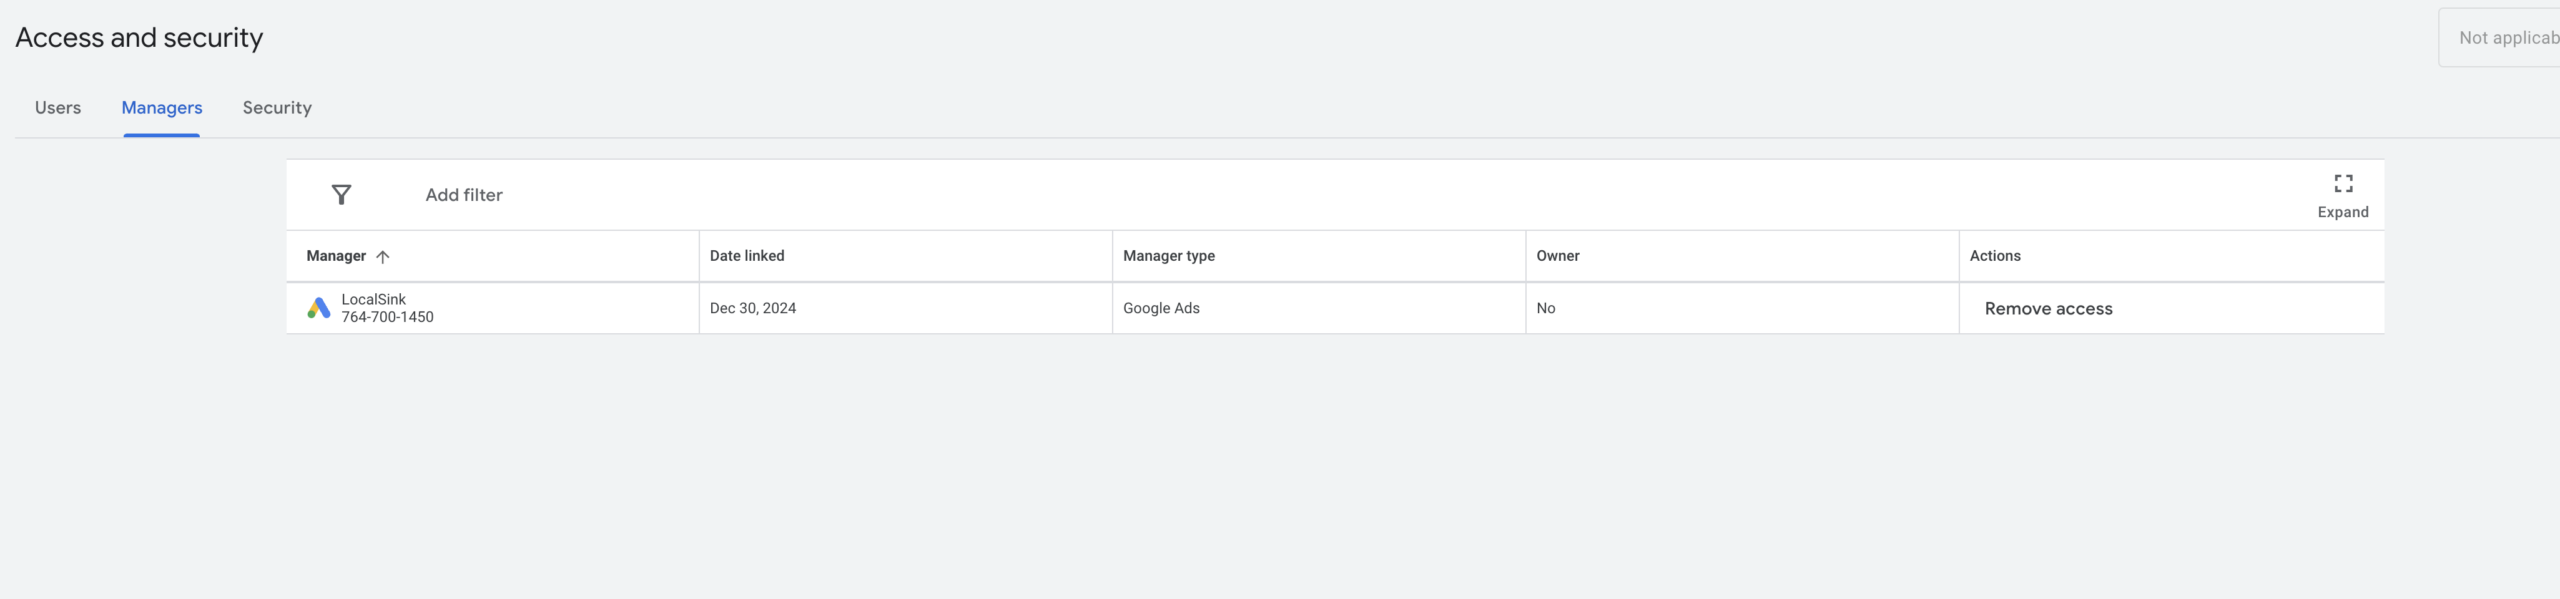
Managing multiple client accounts efficiently is a cornerstone of successful digital marketing agencies. Linking a Google Ads Manager Account (formerly known as MCC – My Client Center) to sub-accounts allows agencies to oversee and manage their clients’ advertising campaigns seamlessly under one roof. In the “How to Link a Google Ads Manager Account to a Sub Account” video, you learn a straightforward method to connect your manager account with your clients’ Google Ads accounts. This comprehensive guide will expand on those instructions, providing you with detailed steps, best practices, and additional insights to ensure a smooth and effective linking process.
Why Linking Google Ads Manager to Sub Accounts Matters
Linking your Google Ads Manager Account to sub-accounts offers numerous benefits that streamline campaign management and enhance overall efficiency.
Centralized Management
Having all your clients’ accounts linked to a single manager account allows for centralized management. This setup simplifies monitoring, reporting, and optimizing campaigns across multiple clients without the need to log into each account individually.
Enhanced Reporting and Insights
A manager account provides aggregated data and insights, enabling you to analyze performance metrics across all linked accounts. This comprehensive view helps in identifying trends, optimizing strategies, and demonstrating value to your clients through detailed reports.
Efficient Billing and Budget Management
Managing billing for multiple accounts becomes more straightforward with a manager account. You can oversee budgets, track expenditures, and ensure that each client’s spending aligns with their marketing goals without juggling separate billing systems.
Streamlined Campaign Optimization
With all accounts accessible from one place, optimizing campaigns becomes more efficient. You can implement changes, test different strategies, and manage ad performance across multiple clients swiftly, ensuring timely adjustments to maximize ROI.
Step-by-Step Guide to Linking Google Ads Manager Account to a Sub Account
Follow these detailed steps to link your Google Ads Manager Account to a client’s Google Ads sub-account effectively.
Step 1: Access Your Google Ads Manager Account
- Sign In to Your Manager Account
- Navigate to Google Ads and sign in using the credentials associated with your Manager Account.
- Navigate to Accounts Section
- In the top menu, click on the Tools and Settings icon (🔧).
- Under the Setup section, select Account access.
Step 2: Initiate the Linking Process
- Go to Accounts
- In the left-hand menu, click on Accounts to view all your linked and unlinked accounts.
- Click on Sub Account Settings
- Find and click on the Sub account settings option.
- Add a New Sub Account
- Click on the + button (often labeled as “Add”) to initiate adding a new sub-account.
- Link Existing Account
- Select Link existing account. This option allows you to connect an already active Google Ads account to your Manager Account.
Step 3: Obtain and Enter Client’s Google Ads ID
- Obtain Client’s Google Ads ID
- Request your client’s Google Ads Customer ID. This ID is a unique number that identifies their Google Ads account.
- Enter the Google Ads ID
- Paste the client’s Google Ads Customer ID into the designated field in your Manager Account interface.
- Send Link Request
- After entering the ID, click Send request. This action sends a linking invitation to your client’s Google Ads account.
Step 4: Client Accepts the Linking Request
- Client Receives Notification
- Your client will receive an email notification or see a pending request in their Google Ads account dashboard indicating that you have requested to link their account.
- Client Accepts the Request
- Client Actions:
- The client logs into their Google Ads account.
- Navigates to Tools and Settings > Account access.
- Under the Managers tab, they will see the pending request from your Manager Account.
- Click Accept to approve the linking request.
- Client Actions:
- Grant Appropriate Access
- The client can choose the level of access you have to their account (e.g., Administrative, Standard, Read-only). It’s advisable to discuss and agree on the appropriate access level based on your agency’s needs.
Step 5: Confirmation of Linking
- Verification in Manager Account
- Once the client accepts the request, refresh your Manager Account dashboard. The linked account should now appear under your Accounts section.
- Ensure Proper Access
- Verify that you have the correct level of access to manage the client’s campaigns effectively. Adjust permissions if necessary.
Best Practices for Linking Google Ads Manager Accounts
Implementing best practices ensures that your linking process is efficient, secure, and beneficial for both your agency and your clients.
Maintain Clear Communication with Clients
- Explain the Process: Clearly explain the benefits and steps involved in linking their accounts to your Manager Account.
- Set Expectations: Discuss the level of access you require and how you will manage their campaigns to build trust and transparency.
Ensure Proper Access Levels
- Grant Necessary Permissions: Only request the access levels necessary to perform your duties effectively. Avoid requesting Administrative access unless absolutely required.
- Review Permissions Regularly: Periodically review and adjust access permissions to maintain security and efficiency.
Keep Client Accounts Organized
- Use Labels and Filters: Organize linked accounts using labels and filters within your Manager Account to streamline management and reporting.
- Regular Audits: Conduct regular audits of your linked accounts to ensure that all connections are active and that there are no unauthorized accesses.
Utilize Manager Account Features
- Automated Rules: Leverage automated rules to manage bids, budgets, and other campaign settings across multiple accounts efficiently.
- Bulk Actions: Use bulk actions to make simultaneous changes to multiple accounts, saving time and ensuring consistency.
Protect Client Data
- Data Privacy: Adhere to data privacy laws and best practices to protect your clients’ sensitive information.
- Secure Access: Implement strong security measures, such as two-factor authentication (2FA), to safeguard access to your Manager Account.
Common Mistakes and How to Avoid Them
Avoiding these common pitfalls can enhance the efficiency and effectiveness of linking your Manager Account to sub-accounts.
Incorrect Customer ID Entry
- Impact: Entering an incorrect Google Ads Customer ID can result in failed linking attempts or unintentional access to the wrong account.
- Solution: Double-check the Customer ID provided by your client before entering it into your Manager Account. Confirm with your client to ensure accuracy.
Overcomplicating the Linking Process
- Impact: Overcomplicating the process can lead to confusion and delays in account linking.
- Solution: Follow the straightforward steps outlined in this guide and maintain clear communication with your client to ensure a smooth linking process.
Requesting Excessive Access Levels
- Impact: Requesting higher access levels than necessary can breach client trust and pose security risks.
- Solution: Only request the access levels required to manage your client’s campaigns effectively. Discuss and agree on permissions with your client beforehand.
Neglecting Regular Account Reviews
- Impact: Failing to regularly review linked accounts can result in outdated permissions and potential security vulnerabilities.
- Solution: Schedule regular reviews of your linked accounts to ensure permissions are up-to-date and that all connections are secure.
Ignoring Client Feedback
- Impact: Ignoring client feedback can lead to dissatisfaction and potential loss of clients.
- Solution: Encourage and address client feedback regarding campaign management and account linking to maintain strong relationships and improve services.
Frequently Asked Questions
How Many Sub Accounts Can I Link to My Google Ads Manager Account?
Google Ads Manager Accounts can manage thousands of sub-accounts, making them ideal for large agencies handling multiple clients. However, it’s essential to manage them efficiently to maintain optimal performance and organization.
Can I Link Multiple Manager Accounts to a Single Sub Account?
No, a single Google Ads sub-account can only be linked to one Manager Account. If you need to manage the same sub-account from different Manager Accounts, you’ll need to remove the existing link and establish a new one, which can disrupt campaign management.
What Happens If a Client Rejects the Linking Request?
If a client rejects the linking request, you will not have access to their Google Ads account. To proceed, communicate with the client to understand their concerns and address any issues they may have before attempting to link the accounts again.
Can I Unlink a Sub Account from My Manager Account?
Yes, you can unlink a sub-account from your Manager Account. However, this action will revoke your access to manage that account. To unlink, navigate to Account access in your Manager Account, select the sub-account, and choose the option to remove or unlink it.
Do I Need to Use Google Tag Manager for Conversion Tracking After Linking Accounts?
Using Google Tag Manager (GTM) for conversion tracking is recommended but not mandatory. GTM simplifies the process of managing tracking codes and implementing conversion tracking across multiple accounts, enhancing efficiency and flexibility.
Maximizing the Impact of Linked Accounts
To fully leverage the benefits of linking your Google Ads Manager Account to sub-accounts, integrate these strategies into your broader marketing and operational plans.
Utilize Advanced Reporting Features
- Custom Reports: Create custom reports in your Manager Account to analyze performance metrics across all linked accounts. Use these reports to identify trends and optimize strategies.
- Automated Reports: Set up automated reports to receive regular updates on campaign performance, saving time and ensuring you stay informed.
Implement Cross-Account Strategies
- Shared Insights: Share insights and best practices across your client accounts to improve overall performance and drive better results.
- Unified Branding: Ensure consistent branding and messaging across all campaigns managed through your Manager Account to reinforce brand identity.
Leverage Bulk Management Tools
- Bulk Edits: Use bulk editing features to make simultaneous changes to multiple campaigns or accounts, increasing efficiency and maintaining consistency.
- Automated Rules: Implement automated rules to manage bids, budgets, and other settings across multiple accounts, ensuring timely adjustments and optimal performance.
Enhance Client Communication
- Regular Updates: Provide clients with regular updates on campaign performance, using the centralized data available in your Manager Account.
- Transparent Reporting: Use the reporting features to offer transparent and detailed performance insights, building trust and demonstrating value.
Stay Informed with Google Ads Updates
- Continuous Learning: Stay updated with the latest Google Ads features, policies, and best practices to ensure you’re utilizing your Manager Account effectively.
- Training and Certifications: Encourage your team to pursue Google Ads certifications and training to enhance their skills and stay ahead of industry trends.
Conclusion
Linking your Google Ads Manager Account to sub-accounts is a vital strategy for agencies managing multiple clients. It streamlines campaign management, enhances reporting and insights, and optimizes ad spend across all your clients’ accounts. By following the step-by-step guide provided in this post, implementing best practices, and avoiding common mistakes, you can ensure a smooth and effective linking process. Properly linked accounts not only improve your operational efficiency but also drive better results for your clients, fostering long-term success and growth in the competitive digital marketing landscape.