
Category: Google Local Service Ads
How to Fix Incorrect Number of Years in Business on Google Guaranteed Ad (LSA)
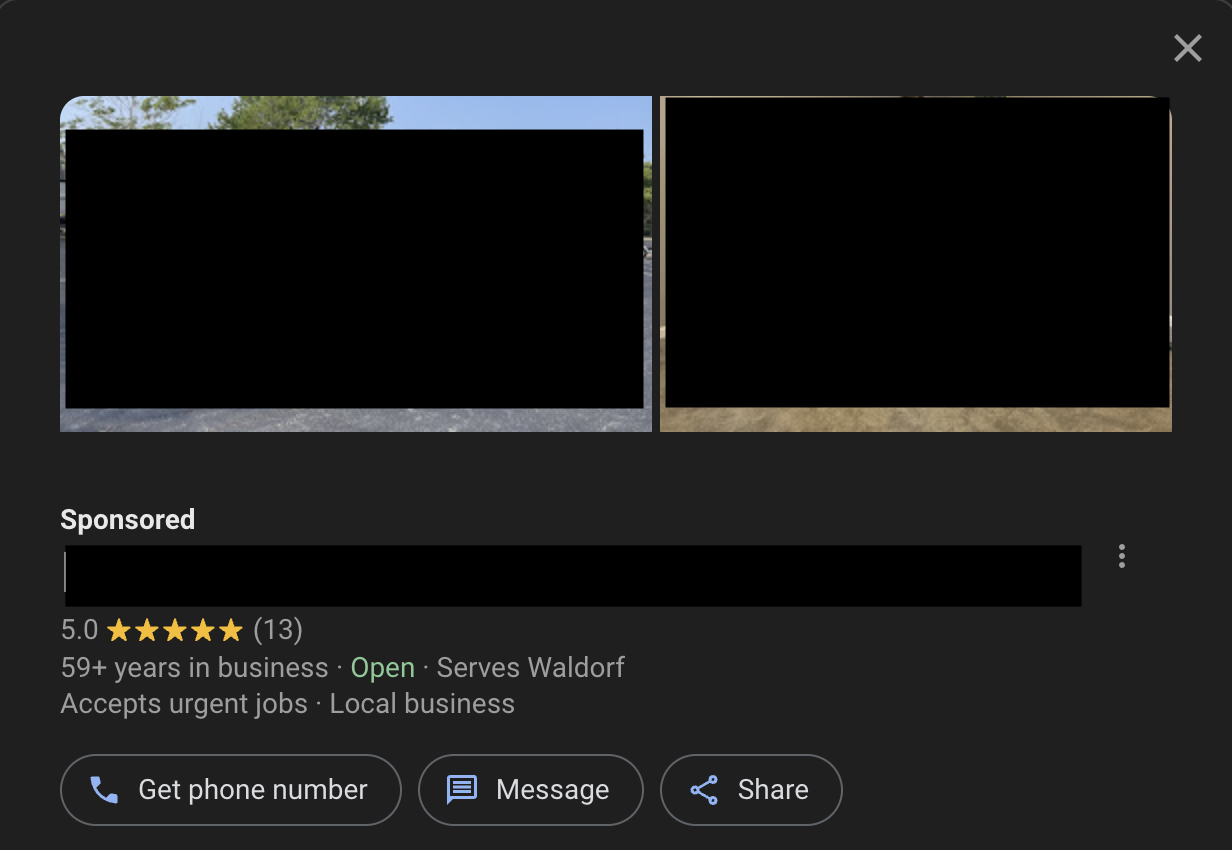
We recently had a client who had the incorrect number of “years in business” on their Local Services Ad listing online. We decided to remove the years in business from the business bio, expecting the problem to be fixed. However, a few weeks had passed, and the years in business was still incorrect.
So, we decided we would call the Local Services Ads support number to get help. The LSA support team can be reached by calling this number: +1 844-263-9884
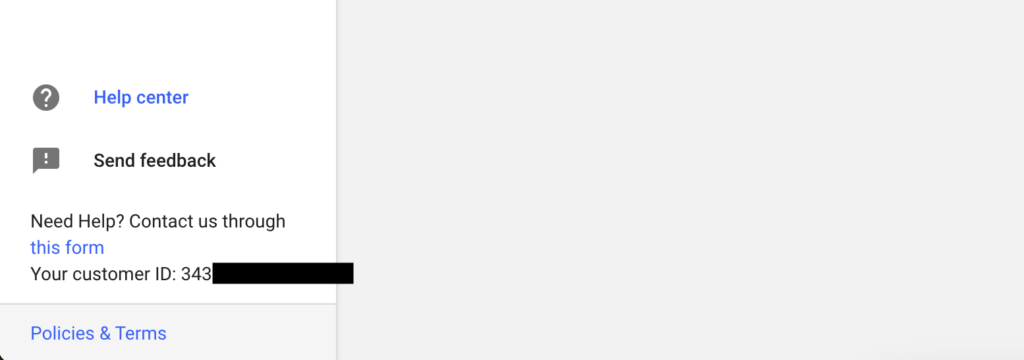
When we called, as usual, we were asked for our account ID number, which can be found by clicking the hamburger menu at the top left of the LSA dashboard, and then the number will be on the bottom left of the screen, as seen on the screenshot below:
You will also need to give the rep your email address, which can be found by going to the “Account Access” tab.
Make sure you have both your customer ID and email address handy to make the process faster.
We then explained our issue, and the rep sent us an email to confirm the changes we wanted to make to the profile:

As you can see, the email asks you to confirm the changes you want to make to the account. We gave them our customer ID, and for the second bullet point, wrote this:
“Request: I authorize Google to change the opening date/founded date of our Local Services Ads business to 1966“
Then, they put us on hold for a few minutes, and when they came back, they stated that they successfully changed our opening date on the Local Services Ad account!
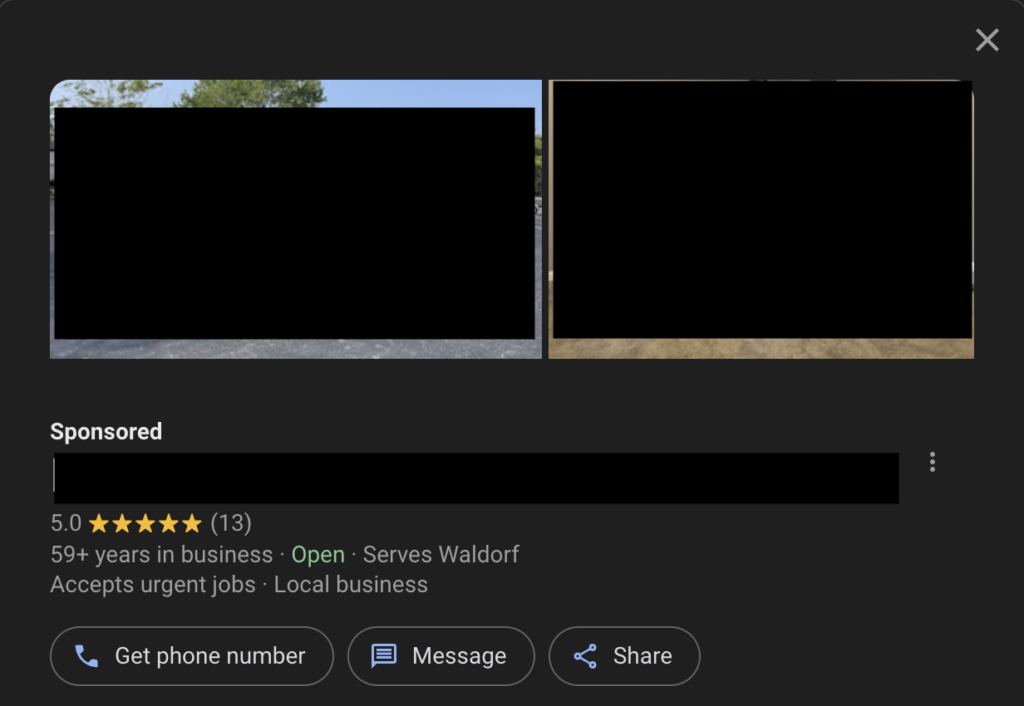
Now, as you can see, the opening date for this profile is showing up correctly, and no longer says “1+ year in business.”
How to Add Photos to Your Google Local Services Ads Account
Adding photos to your Google Local Services Ads (LSA) account is a crucial step for home-service businesses aiming to enhance their online presence and attract more customers. In the “How to Add Photos to Your Google Local Services Ads Account” video, you learn the importance of consistently uploading relevant images to your LSA profile. This comprehensive guide will expand on those instructions, providing you with detailed steps, best practices, and additional insights to maximize the effectiveness of your photo uploads and improve your local SEO.
Why Adding Photos to Your Google Local Services Ads Account Matters
Photos play a significant role in how potential customers perceive your business online. They provide a visual representation of your services, team, and operations, helping to build trust and credibility. Here’s why adding photos to your Google Local Services Ads account is essential:
Enhance Visual Appeal
Visual content is more engaging than text alone. High-quality photos can capture the attention of potential customers, making your ads stand out among competitors. Even simple, well-taken images can significantly improve the attractiveness of your profile.
Build Trust and Credibility
Photos of your team, equipment, and completed projects showcase your professionalism and the quality of your services. They provide tangible proof of what you offer, helping to build trust with potential customers who are considering your services.
Improve Local SEO
Google values businesses that provide rich, engaging content. Regularly updating your LSA account with photos can improve your local SEO rankings, making it easier for customers in your service areas to find you.
Showcase Your Services and Expertise
Photos allow you to highlight specific aspects of your services, such as before-and-after shots of projects, the tools you use, and the environments in which you work. This detailed visual information can help customers understand the scope and quality of your offerings.
Step-by-Step Guide to Adding Photos to Your Google Local Services Ads Account
Follow these steps to effectively add photos to your Google Local Services Ads account, ensuring that your business stands out and attracts the right customers.
Step 1: Access Your Google Local Services Ads Account
- Sign In to Your Google Local Services Ads Account
- Navigate to Google Local Services Ads and click on “Sign in” at the top right corner.
- Enter the Gmail account credentials associated with your LSA account.
- Select the Correct Business Profile
- If you manage multiple business profiles, ensure you select the one where you want to add photos. This guarantees that your updates are made to the appropriate profile.
Step 2: Navigate to the Profile and Budget Tab
- Open the Dashboard
- Once signed in, you’ll be directed to your LSA dashboard. This is where you manage various aspects of your ads, including settings, budget, and service areas.
- Locate the “Profile and Budget” Tab
- In the dashboard menu, find and click on the “Profile and Budget” tab. This section allows you to manage your business information and advertising budget.
Step 3: Add Photos to Your LSA Account
- Scroll Down to the Photos Section
- Within the “Profile and Budget” tab, scroll down until you find the “Photos” section. This is where you can upload images to your LSA profile.
- Click on the “Add Photos” Button
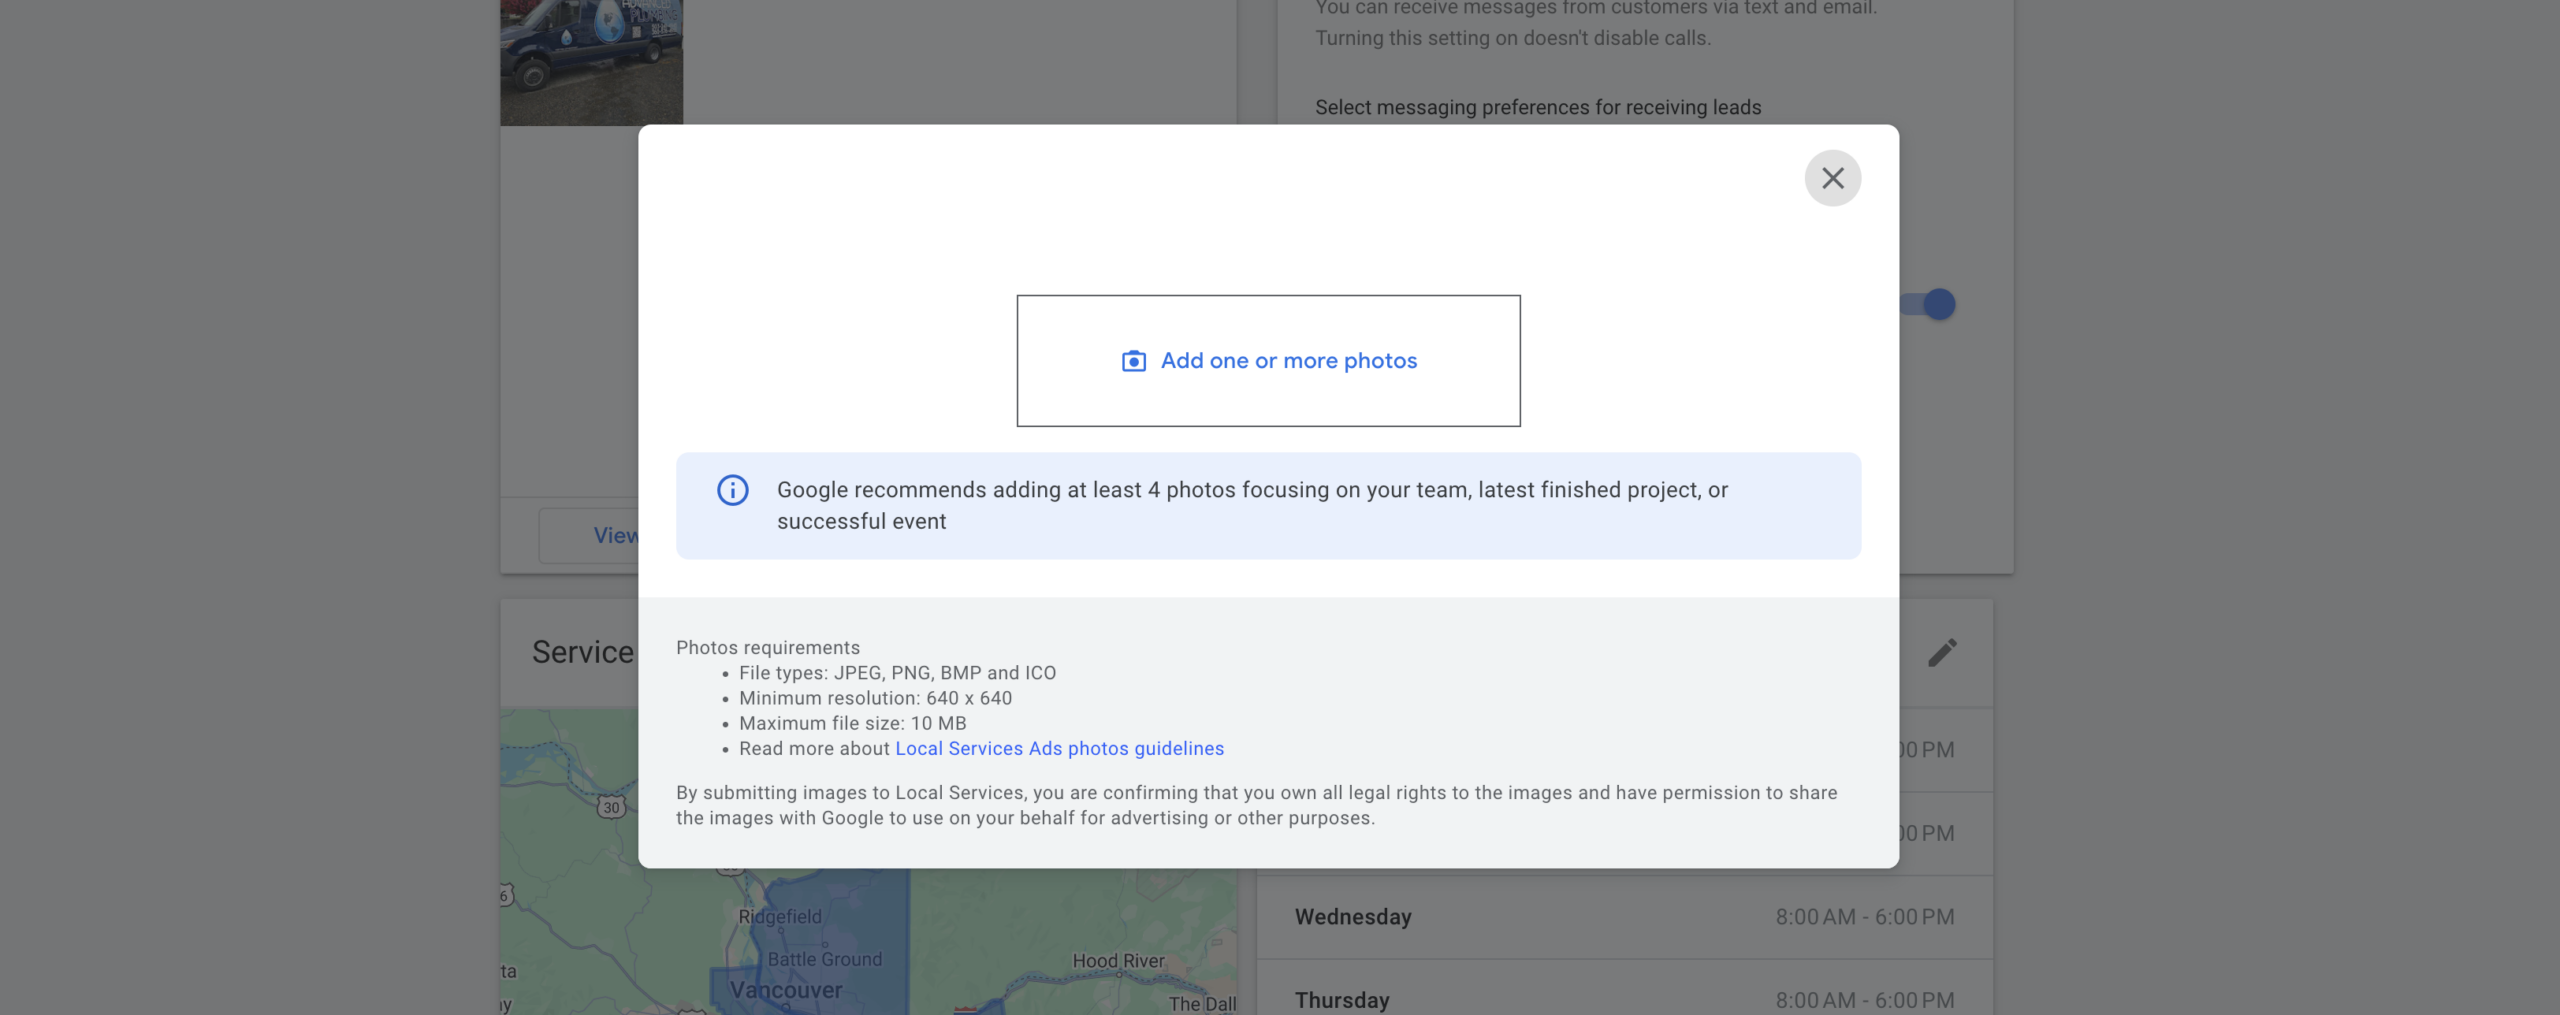
- Click the “Add Photos” button to open the upload interface.
- Upload Relevant Photos
- Choose Your Photos: Select one or more photos that best represent your business. Recommended types include:
- Van or Service Vehicles: Showcasing your branded vehicles helps customers recognize your business in their area.
- Team Members: Photos of your team can personalize your business and build trust.
- Office or Workspace: Displaying your office or work environment gives customers a sense of your professionalism.
- Equipment and Tools: Highlighting the tools you use emphasizes your expertise and the quality of your services.
- Completed Projects: Before-and-after photos of your work demonstrate your capabilities and the results customers can expect.
- Choose Your Photos: Select one or more photos that best represent your business. Recommended types include:
- Upload and Save
- After selecting the appropriate photos, upload them to your LSA account. Once uploaded, click “Save” to ensure the photos are added to your profile.
Step 4: Maintain a Consistent Photo Upload Schedule
- Initial Uploads
- When setting up your LSA account, upload a substantial number of photos to provide a comprehensive view of your business from the outset.
- Regular Updates
- Aim to add new photos at least once a week. If weekly uploads are not feasible, strive to update your photo gallery monthly. Consistent additions keep your profile fresh and engaging.
Best Practices for Adding Photos to Your Google Local Services Ads Account
Implementing best practices ensures that your photo uploads are effective and contribute positively to your online presence.
Use High-Quality Images
- Clarity and Resolution: Ensure that your photos are clear and have a high resolution. Blurry or pixelated images can create a negative impression of your business.
- Proper Lighting: Good lighting enhances the quality of your photos. Natural light is ideal, but if that’s not possible, use well-lit indoor settings.
- Professional Composition: Arrange your subjects thoughtfully. For example, team photos should show everyone clearly, and project photos should highlight the most impressive aspects.
Showcase a Variety of Content
- Diverse Perspectives: Include different types of photos to provide a well-rounded view of your business. Avoid repeating the same type of image too often.
- Action Shots: Photos of your team in action performing services can illustrate your expertise and dedication.
- Customer Interactions: Images that show your team interacting with customers can build a sense of trust and reliability.
Optimize File Sizes and Formats
- Appropriate File Sizes: Ensure that your photos are not too large, which can slow down loading times, or too small, which can reduce their impact. Google typically recommends using images with a resolution of at least 720 x 720 pixels.
- Compatible Formats: Use common image formats such as JPEG or PNG to ensure compatibility with Google’s upload system.
Use Descriptive File Names
- SEO Benefits: Name your photo files descriptively using relevant keywords. For example, “plumbing-service-van.jpg” is more effective than “IMG1234.jpg.”
- Organization: Descriptive names help you keep track of your photos and make it easier to manage your image library.
Align Photos with Your Brand
- Consistent Branding: Ensure that your photos reflect your brand’s colors, style, and values. This consistency helps in building brand recognition and trust.
- Professional Appearance: Even if photos don’t have to be taken by a professional, ensure they represent your business in a positive and professional manner.
Monitor and Refresh Your Photo Gallery
- Regular Audits: Periodically review your photo gallery to remove outdated or irrelevant images. Keep your profile updated with the latest representations of your business.
- Seasonal Updates: Add photos that reflect seasonal changes or special promotions to keep your profile relevant and engaging throughout the year.
Common Mistakes to Avoid
Avoiding these common mistakes can help ensure that your photo uploads contribute positively to your Google Local Services Ads performance.
Uploading Low-Quality Photos
- Impact: Low-quality images can harm your business’s credibility and deter potential customers.
- Solution: Always use clear, high-resolution photos that accurately represent your services and business environment.
Overloading Your Profile with Irrelevant Images
- Impact: Irrelevant photos can confuse customers and dilute the effectiveness of your profile.
- Solution: Focus on uploading images that are directly related to your services, team, and business operations.
Inconsistent Photo Uploads
- Impact: Irregular updates can make your profile appear inactive or neglected.
- Solution: Establish a consistent photo upload schedule to keep your profile fresh and engaging.
Ignoring Mobile Optimization
- Impact: Many users access Google Local Services Ads via mobile devices. Non-optimized photos can lead to a poor user experience.
- Solution: Ensure all photos are optimized for mobile viewing by maintaining appropriate resolutions and clear compositions.
Neglecting to Update Photos Regularly
- Impact: Outdated photos can misrepresent your current services and business status.
- Solution: Regularly refresh your photo gallery to reflect the latest developments in your business.
Frequently Asked Questions
Do I Need Professional Photos to Add to My Google Local Services Ads Account?
No, professional photos are not mandatory. While high-quality images can enhance your profile, photos taken with a smartphone can also be effective as long as they are clear, well-lit, and relevant to your business.
How Many Photos Should I Add Initially?
It’s recommended to upload a substantial number of photos when setting up your LSA account, such as 10-20 images, to provide a comprehensive view of your business. This initial upload sets a strong foundation for your profile.
Can I Remove Photos After Uploading Them?
Yes, you can remove photos from your LSA account at any time. Navigate to the “Photos” section in your profile and select the photos you wish to delete. Click on the delete option to remove them from your profile.
Are There Any Restrictions on the Types of Photos I Can Upload?
Google prefers photos that accurately represent your business and services. Avoid uploading misleading or inappropriate images. Ensure that all photos comply with Google’s content policies and guidelines.
How Often Should I Update My Photo Gallery?
Aim to add new photos at least once a week. If weekly updates are not feasible, strive to update your gallery monthly. Consistent updates keep your profile engaging and show that your business is active.
Maximizing the Impact of Your Photos
To fully leverage the benefits of adding photos to your Google Local Services Ads account, integrate these strategies into your broader marketing efforts.
Promote Your Photos on Social Media
Share your LSA photos on your social media platforms to increase visibility and drive traffic to your Google profile. Encourage your followers to check out your services through your LSA account.
Use Photos to Highlight Special Offers
Incorporate images that showcase special promotions, discounts, or seasonal services. Visual representations of your offers can attract more attention and encourage bookings.
Incorporate Photos into Your Website
Ensure that the photos you upload to your LSA account are also featured on your website. This consistency across platforms reinforces your brand and provides a seamless experience for customers.
Encourage Customer-Generated Photos
Ask satisfied customers to share photos of your work or their experiences with your services. User-generated content can add authenticity and provide diverse perspectives on your business.
Leverage Before-and-After Shots
Showcase the quality of your services by including before-and-after photos of your projects. This visual proof of your expertise can persuade potential customers to choose your services.
Conclusion
Adding photos to your Google Local Services Ads account is a powerful way to enhance your online presence, build trust with potential customers, and improve your local SEO. By following the step-by-step guide outlined in this post, implementing best practices, and avoiding common mistakes, you can ensure that your photo uploads effectively showcase your business and attract the right clientele. Regularly updating your photo gallery and maintaining a consistent upload schedule will keep your profile fresh and engaging, ultimately driving business growth and success in the competitive home-service market.
How to Add, Remove, & Exclude Service Areas in Google Local Services Ads
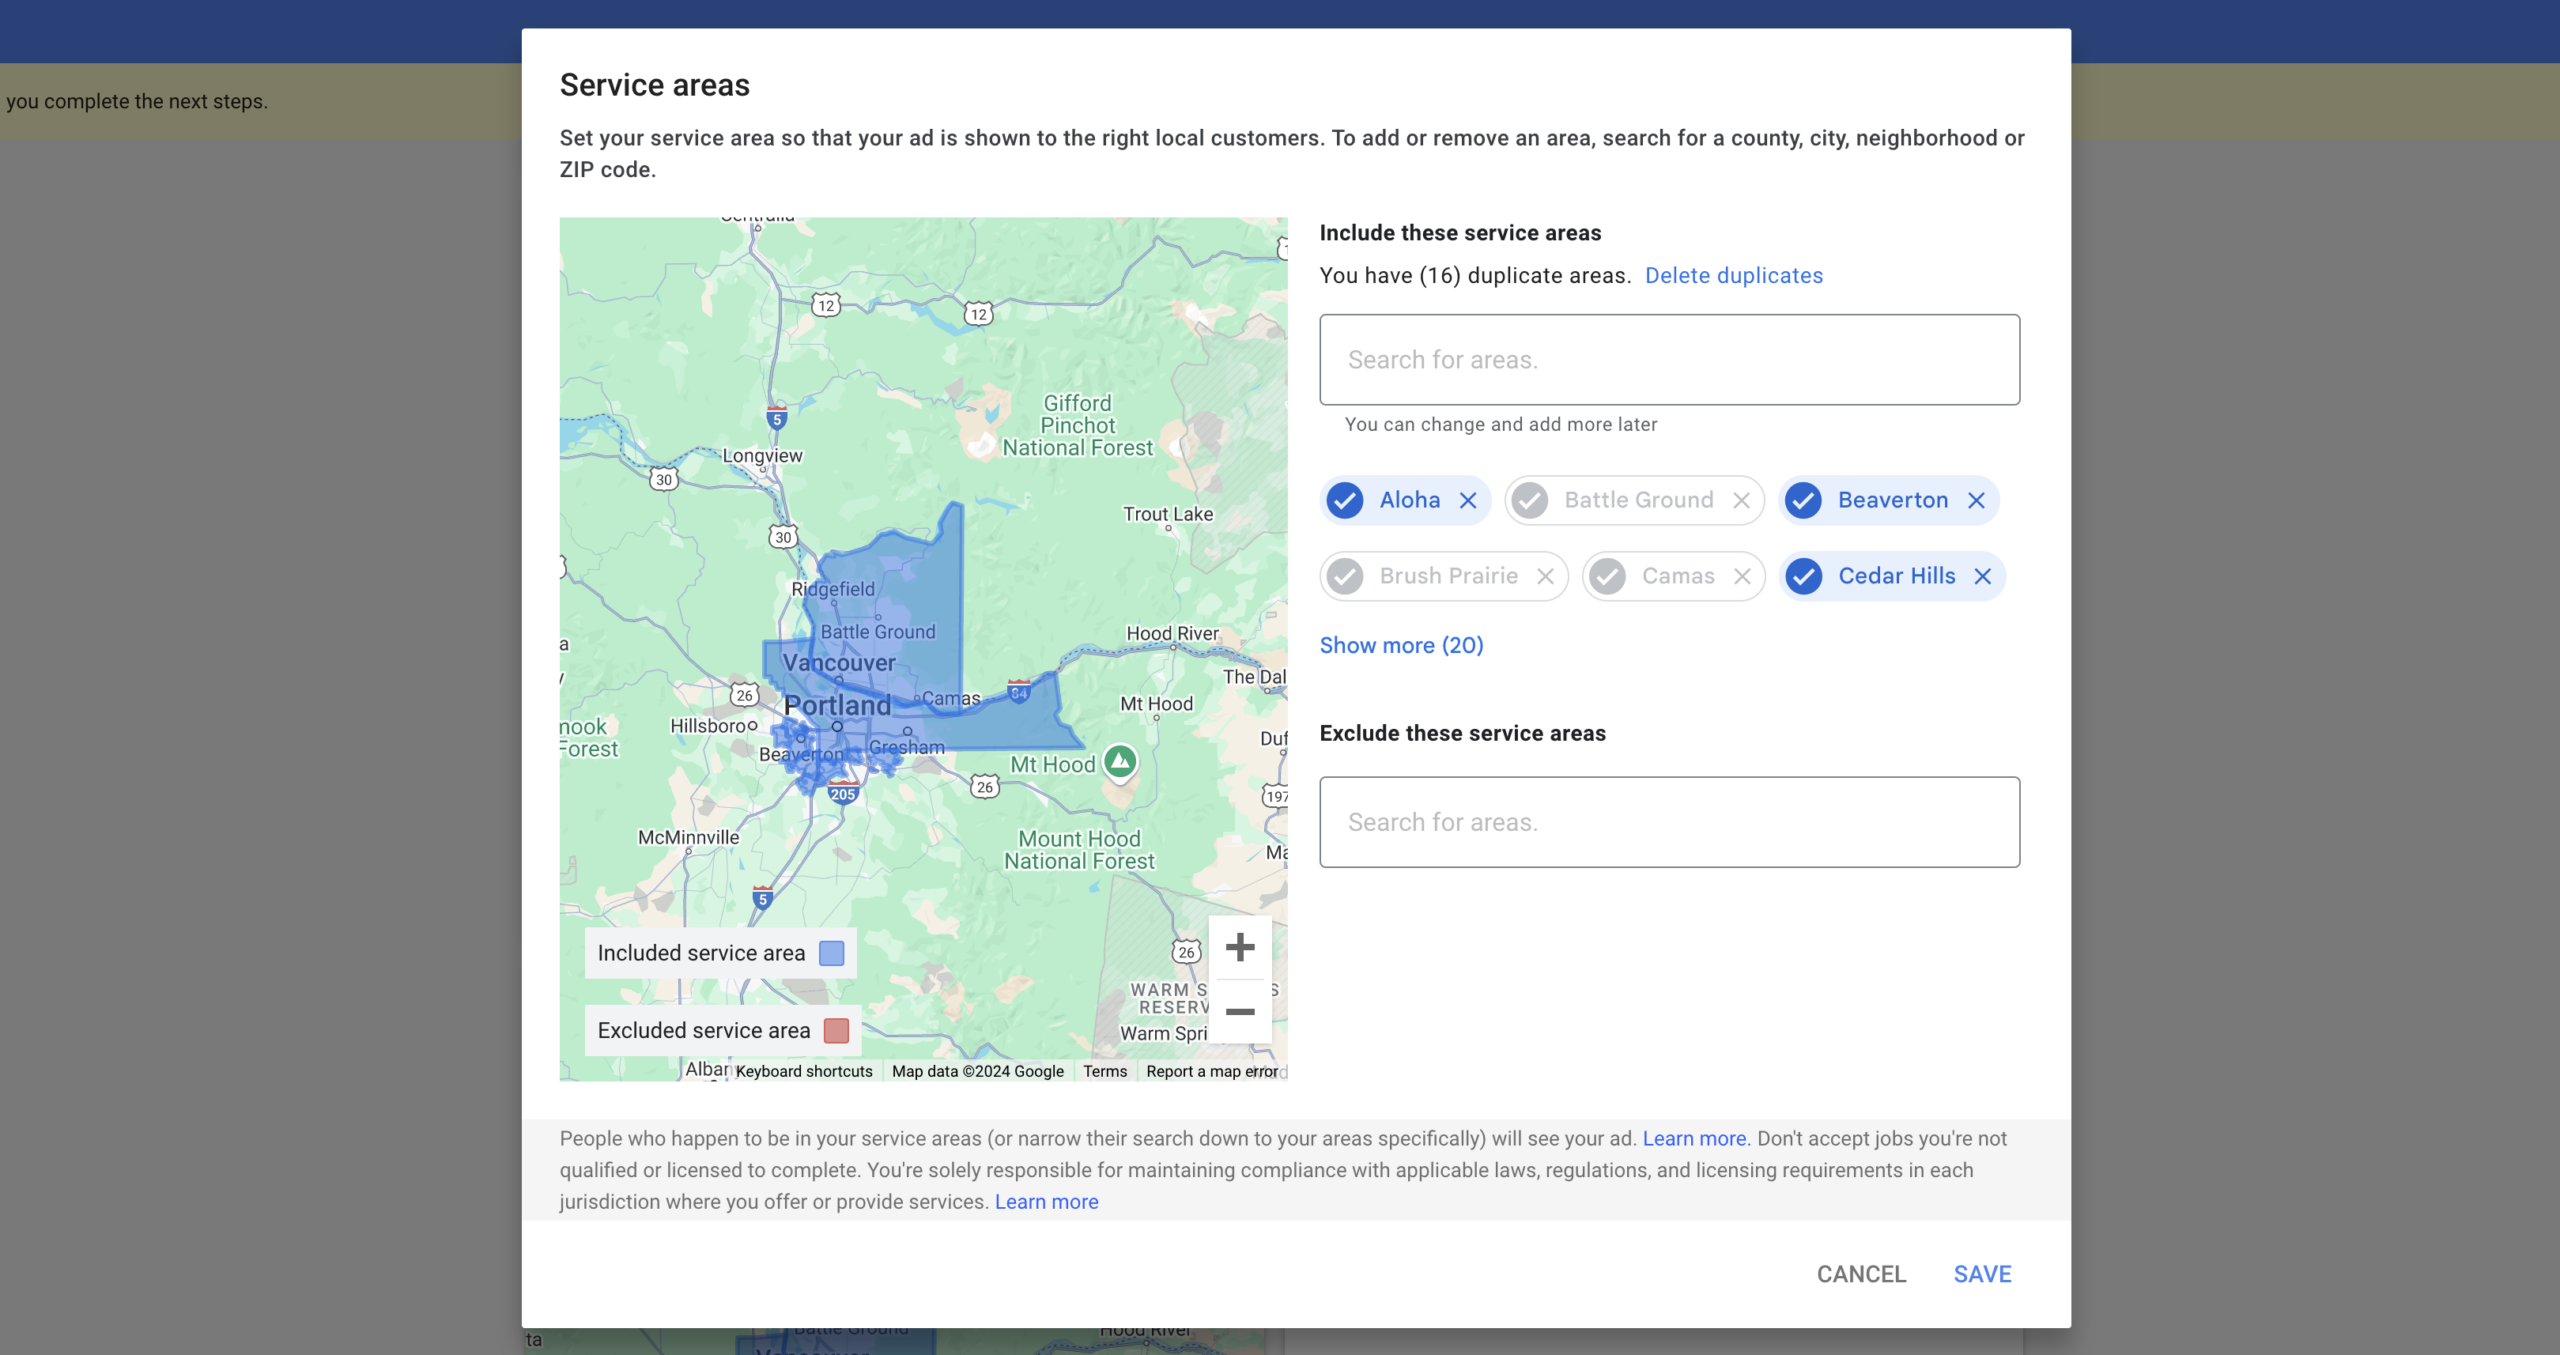
Managing your service areas in Google Local Services Ads is crucial for home-service businesses aiming to optimize their online presence and attract the right customers. In the “How to Add, Remove, & Exclude Service Areas in Google Local Services Ads” video, you learn effective strategies to fine-tune your service areas, ensuring that your business ranks appropriately and reaches your target audience. This comprehensive guide will delve deeper into those instructions, providing you with detailed steps, best practices, and additional insights to help you manage your service areas efficiently.
Why Managing Service Areas Matters
Properly managing your service areas in Google Local Services Ads can significantly impact your business’s visibility and lead generation. Here’s why it’s essential:
Enhance Local Visibility
By accurately defining your service areas, you ensure that your ads appear to customers who are genuinely looking for the services you offer in specific locations. This targeted approach increases the likelihood of attracting qualified leads and reduces wasted ad spend on irrelevant searches.
Improve Ad Performance
When your service areas are well-defined, Google can better match your ads with customer searches. This alignment can lead to higher click-through rates (CTR) and conversion rates, as your ads are shown to users who are more likely to require your services.
Optimize Budget Allocation
Focusing your ads on areas where you can effectively serve customers allows you to allocate your advertising budget more efficiently. By excluding regions where you don’t operate, you prevent unnecessary expenditures and ensure that your resources are directed towards areas with the highest potential for returns.
Step-by-Step Guide to Managing Service Areas
Follow these steps to add, remove, and exclude service areas in your Google Local Services Ads account effectively.
Step 1: Access Your Google Local Services Ads Account
- Sign In to Your Account
- Navigate to Google Local Services Ads and sign in using your business’s Google account credentials.
- Select the Correct Business Profile
- If you manage multiple business profiles, ensure you select the one you want to update. This guarantees that changes are made to the appropriate profile.
Step 2: Navigate to the Service Areas Section
- Open the Dashboard
- Once logged in, you’ll be directed to your account dashboard where you can manage various aspects of your ads and business information.
- Locate the “Service Areas” Tab
- Find and click on the “Service Areas” tab. This section allows you to add, remove, and exclude specific areas where you offer services.
Step 3: Add Service Areas
- Choose to Add by City Name
- It’s highly recommended to add service areas by city name rather than zip codes. Adding cities like “Gresham, Oregon” ensures broader visibility and better ranking in search results.
- Enter the City Name
- Type in the name of the city you want to add. For example, enter “Gresham, Oregon” instead of multiple zip codes within Gresham.
- Review and Confirm
- After entering the city name, review the information and click “Add.” The city will now be included in your active service areas, highlighted in blue on the map interface.
Step 4: Remove or Exclude Service Areas
- Identify Areas to Exclude
- Determine which areas you no longer want to target or serve. For instance, if you want to exclude “Malala, Oregon,” ensure it’s accurately identified.
- Add to Excluded Areas
- In the “Service Areas” section, select the option to exclude an area. Enter the city name you wish to exclude, such as “Malala, Oregon.”
- Confirm Exclusion
- Once added, the excluded area will be highlighted in red on the map. This ensures that your ads won’t appear to users searching in these regions.
Step 5: Utilize Both City Names and Zip Codes
- Combine Approaches for Maximum Coverage
- While city names are effective, adding relevant zip codes can further refine your targeting. Ensure you add both city names and associated zip codes to cover all potential search queries.
- Monitor Ad Performance
- Regularly check the performance of your service areas. If you notice leads coming from excluded areas, consider adjusting your exclusions or adding new areas based on demand.
Best Practices for Managing Service Areas
Implementing best practices can enhance the effectiveness of your service area management in Google Local Services Ads.
Add Relevant and Specific Locations
- Be Precise: Only add areas where you can reliably provide services. Overextending can lead to negative customer experiences and wasted ad spend.
- Research Demand: Focus on areas with high demand for your services to maximize lead generation and return on investment (ROI).
Regularly Update Service Areas
- Stay Current: Business operations and market demands can change. Regularly review and update your service areas to reflect any shifts in your service capabilities or target markets.
- Adapt to Feedback: Use customer feedback and lead sources to identify new areas of opportunity or regions to exclude.
Optimize for Local SEO
- Consistent NAP Information: Ensure that your Name, Address, and Phone number (NAP) are consistent across all online platforms to improve local SEO.
- Localized Content: Incorporate localized keywords in your ad copy and website content to enhance relevance and searchability within your service areas.
Monitor and Analyze Performance
- Use Analytics Tools: Leverage Google’s analytics tools to track the performance of your service areas. Monitor metrics like CTR, conversion rates, and lead quality to assess effectiveness.
- Adjust Strategies: Based on performance data, make informed decisions to add or exclude service areas, optimize ad spend, and refine targeting strategies.
Common Mistakes and How to Avoid Them
Avoiding common pitfalls can ensure that your service area management is effective and beneficial to your business.
Relying Solely on Zip Codes
- Limited Reach: Using only zip codes can limit your visibility and make it harder for customers searching by city name to find your services.
- Solution: Combine zip codes with city names to broaden your reach and improve ranking in diverse search queries.
Overcomplicating Service Areas
- Confusion and Inefficiency: Adding too many service areas or overly specific locations can complicate management and dilute your ad effectiveness.
- Solution: Focus on key areas where you have a strong presence and demand. Keep your service areas streamlined and manageable.
Ignoring Excluded Areas
- Wasted Ad Spend: Failing to exclude areas where you don’t provide services can lead to wasted ad spend and irrelevant leads.
- Solution: Regularly review and update your excluded areas to ensure your ads target only the regions where you offer services.
Neglecting Regular Updates
- Outdated Information: Not updating your service areas can result in missed opportunities and inefficiencies.
- Solution: Set a schedule to periodically review and adjust your service areas based on business changes and market trends.
Frequently Asked Questions
How Many Service Areas Can I Add to My Google Local Services Ads?
There’s no strict limit on the number of service areas you can add. However, it’s best to focus on areas where you can effectively serve customers to maintain ad relevance and manage your budget efficiently.
Can I Use Both City Names and Zip Codes?
Yes, you can use both city names and zip codes to define your service areas. Combining both can enhance your coverage and ensure that your ads appear in a wider range of relevant searches.
What Happens If I Don’t Exclude Certain Areas?
If you don’t exclude areas where you don’t provide services, your ads may appear to customers in those regions. This can lead to irrelevant leads and wasted ad spend. It’s important to exclude non-serving areas to optimize your ad performance.
How Long Does It Take for Changes to Service Areas to Reflect?
Changes to service areas typically take a few days to process and reflect in your ads. It’s advisable to monitor your account regularly after making adjustments to ensure they are implemented correctly.
Can I Change My Service Areas Anytime?
Yes, you can add, remove, or exclude service areas at any time. However, frequent changes should be managed carefully to avoid confusion and ensure consistency in your ad performance.
Maximizing the Impact of Service Area Management
To fully leverage the benefits of managing your service areas in Google Local Services Ads, integrate these strategies into your broader marketing and operational plans.
Align with Business Expansion
- New Locations: When expanding your business to new areas, promptly add these locations to your service areas to start attracting customers from day one.
- Service Diversification: If you introduce new services, adjust your service areas to target regions where there’s demand for these offerings.
Coordinate with Offline Marketing
- Local Promotions: Sync your online service area management with offline marketing efforts like local events, sponsorships, and community engagements to boost visibility.
- Referral Programs: Encourage satisfied customers in your target areas to refer your services, reinforcing your presence and reputation within those regions.
Enhance Customer Engagement
- Localized Content Marketing: Create content tailored to the specific needs and interests of customers in your service areas. This can include blog posts, social media updates, and localized offers.
- Personalized Customer Service: Offer personalized service experiences based on the unique characteristics and preferences of customers in different service areas.
Utilize Advanced Targeting Options
- Seasonal Adjustments: Modify your service areas based on seasonal demands. For example, increase focus on areas prone to winter plumbing issues during colder months.
- Event-Based Targeting: Adjust your service areas temporarily to cater to special events or emergencies in specific regions.
Conclusion
Effectively managing your service areas in Google Local Services Ads is a powerful strategy for home-service businesses aiming to optimize their online presence and attract the right customers. By adding relevant cities, excluding non-serving areas, and following best practices, you can enhance your local SEO, improve ad performance, and drive business growth. Avoid common mistakes by maintaining accurate and up-to-date service areas, and leverage analytics to continuously refine your targeting strategies. Implementing these steps will ensure that your Google Local Services Ads are both efficient and effective, helping your business thrive in a competitive market.
How to Maximize Google Local Services Ads Results by Properly Managing Leads
Google Local Services Ads (LSAs) are a powerful way for local businesses to connect with potential customers. However, many companies fail to make the most of this tool simply because they don’t manage their leads effectively. In this guide, we’ll walk you through the key lead management practices and tools within LSAs to help you boost your ad performance and get better results.
We’ll also include five video tutorials that explain how to work with the various lead tabs in detail, making it easier for you to take action and see improvements quickly.
The Importance of the Leads Tab
The Leads tab is the backbone of your success with LSAs, accounting for 90% of your results. Companies that mark their leads accurately and in a timely manner consistently outperform competitors, ranking higher and receiving more leads.
By marking leads as soon as they come in—whether responding to message leads or answering phone calls—you train Google’s algorithm to deliver better-quality leads to your business. Neglecting this crucial step can cause leads to pile up, costing you valuable opportunities.
Overview of the Lead Tabs
The Leads tab includes several sub-tabs, each serving a distinct purpose:
- New
- Active
- Booked
- Completed
Each tab plays a role in the lead management process, and understanding how to navigate and update them is vital. Below, we break down the function of each tab and how to use them effectively.
1. New Tab
The New tab is where all new leads first appear. This includes incoming phone calls and message inquiries. Here’s how to handle leads in the New tab:
- Review Each Lead:
- For message leads, review the content of the message.
- For phone call leads, listen to the call recording (calls longer than 60 seconds typically indicate meaningful interactions).
- Rate Leads: Mark each lead as “Very Satisfied,” “Satisfied,” or “Very Dissatisfied.”
- For satisfied leads, indicate why they are relevant to your business.
- For bad leads, specify the reason (e.g., wrong service type, job inquiry, etc.). This helps train Google’s algorithm to refine lead quality.
- Action Steps:
- Archive leads that don’t qualify.
- Mark good leads as “Booked” or “Upcoming” to move them through the pipeline.
2. Active Tab
The Active tab is the most critical section to manage. Leads often “hide” here, causing businesses to miss opportunities. Clearing this tab regularly is essential to maintaining a high lead volume.
- Clear Out Backlogs:
- Go through each lead in the Active tab.
- Listen to phone calls or review messages.
- Mark leads as “Booked,” “Archived,” or “Completed” as appropriate.
- Consistency is Key:
- Make it a habit to review and clear the Active tab daily. This real-time management keeps your leads organized and ensures Google sees your business as responsive.
- Pro Tip: If you have a significant backlog, prioritize clearing it out quickly rather than being overly meticulous about rating every lead.
3. Booked Tab
The Booked tab stores jobs that you’ve scheduled as “Upcoming.” Once the scheduled time has passed, these leads automatically move to the Completed tab.
- What to Do Here:
- Edit appointment times or details if there are changes.
- Keep an eye on this tab to ensure appointments are accurate, but it requires less frequent management compared to New and Active tabs.
4. Completed Tab
The Completed tab serves as a log of past jobs. Leads automatically move here after their scheduled time in the Booked tab has passed.
- Minimal Interaction Needed:
- Use this tab to review call recordings or messages for analysis.
- No significant action is required here.
Tips for Success
- Mark Leads Accurately: Properly rate leads and mark them as booked, archived, or completed. This helps Google’s algorithm deliver more relevant leads over time.
- Clear Tabs Daily: Keeping tabs like Active and New clear ensures you’re not missing opportunities.
- Be Proactive: Respond to leads in real-time whenever possible. Speed and consistency are key to staying ahead of competitors.
- Train the Algorithm: By accurately marking bad leads, you’re “training” Google to avoid sending similar low-quality leads.
Final Thoughts
Managing your leads effectively within Google Local Services Ads is the single most important factor in improving your ad performance. By mastering the use of the New, Active, Booked, and Completed tabs, you’ll not only increase your lead volume but also enhance the quality of leads over time. If you need help with setting up or optimizing your Google Local Services Ads account, feel free to contact us today so we can help you get started!
Take the time to set up a daily routine for lead management, and you’ll see noticeable improvements in your results. Watch the embedded videos for step-by-step guidance, and start implementing these tips today!
The Complete, Unhinged Guide to Google Local Service Ads (get more LSA leads)
In today’s competitive market, attracting new customers for your home service business is more important than ever. Google Local Service Ads (LSA) offers a highly effective and cost-efficient solution to achieve this goal. This comprehensive guide will take you through every step of setting up and optimizing your LSA account, ensuring you get the most out of your investment.
Why Google Local Service Ads are Essential for Home Service Businesses
Google Local Service Ads are designed specifically for local businesses looking to connect with potential customers in their area. Here’s why LSAs are the ideal lead generation tool for home service businesses:
- Targeted Customer Acquisition: LSAs connect you directly with qualified leads actively searching for services like yours within your local area.
- Streamlined Lead Management: With a user-friendly dashboard, managing leads and tracking campaign performance becomes as easy as using a Customer Relationship Management (CRM) system.
- Cost-Effective Lead Generation: The pay-per-lead structure ensures you only incur costs when a potential customer expresses interest, making it a budget-conscious marketing strategy.
Before diving into the setup process, it’s important to ensure your business is eligible for the Google Guaranteed Badge, which can enhance your credibility and attract more customers.
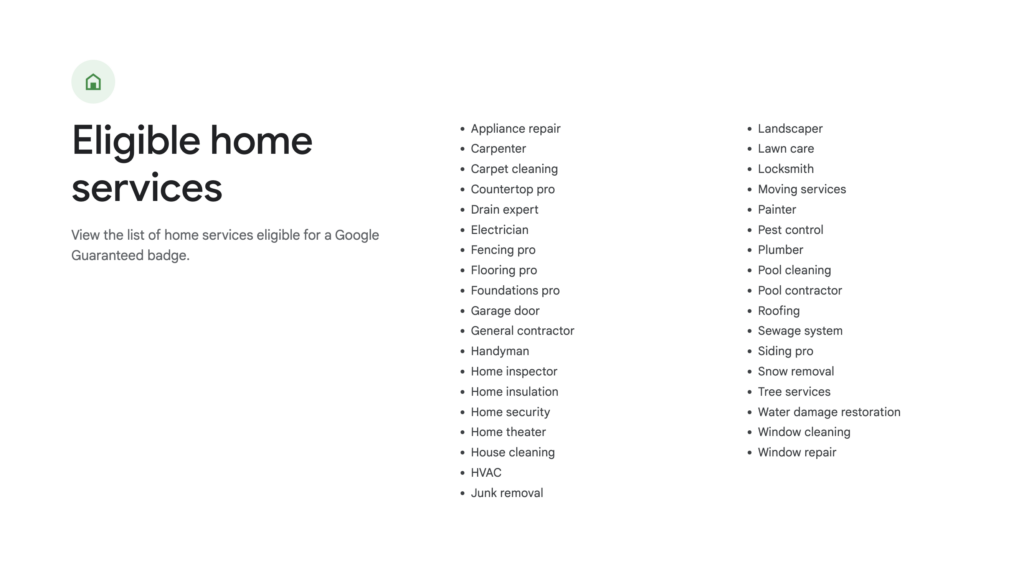
Step 1: Check Your Eligibility for Google Local Service Ads
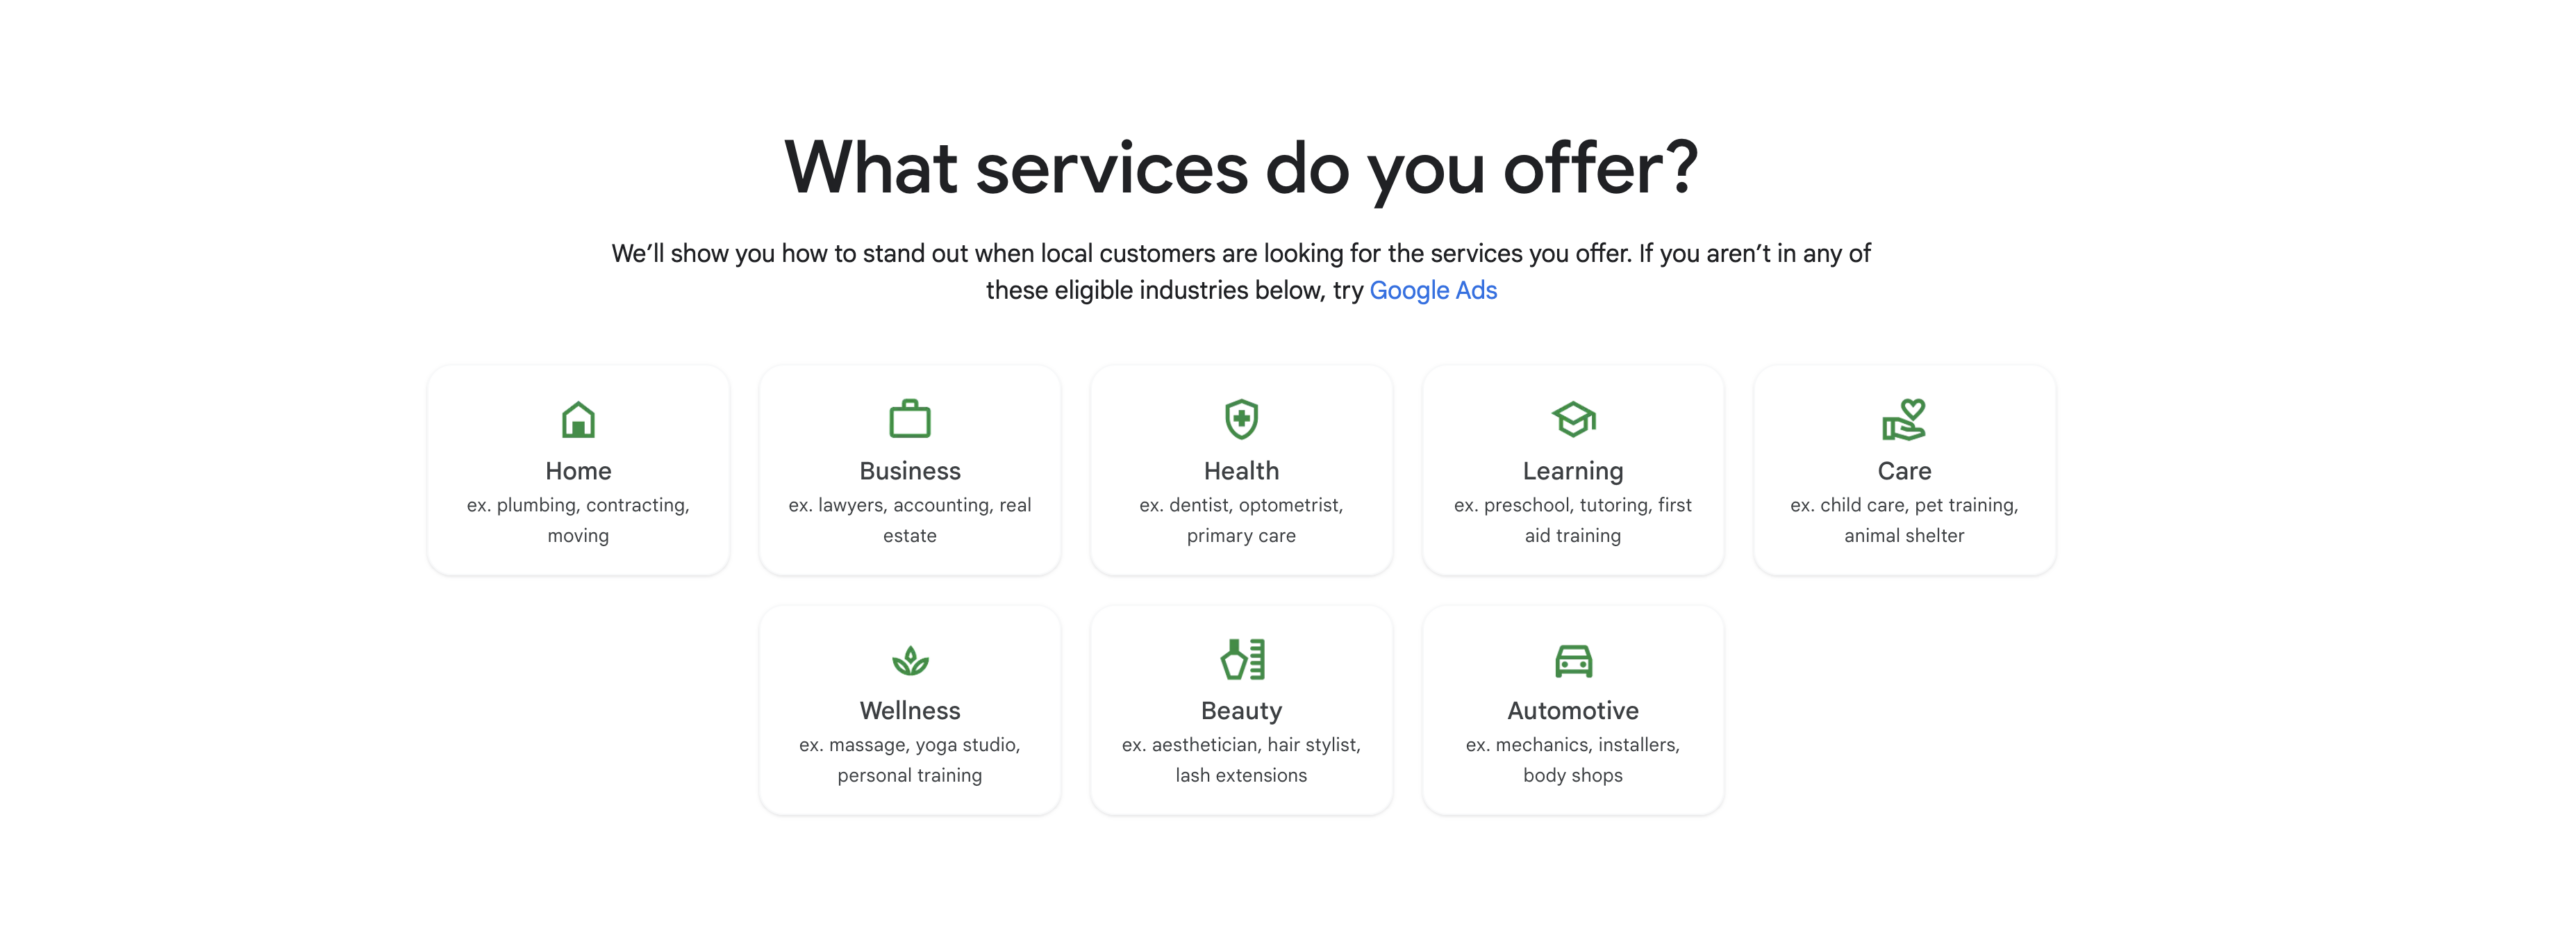
Google Local Service Ads cater to a wide range of home services, including but not limited to appliance repair, carpentry, landscaping, pest control, plumbing, roofing, and HVAC services. Before setting up your LSA account, check if your business falls under one of the eligible categories.
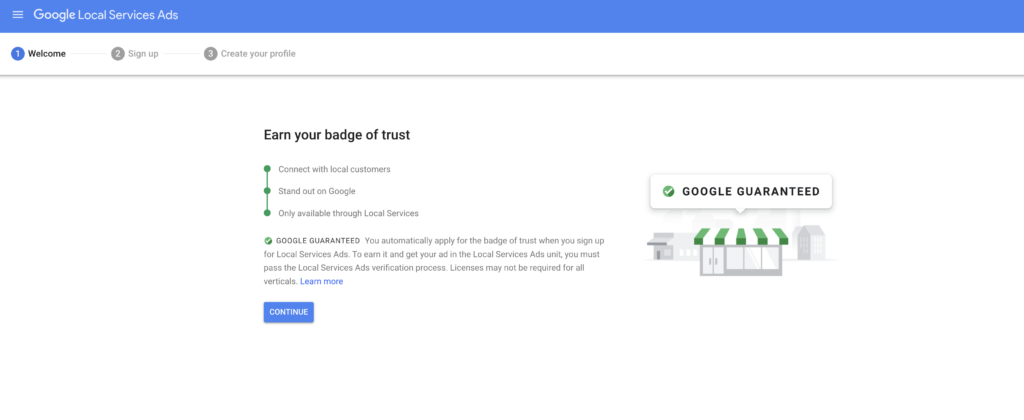
Step 2: Signing Up for a Google Local Service Ads Account
To start, visit ads.google.com/localservices/signup and click “Continue.” You’ll be redirected to an eligibility window where you can input your location and job category. Make sure to choose an email that you have access to, as all communication regarding leads and billing will be sent there.
Information Required for Account Setup
- Business Details: Enter your business name, phone number, website (optional), messaging preferences, owner’s name, and address. Ensure all information is accurate to avoid any verification issues.
- Verification Documents: To complete your profile setup, you’ll need to provide a valid license number, proof of insurance, and complete a background check for all customer-facing employees. Ensure all documentation is current and complies with Google’s requirements.
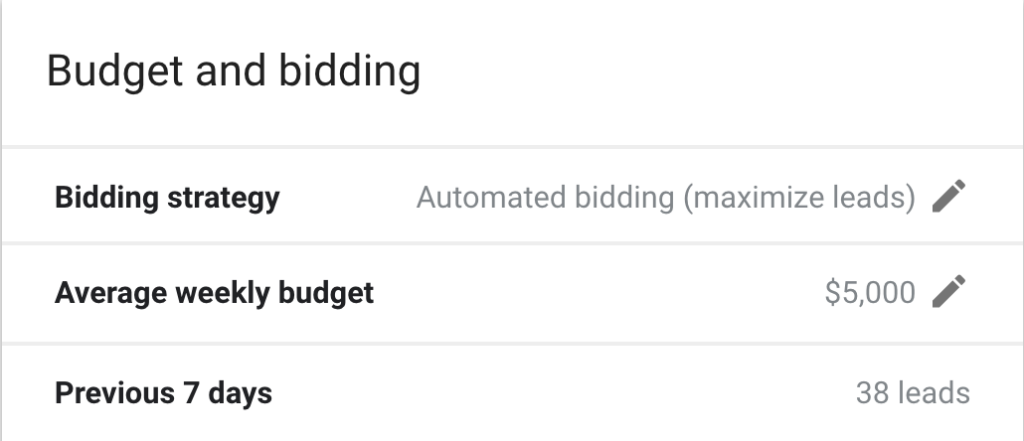
Step 3: Setting Your Budget and Bidding Strategy
Once your account is set up, it’s time to decide on a budget and bidding strategy:
- Budget: Start with a flexible budget between $500 and $2,000 to test the waters. Adjust based on the performance and volume of leads you receive.
- Bidding Strategy: Google offers two primary bidding options:
- Maximize Leads Bidding: This automated strategy focuses on generating the most leads within your budget. It’s ideal for established businesses looking to optimize lead volume.
- Manual Bidding: For more experienced users, manual bidding allows you to set a maximum bid per lead, providing greater control over your spending.
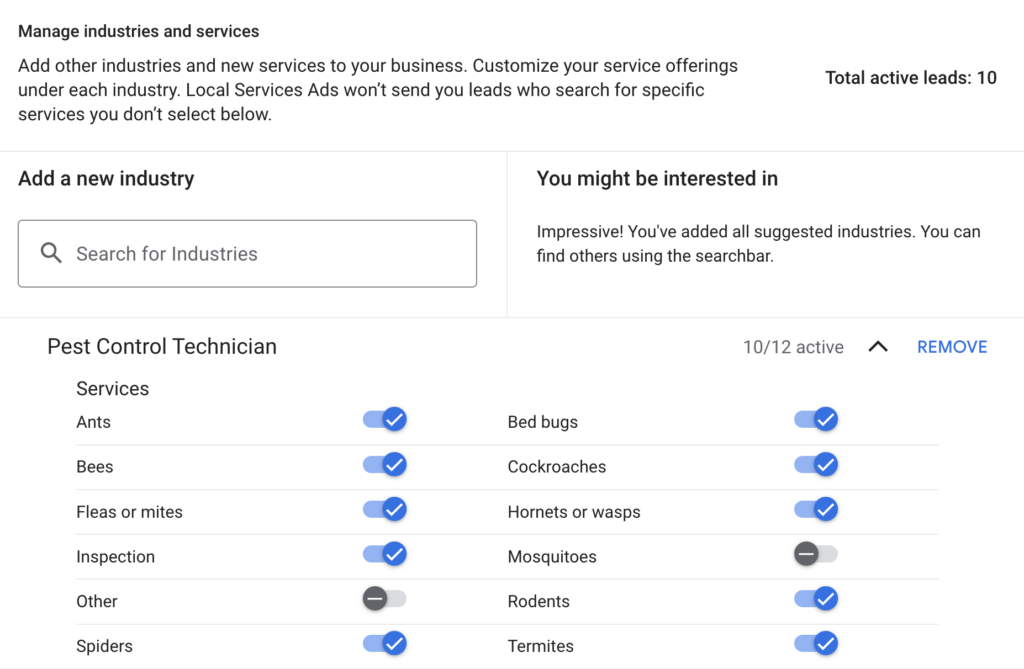
Step 4: Selecting Relevant Job Types and Service Areas
It’s crucial to select the specific job types your business offers and define the geographic areas where you’re willing to provide service:
- Job Types: Choose only the services you genuinely offer to avoid irrelevant leads. While you can include an “Other” option to capture more inquiries, this may result in calls that aren’t directly related to your core services.
- Service Areas: Clearly specify your target service areas and exclude regions you don’t want to cover. Regularly monitor your call logs to ensure you’re not receiving leads from outside your designated areas.
Step 5: Optimizing Your LSA Profile
A well-optimized LSA profile is key to attracting more leads and improving your local SEO:

- Photos: Upload high-quality images of your business, projects, team, and branded vehicles. A visually appealing profile can significantly enhance your campaign performance and build trust with potential customers.

- Business Hours: Set your business hours accurately to reflect when your team is available to take calls. This ensures Google sends leads during your operational hours, maximizing the chances of conversion.
Step 6: Lead Management and Optimization
Effective lead management is crucial for the success of your LSA campaigns. Here’s how to stay on top of your leads:
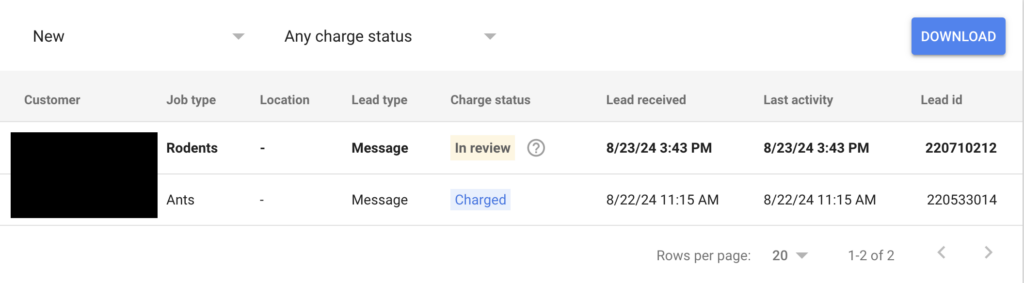
- Consistent Lead Marking: Mark your leads daily as “Booked,” “Completed,” “Archived,” or “Disputed” based on their status. This practice provides valuable data for optimizing your campaigns and improves your standing with Google.
- Disputing Leads: If you receive a lead that falls outside your service parameters or is otherwise irrelevant, don’t hesitate to dispute it. Google allows you to dispute leads for various reasons, such as incorrect contact information or services not offered.
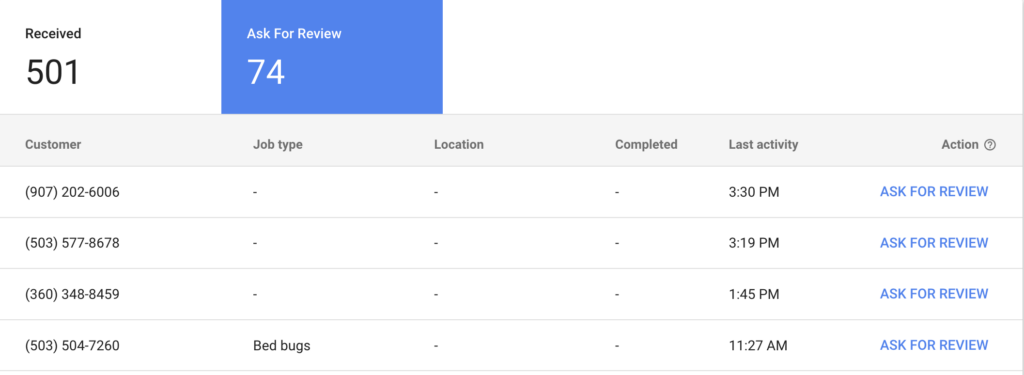
Step 7: Leveraging Reviews for Better Performance
Positive reviews significantly impact the visibility and credibility of your LSA profile. Encourage satisfied customers to leave reviews, especially Google Verified Reviews, which are highly valuable due to their direct connection to a completed LSA transaction.
Step 8: Analyzing Reports and Adjusting Strategies
The “Reports” tab in your LSA dashboard provides insights into campaign performance. Use this data to:
- Track Lead Generation: Monitor the volume of leads over time to identify trends and make necessary adjustments.
- Adjust Budgets: Regularly review your budget allocation and adjust it based on performance metrics to ensure you’re maximizing your return on investment.

Step 9: Managing Account Access and Notifications
Efficiently managing account access and configuring notifications ensures smooth operation and keeps your team informed about campaign performance. Set appropriate permission levels for users and customize notification preferences to stay updated on lead activity and performance reports.
Conclusion: Achieving Success with Google Local Service Ads
Google Local Service Ads are a powerful tool for home service businesses looking to connect with local customers and generate more leads. By following this comprehensive guide, you can optimize your LSA account to maximize its effectiveness, improve your local SEO, and ultimately grow your business.
If you need further assistance or want to learn more about how to leverage digital marketing for your home service business, feel free to reach out. I’m Will, and I run LocalSink, an agency dedicated to helping local service businesses succeed online.
First LSA Lead After Weeks of No Leads (Low Review Roofing Company)
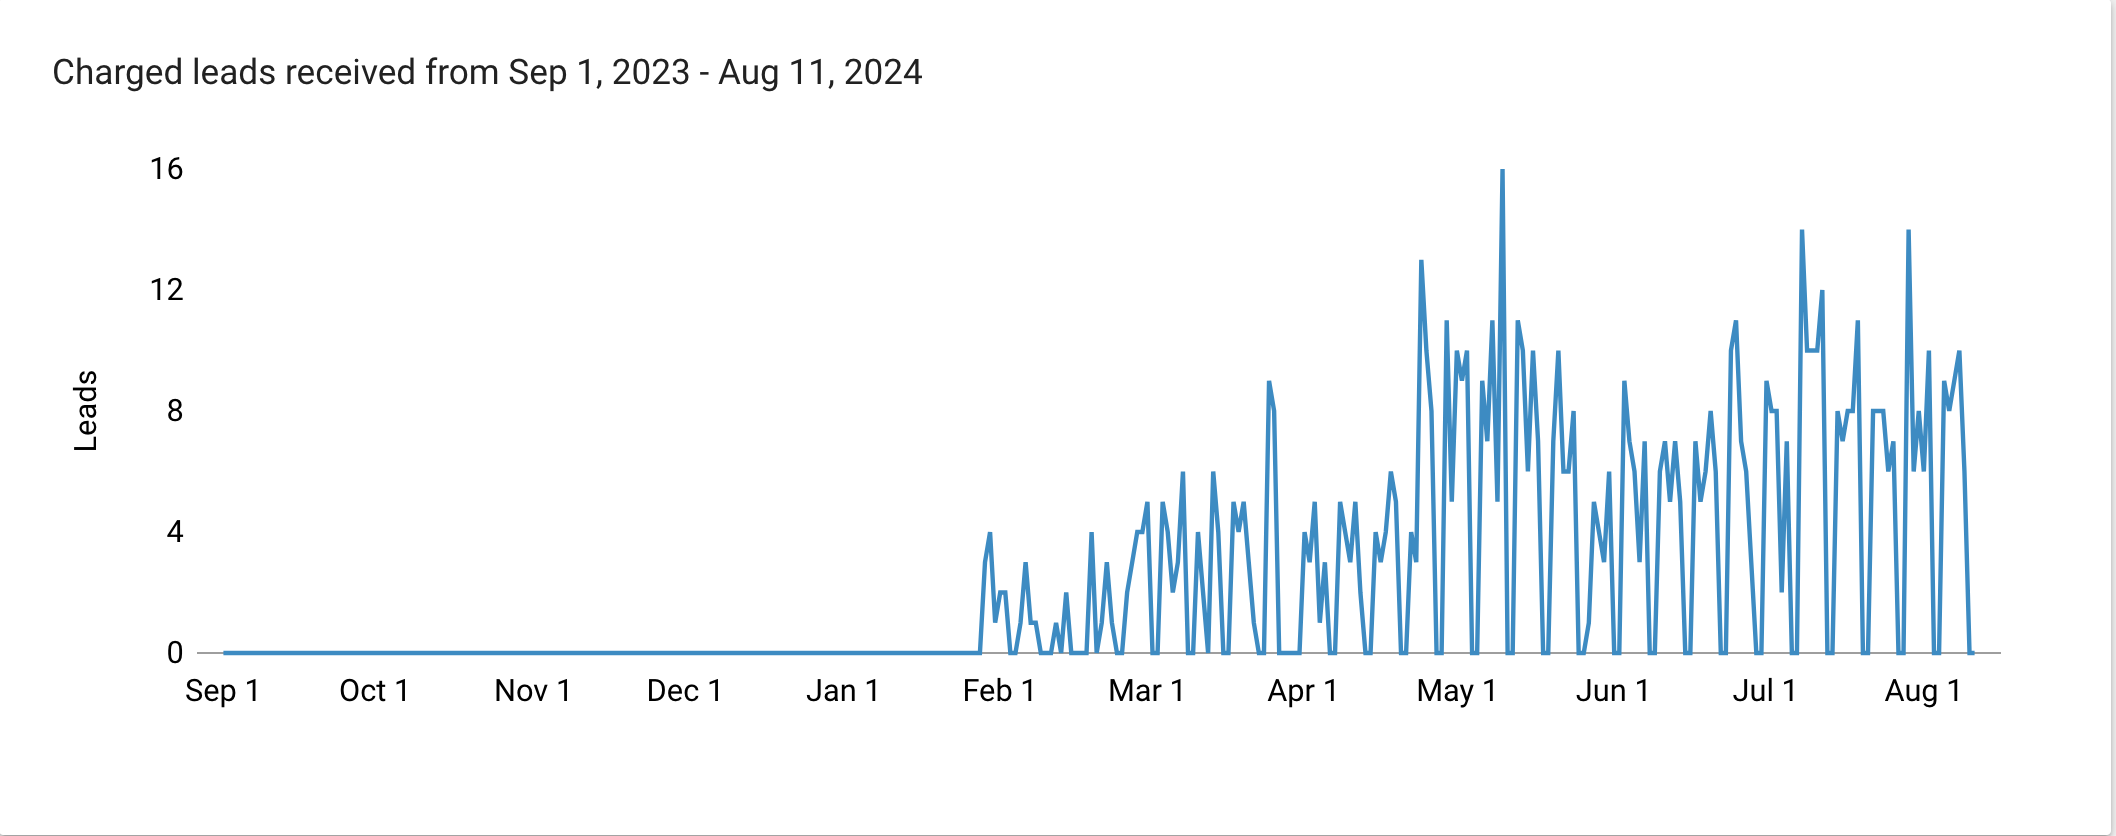
How to Revive a Failing Local Services Ads Account: Lessons from a Real-World Experience
As a roofing company, there’s nothing more frustrating than investing time and money into a Local Services Ads (LSA) account, only to see it fail to deliver any leads. It’s a feeling of helplessness—watching your account gain impressions without generating a single call, and wondering if all your efforts are in vain.
This is exactly what happened with a roofing company I worked with in Portland and Vancouver. Despite setting up their LSA account just like I had for other successful clients, the leads weren’t coming in. Here’s what I did to turn things around and how you can, too.
While working with a new roofing company in Portland & Vancouver, I faced an unexpected challenge: their LSA (Local Services Ads) account was dead in the water. Despite setting it up as I had done for countless other companies, no leads were coming in. Frustration was mounting on both sides.
Here’s the timeline:
- June 1st: We started with 88 impressions and a 100% top impression rate, but the account was never ranking number one. No leads came in.
- July: Still no leads, and while the impression rate remained high, the account continued to fail to secure the top spot.
- August: Finally, a breakthrough. By the 5th of the month, the client received their first lead at a relatively low cost. We had 65 impressions, with a 41% absolute top impression rate.
So, what changed?
I took several key steps to optimize the account:
- Increased Budget: Initially, the budget was set at $1,000. I increased it to $3,000 to improve visibility.
- Constant GBP Updates: I made regular updates to the Google Business Profile (GBP). This included adding photos, ensuring the business hours were accurate, and embedding the GBP on the client’s website.
- Engagement: I actively engaged with the account by asking and answering questions, utilizing insights from a “People Also Ask” interview with one of their technicians.
- Linked Social Media: I connected all relevant social media profiles to the GBP.
- Manual Monitoring and Management: I kept a close eye on the account, marking leads as booked immediately and ensuring nothing was stuck in the active tab. This is crucial because unresolved leads can clog the system and slow down performance.
Despite initial setbacks, persistence paid off. The key takeaway is that even if your LSA account isn’t performing right away, continuous updates, engagement, and patience are critical. Don’t be discouraged; with time and consistent effort, results will follow.
If you need help with optimizing Local Service Ads for your local service business, feel free to reach out! My name is Will, and I run an agency that helps local service businesses called LocalSink. I’m here to help you navigate these challenges and achieve success.
Alternatively, check out our FREE Guide: Optimize your Local Service Ads for Local Home Service Businesses.