
Author: David Bratvold
How to Install a CallRail JavaScript Snippet on Website Using Google Tag Manager

Effective call tracking is essential for businesses aiming to understand their customer interactions and optimize their marketing strategies. CallRail provides a robust solution for tracking phone calls, allowing you to gain insights into where your calls are coming from and how your marketing efforts are performing. Integrating CallRail with your website using Google Tag Manager (GTM) streamlines the installation process and ensures accurate tracking without the need for direct code modifications. This comprehensive guide will walk you through the steps to install the CallRail JavaScript snippet on your website using Google Tag Manager, ensuring seamless integration and optimal call tracking.
Why Install the CallRail JavaScript Snippet Using Google Tag Manager?
Google Tag Manager is a powerful tool that simplifies the process of managing and deploying marketing tags (snippets of code) on your website without requiring direct code edits. By using GTM to install the CallRail JavaScript snippet, you can efficiently manage your call tracking setup, reduce the risk of errors, and maintain better control over your website’s tagging infrastructure.
Benefits of Using Google Tag Manager for CallRail Integration
- Ease of Implementation: Deploy the CallRail snippet without modifying your website’s code directly.
- Centralized Tag Management: Manage all your tracking codes in one place, simplifying updates and maintenance.
- Enhanced Flexibility: Easily add, remove, or update tags as your tracking needs evolve.
- Improved Site Performance: Optimize tag loading to enhance website speed and user experience.
- Error Reduction: Minimize the risk of code conflicts and errors by using GTM’s built-in validation and debugging tools.
Step-by-Step Guide to Installing the CallRail JavaScript Snippet Using Google Tag Manager
Follow these detailed steps to install the CallRail JavaScript snippet on your website using Google Tag Manager, ensuring accurate call tracking and seamless integration.
Step 1: Sign In to Your CallRail Account
- Access CallRail:
- Open your web browser and navigate to CallRail.
- Click on the Sign In button located at the top-right corner of the homepage.
- Enter Credentials:
- Input your CallRail account email and password.
- Click Sign In to access your CallRail dashboard.
Step 2: Obtain Your CallRail JavaScript Snippet
- Navigate to Integrations:
- In the CallRail dashboard, click on the Settings icon (typically represented by a gear).
- Select Integrations from the dropdown menu.
- Access JavaScript Snippet:
- Click on JavaScript Snippet.If you have previously added the snippet, it will show as active. To install a new snippet, ensure you have the correct script copied.Copy the JavaScript Snippet: Highlight the entire script and copy it to your clipboard.
Step 3: Sign In to Your Google Tag Manager Account
- Access Google Tag Manager:
- Open a new tab and navigate to Google Tag Manager.
- Enter Credentials:
- Sign in with your Google account credentials associated with your GTM container.
- Select the Appropriate Container:
- Choose the container linked to the website where you want to install the CallRail snippet.
Step 4: Create a New Tag in Google Tag Manager
- Navigate to Tags:
- In the GTM dashboard, click on Tags in the left-hand sidebar.
- Create a New Tag:
- Click on the New button to create a new tag.
- Configure the Tag:
- Name Your Tag: Enter a descriptive name, such as
CallRail JavaScript Snippet.Choose Tag Type: Click on Tag Configuration and select Custom HTML from the list of tag types.Paste the JavaScript Snippet: In the HTML field, paste the CallRail JavaScript snippet you copied earlier.
- Name Your Tag: Enter a descriptive name, such as
- Set Triggering:
- Click on Triggering and select All Pages to ensure the snippet loads on every page of your website.
Step 5: Save and Publish Your Tag
- Save the Tag:
- After configuring the tag and setting the trigger, click Save to finalize the tag setup.
- Submit Changes:
- Click on the Submit button in the top-right corner of the GTM dashboard.
- Publish the Container:
- Add a version name and description (optional) for your changes.Click Publish to apply the new tag to your website.
Step 6: Verify the Installation
- Test the Tag:
- Use GTM’s Preview Mode to ensure the CallRail snippet is firing correctly on your website.
- Click on Preview in GTM and enter your website URL to start the debug session.
- Check CallRail Dashboard:
- Make a test call to your tracking number and verify that the call appears in your CallRail dashboard.
- Use Tag Assistant:
- Optionally, use Google’s Tag Assistant browser extension to verify that the CallRail tag is correctly installed and firing on your website.
Best Practices for Installing CallRail with Google Tag Manager
Implementing best practices ensures that your CallRail installation is both effective and secure, providing accurate data without disrupting your website’s performance.
Use Descriptive Naming Conventions
- Tag Names: Clearly name your tags (e.g.,
CallRail JavaScript Snippet) to easily identify their purpose within GTM. - Version Control: Document changes with version names and descriptions to track updates and modifications over time.
Keep Tags Organized
- Folders: Use folders within GTM to categorize tags based on their function or marketing channel.
- Consistent Structure: Maintain a consistent tagging structure to simplify management and troubleshooting.
Minimize Third-Party Integrations
- Selective Integration: Only integrate essential third-party scripts to reduce potential conflicts and maintain site performance.
- Regular Audits: Periodically review and clean up unused tags to keep your GTM container streamlined.
Monitor Tag Performance
- Regular Checks: Continuously monitor your CallRail tags to ensure they are firing correctly and collecting accurate data.
- Analytics Integration: Integrate CallRail with Google Analytics to gain deeper insights into call performance and user behavior.
Maintain Security
- Access Control: Limit GTM access to trusted team members and use strong authentication methods.
- Secure Scripts: Ensure that all scripts, including the CallRail snippet, are securely implemented to prevent vulnerabilities.
Common Mistakes to Avoid
Avoiding these common pitfalls can enhance the effectiveness of your CallRail installation and ensure accurate call tracking.
Incorrect Snippet Placement
- Impact: Placing the CallRail snippet in the wrong location can prevent it from functioning correctly.
- Solution: Always place the snippet within a Custom HTML tag in GTM and ensure it is set to fire on all pages.
Failing to Publish Changes
- Impact: Changes made in GTM won’t take effect until the container is published.
- Solution: After configuring and saving your tags, always remember to submit and publish the container to apply the changes.
Not Testing the Implementation
- Impact: Without testing, you won’t know if the snippet is working correctly, leading to missed call data.
- Solution: Use GTM’s Preview Mode and perform test calls to verify that the snippet is firing and tracking calls as intended.
Overloading the Tag Manager
- Impact: Adding too many tags can slow down your website and complicate tag management.
- Solution: Keep your GTM container clean by only adding necessary tags and regularly reviewing and removing unused ones.
Ignoring Call Analytics
- Impact: Failing to analyze call data means missing out on valuable insights to optimize your marketing strategies.
- Solution: Regularly review your CallRail dashboard and integrate data with your analytics tools to make informed decisions.
Frequently Asked Questions
Can I Install the CallRail JavaScript Snippet Without Google Tag Manager?
Yes, you can manually install the CallRail JavaScript snippet by adding it directly to your website’s HTML, typically within the <head> section. However, using Google Tag Manager simplifies the process, especially if you plan to manage multiple tags or require frequent updates.
Will Using Google Tag Manager Affect My Website’s Performance?
Properly implemented tags through GTM should have minimal impact on your website’s performance. It’s important to regularly audit and optimize your tags to ensure they load efficiently and do not slow down your site.
How Do I Update the CallRail Snippet in Google Tag Manager?
- Access GTM: Log in to your Google Tag Manager account.
- Navigate to Tags: Click on Tags in the left sidebar.
- Select the CallRail Tag: Find and click on the
CallRail JavaScript Snippettag. - Update the Snippet: Modify the Custom HTML with the new CallRail snippet as provided in your CallRail account.
- Save and Publish: Click Save, then Submit and Publish to apply the changes.
Can I Use CallRail with Multiple Websites in One GTM Account?
Yes, you can use CallRail with multiple websites by creating separate containers for each website in Google Tag Manager or by managing multiple tags within a single container, depending on your organization’s structure and needs.
Do I Need a CallRail Account to Use Their JavaScript Snippet?
Yes, you need an active CallRail account to generate and utilize the JavaScript snippet for call tracking on your website.
Maximizing the Impact of CallRail on Your Website
To fully leverage the benefits of CallRail, integrate these strategies into your broader marketing and operational plans.
Align with Your Marketing Goals
- Define Clear Objectives: Determine what you want to achieve with call tracking, such as increasing lead generation, improving customer service, or optimizing ad campaigns.
- Tailor Tracking to Goals: Set up specific tracking numbers for different marketing channels to attribute calls accurately and measure campaign effectiveness.
Use Data to Optimize Strategies
- Analyze Call Data: Regularly review call analytics to understand which campaigns are driving the most calls and conversions.
- Refine Marketing Strategies: Use insights from CallRail to adjust your marketing strategies, focusing on high-performing channels and improving underperforming ones.
Integrate with Other Marketing Tools
- Connect with CRM Systems: Integrate CallRail with your Customer Relationship Management (CRM) system to streamline lead management and follow-up processes.
- Leverage Google Analytics: Combine CallRail data with Google Analytics to gain a comprehensive view of user behavior and campaign performance.
Leverage Advanced CallRail Features
- Dynamic Number Insertion (DNI): Use DNI to display unique phone numbers to visitors from different traffic sources, enhancing call attribution.
- Call Recording and Transcription: Utilize CallRail’s call recording and transcription features to gain deeper insights into customer interactions and improve service quality.
Foster Team Collaboration
- Regular Reporting: Generate and share regular call reports with your team to keep everyone informed about campaign performance and lead quality.
- Training and Education: Ensure that your team members are trained on using CallRail effectively, understanding how to interpret call data and act on insights.
Enhance Customer Experience
- Prompt Lead Follow-Up: Use CallRail’s call tracking data to ensure that leads are followed up promptly, increasing the likelihood of conversions.
- Personalize Interactions: Leverage call data to personalize customer interactions, addressing their specific needs and preferences effectively.
How to Add Users to CallRail Account
Managing your CallRail account effectively is crucial for tracking and analyzing your call sources, optimizing your marketing strategies, and enhancing team collaboration. Whether you need to delegate tasks to customer service representatives (CSRs), collaborate with an agency, or grant access to team members, adding users to your CallRail account ensures that everyone involved can contribute efficiently while maintaining the security and integrity of your call data. This comprehensive guide will walk you through the process of adding users to your CallRail account, detailing each step and offering best practices to ensure seamless and secure user management.
Why Adding Users to Your CallRail Account Matters
Delegating access within your CallRail account allows multiple team members or external partners to monitor and manage call tracking without compromising your account’s security. Proper user management enhances collaboration, ensures accurate call data analysis, and optimizes your marketing efforts by allowing specialized roles to handle specific tasks.
Benefits of Adding Users
- Collaborative Management: Enable team members to view and analyze call data, manage tracking numbers, and configure settings based on their roles.
- Enhanced Efficiency: Delegate specific tasks such as managing campaigns, monitoring call performance, or handling billing, allowing you to focus on strategic initiatives.
- Improved Security: Assign appropriate access levels to ensure that users have only the permissions necessary for their roles, minimizing the risk of unauthorized changes.
- Scalability: Easily manage access as your team grows, accommodating new members without disrupting existing workflows.
Step-by-Step Guide to Adding Users in CallRail
Follow these detailed steps to securely add users to your CallRail account, ensuring that each user has the appropriate access level for their role.
Step 1: Sign In to Your CallRail Account
- Access CallRail:
- Open your web browser and navigate to CallRail.
- Click on the Sign In button located at the top-right corner of the homepage.
- Enter Credentials:
- Input your CallRail account email and password.
- Click Sign In to access your CallRail dashboard.
Step 2: Navigate to the Users Section
- Open the Dashboard:
- Once logged in, you’ll be directed to your CallRail dashboard, which provides an overview of your call tracking numbers, campaigns, and performance metrics.
- Access Users:
- In the top-left corner of the screen, you’ll see your business initials or name.Click on these initials to open a dropdown menu.Select Users from the dropdown to navigate to the Users management page.
Step 3: Add a New User
- Click on Create User:
- On the Users page, locate the blue Create User button and click on it to initiate the user addition process.
- Enter User Details:
- First Name: Enter the first name of the user (e.g., Natalie).Last Name: Enter the last name of the user.Email Address: Input the user’s email address (e.g., [email protected]).Chat Display Name: This is how the user will appear in any internal chat or communication tools.
Step 4: Assign Access Levels
- Select Access Level:
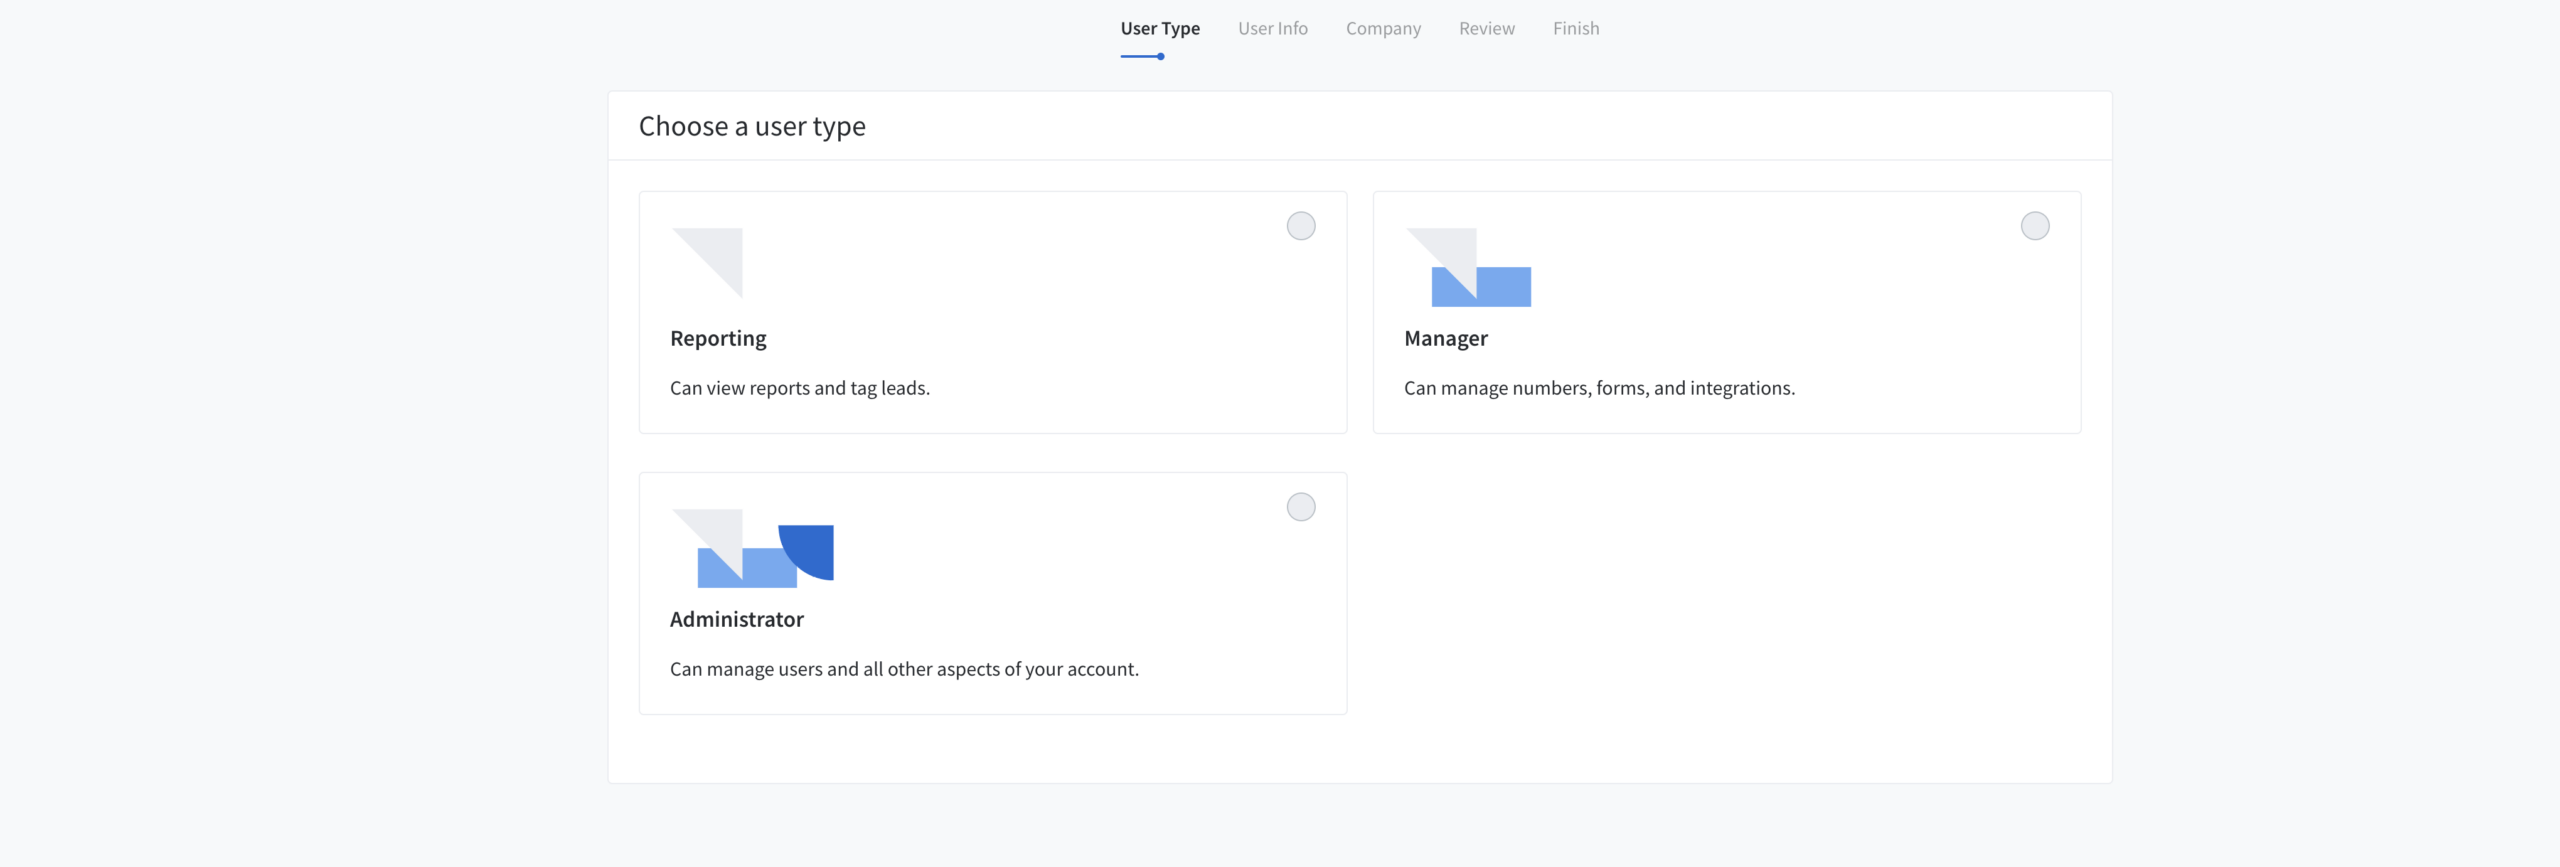
- CallRail offers three primary access levels to control what each user can do within the account:
- Reporting: Users can view call data and generate reports but cannot make any changes to settings or tracking numbers.
- Manager: Users can manage tracking numbers, campaigns, and view reports. They have more control than Reporting users but cannot add or remove other users.
- Administrator: Users have full access to the account, including adding or removing users, managing tracking numbers, and configuring account settings.
- For example, if you want Natalie to have full control over the account, select Administrator.
- CallRail offers three primary access levels to control what each user can do within the account:
- Choose the Appropriate Role:
- Reporting: Ideal for team members who need to analyze call data without modifying account settings.
- Manager: Suitable for users who manage campaigns and tracking numbers.
- Administrator: Best for trusted individuals who oversee the entire CallRail account.
Step 5: Review and Send Invitation
- Review User Information:
- Ensure that all the entered details are correct.
- Decide whether to send an invitation email to notify the user about their new access.
- Optional Settings:
- Send Invoice Emails: Choose whether the user should receive invoice-related emails.
- Add a Custom Message: You can include a personalized message in the invitation email.
- Send Invitation:
- Click Send to dispatch the invitation email to the new user.The user will receive an email with instructions to accept the invitation and set up their access.
Step 6: Confirm and Manage Access
- Verify Invitations:
- After sending the invitation, the new user will appear under the Pending Invitations section.
- Once the user accepts the invitation, they will move to the Active Users list.
- Adjust Permissions if Needed:
- To change a user’s permission level, click on their name in the Active Users list.
- Select a different role from the dropdown menu and save the changes.
- Remove Users:
- To revoke a user’s access, click the three-dot menu next to their name and select Remove Access.Confirm the action to ensure the user no longer has access to your CallRail account.
Best Practices for Adding Users to CallRail
Implementing best practices ensures that granting access to your CallRail account is secure, efficient, and beneficial for your business.
Define Clear Roles and Responsibilities
- Assess Needs: Determine what tasks each user needs to perform and assign roles based on their responsibilities.
- Avoid Overlapping Duties: Clearly define each user’s role to prevent confusion and ensure accountability.
Limit Access Based on Necessity
- Principle of Least Privilege: Grant only the access necessary for users to perform their tasks. Avoid assigning higher permissions than required.
- Regularly Review Permissions: Periodically audit user access to ensure that permissions are still appropriate and revoke access for users who no longer need it.
Maintain Security
- Use Strong Passwords: Ensure that all users have strong, unique passwords for their CallRail accounts.
- Enable Two-Factor Authentication (2FA): Add an extra layer of security by enabling 2FA for all accounts with access to your CallRail.
- Monitor Account Activity: Regularly check the Users section for any unusual activity or unauthorized access.
Communicate Effectively
- Provide Guidelines: Share clear guidelines on how users should interact with the CallRail account to maintain data integrity and consistency.
- Foster Collaboration: Encourage open communication among team members to streamline workflows and address any issues promptly.
Utilize CallRail Features
- Leverage Reporting Tools: Use CallRail’s reporting features to monitor call performance and generate insights.
- Manage Tracking Numbers: Assign users the responsibility of managing specific tracking numbers to organize call sources effectively.
- Integrate with Other Tools: Connect CallRail with your CRM, Google Analytics, or other marketing tools to enhance data synchronization and reporting.
Common Mistakes to Avoid
Avoiding these common pitfalls can enhance the effectiveness and security of granting access to your CallRail account.
Granting Excessive Permissions
- Impact: Assigning higher permissions than necessary can lead to unauthorized changes or misuse of your call data.
- Solution: Carefully evaluate the access level required for each user and assign roles accordingly.
Neglecting to Update Permissions
- Impact: Failing to update permissions when roles change or when users leave can compromise your account’s security.
- Solution: Regularly review and update user permissions to reflect current team structures and responsibilities.
Overlooking Security Measures
- Impact: Inadequate security can expose your call tracking data to potential threats.
- Solution: Implement robust security practices, including strong passwords and 2FA, to protect your account.
Poor Communication
- Impact: Lack of clear communication can lead to misunderstandings and inconsistent account management.
- Solution: Establish clear communication channels and provide comprehensive training and guidelines for all users.
Ignoring Call Analytics Insights
- Impact: Failing to utilize the data collected can result in missed opportunities for optimizing your marketing strategies.
- Solution: Encourage users to actively engage with the call analytics data and use it to inform decision-making processes.
Frequently Asked Questions
Can I Grant Access to Multiple People at Once?
Yes, you can invite multiple users by repeating the invitation process for each individual. However, manage invitations carefully to maintain control over who has access to your CallRail account.
What Are the Different Permission Levels?
- Reporting: Can view call data and generate reports but cannot make any changes to settings or tracking numbers.
- Manager: Can manage tracking numbers, campaigns, and view reports. Cannot add or remove other users.
- Administrator: Full access to the account, including adding or removing users, managing tracking numbers, and configuring account settings.
How Do I Remove Someone’s Access?
- Navigate to Users Section:
- Go to the Users tab in your CallRail dashboard.
- Find the User:
- Locate the user you want to remove in the Active Users list.
- Remove Access:
- Click the three-dot menu next to their name and select Remove Access.
- Confirm the action to revoke their access.
Do Users Need a CallRail Account to Access My CallRail Account?
Yes, users must have a CallRail account to accept an invitation and access your CallRail account. Ensure that you are adding users with valid email addresses to facilitate account creation.
Can I Change a User’s Permission Level After Granting Access?
Yes, you can adjust a user’s permission level at any time by navigating to the Users section, clicking on the user’s name, and selecting a new role from the dropdown menu.
Maximizing the Impact of Added Users
To fully leverage the benefits of adding users to your CallRail account, integrate these strategies into your broader marketing and operational plans.
Align with Your Marketing Goals
- Define Clear Objectives: Identify what you want to achieve with your call tracking, such as increasing lead generation, improving customer service, or optimizing ad campaigns.
- Tailor Reporting: Set up specific reports and dashboards in CallRail that align with your marketing objectives, ensuring that users have access to the most relevant data.
Use Data to Optimize Strategies
- Analyze Call Data: Regularly review call analytics to understand which campaigns are driving the most calls and conversions.
- Refine Marketing Strategies: Use insights from CallRail to adjust your marketing strategies, focusing on high-performing channels and improving underperforming ones.
Integrate with Other Marketing Tools
- Connect with CRM Systems: Integrate CallRail with your Customer Relationship Management (CRM) system to streamline lead management and follow-up processes.
- Leverage Google Analytics: Combine CallRail data with Google Analytics to gain a comprehensive view of user behavior and campaign performance.
Leverage Advanced CallRail Features
- Dynamic Number Insertion (DNI): Use DNI to display unique phone numbers to visitors from different traffic sources, enhancing call attribution.
- Call Recording and Transcription: Utilize CallRail’s call recording and transcription features to gain deeper insights into customer interactions and improve service quality.
Foster Team Collaboration
- Regular Reporting: Generate and share regular call reports with your team to keep everyone informed about campaign performance and lead quality.
- Training and Education: Ensure that your team members are trained on using CallRail effectively, understanding how to interpret call data and act on insights.
Enhance Customer Experience
- Prompt Lead Follow-Up: Use CallRail’s call tracking data to ensure that leads are followed up promptly, increasing the likelihood of conversions.
- Personalize Interactions: Leverage call data to personalize customer interactions, addressing their specific needs and preferences effectively.
Conclusion
Adding users to your CallRail account is a strategic move that enhances your call tracking capabilities, facilitates team collaboration, and optimizes your marketing strategies. By following the step-by-step guide provided in this post, implementing best practices, and avoiding common mistakes, you can ensure that your CallRail account is managed securely and efficiently. Proper delegation and strategic management of your CallRail account not only streamline operations but also drive better performance and foster long-term success in the competitive business landscape.
How to Give Someone Else Access to Your GoDaddy Account (Delegate Access)
Managing multiple domains or collaborating with team members, clients, or agencies often requires delegating access to your GoDaddy account. Whether you need someone to manage your domains, update DNS settings, or handle purchases, GoDaddy’s Delegate Access feature provides a secure and efficient way to grant the necessary permissions without sharing your personal login credentials. In this comprehensive guide, you’ll learn how to give someone else access to your GoDaddy account, understand the different access levels, and implement best practices to maintain the security and integrity of your online assets.
Why Delegating Access in GoDaddy Matters
Delegating access in GoDaddy is essential for businesses and individuals who manage multiple domains or require assistance from others in maintaining their online presence. Proper delegation ensures that tasks are handled efficiently while maintaining control over your account’s security and settings.
Benefits of Delegating Access
- Efficient Management: Allow team members or agencies to manage specific aspects of your account, such as domains or DNS settings, without granting full access.
- Enhanced Collaboration: Facilitate seamless collaboration with clients, developers, or marketing professionals by providing them with the necessary permissions.
- Improved Security: Reduce the risk associated with sharing your personal login credentials by assigning specific roles with limited access.
- Time-Saving: Streamline workflows by enabling delegated users to handle routine tasks, freeing up your time for more strategic activities.
Step-by-Step Guide to Delegate Access in GoDaddy
Follow these detailed steps to securely grant someone else access to your GoDaddy account using the Delegate Access feature.
Step 1: Sign In to Your GoDaddy Account
- Access GoDaddy:
- Open your web browser and navigate to GoDaddy.
- Click on the Sign In button located at the top-right corner of the homepage.
- Enter Credentials:
- Input your GoDaddy username and password.
- Click Sign In to access your GoDaddy dashboard.
Step 2: Navigate to Delegate Access Settings
- Open the Dashboard:
- Once logged in, you’ll be directed to your GoDaddy account dashboard, which provides an overview of your domains, hosting services, and account settings.
- Access Delegate Access:
- Click on the Domains tab in the top navigation bar.In the left-hand sidebar, click on Settings.From the Settings menu, select Delegate Access.
Step 3: Invite a New User
- Initiate Invitation:
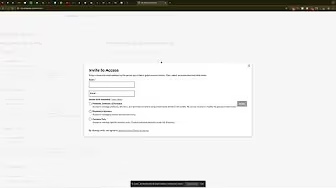
- On the Delegate Access page, locate the Invite to Access section.
- Click on the blue Invite to Access button.
- Enter User Details:
- Name: Enter the full name of the person you want to invite (e.g., Will Tro).Email Address: Input the email address of the person (e.g., [email protected]).
- Select Access Level:
- Choose the appropriate access level based on the permissions you want to grant. GoDaddy typically offers the following options:
- Domains Only: The user can view and manage your domains.
- Products and Domains: The user can manage domains and other products like hosting or SSL certificates.
- Products, Domains, and Purchase: The user has full access, including making purchases on your behalf.
- For example, if you want Will to manage domains and products but not make purchases, select Products and Domains.
- Choose the appropriate access level based on the permissions you want to grant. GoDaddy typically offers the following options:
- Send Invitation:
- After selecting the desired access level, click Invite to send the access invitation to the specified email address.
Step 4: Manage Invited Users
- Review Pending Invitations:
- Once you send an invitation, it will appear under the Pending Invitations section on the Delegate Access page.
- The invited user will receive an email notification with instructions to accept the invitation.
- Verify Access:
- After the user accepts the invitation, their name and assigned role will appear under the People Who Can Access My Account section.You can manage their permissions or remove access at any time by clicking on their name and selecting the desired action.
Step 5: Adjust Permissions as Needed
- Change Access Levels:
- To modify a user’s access level, hover over their name and click on the Edit option.
- Select a new role from the dropdown menu and click Save to apply the changes.
- Remove Access:
- If you need to revoke a user’s access, hover over their name, click the three-dot menu, and select Remove Access.
- Confirm the action when prompted to ensure the user no longer has access to your GoDaddy account.
Best Practices for Delegating Access in GoDaddy
Implementing best practices ensures that delegating access to your GoDaddy account is secure, efficient, and beneficial for your business.
Define Clear Roles and Responsibilities
- Assess Needs: Determine what tasks each user needs to perform and assign roles based on their responsibilities.
- Avoid Overlapping Duties: Clearly define each user’s role to prevent confusion and ensure accountability.
Limit Access Based on Necessity
- Principle of Least Privilege: Grant only the access necessary for users to perform their tasks. Avoid assigning higher permissions than required.
- Regularly Review Permissions: Periodically audit user access to ensure that permissions are still appropriate and revoke access for users who no longer need it.
Maintain Security
- Use Strong Passwords: Ensure that all users have strong, unique passwords for their GoDaddy accounts.
- Enable Two-Factor Authentication (2FA): Add an extra layer of security by enabling 2FA for all accounts with access to your GoDaddy account.
- Monitor Account Activity: Regularly check the Delegate Access section for any unusual activity or unauthorized access.
Communicate Effectively
- Provide Guidelines: Share clear guidelines on how users should interact with the GoDaddy account to maintain data integrity and consistency.
- Foster Collaboration: Encourage open communication among team members to streamline workflows and address any issues promptly.
Utilize GoDaddy Features
- Use Account Dashboard: Leverage GoDaddy’s account dashboard to monitor domain statuses, hosting services, and billing information.
- Set Up Alerts: Enable notifications for important account activities to stay informed about changes or updates.
Common Mistakes to Avoid
Avoiding these common pitfalls can enhance the effectiveness and security of managing delegated access in your GoDaddy account.
Granting Excessive Permissions
- Impact: Assigning higher permissions than necessary can lead to unauthorized changes or misuse of your account.
- Solution: Carefully evaluate the access level required for each user and assign roles accordingly.
Neglecting to Update Permissions
- Impact: Failing to update permissions when roles change or when users leave can compromise your account’s security.
- Solution: Regularly review and update user permissions to reflect current team structures and responsibilities.
Overlooking Security Measures
- Impact: Inadequate security can expose your account to potential threats.
- Solution: Implement robust security practices, including strong passwords and 2FA, to protect your account.
Poor Communication
- Impact: Lack of clear communication can lead to misunderstandings and inconsistent account management.
- Solution: Establish clear communication channels and provide comprehensive training and guidelines for all users.
Ignoring Account Activity
- Impact: Not monitoring account activity can result in unnoticed unauthorized access or changes.
- Solution: Regularly review the Delegate Access section and monitor account logs for any suspicious activity.
Frequently Asked Questions
Can I Grant Access to Multiple People at Once?
Yes, you can invite multiple users by repeating the invitation process for each individual. However, manage invitations carefully to maintain control over who has access to your GoDaddy account.
What Are the Different Permission Levels?
- Domains Only: The user can view and manage your domains.
- Products and Domains: The user can manage domains and other products like hosting or SSL certificates.
- Products, Domains, and Purchase: The user has full access, including making purchases on your behalf.
How Do I Remove Someone’s Access?
- Navigate to Delegate Access Settings:
- Go to Domains > Settings > Delegate Access in your GoDaddy dashboard.
- Find the User:
- Locate the user you want to remove in the People Who Can Access My Account section.
- Remove Access:
- Click the three-dot menu next to their name and select Remove Access.
- Confirm the action when prompted.
Do Users Need a GoDaddy Account to Access My Delegated Account?
Yes, users must have a GoDaddy account to accept an invitation and access your delegated account. Ensure that you are adding users with valid email addresses to facilitate account creation.
Can I Change a User’s Permission Level After Granting Access?
Yes, you can adjust a user’s permission level at any time by navigating to Domains > Settings > Delegate Access, clicking on the user’s name, and selecting a new role from the dropdown menu.
Maximizing the Impact of Delegated Access
To fully leverage the benefits of granting access to your GoDaddy account, integrate these strategies into your broader domain and hosting management plans.
Align with Your Business Goals
- Define Clear Objectives: Identify what you want to achieve with your domain and hosting management, such as increasing website uptime, optimizing SEO, or expanding your online presence.
- Tailor Access to Goals: Assign roles that align with your business objectives, ensuring that users have the necessary permissions to contribute effectively.
Use Data to Optimize Management
- Monitor Domain Performance: Regularly review domain statuses, renewals, and DNS settings to ensure optimal performance and prevent downtime.
- Optimize Hosting Services: Utilize GoDaddy’s hosting tools to manage website performance, security, and scalability based on user inputs and insights.
Integrate with Other Tools
- Connect with CMS Platforms: Integrate your GoDaddy hosting with content management systems like WordPress or Joomla to streamline website management.
- Utilize SEO Tools: Use GoDaddy’s SEO tools in conjunction with user access to enhance your website’s search engine visibility and performance.
Foster Team Collaboration
- Regular Meetings: Hold regular meetings with your team to discuss domain management, hosting configurations, and any issues that need addressing.
- Shared Responsibilities: Distribute tasks such as managing DNS settings, handling renewals, and optimizing hosting resources among team members to ensure efficient account management.
Enhance Security Measures
- Regular Audits: Conduct regular security audits to identify and address potential vulnerabilities in your domains and hosting services.
- Implement Best Practices: Follow security best practices, such as using SSL certificates, enabling firewall protection, and keeping software up-to-date to safeguard your online assets.
Conclusion
Giving someone else access to your GoDaddy account through Delegate Access is a strategic move that enhances your ability to manage multiple domains, collaborate with team members, and maintain the security of your online assets. By following the step-by-step guide provided in this post, implementing best practices, and avoiding common mistakes, you can ensure that your GoDaddy account management is both secure and efficient. Proper delegation not only streamlines operations but also drives better performance and fosters long-term success in the competitive digital landscape.
How to Set Up a Tracking Number on Your Google Business Profile Using CallRail

Understanding where your calls originate is crucial for optimizing your marketing efforts and enhancing customer interactions. By setting up a call tracking number on your Google Business Profile using CallRail, you can gain valuable insights into which marketing channels are driving phone calls to your business. This comprehensive guide will walk you through the process of integrating CallRail with your Google Business Profile, ensuring accurate call tracking without compromising your existing citations and online presence.
Why Set Up a Tracking Number on Your Google Business Profile?
Implementing a call tracking number on your Google Business Profile provides numerous benefits that can significantly impact your business’s growth and customer engagement strategies.
Benefits of Call Tracking
- Insightful Analytics: Understand which marketing campaigns are generating the most phone calls, helping you allocate your marketing budget more effectively.
- Enhanced Customer Experience: Track call durations and outcomes to improve your customer service and address any recurring issues.
- Optimized Marketing Strategies: Identify high-performing keywords and marketing channels to refine your advertising efforts.
- Improved ROI: Measure the effectiveness of your marketing campaigns in driving actual leads and conversions, ensuring better return on investment.
Step-by-Step Guide to Setting Up a Tracking Number on Google Business Profile Using CallRail
Follow these detailed steps to set up a CallRail tracking number on your Google Business Profile, ensuring seamless integration and accurate call tracking.
Step 1: Sign In to Your CallRail Account
- Access CallRail:
- Open your web browser and navigate to CallRail.
- Click on the Sign In button located at the top-right corner.
- Enter your CallRail account credentials to log in.
- Navigate to Your Dashboard:
- Once logged in, you’ll be directed to your CallRail dashboard, where you can manage your tracking numbers and settings.
Step 2: Create a New Tracking Number
- Add a New Number:
- In the CallRail dashboard, click on the Numbers tab.
- Select Add Number to create a new tracking number.
- Choose the Number Type:
- Destination Type: Select Other instead of Google My Business to maintain minimal third-party integrations and avoid potential account suspension issues.
- Select a Local Number:
- Choose a phone number that is local to your business location to ensure consistency in your NAP (Name, Address, Phone) citations.
- For example, select a number with the area code
360if your business is located in that region.
- Name Your Tracking Number:
- Assign a descriptive name to your tracking number, such as
Vancouver GBP, to easily identify its purpose and associated Google Business Profile location.
- Assign a descriptive name to your tracking number, such as
Step 3: Configure Number Routing and Settings
- Set Up Number Routing:
- Scroll down to the Number Routing section.
- Enter your actual office phone number where you want the calls to be forwarded.
- Enable Call Recording (Optional):
- Toggle on Inbound Call Recording if you wish to record calls for quality assurance and training purposes.
- Activate Whisper Message (Optional):
- Enable Whisper Message to inform your team members that the call is being tracked, helping them provide better service.
- Finalize and Activate:
- Click Activate Tracking Number to finalize the setup. Your new tracking number is now ready to be used.
Step 4: Integrate the Tracking Number with Your Google Business Profile
- Access Your Google Business Profile:
- Go to Google Business Profile and sign in with your Google account credentials.
- Navigate to Profile Settings:
- Select the appropriate business location if you manage multiple profiles.
- Click on the Info tab in the left-hand menu.
- Update the Primary Phone Number:
- Locate the Phone section and click the Pencil Icon to edit.
- Replace your existing primary phone number with the new CallRail tracking number.
- Ensure that the format matches Google’s preferred phone number format for consistency.
- Save Changes:
- Click Apply to save the updated phone number to your Google Business Profile.
Step 5: Verify and Monitor Call Tracking
- Test the Tracking Number:
- Call your Google Business Profile phone number to ensure that the call is correctly routed to your office number and is being tracked in CallRail.
- Monitor Call Data:
- Log in to your CallRail dashboard to review call analytics, including call sources, durations, and outcomes.
- Adjust Settings as Needed:
- Based on your call tracking data, make necessary adjustments to your marketing strategies and call routing settings to optimize performance.
Best Practices for Setting Up Call Tracking on Google Business Profile
Implementing best practices ensures that your call tracking setup is both effective and secure, providing accurate data without disrupting your existing online presence.
Use Local Tracking Numbers
- Consistency in NAP: Ensure that your tracking number is local to your business to maintain consistency in your Name, Address, and Phone citations, which are crucial for local SEO.
- Customer Trust: Local numbers enhance customer trust and increase the likelihood of them answering calls.
Avoid Excessive Third-Party Integrations
- Minimal Integrations: Limit the number of third-party platforms connected to your Google Business Profile to reduce the risk of account suspension and maintain control over your data.
- Direct Integration Benefits: Directly integrating CallRail with your Google Business Profile ensures smoother operations and fewer technical issues.
Regularly Review Call Analytics
- Performance Insights: Use CallRail’s analytics to gain insights into which marketing channels are driving the most calls.
- Optimize Campaigns: Adjust your marketing strategies based on call data to focus on high-performing channels and improve ROI.
Maintain Updated Contact Information
- Accurate Information: Ensure that your business information, including your primary phone number, is always up-to-date on your Google Business Profile.
- Consistent Branding: Consistent contact information across all platforms helps in building a reliable brand image.
Common Mistakes to Avoid
Avoiding these common pitfalls can enhance the effectiveness of your call tracking setup and prevent potential issues with your Google Business Profile.
Using Non-Local Tracking Numbers
- Impact: Using tracking numbers from different area codes can disrupt your NAP citations, negatively affecting your local SEO.
- Solution: Always choose a tracking number that is local to your business location to maintain consistency.
Disconnecting Primary Phone Numbers
- Impact: Removing your actual office number and replacing it solely with a tracking number can lead to confusion and missed calls if the tracking service experiences downtime.
- Solution: Forward your tracking number to your actual office number rather than replacing it entirely.
Ignoring Call Analytics
- Impact: Failing to monitor and analyze call data can result in missed opportunities for optimizing your marketing strategies.
- Solution: Regularly review call analytics to make informed decisions about your marketing efforts.
Overcomplicating the Setup
- Impact: Adding too many tracking numbers or overly complex routing settings can make it difficult to manage and interpret call data.
- Solution: Keep your call tracking setup simple and focused on key marketing channels to ensure clarity and ease of management.
Neglecting Security Measures
- Impact: Inadequate security can expose your call tracking data to unauthorized access and misuse.
- Solution: Implement strong passwords, enable two-factor authentication (2FA), and restrict access to your CallRail and Google Business Profile accounts to trusted individuals only.
Frequently Asked Questions
Can I Use CallRail with Multiple Google Business Profiles?
Yes, you can use CallRail to set up tracking numbers for multiple Google Business Profiles. Each profile can have its own unique tracking number to accurately attribute calls to specific locations or services.
Will Using a CallRail Tracking Number Affect My Local SEO?
No, using a CallRail tracking number will not negatively impact your local SEO as long as the tracking number is local to your business location. Google prioritizes NAP consistency by matching the business name and address rather than the phone number.
How Do I Change My Tracking Number in CallRail?
- Log In to CallRail: Access your CallRail account.
- Navigate to Numbers: Click on the Numbers tab.
- Select the Number: Choose the tracking number you wish to change.
- Edit Routing: Update the call routing settings or replace the number as needed.
- Save Changes: Confirm and save your updates to ensure the new settings take effect.
Can I Track Calls from Specific Marketing Channels?
Yes, CallRail allows you to assign different tracking numbers to various marketing channels (e.g., Google Ads, social media, email campaigns). This enables you to attribute calls accurately and analyze the performance of each channel.
Do I Need to Connect CallRail Directly to My Google Business Profile?
No, connecting CallRail directly to your Google Business Profile is optional. You can manually set up tracking by creating a tracking number in CallRail and updating your Google Business Profile with that number. This method provides greater control and minimizes third-party integrations.
Maximizing the Impact of Call Tracking on Your Google Business Profile
To fully leverage the benefits of call tracking, integrate these strategies into your broader marketing and operational plans.
Align with Your Marketing Goals
- Define Clear Objectives: Determine what you want to achieve with call tracking, such as increasing lead generation, improving customer service, or optimizing ad campaigns.
- Tailor Tracking to Goals: Set up specific tracking numbers for different marketing channels to attribute calls accurately and measure campaign effectiveness.
Use Data to Optimize Strategies
- Analyze Call Data: Regularly review call analytics to understand which campaigns are driving the most calls and conversions.
- Refine Marketing Strategies: Use insights from CallRail to adjust your marketing strategies, focusing on high-performing channels and improving underperforming ones.
Integrate with Other Marketing Tools
- Connect with CRM Systems: Integrate CallRail with your Customer Relationship Management (CRM) system to streamline lead management and follow-up processes.
- Leverage Google Analytics: Combine CallRail data with Google Analytics to gain a comprehensive view of user behavior and campaign performance.
Leverage Advanced CallRail Features
- Dynamic Number Insertion (DNI): Use DNI to display unique phone numbers to visitors from different traffic sources, enhancing call attribution.
- Call Recording and Transcription: Utilize CallRail’s call recording and transcription features to gain deeper insights into customer interactions and improve service quality.
Foster Team Collaboration
- Regular Reporting: Generate and share regular call reports with your team to keep everyone informed about campaign performance and lead quality.
- Training and Education: Ensure that your team members are trained on using CallRail effectively, understanding how to interpret call data and act on insights.
Enhance Customer Experience
- Prompt Lead Follow-Up: Use CallRail’s call tracking data to ensure that leads are followed up promptly, increasing the likelihood of conversions.
- Personalize Interactions: Leverage call data to personalize customer interactions, addressing their specific needs and preferences effectively.
Conclusion
Setting up a tracking number on your Google Business Profile using CallRail is a strategic move that can significantly enhance your understanding of where your calls are coming from and how your marketing efforts are performing. By following this step-by-step guide, implementing best practices, and avoiding common mistakes, you can ensure a seamless and effective call tracking setup. Proper call tracking not only improves your ability to measure campaign performance but also empowers you to make data-driven decisions that drive business growth and success in the competitive digital landscape.
How to Switch Accounts in GoDaddy (Switch to Other Person’s Account)
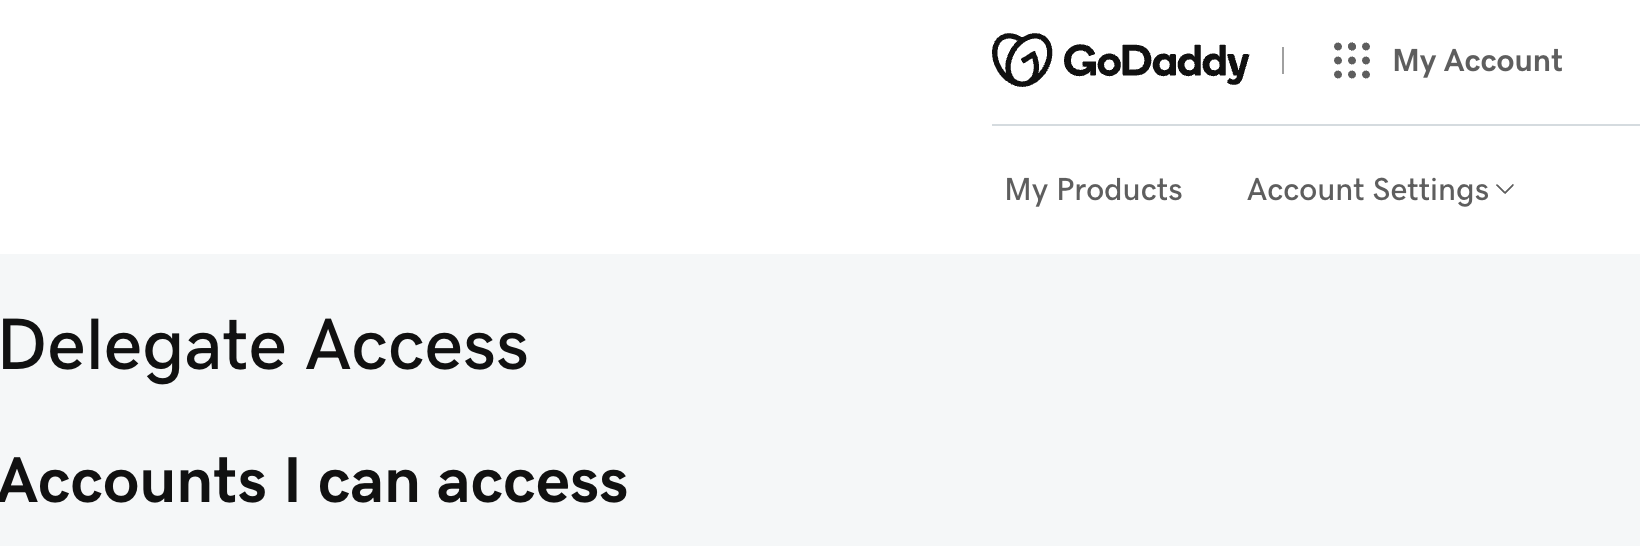
Managing multiple domains and delegating access to team members or agencies can streamline your online operations and enhance productivity. Whether you’re a web developer handling client websites, a business owner managing various online assets, or collaborating with marketing professionals, knowing how to switch accounts in GoDaddy is essential. In the “How to Switch Accounts in GoDaddy (Switch to Other Person’s Account)” video, you learn a straightforward method to access delegated accounts and resolve common permission issues. This comprehensive guide will expand on those instructions, offering detailed steps, best practices, and additional insights to ensure secure and efficient management of your GoDaddy accounts.
Why Switching Accounts in GoDaddy Matters
Switching accounts in GoDaddy allows you to manage multiple domains and hosting services without the hassle of logging in and out repeatedly. It facilitates collaboration, ensures that each user has the appropriate access level, and maintains the security and integrity of your online assets.
Benefits of Switching Accounts
- Efficient Management: Quickly access different accounts to manage various domains, hosting services, and DNS settings without logging out.
- Collaborative Workflows: Delegate tasks to team members or agencies, enabling them to manage specific domains or services while maintaining overall control.
- Enhanced Security: Assign roles with specific permissions to ensure that users can only access the areas they need, reducing the risk of unauthorized changes.
- Time-Saving: Streamline your workflow by minimizing the need to switch between multiple logins, allowing you to focus on more critical tasks.
Step-by-Step Guide to Switching Accounts in GoDaddy
Follow these detailed steps to securely switch accounts in GoDaddy, ensuring that you can efficiently manage delegated access without encountering permission issues.
Step 1: Sign In to Your GoDaddy Account
- Access GoDaddy:
- Open your web browser and navigate to GoDaddy.
- Click on the Sign In button located at the top-right corner of the homepage.
- Enter Credentials:
- Input your GoDaddy username and password.
- Click Sign In to access your GoDaddy dashboard.
Step 2: Navigate to Account Access Settings
- Open the Dashboard:
- Once logged in, you’ll be directed to your GoDaddy account dashboard, which provides an overview of your domains, hosting services, and account settings.
- Access Account Settings:
- Click on your profile name or icon located at the top-right corner of the dashboard.
- From the dropdown menu, select Account Settings.
Step 3: Go to Delegated Access
- Find Delegated Access:
- In the Account Settings menu, locate and click on Delegate Access. This section allows you to manage who has access to your account and what level of permissions they possess.
- View Delegated Users:
- Here, you can see a list of all users who have been granted access to your GoDaddy account, along with their permission levels.
Step 4: Switch to a Delegated Account
- Identify the Account:
- In the Delegated Access section, find the account you wish to switch to. This could be a client’s account, an agency’s account, or another delegated user’s account.
- Click on Access:
- Next to the desired account, click on the Access button. This action will switch your dashboard to the selected delegated account.
- Verify Permissions:
- Once switched, ensure that you have the appropriate permissions to manage the account. Depending on the role assigned (e.g., Administrator, Standard, Read-Only), your capabilities may vary.
Step 5: Manage Permissions and Roles
- Assign Roles Appropriately:
- When adding a new user, choose the appropriate role based on their responsibilities. Common roles include:
- Administrator: Full control over the account, including managing users and account settings.
- Standard: Can manage domains and hosting but cannot manage user permissions.
- Read-Only: Can view account details without making any changes.
- When adding a new user, choose the appropriate role based on their responsibilities. Common roles include:
- Add Users as Needed:
- To add a new user, click on the Add User button, enter their email address, select the desired role, and send the invitation.
Step 6: Resolve Security Allowed Domain Issues
A common issue when adding users is encountering the error message: “This domain is not an allowed domain to make changes to the allowed domain list. Please update your security settings.” Here’s how to resolve it:
- Access Security Settings:
- In your GoDaddy dashboard, navigate back to Account Settings.
- Click on the Security tab.
- Add Allowed Domain:
- Under the Allowed Domains section, click on Add Domain.Enter the domain of the user you’re trying to add (e.g.,
localsync.com).Click Save to update the allowed domains list.
- Under the Allowed Domains section, click on Add Domain.Enter the domain of the user you’re trying to add (e.g.,
- Retry Adding the User:
- Return to the Delegate Access section.
- Attempt to add the user again by entering their email address and selecting the appropriate role.
- The error should no longer appear, allowing you to successfully grant access.
Best Practices for Managing Delegated Access
Implementing best practices ensures that granting and managing access to your GoDaddy accounts is secure, efficient, and beneficial for your business.
Define Clear Roles and Responsibilities
- Assess Needs: Determine what tasks each user needs to perform and assign roles based on their responsibilities.
- Avoid Overlapping Duties: Clearly define each user’s role to prevent confusion and ensure accountability.
Limit Access Based on Necessity
- Principle of Least Privilege: Grant only the access necessary for users to perform their tasks. Avoid assigning higher permissions than required.
- Regularly Review Permissions: Periodically audit user access to ensure that permissions are still appropriate and revoke access for users who no longer need it.
Maintain Security
- Use Strong Passwords: Ensure that all users have strong, unique passwords for their GoDaddy accounts.
- Enable Two-Factor Authentication (2FA): Add an extra layer of security by enabling 2FA for all accounts with access to your GoDaddy account.
- Monitor Account Activity: Regularly check the Delegate Access section for any unusual activity or unauthorized access.
Communicate Effectively
- Provide Guidelines: Share clear guidelines on how users should interact with the GoDaddy account to maintain data integrity and consistency.
- Foster Collaboration: Encourage open communication among team members to streamline workflows and address any issues promptly.
Utilize GoDaddy Features
- Use Account Dashboard: Leverage GoDaddy’s account dashboard to monitor domain statuses, hosting services, and billing information.
- Set Up Alerts: Enable notifications for important account activities to stay informed about changes or updates.
Common Mistakes to Avoid
Avoiding these common pitfalls can enhance the effectiveness and security of managing delegated access in your GoDaddy account.
Granting Excessive Permissions
- Impact: Assigning higher permissions than necessary can lead to unauthorized changes or misuse of your account.
- Solution: Carefully evaluate the access level required for each user and assign roles accordingly.
Neglecting to Update Permissions
- Impact: Failing to update permissions when roles change or when users leave can compromise your account’s security.
- Solution: Regularly review and update user permissions to reflect current team structures and responsibilities.
Overlooking Security Measures
- Impact: Inadequate security can expose your account to potential threats.
- Solution: Implement robust security practices, including strong passwords and 2FA, to protect your account.
Poor Communication
- Impact: Lack of clear communication can lead to misunderstandings and inconsistent account management.
- Solution: Establish clear communication channels and provide comprehensive training and guidelines for all users.
Ignoring Account Activity
- Impact: Not monitoring account activity can result in unnoticed unauthorized access or changes.
- Solution: Regularly review the Delegate Access section and monitor account logs for any suspicious activity.
Frequently Asked Questions
Can I Grant Access to Multiple People at Once?
Yes, you can invite multiple users by repeating the invitation process for each individual. However, manage invitations carefully to maintain control over who has access to your GoDaddy account.
What Are the Different Permission Levels?
- Administrator: Full control, including managing users and account settings.
- Standard: Can manage domains and hosting but cannot manage user permissions.
- Read-Only: Can view account details without making any changes.
How Do I Remove Someone’s Access?
- Navigate to Account Settings > Delegate Access.
- Find the User: Locate the user you want to remove.
- Remove Access: Click the three-dot menu next to their name and select Remove Access.
Do Users Need a GoDaddy Account to Access My Delegated Account?
Yes, users must have a GoDaddy account to accept an invitation and access your delegated account. Ensure that you are adding users with valid email addresses to facilitate account creation.
Can I Change a User’s Permission Level After Granting Access?
Yes, you can adjust a user’s permission level at any time by navigating to Account Settings > Delegate Access, clicking on the user’s name, and selecting a new role from the dropdown menu.
Maximizing the Impact of Delegated Access
To fully leverage the benefits of granting access to your GoDaddy account, integrate these strategies into your broader domain and hosting management plans.
Align with Your Business Goals
- Define Clear Objectives: Identify what you want to achieve with your domain and hosting management, such as increasing website uptime, optimizing SEO, or expanding your online presence.
- Tailor Access to Goals: Assign roles that align with your business objectives, ensuring that users have the necessary permissions to contribute effectively.
Use Data to Optimize Management
- Monitor Domain Performance: Regularly review domain statuses, renewals, and DNS settings to ensure optimal performance and prevent downtime.
- Optimize Hosting Services: Utilize GoDaddy’s hosting tools to manage website performance, security, and scalability based on user inputs and insights.
Integrate with Other Tools
- Connect with CMS Platforms: Integrate your GoDaddy hosting with content management systems like WordPress or Joomla to streamline website management.
- Utilize SEO Tools: Use GoDaddy’s SEO tools in conjunction with user access to enhance your website’s search engine visibility and performance.
Foster Team Collaboration
- Regular Meetings: Hold regular meetings with your team to discuss domain management, hosting configurations, and any issues that need addressing.
- Shared Responsibilities: Distribute tasks such as managing DNS settings, handling renewals, and optimizing hosting resources among team members to ensure efficient account management.
Enhance Security Measures
- Regular Audits: Conduct regular security audits to identify and address potential vulnerabilities in your domains and hosting services.
- Implement Best Practices: Follow security best practices, such as using SSL certificates, enabling firewall protection, and keeping software up-to-date to safeguard your online assets.
Conclusion
Switching accounts in GoDaddy is a strategic capability that enhances your ability to manage multiple domains, collaborate with team members, and maintain the security of your online assets. By following the step-by-step guide provided in this post, implementing best practices, and avoiding common mistakes, you can ensure that your GoDaddy account management is both secure and efficient. Proper delegation and strategic management of your GoDaddy accounts not only streamline operations but also drive better performance and foster long-term success in the competitive digital landscape.
How to Install the CallRail JavaScript Snippet on Your WordPress Website Using the Plugin
Tracking phone calls effectively is essential for understanding your marketing efforts and optimizing your business strategies. CallRail offers robust call tracking solutions that help you monitor and analyze phone interactions, providing valuable insights into your customer behavior and campaign performance. Installing the CallRail JavaScript snippet on your WordPress website is a straightforward process, especially when using a dedicated plugin. In the “How to Install the CallRail JavaScript Snippet on Your WordPress Website Using the Plugin” video, you learn a step-by-step method to integrate CallRail seamlessly with your WordPress site. This comprehensive guide will expand on those instructions, offering detailed steps, best practices, and additional insights to ensure a smooth and successful installation.
Why Install the CallRail JavaScript Snippet on Your WordPress Website?
Integrating CallRail with your WordPress website allows you to track phone calls generated from your site, attribute them to specific marketing campaigns, and gain deeper insights into your lead generation efforts. This integration is crucial for businesses aiming to measure the effectiveness of their online marketing and improve customer engagement.
Benefits of Installing the CallRail JavaScript Snippet
- Accurate Call Tracking: Monitor incoming calls from different marketing channels, such as PPC, SEO, and social media, to determine which strategies are driving the most leads.
- Enhanced Analytics: Gain access to detailed call analytics, including call duration, caller location, and call outcomes, to better understand customer behavior.
- Improved ROI: Allocate your marketing budget more effectively by identifying high-performing campaigns and optimizing underperforming ones.
- Seamless Integration: Easily integrate CallRail with other tools like CRM systems, Google Analytics, and marketing platforms to streamline your workflow and data management.
Step-by-Step Guide to Installing the CallRail JavaScript Snippet Using the Plugin
Follow these detailed steps to install the CallRail JavaScript snippet on your WordPress website using the CallRail plugin, ensuring that your call tracking is set up correctly and efficiently.
Step 1: Sign In to Your CallRail Account
- Access CallRail:
- Open your web browser and navigate to CallRail.
- Click on the Sign In button located at the top-right corner.
- Enter your CallRail account credentials to log in.
- Navigate to Account Settings:
- Once logged in, click on your profile icon or account name in the top-right corner.
- Select Account Settings from the dropdown menu.
Step 2: Obtain Your CallRail JavaScript Snippet
- Access Tracking Settings:
- In the Account Settings, navigate to the Tracking or Integrations section.
- Copy the JavaScript Snippet:
- Locate the JavaScript snippet provided by CallRail.Click on Copy to Clipboard to copy the snippet for later use.
Step 3: Install the CallRail Plugin on Your WordPress Website
- Log In to Your WordPress Dashboard:
- Open a new tab and navigate to your WordPress login page, typically found at your website /wp-admin
- Enter your WordPress username and password to access the dashboard.
- Navigate to Plugins:
- In the left-hand sidebar, hover over Plugins and click on Add New.
- Search for the CallRail Plugin:
- In the search bar, type CallRail.Locate the CallRail Phone Tracking plugin from the search results.
- Install and Activate the Plugin:
- Click on the Install Now button next to the CallRail plugin.After installation, click Activate to enable the plugin on your website.
Step 4: Configure the CallRail Plugin
- Access Plugin Settings:
- In the left-hand sidebar, hover over Settings and click on CallRail.
- Enter Your CallRail Plugin Key:
- Locate the field labeled CallRail Plugin Key.Return to your CallRail account, where you previously copied the JavaScript snippet.Extract the plugin key from the snippet or from your CallRail account settings.Paste the plugin key into the designated field in the WordPress plugin settings.
- Save Changes:
- After entering the plugin key, click on Save Changes to apply the settings.
Step 5: Verify the Installation
- Test the Snippet:
- Visit your website and perform a test call to ensure that CallRail is tracking the call correctly.
- Check your CallRail dashboard to verify that the test call appears in your call logs.
- Troubleshoot if Necessary:
- If the call does not appear, revisit the plugin settings to ensure that the plugin key is entered correctly.Ensure that the plugin is activated and that no other plugins are conflicting with CallRail.
Step 6: Optimize Call Tracking Settings
- Set Up Tracking Numbers:
- In your CallRail account, configure tracking numbers for different marketing channels to attribute calls accurately.
- Integrate with Other Tools:
- Connect CallRail with your CRM, Google Analytics, or other marketing platforms to enhance data synchronization and reporting.
- Customize Call Handling:
- Configure call routing, voicemail settings, and automated responses to optimize the caller experience.
Best Practices for Installing the CallRail JavaScript Snippet
Implementing best practices ensures that your CallRail installation is secure, efficient, and provides accurate tracking data.
Use a Dedicated Plugin
- Why: Using the official CallRail plugin simplifies the installation process, ensures compatibility with WordPress updates, and provides easy access to plugin settings.
- How: Always use the latest version of the CallRail plugin from the WordPress repository to benefit from the latest features and security updates.
Secure Your Plugin Key
- Why: The plugin key is essential for authenticating your WordPress site with CallRail. Keeping it secure prevents unauthorized access to your call tracking data.
- How: Do not share your plugin key publicly. Store it securely and restrict access to trusted team members.
Regularly Update Plugins and WordPress
- Why: Keeping your WordPress installation and plugins up-to-date ensures compatibility, enhances security, and improves performance.
- How: Regularly check for updates in your WordPress dashboard under Dashboard > Updates and apply them promptly.
Monitor Call Tracking Data
- Why: Regular monitoring helps you identify trends, optimize marketing strategies, and ensure that your call tracking is functioning correctly.
- How: Use CallRail’s analytics and reporting features to review call data, track conversions, and adjust your campaigns based on insights.
Integrate with Other Marketing Tools
- Why: Integration with tools like Google Analytics and your CRM provides a comprehensive view of your marketing performance and customer interactions.
- How: Utilize CallRail’s integration options to connect with your existing marketing stack, enhancing data synchronization and reporting capabilities.
Common Mistakes to Avoid
Avoiding these common pitfalls can enhance the effectiveness and accuracy of your CallRail installation on WordPress.
Incorrect Plugin Key Entry
- Impact: An incorrect plugin key can prevent the CallRail snippet from functioning, leading to missing call data.
- Solution: Double-check the plugin key entered in the plugin settings. Ensure there are no extra spaces or characters.
Not Verifying the Installation
- Impact: Failing to verify the installation may result in undetected issues, leading to inaccurate call tracking.
- Solution: Perform regular tests by making test calls and verifying their appearance in the CallRail dashboard.
Overlapping Plugins
- Impact: Using multiple plugins for the same purpose can cause conflicts and disrupt call tracking.
- Solution: Use only the CallRail plugin for call tracking. Disable or remove any other plugins that perform similar functions.
Ignoring Call Routing Settings
- Impact: Improper call routing can lead to missed calls or unprofessional handling of customer inquiries.
- Solution: Configure call routing settings in CallRail to ensure that calls are directed to the appropriate team members or departments.
Neglecting Security Measures
- Impact: Inadequate security can expose your website and call tracking data to potential threats.
- Solution: Implement security best practices, such as using strong passwords, enabling two-factor authentication (2FA), and keeping your WordPress site and plugins updated.
Frequently Asked Questions
Can I Install the CallRail JavaScript Snippet Without a Plugin?
Yes, you can manually install the JavaScript snippet by adding it to your WordPress theme’s header.php file or using a code injection plugin. However, using the official CallRail plugin is recommended for ease of installation, automatic updates, and enhanced compatibility.
What Should I Do If Call Tracking Isn’t Working?
- Check Plugin Activation: Ensure that the CallRail plugin is activated in your WordPress dashboard.
- Verify Plugin Key: Double-check that the correct plugin key is entered in the plugin settings.
- Test the Snippet: Make a test call and check if it appears in your CallRail dashboard.
- Consult Support: If issues persist, contact CallRail support for assistance.
How Do I Update the CallRail JavaScript Snippet?
If you need to update the JavaScript snippet, the CallRail plugin typically handles updates automatically. Ensure that the plugin is up-to-date in your WordPress dashboard. If you installed the snippet manually, replace the old snippet with the new one provided by CallRail.
Can I Use CallRail with Multiple WordPress Sites?
Yes, you can use CallRail with multiple WordPress sites by installing the CallRail plugin on each site and using unique plugin keys for each account. This allows you to track calls separately for each website.
How Do I Remove the CallRail JavaScript Snippet?
- Using the Plugin: Deactivate or delete the CallRail plugin from your WordPress dashboard under Plugins > Installed Plugins.
- Manual Removal: If you installed the snippet manually, remove the JavaScript code from your theme’s
header.phpfile or the code injection plugin you used.
Maximizing the Impact of CallRail on Your WordPress Website
To fully leverage the benefits of CallRail, integrate these strategies into your broader marketing and operational plans.
Align with Your Marketing Goals
- Define Clear Objectives: Identify what you want to achieve with call tracking, such as increasing lead generation, improving customer service, or optimizing ad campaigns.
- Tailor Tracking to Goals: Set up specific tracking numbers for different marketing channels to attribute calls accurately and measure campaign effectiveness.
Use Data to Optimize Campaigns
- Analyze Call Data: Regularly review call analytics to understand which campaigns are driving the most calls and conversions.
- Refine Marketing Strategies: Use insights from CallRail to adjust your marketing strategies, focusing on high-performing channels and improving underperforming ones.
Integrate with Other Marketing Tools
- Connect with CRM Systems: Integrate CallRail with your CRM to streamline lead management and follow-up processes.
- Leverage Google Analytics: Combine CallRail data with Google Analytics to gain a comprehensive view of user behavior and campaign performance.
Leverage Advanced CallRail Features
- Dynamic Number Insertion (DNI): Use DNI to display unique phone numbers to visitors from different traffic sources, enhancing call attribution.
- Call Recording and Transcription: Utilize CallRail’s call recording and transcription features to gain deeper insights into customer interactions and improve service quality.
Foster Team Collaboration
- Regular Reporting: Generate and share regular call reports with your team to keep everyone informed about campaign performance and lead quality.
- Training and Education: Ensure that your team members are trained on using CallRail effectively, understanding how to interpret call data and act on insights.
Enhance Customer Experience
- Prompt Lead Follow-Up: Use CallRail’s call tracking data to ensure that leads are followed up promptly, increasing the likelihood of conversions.
- Personalize Interactions: Leverage call data to personalize customer interactions, addressing their specific needs and preferences effectively.
Conclusion
Installing the CallRail JavaScript snippet on your WordPress website using the CallRail plugin is a strategic move that can significantly enhance your call tracking capabilities, providing valuable insights into your marketing efforts and customer interactions. By following the step-by-step guide provided in this post, implementing best practices, and avoiding common mistakes, you can ensure a seamless and effective CallRail integration. Proper call tracking not only improves your ability to measure campaign performance but also empowers you to make data-driven decisions that drive business growth and success in the competitive digital landscape.
How to Add Users to Your Google Ads Account
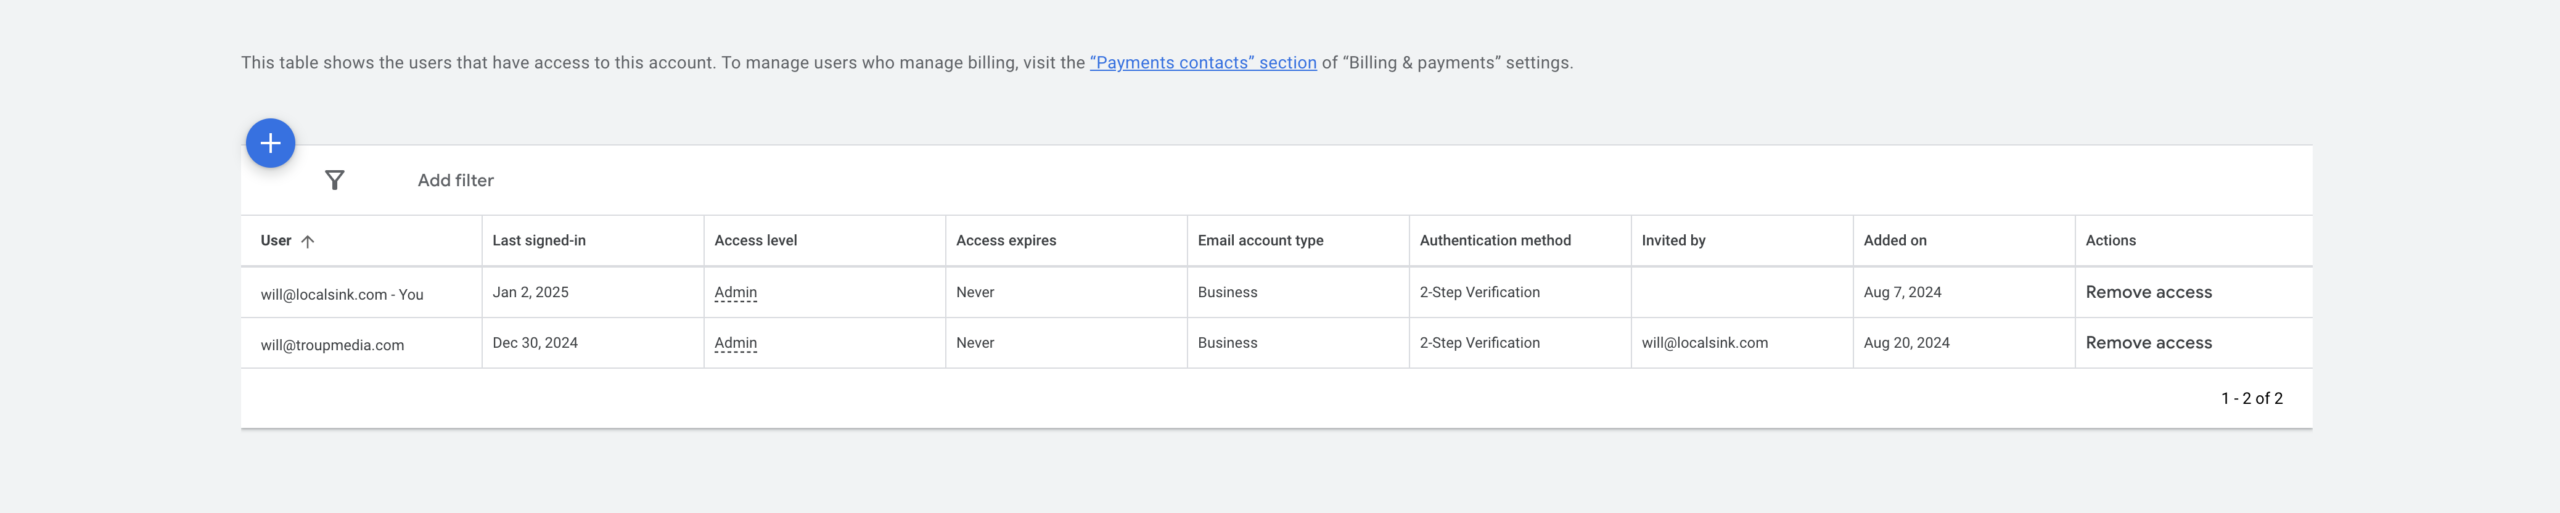
Managing your Google Ads account effectively is crucial for optimizing your advertising campaigns, monitoring performance, and driving business growth. Whether you’re collaborating with an agency, delegating tasks to team members, or working with external partners, granting appropriate access to your Google Ads account ensures that everyone can contribute effectively without compromising your account’s security. In the “How to Add Users to Your Google Ads Account and Fix the Security Allowed Domain Issue” video, you learn a straightforward method to provide access and resolve common permission issues. This comprehensive guide will expand on those instructions, offering detailed steps, best practices, and additional insights to ensure secure and effective management of your Google Ads account.
Why Adding Users to Your Google Ads Account Matters
Granting access to your Google Ads account enables collaboration, streamlines workflow, and enhances your advertising performance. Whether you’re working with customer service representatives (CSRs), hiring marketing specialists, or partnering with agencies, providing the right level of access ensures that everyone involved can contribute effectively without compromising your account’s security.
Benefits of Adding Users
- Collaborative Campaign Management: Enable team members to create, manage, and optimize ad campaigns, ensuring that your advertising efforts are comprehensive and well-coordinated.
- Improved Response Times: Allowing CSRs to access the account can lead to faster lead follow-ups and improved customer satisfaction.
- Enhanced Campaign Optimization: Granting access to marketing specialists or agencies allows for continuous optimization of your ads based on performance data.
- Efficient Workflow: Delegate specific tasks to team members, freeing up your time to focus on strategic business activities while ensuring that your advertising efforts are well-maintained.
Step-by-Step Guide to Adding Users in Google Ads
Follow these detailed steps to securely add users to your Google Ads account and resolve any security allowed domain issues that may arise.
Step 1: Sign In to Your Google Ads Account
- Access Google Ads:
- Open your web browser and navigate to Google Ads.
- Click on the Sign In button located at the top-right corner.
- Enter your Google account credentials associated with your Google Ads account.
- Select Your Account:
- If you manage multiple accounts, select the one you want to grant access to from the list of available accounts.
Step 2: Navigate to Admin Access and Security
- Open the Dashboard:
- Once logged in, you’ll be directed to your Google Ads dashboard, which provides an overview of your campaigns, performance metrics, and account settings.
- Access Admin Settings:
- In the upper right corner, click on the Tools and Settings icon (represented by a wrench or three vertical dots).Under the Setup section, select Access and security.
Step 3: Add a New User
- Click on Add User:
- On the Access and security page, click the blue + button or the Add User button located at the top-right corner.
- Enter User Details:
- Email Address: Input the email address of the person you want to grant access to. Ensure it is a Google account email (Gmail or Google Workspace account).Access Level: Choose the appropriate access level based on the role you want to assign. The available access levels typically include:
- Admin: Full access, including managing users and account settings.Standard: Can manage campaigns, view reports, and handle billing but cannot manage users.Read-Only: Can view account data and performance metrics but cannot make any changes.
- Email Address: Input the email address of the person you want to grant access to. Ensure it is a Google account email (Gmail or Google Workspace account).Access Level: Choose the appropriate access level based on the role you want to assign. The available access levels typically include:
- Send Invitation:
- After entering the email address and selecting the access level, click Send Invitation to grant access.
- The invited user will receive an email notification with instructions to accept the invitation and gain access to your Google Ads account.
Step 4: Resolve the Security Allowed Domain Issue
A common issue when adding users is encountering the error: “This domain is not an allowed domain to make changes to the allowed domain list. Please update your security settings.” Here’s how to fix it:
- Access Security Settings:
- In the Access and security page, click on the Security tab.
- Allow Domains:
- Locate the Allowed Domains section.
- Click on Add Domain.
- Add the User’s Domain:
- Enter the domain of the user you’re trying to add (e.g.,
localsink.com).Click Save to update the allowed domains list.
- Enter the domain of the user you’re trying to add (e.g.,
- Retry Adding the User:
- Return to the Access and security page.
- Click Add User again, enter the user’s email address, select the appropriate access level, and send the invitation.
- The user should now be added without encountering the security error.
Step 5: Confirm and Manage Access
- Verify Invitations:
- Ensure that the invited users have accepted the invitations by checking the Access and security section. The new users should appear in the list with their assigned roles.
- Adjust Permissions if Needed:
- To change a user’s permission level, click on their name and select a different role from the dropdown menu.
- Remove Users:
- To revoke access, click the three-dot menu next to the user’s name and select Remove access.
Best Practices for Granting Access
Implementing best practices ensures that granting access to your Google Ads account is secure, efficient, and beneficial for your business.
Define Clear Roles and Responsibilities
- Assess Needs: Determine what tasks each user needs to perform and assign roles based on their responsibilities.
- Avoid Overlapping Duties: Clearly define each user’s role to prevent confusion and ensure accountability.
Limit Access Based on Necessity
- Principle of Least Privilege: Grant only the access necessary for users to perform their tasks. Avoid assigning higher permissions than required.
- Regularly Review Permissions: Periodically audit user access to ensure that permissions are still appropriate and revoke access for users who no longer need it.
Maintain Security
- Use Strong Passwords: Ensure that all users have strong, unique passwords for their Google accounts.
- Enable Two-Factor Authentication (2FA): Add an extra layer of security by enabling 2FA for all accounts with access to your Google Ads.
- Monitor Account Activity: Regularly check the Access and security section for any unusual activity or unauthorized access.
Communicate Effectively
- Provide Guidelines: Share clear guidelines on how users should interact with the Google Ads account to maintain data integrity and consistency.
- Foster Collaboration: Encourage open communication among team members to streamline workflows and address any issues promptly.
Utilize Google Ads Features
- Leverage Insights: Use the insights and analytics provided by Google Ads to monitor performance and make informed decisions.
- Manage Billing: Assign billing responsibilities to specific users to ensure accurate and timely payments.
Common Mistakes to Avoid
Avoiding these common pitfalls can enhance the effectiveness and security of granting access to your Google Ads account.
Granting Excessive Permissions
- Impact: Assigning higher permissions than necessary can lead to unauthorized changes or misuse of your account.
- Solution: Carefully evaluate the access level required for each user and assign roles accordingly.
Neglecting to Update Permissions
- Impact: Failing to update permissions when roles change or when users leave can compromise your account’s security.
- Solution: Regularly review and update user permissions to reflect current team structures and responsibilities.
Overlooking Security Measures
- Impact: Inadequate security can expose your account to potential threats.
- Solution: Implement robust security practices, including strong passwords and 2FA, to protect your account.
Poor Communication
- Impact: Lack of clear communication can lead to misunderstandings and inconsistent account management.
- Solution: Establish clear communication channels and provide comprehensive training and guidelines for all users.
Ignoring Analytics Insights
- Impact: Failing to utilize the data collected can result in missed opportunities for optimizing your advertising strategies.
- Solution: Encourage users to actively engage with the analytics data and use it to inform decision-making processes.
Frequently Asked Questions
Can I Grant Access to Multiple People at Once?
Yes, you can invite multiple users by repeating the invitation process for each individual. However, manage invitations carefully to maintain control over who has access to your Google Ads account.
What Are the Different Permission Levels?
- Admin: Full access, including managing users and account settings.
- Standard: Can manage campaigns, view reports, and handle billing but cannot manage users.
- Read-Only: Can view account data and performance metrics but cannot make any changes.
How Do I Remove Someone’s Access?
- Navigate to Admin > Access and security.
- Find the User: Locate the user you want to remove in the list.
- Remove Access: Click the three-dot menu next to their name and select Remove access.
Do Users Need a Google Account to Access My Ads?
Yes, users must have a Google account (Gmail or Google Workspace account) to accept an invitation and access your Google Ads account.
Can I Change a User’s Permission Level After Granting Access?
Yes, you can adjust a user’s permission level at any time by navigating to Admin > Access and security, clicking on the user’s name, and selecting a new role from the dropdown menu.
Maximizing the Impact of Granted Access
To fully leverage the benefits of granting access to your Google Ads account, integrate these strategies into your broader marketing and operational plans.
Align with Your Marketing Goals
- Define Clear Objectives: Identify what you want to achieve with your Google Ads campaigns, such as increasing brand awareness, driving website traffic, or boosting conversions.
- Tailor Campaign Management: Ensure that users assigned to manage your ads understand and align with your marketing objectives to maintain consistency and focus.
Use Data to Optimize Campaigns
- Analyze Performance Metrics: Regularly review the performance metrics provided by Google Ads to understand how your campaigns are performing and identify areas for improvement.
- Refine Targeting: Adjust your ad targeting based on insights gained from your campaign data to reach more qualified leads and improve ROI.
Integrate with Other Marketing Tools
- Link with Google Analytics: Connect your Google Ads account with Google Analytics to gain a more comprehensive view of your website’s performance and user behavior.
- Utilize CRM Systems: Integrate Google Ads data with your Customer Relationship Management (CRM) system to streamline lead management and follow-up processes.
Leverage Advanced Google Ads Features
- Use Custom Audiences: Create and utilize custom audiences to target specific segments of your market more effectively.
- Implement Conversion Tracking: Set up conversion tracking to measure the effectiveness of your campaigns and understand the return on investment (ROI).
Foster Team Collaboration
- Regular Meetings: Hold regular meetings with your team to discuss insights from Google Ads, review performance metrics, and plan updates or improvements to your campaigns.
- Shared Responsibilities: Distribute tasks such as campaign creation, optimization, and reporting among team members to ensure efficient account management.
Enhance Customer Experience
- Optimize Ad Content: Ensure that your ads are relevant, engaging, and aligned with your brand message to attract and retain customers.
- Responsive Support: Assign team members to monitor and respond to customer inquiries and feedback related to your ads, enhancing customer satisfaction and trust.
Conclusion
Adding users to your Google Ads account is a strategic move that can significantly enhance your advertising efforts, streamline collaboration, and optimize campaign management. By following the step-by-step guide provided in this post, implementing best practices, and avoiding common mistakes, you can ensure that your Google Ads setup is secure, efficient, and aligned with your business objectives. Proper collaboration and strategic management of your Google Ads account not only streamline operations but also drive better performance and foster long-term success in the competitive digital advertising landscape.
How to Add a User to Your WordPress Website

Managing a WordPress website often involves collaboration among multiple team members, whether you’re working with content creators, editors, developers, or marketing specialists. Adding users with appropriate roles ensures that each team member has the necessary access to perform their tasks without compromising the site’s security or integrity. In the “How to Add a User to Your WordPress Website” video, you learn a straightforward method to provide access using WordPress’s built-in user management features. This comprehensive guide will expand on those instructions, offering detailed steps, best practices, and additional insights to ensure secure and effective management of your WordPress site.
Why Adding Users to Your WordPress Website Matters
Granting access to your WordPress website allows trusted individuals to contribute to your site’s content, manage settings, and perform various administrative tasks. Proper user management enhances collaboration, streamlines workflows, and maintains the security and functionality of your website.
Benefits of Adding Users
- Collaborative Content Creation: Enable team members to write, edit, and publish content, ensuring a steady flow of fresh material without overburdening a single individual.
- Efficient Site Management: Assign specific roles to manage site settings, themes, plugins, and updates, ensuring that your website remains secure and up-to-date.
- Enhanced Security: Control who has access to sensitive areas of your website, minimizing the risk of unauthorized changes or data breaches.
- Scalability: Easily scale your website’s management by adding new users as your team grows, without disrupting existing workflows.
Step-by-Step Guide to Adding Users in WordPress
Follow these detailed steps to securely add users to your WordPress website, ensuring that each user has the appropriate access level for their role.
Step 1: Sign In to Your WordPress Dashboard
- Access Your WordPress Login Page:
- Open your web browser and navigate to your WordPress login page, typically found at
yourwebsite.com/wp-admin/oryourwebsite.com/wp-login.php.
- Open your web browser and navigate to your WordPress login page, typically found at
- Enter Credentials:
- Input your admin username and password, then click Log In to access the WordPress dashboard.
Step 2: Navigate to the Users Section
- Open the Dashboard:
- Once logged in, you’ll be directed to the WordPress dashboard, which provides an overview of your site’s status and activities.
- Go to Users:
- In the left-hand sidebar, hover over Users and click on Add New from the dropdown menu.
Step 3: Add a New User
- Fill in User Details:
- Username: Enter a unique username for the new user. It’s advisable to use their email address for consistency.
- Email: Input the user’s email address. Ensure it’s a valid Google account email (Gmail or Google Workspace account) to receive notifications.
- First Name & Last Name: (Optional) Enter the user’s first and last name.
- Website: (Optional) Add the user’s website if applicable.
- Set a Password:
- Click Show password to set a secure password for the new user. WordPress will generate a strong password automatically, but you can customize it as needed.
- Ensure the password is strong to maintain site security.
- Send User Notification:
- Check the box labeled Send the new user an email about their account to notify them via email about their new account.
Step 4: Assign a User Role
WordPress offers several predefined roles, each with varying levels of access and capabilities. Assigning the appropriate role is crucial for maintaining site security and ensuring users can perform their tasks effectively.
- Select a Role:
- Scroll down to the Role dropdown menu and choose the appropriate role for the new user. The available roles are:
- Administrator:
- Capabilities: Full access to all administrative features, including managing other users, themes, plugins, and site settings.
- Use Case: Reserved for the primary site owner or trusted team members who need comprehensive control over the website.
- Editor:
- Capabilities: Can manage and publish posts, pages, and other content. Can moderate comments and manage categories and tags.
- Use Case: Suitable for team members responsible for content creation and management.
- Author:
- Capabilities: Can write, edit, and publish their own posts but cannot manage others’ content.
- Use Case: Ideal for freelance writers or contributors who produce individual content pieces.
- Contributor:
- Capabilities: Can write and edit their own posts but cannot publish them. Must submit posts for approval.
- Use Case: Best for guest authors or interns who contribute content under supervision.
- Subscriber:
- Capabilities: Can only manage their profile and view content restricted to subscribers.
- Use Case: Suitable for users who need minimal access, such as beta testers or users who receive newsletters.
- Administrator:
- Scroll down to the Role dropdown menu and choose the appropriate role for the new user. The available roles are:
- Choose the Right Role:
- Assign the role based on the user’s responsibilities. For example, give Administrator access only to trusted individuals who manage the entire website, while giving Editor or Author roles to content managers.
Step 5: Add the User
- Finalize User Addition:
- After filling in all necessary details and selecting the appropriate role, click the Add New User button at the bottom of the page.
- User Receives Notification:
- The new user will receive an email with their login credentials and a link to access the WordPress dashboard.
Step 6: Verify and Manage User Access
- Review Added Users:
- Navigate back to Users > All Users to see the list of current users and their assigned roles.
- Adjust Permissions if Needed:
- To change a user’s role, hover over their name and click Edit. From there, you can select a different role and update their permissions accordingly.
- Remove Users:
- If a user no longer needs access, hover over their name, click Delete, and follow the prompts to remove them from the site.
Best Practices for Adding Users to WordPress
Implementing best practices ensures that granting access to your WordPress site is secure, efficient, and beneficial for your business.
Define Clear Roles and Responsibilities
- Assess Needs: Determine what tasks each user needs to perform and assign roles based on their responsibilities.
- Avoid Overlapping Duties: Clearly define each user’s role to prevent confusion and ensure accountability.
Limit Access Based on Necessity
- Principle of Least Privilege: Grant only the access necessary for users to perform their tasks. Avoid assigning higher permissions than required.
- Regularly Review Permissions: Periodically audit user access to ensure that permissions are still appropriate and revoke access for users who no longer need it.
Maintain Security
- Use Strong Passwords: Ensure that all users have strong, unique passwords for their WordPress accounts.
- Enable Two-Factor Authentication (2FA): Add an extra layer of security by enabling 2FA for all accounts with elevated permissions.
- Monitor User Activity: Regularly check the Users section for any unusual activity or unauthorized access.
Communicate Effectively
- Provide Guidelines: Share clear guidelines on how users should interact with the WordPress dashboard to maintain data integrity and consistency.
- Foster Collaboration: Encourage open communication among team members to streamline workflows and address any issues promptly.
Utilize WordPress Features
- Use Plugins Wisely: Install security plugins like Wordfence or Sucuri to monitor and protect your site from malicious activities.
- Regular Backups: Ensure that your website is regularly backed up to prevent data loss in case of unauthorized changes or security breaches.
Common Mistakes to Avoid
Avoiding these common pitfalls can enhance the effectiveness and security of granting access to your WordPress site.
Granting Excessive Permissions
- Impact: Assigning higher permissions than necessary can lead to unauthorized changes or misuse of your site’s content and settings.
- Solution: Carefully evaluate the access level required for each user and assign roles accordingly.
Neglecting to Update Permissions
- Impact: Failing to update permissions when roles change or when users leave can compromise your site’s security.
- Solution: Regularly review and update user permissions to reflect current team structures and responsibilities.
Overlooking Security Measures
- Impact: Inadequate security can expose your site to potential threats such as hacking or data breaches.
- Solution: Implement robust security practices, including strong passwords and 2FA, to protect your site.
Poor Communication
- Impact: Lack of clear communication can lead to misunderstandings and inconsistent site management.
- Solution: Establish clear communication channels and provide comprehensive training and guidelines for all users.
Ignoring Updates and Maintenance
- Impact: Neglecting to keep WordPress, themes, and plugins updated can lead to security vulnerabilities and site performance issues.
- Solution: Regularly update your WordPress core, themes, and plugins to the latest versions.
Frequently Asked Questions
Can I Grant Access to Multiple Users at Once?
Yes, you can invite multiple users by repeating the invitation process for each individual. However, manage invitations carefully to maintain control over who has access to your WordPress site.
What Are the Different User Roles in WordPress?
- Administrator: Full access to all features, including managing users, themes, plugins, and site settings.
- Editor: Can manage and publish posts, pages, and other content, but cannot manage users or site settings.
- Author: Can write, edit, and publish their own posts.
- Contributor: Can write and edit their own posts but cannot publish them.
- Subscriber: Can only manage their profile and view content restricted to subscribers.
How Do I Remove Someone’s Access?
- Navigate to Users > All Users.
- Find the User: Locate the user you want to remove.
- Delete User: Hover over their name, click Delete, and follow the prompts to remove their access.
Do Users Need a WordPress Account to Access My Website?
Yes, users must have a WordPress account with the appropriate permissions to access and manage your website. Ensure that you are adding users with valid email addresses to facilitate account creation.
Can I Change a User’s Permission Level After Granting Access?
Yes, you can adjust a user’s permission level at any time by navigating to Users > All Users, clicking Edit under the user’s name, selecting a new role from the Role dropdown menu, and clicking Update User.
Maximizing the Impact of Added Users
To fully leverage the benefits of adding users to your WordPress site, integrate these strategies into your broader content management and operational plans.
Align with Your Marketing Goals
- Define Clear Objectives: Identify what you want to achieve with your WordPress site, such as increasing traffic, enhancing user engagement, or improving conversion rates.
- Tailor User Roles: Assign roles that align with your marketing objectives, ensuring that each user has the necessary access to contribute effectively.
Use Data to Optimize Strategies
- Analyze User Activity: Utilize plugins like Google Analytics for WordPress to monitor user behavior and site performance.
- Refine Content Strategy: Based on data insights, adjust your content strategy to better meet your audience’s needs and preferences.
Integrate with Other Marketing Tools
- Connect with Email Marketing: Use tools like Mailchimp or ConvertKit to integrate your WordPress site with your email marketing campaigns.
- Leverage Social Media: Use plugins to share your content on social media platforms, increasing your site’s reach and engagement.
Leverage Advanced WordPress Features
- Custom Post Types: Create custom post types to better organize your content and improve site structure.
- SEO Optimization: Install SEO plugins like Yoast SEO or Rank Math to enhance your site’s search engine visibility.
Foster Team Collaboration
- Use Collaborative Tools: Integrate project management tools like Trello, Slack, or Asana to coordinate tasks and communicate effectively with your team.
- Regular Training: Provide ongoing training and resources to ensure that all users are familiar with WordPress best practices and security measures.
Enhance User Experience
- Optimize Site Performance: Use caching plugins and optimize images to ensure fast loading times, enhancing user experience and SEO.
- Mobile Responsiveness: Ensure that your WordPress theme is mobile-friendly, providing a seamless experience for users on all devices.
Conclusion
Adding users to your WordPress website is a strategic move that can significantly enhance your site’s management, content creation, and overall performance. By following the step-by-step guide provided in this post, implementing best practices, and avoiding common mistakes, you can ensure that your WordPress setup is secure, efficient, and aligned with your business objectives. Proper collaboration and strategic management of your WordPress site not only streamline operations but also drive better performance and foster long-term success in the competitive digital landscape.
How to Add Users to Your Google Local Services Ads Account And Fix the Security Allowed Domain Issue
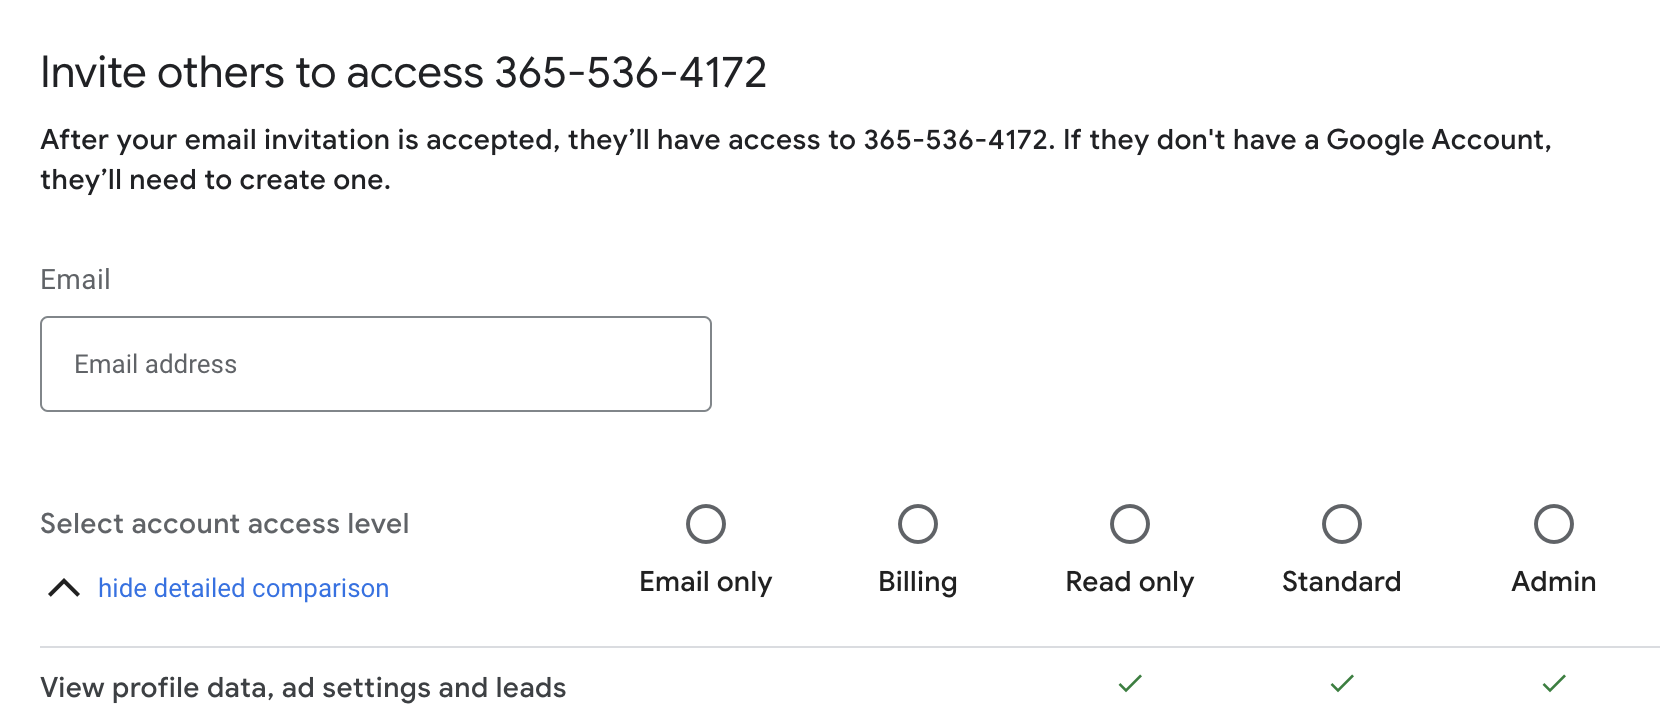
Managing your Google Local Services Ads (LSA) account effectively is crucial for driving local leads and optimizing your advertising efforts. As your business grows, you may need to delegate tasks such as managing leads, adjusting ad settings, or handling billing to team members or external agencies. Granting access to your Google Local Services Ads account allows trusted individuals to assist in these tasks, enhancing your campaign’s efficiency and effectiveness. In the “How to Add Users to Your Google Local Services Ads Account and Fix the Security Allowed Domain Issue” video, you learn a straightforward method to provide access and resolve common permission issues. This comprehensive guide will expand on those instructions, offering detailed steps, best practices, and additional insights to ensure secure and effective management of your LSA account.
Why Granting Access to Your Google Local Services Ads Account Matters
Granting access to your LSA account enables collaboration, streamlines workflow, and enhances your advertising performance. Whether you’re working with customer service representatives (CSRs), hiring marketing specialists, or partnering with agencies, providing the right level of access ensures that everyone involved can contribute effectively without compromising your account’s security.
Benefits of Granting Access
- Collaborative Management: Enable team members to manage leads, adjust ad settings, and handle billing, ensuring that your LSA campaigns run smoothly and efficiently.
- Improved Response Times: Allowing CSRs to access the account can lead to faster lead follow-ups and improved customer satisfaction.
- Enhanced Campaign Optimization: Granting access to marketing specialists or agencies allows for continuous optimization of your ads based on performance data.
- Efficient Workflow: Delegate specific tasks to team members, freeing up your time to focus on strategic business activities while ensuring that your advertising efforts are well-maintained.
Step-by-Step Guide to Adding Users in Google Local Services Ads
Follow these detailed steps to securely add users to your Google Local Services Ads account and resolve any security allowed domain issues that may arise.
Step 1: Sign In to Your Google Local Services Ads Account
- Access Google Local Services Ads:
- Open your web browser and navigate to Google Local Services Ads.
- Click on the Sign In button located at the top-right corner.
- Enter the Google account credentials associated with your LSA account.
- Select Your Business:
- If you manage multiple businesses, select the one you want to grant access to from the list of available profiles.
Step 2: Navigate to Account Access Settings
- Open the Dashboard:
- Once signed in, you’ll be directed to your Google Local Services Ads dashboard, which provides an overview of your campaigns, leads, and performance metrics.
- Access Account Settings:
- Click on the Settings icon (usually represented by a gear or three vertical dots) located in the top-left corner of the dashboard.
- From the dropdown menu, select Account Access.
Step 3: Add a New User
- Click on Add User:
- On the Account Access page, click the blue Add User button located at the top-right corner.
- Enter User Details:
- Email Address: Input the email address of the person you want to grant access to. Ensure it is a Google account email (Gmail or Google Workspace account).Role Selection: Choose the appropriate role based on the level of access you want to grant. Options typically include:
- Administrator: Full access, including managing users and account settings.Standard: Can manage campaigns, view leads, and handle billing but cannot manage users.Read-Only: Can view account data and performance metrics but cannot make any changes.
- Email Address: Input the email address of the person you want to grant access to. Ensure it is a Google account email (Gmail or Google Workspace account).Role Selection: Choose the appropriate role based on the level of access you want to grant. Options typically include:
Step 4: Assign Roles and Permissions
- Select Permission Level:
- Choose the role that best fits the responsibilities you want to assign:
- Administrator: Grants complete control, including the ability to add or remove other users.
- Standard: Allows comprehensive management of campaigns and billing without altering user permissions.
- Read-Only: Provides access to view data and insights without making any changes.
- Choose the role that best fits the responsibilities you want to assign:
- Configure Additional Settings:
- Billing Access: Decide if the user should have access to billing information. Toggle this option based on their role and necessity.
Step 5: Send the Invitation
- Add User:
- After entering the email address and selecting the permission level, click Invite to send the access invitation.
- User Receives Notification:
- The invited user will receive an email notification with instructions to accept the invitation and gain access to your Google Local Services Ads account.
Step 6: Resolve the Security Allowed Domain Issue
A common issue when adding users is encountering the “This email address isn’t an allowed domain to make changes to the allowed domain list. Please update your security settings” error. Here’s how to fix it:
- Access Security Settings:
- In your LSA dashboard, navigate to the Settings icon and select Security from the dropdown menu.
- Allow Domains:
- Click on the Security tab.
- Locate the Allowed Domains section.
- Add the User’s Domain:
- Click on Add Domain.
- Enter the domain of the user you’re trying to add (e.g.,
localsync.com). - Click Save to update the allowed domains list.
- Retry Adding the User:
- Return to the Account Access page.Click on Add User again and enter the user’s email address.Select the appropriate role and send the invitation.
- Verify Access:
- Once the domain is added and the user accepts the invitation, they should have the designated access to your LSA account without encountering the security error.
Step 7: Confirm and Manage Access
- Verify Invitations:
- Ensure that the invited users have accepted the invitations by checking the Account Access section. The new users should appear in the list with their assigned roles.
- Adjust Permissions if Needed:
- To change a user’s permission level, click on their name and select a different role from the dropdown menu.
- Remove Users:
- To revoke access, click the three-dot menu next to the user’s name and select Remove access.
Best Practices for Granting Access
Implementing best practices ensures that granting access to your LSA account is secure, efficient, and beneficial for your business.
Define Clear Roles and Responsibilities
- Assess Needs: Determine what tasks each user needs to perform and assign roles based on their responsibilities.
- Avoid Overlapping Duties: Clearly define each user’s role to prevent confusion and ensure accountability.
Limit Access Based on Necessity
- Principle of Least Privilege: Grant only the access necessary for users to perform their tasks. Avoid assigning higher permissions than required.
- Regularly Review Permissions: Periodically audit user access to ensure that permissions are still appropriate and revoke access for users who no longer need it.
Maintain Security
- Use Strong Passwords: Ensure that all users have strong, unique passwords for their Google accounts.
- Enable Two-Factor Authentication (2FA): Add an extra layer of security by enabling 2FA for all accounts with access to your LSA.
- Monitor Account Activity: Regularly check the Account Access section for any unusual activity or unauthorized access.
Communicate Effectively
- Provide Guidelines: Share clear guidelines on how users should interact with the LSA account to maintain data integrity and consistency.
- Foster Collaboration: Encourage open communication among team members to streamline workflows and address any issues promptly.
Utilize Google Local Services Ads Features
- Leverage Insights: Use the insights and analytics provided by LSA to monitor performance and make informed decisions.
- Manage Leads Effectively: Assign team members the responsibility of following up on leads to maximize conversion rates.
- Optimize Ad Settings: Collaborate on optimizing ad settings, budgets, and targeting to enhance campaign performance.
Common Mistakes to Avoid
Avoiding these common pitfalls can enhance the effectiveness and security of granting access to your LSA account.
Granting Excessive Permissions
- Impact: Assigning higher permissions than necessary can lead to unauthorized changes or misuse of your account.
- Solution: Carefully evaluate the access level required for each user and assign roles accordingly.
Neglecting to Update Permissions
- Impact: Failing to update permissions when roles change or when users leave can compromise your account’s security.
- Solution: Regularly review and update user permissions to reflect current team structures and responsibilities.
Overlooking Security Measures
- Impact: Inadequate security can expose your account to potential threats.
- Solution: Implement robust security practices, including strong passwords and 2FA, to protect your account.
Poor Communication
- Impact: Lack of clear communication can lead to misunderstandings and inconsistent account management.
- Solution: Establish clear communication channels and provide comprehensive training and guidelines for all users.
Ignoring Analytics Insights
- Impact: Failing to utilize the data collected can result in missed opportunities for optimizing your advertising strategies.
- Solution: Encourage users to actively engage with the analytics data and use it to inform decision-making processes.
Frequently Asked Questions
Can I Grant Access to Multiple People at Once?
Yes, you can invite multiple users by repeating the invitation process for each individual. However, manage invitations carefully to maintain control over who has access to your LSA account.
What Are the Different Permission Levels?
- Administrator: Full control, including managing users and account settings.
- Standard: Can manage campaigns, view leads, and handle billing but cannot manage users.
- Read-Only: Can view account data and performance metrics but cannot make any changes.
How Do I Remove Someone’s Access?
- Navigate to Account Access Settings:
- Go to Settings > Account Access in your LSA dashboard.
- Find the User:
- Locate the user you want to remove in the list.
- Remove Access:
- Click the three-dot menu next to their name and select Remove access.
Do Users Need a Google Account to Access My Local Services Ads?
Yes, users must have a Google account (Gmail or Google Workspace account) to accept an invitation and access your Google Local Services Ads account.
Can I Change a User’s Permission Level After Granting Access?
Yes, you can adjust a user’s permission level at any time by navigating to Account Access, clicking on the user’s name, and selecting a new role from the dropdown menu.
Maximizing the Impact of Granted Access
To fully leverage the benefits of granting access to your LSA account, integrate these strategies into your broader marketing and operational plans.
Align with Your Marketing Goals
- Define Clear Objectives: Identify what you want to achieve with your LSA campaigns, such as increasing local leads, enhancing brand visibility, or improving conversion rates.
- Tailor Campaign Management: Ensure that users assigned to manage your LSA account understand and align with your marketing objectives to maintain consistency and focus.
Use Data to Optimize Campaigns
- Analyze Performance Metrics: Use the data provided by LSA to understand how your campaigns are performing, identify high-performing keywords, and recognize areas for improvement.
- Refine Targeting: Adjust your ad targeting based on insights gained from your campaign data to reach more qualified leads and improve ROI.
Integrate with Other Marketing Tools
- Link with Google Ads: Connect your LSA account with Google Ads to enhance your advertising strategies and track campaign performance more effectively.
- Utilize CRM Systems: Integrate LSA data with your Customer Relationship Management (CRM) system to streamline lead management and follow-up processes.
Leverage Advanced LSA Features
- Manage Reviews: Assign team members to monitor and respond to customer reviews, maintaining a positive online reputation and addressing any negative feedback promptly.
- Optimize Ad Settings: Collaborate on optimizing ad settings, budgets, and targeting to enhance campaign performance and maximize lead generation.
Foster Team Collaboration
- Regular Meetings: Hold regular meetings with your team to discuss insights from LSA, review performance metrics, and plan updates or improvements to your campaigns.
- Shared Responsibilities: Distribute tasks such as managing leads, updating ad settings, and handling billing among team members to ensure efficient account management.
Enhance Customer Experience
- Prompt Lead Follow-Up: Ensure that team members respond to leads promptly to increase conversion rates and improve customer satisfaction.
- Consistent Branding: Maintain consistent branding and messaging across all your LSA campaigns to build trust and recognition with your local audience.
Conclusion
Adding users to your Google Local Services Ads account is a strategic move that can significantly enhance your advertising efforts, streamline collaboration, and optimize lead management. By following the step-by-step guide provided in this post, implementing best practices, and avoiding common mistakes, you can ensure that your LSA setup is secure, efficient, and aligned with your business objectives. Proper collaboration and strategic management of your LSA account not only streamline operations but also drive better performance and foster long-term success in the competitive local advertising landscape.
How to Add a Manager/User to Your Google Business Profile
Managing your Google Business Profile effectively is essential for enhancing your online presence, engaging with customers, and optimizing your local SEO efforts. As your business grows, you may find it necessary to delegate tasks such as updating business information, responding to reviews, or managing posts to trusted team members or agencies. Granting access to your Google Business Profile allows others to help maintain and improve your business’s online visibility. In the “How to Add a User to Your Google Business Profile” video, you learn a straightforward method to provide access using Google Business Profile’s user management features. This comprehensive guide will expand on those instructions, offering detailed steps, best practices, and additional insights to ensure secure and effective management of your Google Business Profile.
Why Granting Access to Your Google Business Profile Matters
Granting access to your Google Business Profile enables collaboration, streamlines workflow, and enhances your business’s online presence. Whether you’re working with a marketing team, hiring a virtual assistant, or partnering with an agency, providing the right level of access ensures that everyone involved can contribute effectively without compromising your business’s information and reputation.
Benefits of Granting Access
- Collaborative Management: Enable team members to update business information, add photos, and manage posts, ensuring that your profile remains current and engaging.
- Improved Customer Engagement: Allow others to respond to customer reviews and questions promptly, enhancing customer satisfaction and trust.
- Enhanced Local SEO: Collaborative efforts can lead to more frequent updates and interactions, positively impacting your local search rankings.
- Efficient Workflow: Delegate specific tasks to team members, allowing you to focus on strategic business activities while ensuring that your online presence is well-maintained.
Step-by-Step Guide to Adding Users in Google Business Profile
Follow these detailed steps to securely add users to your Google Business Profile, ensuring that your business information is managed effectively and securely.
Step 1: Sign In to Google Business Profile
- Access Google Business Profile:
- Open your web browser and navigate to Google Business Profile.
- Click on the Sign In button located at the top-right corner.
- Enter the Google account credentials associated with your business profile.
- Select Your Business:
- If you manage multiple businesses, select the one you want to grant access to from the list of available profiles.
Step 2: Navigate to Users and Permissions
- Open the Dashboard:
- Once signed in, you’ll be directed to your Google Business Profile dashboard, which provides an overview of your business information, reviews, and insights.
- Access Settings:
- In the left-hand sidebar, scroll down and click on Settings.
- Go to Users and Permissions:
- Within the Settings menu, select Users and permissions. This section allows you to manage who has access to your business profile and what level of access they possess.
Step 3: Add a New User
- Click on Add Users:
- On the Users and permissions page, click the blue Add user button located at the top-right corner.
- Enter User Details:
- Email Address: Input the email address of the person you want to grant access to. Ensure it is a Google account email (Gmail or Google Workspace account).Role Selection: Choose the appropriate role based on the level of access you want to grant.
Step 4: Select the Appropriate Permission Level
Google Business Profile offers different permission levels to control the extent of access:
- Owner:
- Full control over the business profile, including managing users and transferring ownership.
- Suitable for primary account holders and trusted administrators.
- Manager:
- Can edit business information, manage posts, respond to reviews, and view insights.
- Cannot manage users or transfer ownership.
- Site Manager:
- Can manage locations, edit business information, and handle customer interactions.
- Limited compared to Managers; ideal for employees handling day-to-day operations.
Choose the role that best fits the responsibilities you want to assign:
- Owner: Grants complete control, including the ability to add or remove other users.
- Manager: Allows comprehensive management of the business profile without altering user permissions.
- Site Manager: Provides focused access for managing specific aspects of the business profile.
Step 5: Send the Invitation
- Add User:
- After entering the email address and selecting the permission level, click Invite to send the access invitation.
- User Receives Notification:
- The invited user will receive an email notification with instructions to accept the invitation and gain access to the Google Business Profile.
Step 6: Confirm and Manage Access
- Verify Invitations:
- Ensure that the invited users have accepted the invitations by checking the Users and permissions section. The new users should appear in the list with their assigned roles.
- Adjust Permissions if Needed:
- To change a user’s permission level, click on their name and select a different role from the dropdown menu.
- Remove Users:
- To revoke access, click the three-dot menu next to the user’s name and select Remove access.
Best Practices for Granting Access
Implementing best practices ensures that granting access to your Google Business Profile is secure, efficient, and beneficial for your business.
Define Clear Roles and Responsibilities
- Assess Needs: Determine what tasks each user needs to perform and assign roles based on their responsibilities.
- Avoid Overlapping Duties: Clearly define each user’s role to prevent confusion and ensure accountability.
Limit Access Based on Necessity
- Principle of Least Privilege: Grant only the access necessary for users to perform their tasks. Avoid assigning higher permissions than required.
- Regularly Review Permissions: Periodically audit user access to ensure that permissions are still appropriate and revoke access for users who no longer need it.
Maintain Security
- Use Strong Passwords: Ensure that all users have strong, unique passwords for their Google accounts.
- Enable Two-Factor Authentication (2FA): Add an extra layer of security by enabling 2FA for all accounts with access to your Google Business Profile.
- Monitor Account Activity: Regularly check the Users and permissions sections for any unusual activity or unauthorized access.
Communicate Effectively
- Provide Guidelines: Share clear guidelines on how users should interact with the Google Business Profile to maintain data integrity and consistency.
- Foster Collaboration: Encourage open communication among team members to streamline workflows and address any issues promptly.
Utilize Google Business Profile Features
- Leverage Insights: Use the insights and analytics provided by Google Business Profile to monitor performance and make informed decisions.
- Manage Reviews: Assign team members the responsibility of responding to customer reviews to maintain a positive online reputation.
- Update Information Regularly: Ensure that business information, such as hours of operation, contact details, and services offered, is kept up-to-date by authorized users.
Common Mistakes to Avoid
Avoiding these common pitfalls can enhance the effectiveness and security of granting access to your Google Business Profile.
Granting Excessive Permissions
- Impact: Assigning higher permissions than necessary can lead to unauthorized changes or misuse of your business profile.
- Solution: Carefully evaluate the access level required for each user and assign roles accordingly.
Neglecting to Update Permissions
- Impact: Failing to update permissions when roles change or when users leave can compromise your account’s security.
- Solution: Regularly review and update user permissions to reflect current team structures and responsibilities.
Overlooking Security Measures
- Impact: Inadequate security can expose your business profile to potential threats.
- Solution: Implement robust security practices, including strong passwords and 2FA, to protect your account.
Poor Communication
- Impact: Lack of clear communication can lead to misunderstandings and inconsistent profile management.
- Solution: Establish clear communication channels and provide comprehensive training and guidelines for all users.
Ignoring Analytics Insights
- Impact: Failing to utilize the data collected can result in missed opportunities for optimizing your online presence and marketing strategies.
- Solution: Encourage users to actively engage with the analytics data and use it to inform decision-making processes.
Frequently Asked Questions
Can I Grant Access to Multiple People at Once?
Yes, you can invite multiple users by repeating the invitation process for each individual. However, manage invitations carefully to maintain control over who has access to your Google Business Profile.
What Are the Different Permission Levels?
- Owner: Full control, including managing users and account settings.
- Manager: Can manage business information, posts, reviews, and insights but cannot manage users.
- Site Manager: Can manage specific aspects like locations and respond to reviews but has limited access compared to Managers.
How Do I Remove Someone’s Access?
- Navigate to Settings > Users and permissions.
- Find the User: Locate the user you want to remove.
- Remove Access: Click the three-dot menu next to their name and select Remove access.
Do Users Need a Google Account to Access My Business Profile?
Yes, users must have a Google account (Gmail or Google Workspace account) to accept an invitation and access your Google Business Profile.
Can I Change a User’s Permission Level After Granting Access?
Yes, you can adjust a user’s permission level at any time by navigating to Settings > Users and permissions, clicking on the user’s name, and selecting a new role.
Maximizing the Impact of Granted Access
To fully leverage the benefits of granting access to your Google Business Profile, integrate these strategies into your broader marketing and operational plans.
Align with Your Marketing Goals
- Define Clear Objectives: Identify what you want to achieve with your Google Business Profile, such as increasing local visibility, enhancing customer engagement, or driving more foot traffic.
- Tailor Profile Management: Ensure that users assigned to manage your profile understand and align with your marketing objectives to maintain consistency and focus.
Use Data to Optimize Strategies
- Analyze Insights: Regularly review the insights provided by Google Business Profile to understand customer behavior, track performance metrics, and identify trends.
- Refine Marketing Tactics: Use the data from GBC to adjust your marketing strategies, such as optimizing keywords, improving service offerings, or targeting specific customer segments.
Integrate with Other Marketing Tools
- Link with Google Ads: Connect your Google Business Profile with Google Ads to enhance local advertising campaigns and track their effectiveness.
- Utilize CRM Systems: Integrate GBC data with your Customer Relationship Management (CRM) system to streamline lead management and follow-up processes.
Leverage Advanced GBC Features
- Enable Messaging: Use the messaging feature to communicate directly with customers, answer queries, and provide support, enhancing customer satisfaction.
- Manage Reviews Effectively: Assign team members to monitor and respond to reviews, maintaining a positive online reputation and addressing any negative feedback promptly.
Foster Team Collaboration
- Regular Meetings: Hold regular meetings with your team to discuss insights from GBC, review performance metrics, and plan updates or improvements to your business profile.
- Shared Responsibilities: Distribute tasks such as updating business information, managing posts, and responding to reviews among team members to ensure efficient profile management.
Enhance Customer Experience
- Optimize Information: Ensure that all business information, including hours of operation, contact details, and service offerings, is accurate and up-to-date to provide a seamless customer experience.
- Engage with Customers: Actively engage with customers through posts, updates, and responses to reviews to build trust and foster a loyal customer base.
Conclusion
Adding users to your Google Business Profile is a strategic move that can significantly enhance your online presence, streamline profile management, and improve customer engagement. By following the step-by-step guide provided in this post, implementing best practices, and avoiding common mistakes, you can ensure that your Google Business Profile is managed securely and efficiently. Proper collaboration and strategic management of your Google Business Profile not only streamline operations but also drive better performance and foster long-term success in the competitive digital landscape.