
Tag: Google Search Console
How to Add Users to Your Google Search Console Account
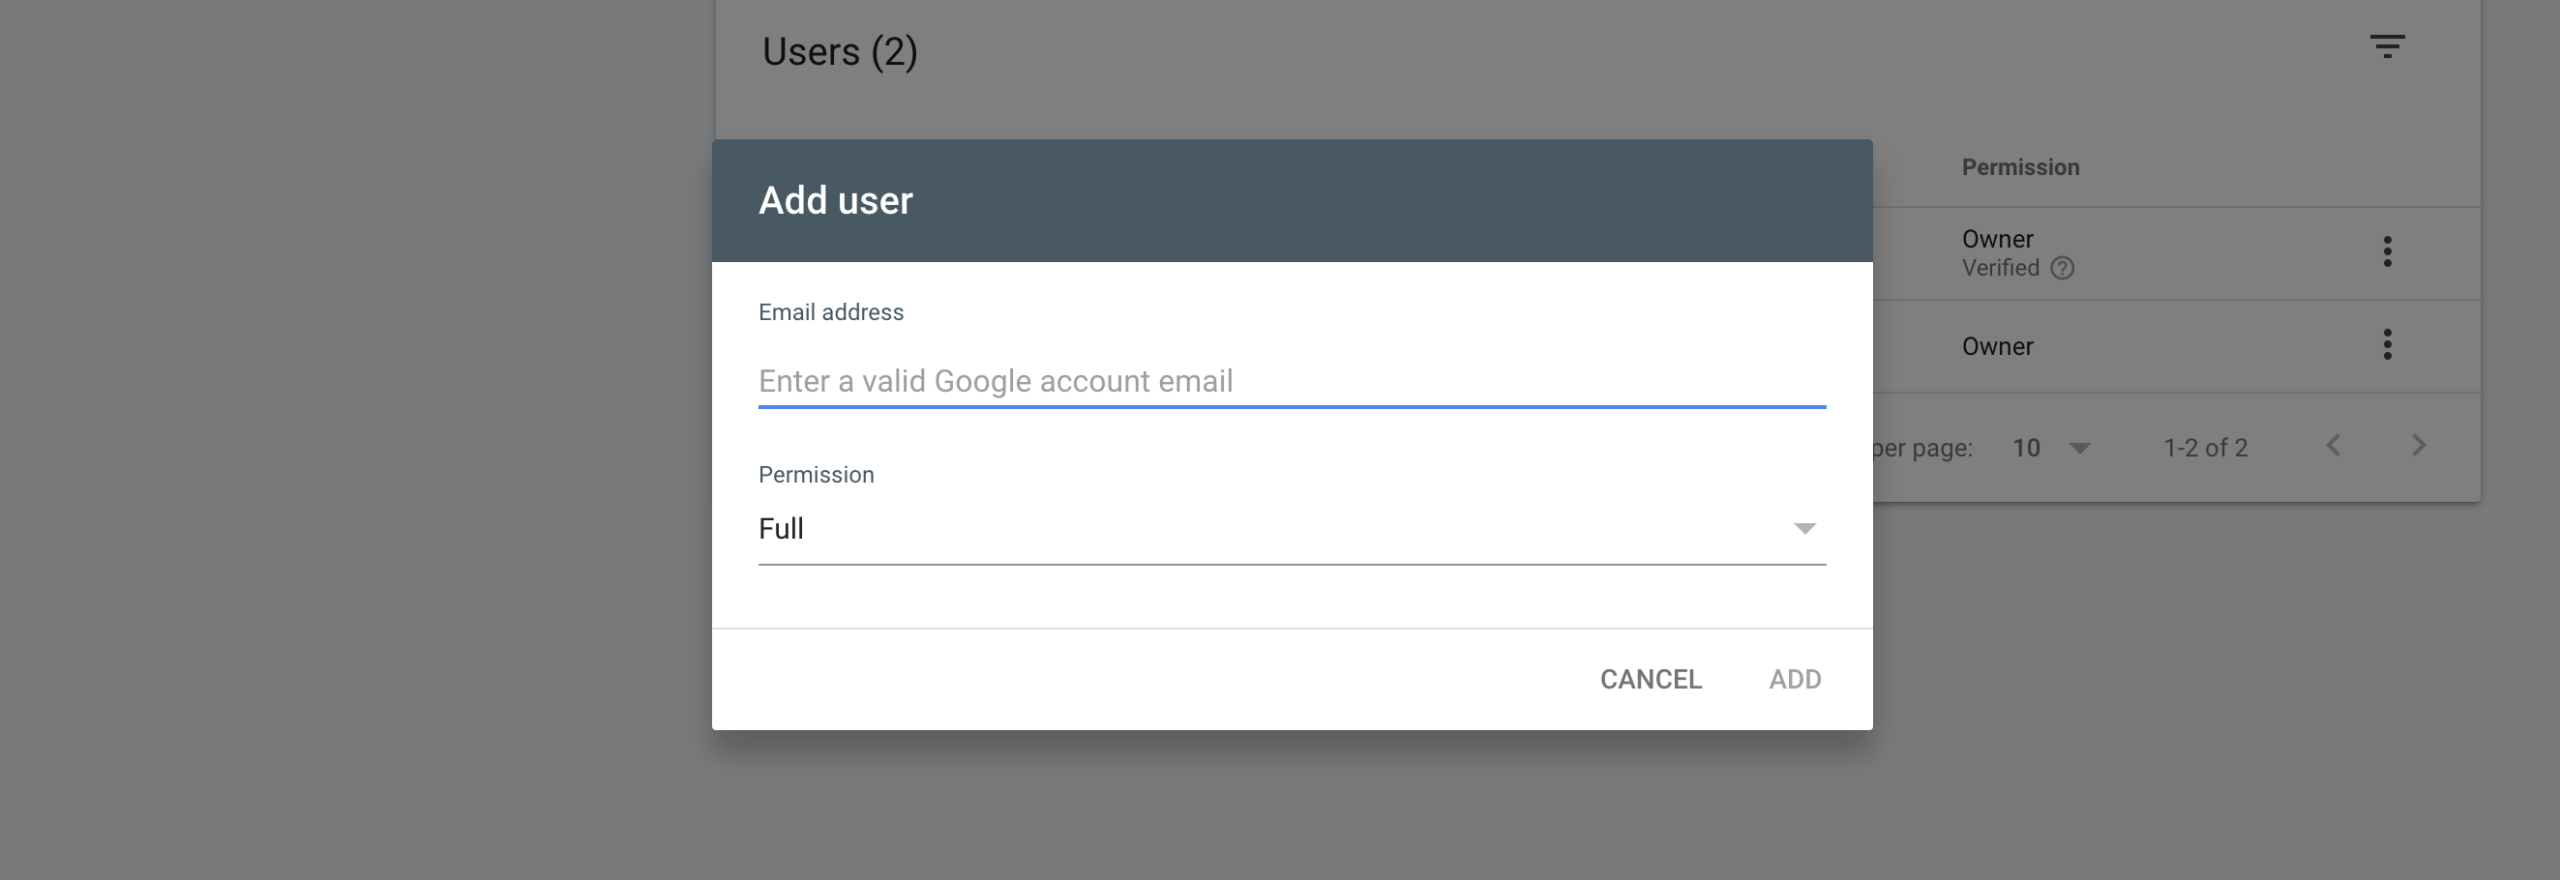
Collaborating effectively is essential for managing your website’s SEO and performance. Whether you’re working with a team, hiring an SEO specialist, or partnering with an agency, granting access to your Google Search Console (GSC) account allows others to monitor and optimize your website’s presence in search results. In the “How to Add Users to Your Google Search Console Account” video, you learn a straightforward method to provide access using GSC’s built-in user management features. This comprehensive guide will expand on those instructions, offering detailed steps, best practices, and additional insights to ensure secure and effective management of your Google Search Console account.
Why Granting Access to Your Google Search Console Account Matters
Granting access to your GSC account enables trusted individuals to view, analyze, and manage your website’s data. Whether you’re collaborating with team members, hiring a marketing specialist, or working with an external agency, providing the right level of access ensures that everyone involved can contribute effectively without compromising your data’s integrity.
Benefits of Granting Access
- Collaborative Analysis: Enable team members to analyze data, generate reports, and derive insights that can inform marketing strategies and business decisions.
- Streamlined Workflow: Delegate tasks such as monitoring performance, identifying issues, and optimizing content, allowing you to focus on higher-level strategic planning.
- Enhanced Security: Control who has access to sensitive data and ensure that only authorized individuals can make changes to your account settings.
- Scalability: As your team grows, easily manage permissions to accommodate new members without disrupting existing workflows.
Step-by-Step Guide to Adding Users in Google Search Console
Follow these detailed steps to securely add users to your Google Search Console account, whether at the account level or within specific properties.
Step 1: Sign In to Google Search Console
- Access Google Search Console:
- Navigate to Google Search Console and sign in with your Google account credentials associated with your GSC account.
- Select Your Property:
- If you manage multiple properties, select the one you want to grant access to from the dropdown menu at the top-left corner.
Step 2: Navigate to Settings
- Open Settings:
- In the left-hand sidebar, scroll down and click on Settings.
- Access Users and Permissions:
- Within the Settings menu, select Users and permissions.
Step 3: Add a New User
- Click on Add User:
- Click the blue Add user button located at the top-right corner of the Users and permissions page.
- Enter User Details:
- Email Address: Input the email address of the person you want to grant access to. Ensure it is a Google account email.Permission Level: Choose the appropriate permission level based on the role you want to assign.
Step 4: Select the Appropriate Permission Level
Google Search Console offers different permission levels to control the extent of access:
- Owner:
- Full control over the property, including managing users, settings, and data.
- Suitable for primary account holders and trusted administrators.
- Full User:
- Can view all data and make changes to settings, but cannot add or remove users.
- Ideal for team members who need to manage content and settings without altering user permissions.
- Restricted User:
- Limited access to view data without making changes to settings or content.
- Best for stakeholders who need to monitor performance but don’t require management capabilities.
Choose the role that best fits the responsibilities you want to assign:
- Owner: Grants complete control, including the ability to add or remove other users.
- Full User: Allows comprehensive management of the property but restricts user management.
- Restricted User: Provides read-only access to data and insights.
Step 5: Send the Invitation
- Add User:
- After entering the email address and selecting the permission level, click Add to send the invitation.
- User Receives Notification:
- The invited user will receive an email notification with instructions to accept the invitation and gain access to the Google Search Console property.
Step 6: Confirm and Manage Access
- Verify Invitations:
- Ensure that the invited users have accepted the invitations by checking the Users and permissions section. The new users should appear in the list with their assigned roles.
- Adjust Permissions if Needed:
- To change a user’s permission level, click on their name and select a different role from the dropdown menu.
- Remove Users:
- To revoke access, click the three-dot menu next to the user’s name and select Remove access.
Best Practices for Granting Access
Implementing best practices ensures that granting access to your GSC account is secure, efficient, and beneficial for your business.
Define Clear Roles and Responsibilities
- Assess Needs: Determine what tasks each user needs to perform and assign roles based on their responsibilities.
- Avoid Overlapping Duties: Clearly define each user’s role to prevent confusion and ensure accountability.
Limit Access Based on Necessity
- Principle of Least Privilege: Grant only the access necessary for users to perform their tasks. Avoid assigning higher permissions than required.
- Regularly Review Permissions: Periodically audit user access to ensure that permissions are still appropriate and revoke access for users who no longer need it.
Maintain Security
- Use Strong Passwords: Ensure that all users have strong, unique passwords for their Google accounts.
- Enable Two-Factor Authentication (2FA): Add an extra layer of security by enabling 2FA for all accounts with access to your GSC.
- Monitor Account Activity: Regularly check the Users and permissions sections for any unusual activity or unauthorized access.
Communicate Effectively
- Provide Guidelines: Share clear guidelines on how users should interact with the GSC account to maintain data integrity and consistency.
- Foster Collaboration: Encourage open communication among team members to streamline workflows and address any issues promptly.
Utilize GSC Features
- Use Performance Reports: Assign users roles that allow them to access and interpret performance data effectively.
- Set Up Alerts: Enable email notifications for significant changes or issues detected by GSC to keep all users informed.
Common Mistakes to Avoid
Avoiding these common pitfalls can enhance the effectiveness and security of granting access to your GSC account.
Granting Excessive Permissions
- Impact: Assigning higher permissions than necessary can lead to unauthorized changes or misuse of your data.
- Solution: Carefully evaluate the access level required for each user and assign roles accordingly.
Neglecting to Update Permissions
- Impact: Failing to update permissions when roles change or when users leave can compromise your account’s security.
- Solution: Regularly review and update user permissions to reflect current team structures and responsibilities.
Overlooking Security Measures
- Impact: Inadequate security can expose your data to potential threats.
- Solution: Implement robust security practices, including strong passwords and 2FA, to protect your account.
Poor Communication
- Impact: Lack of clear communication can lead to misunderstandings and inconsistent data management.
- Solution: Establish clear communication channels and provide comprehensive training and guidelines for all users.
Ignoring Analytics Insights
- Impact: Failing to utilize the data collected can result in missed opportunities for optimizing your website and marketing strategies.
- Solution: Encourage users to actively engage with the analytics data and use it to inform decision-making processes.
Frequently Asked Questions
Can I Grant Access to Multiple People at Once?
Yes, you can invite multiple users by repeating the invitation process for each individual. However, manage invitations carefully to maintain control over who has access to your GSC account.
What Are the Different Permission Levels?
- Owner: Full control, including managing users and account settings.
- Full User: Can view all data and make changes to settings but cannot manage users.
- Restricted User: Limited access to view data without making changes to settings or content.
How Do I Remove Someone’s Access?
- Navigate to Settings > Users and permissions.
- Find the User: Locate the user you want to remove.
- Remove Access: Click the three-dot menu next to their name and select Remove access.
Do Users Need a Google Account to Access My Search Console?
Yes, users must have a Google account to accept an invitation and access your Google Search Console property.
Can I Change a User’s Permission Level After Granting Access?
Yes, you can adjust a user’s permission level at any time by navigating to Users and permissions, clicking on the user’s name, and selecting a new role.
Maximizing the Impact of Granted Access
To fully leverage the benefits of granting access to your GSC account, integrate these strategies into your broader SEO and website management plans.
Align with Your Marketing Goals
- Define Clear Objectives: Identify what you want to achieve with your analytics data, such as increasing organic traffic, improving user engagement, or enhancing campaign performance.
- Tailor Reporting: Set up specific reports and dashboards in GSC that align with your marketing objectives, ensuring that users have access to the most relevant data.
Use Data to Optimize Campaigns
- Analyze Performance Metrics: Use GSC data to understand how your site is performing in search results, identifying strengths and areas for improvement.
- Refine SEO Strategies: Based on insights from GSC, adjust your SEO strategies to target high-performing keywords, optimize underperforming pages, and enhance overall site visibility.
Integrate with Other Marketing Tools
- Link with Google Analytics: Integrate GSC with Google Analytics to gain a more comprehensive view of your website’s performance and user behavior.
- Utilize Third-Party Tools: Use tools like SEMrush, Ahrefs, or Moz in conjunction with GSC data to deepen your SEO analysis and strategy development.
Leverage Advanced GSC Features
- Set Up Sitemaps: Regularly submit and update XML sitemaps to help Google crawl and index your website more efficiently.
- Implement Structured Data: Use structured data to enhance your site’s appearance in search results with rich snippets, improving click-through rates (CTR).
Foster Team Collaboration
- Regular Meetings: Hold regular meetings with your team to discuss insights from GSC, review performance metrics, and plan SEO strategies.
- Shared Goals: Align your team’s SEO efforts with shared goals and objectives, ensuring everyone is working towards the same targets.
Enhance User Experience
- Optimize Site Speed: Use GSC data to identify and address issues affecting your site’s load times, improving user experience and search rankings.
- Mobile Usability: Ensure your website is mobile-friendly by addressing any mobile usability issues flagged in GSC.
Conclusion
Adding users to your Google Search Console account is a strategic move that can significantly enhance your SEO efforts, streamline collaboration, and optimize your website’s performance in search results. By following the step-by-step guide provided in this post, implementing best practices, and avoiding common mistakes, you can ensure that your GSC setup is secure, efficient, and aligned with your business objectives. Proper collaboration and strategic management of your GSC account not only streamline operations but also drive better performance and foster long-term success in the competitive digital landscape.
How to Verify Website Ownership in Google Search Console Using DNS
Verifying ownership of your website in Google Search Console is a crucial step for optimizing your site’s presence in search results, monitoring performance, and leveraging various SEO tools. One of the most reliable methods to verify your website ownership is through DNS (Domain Name System) verification. In the “How to Verify Website Ownership in Google Search Console Using DNS” video, you learn a straightforward method to complete this verification using your domain name provider. This comprehensive guide will expand on those instructions, providing you with detailed steps, best practices, and additional insights to ensure a smooth and successful verification process.
Why Verify Website Ownership in Google Search Console?
Google Search Console (GSC) is an indispensable tool for website owners and SEO professionals. Verifying ownership grants you access to a wealth of data and tools that help you understand how Google views your website and how you can improve its visibility in search results.
Benefits of Verification
- Access to Performance Data: Monitor how your site performs in Google Search, including clicks, impressions, click-through rates (CTR), and average positions.
- Identify and Fix Issues: Detect and resolve technical issues such as crawl errors, indexing problems, and security vulnerabilities.
- Optimize Content: Gain insights into which keywords drive traffic and how users interact with your site’s content.
- Submit Sitemaps: Help Google crawl and index your site more efficiently by submitting XML sitemaps.
- Enhance SEO Strategies: Utilize the data and tools in GSC to refine your SEO strategies and improve your site’s search ranking.
Step-by-Step Guide to Verifying Website Ownership Using DNS
Follow these detailed steps to verify your website ownership in Google Search Console using the DNS verification method.
Step 1: Access Google Search Console
- Sign In to Google Search Console:
- Navigate to Google Search Console and sign in with your Google account credentials.
- Add a Property:
- Click on the Add Property button.Choose the Domain property type for DNS verification. This method covers all subdomains (e.g.,
www.example.com,blog.example.com).
- Click on the Add Property button.Choose the Domain property type for DNS verification. This method covers all subdomains (e.g.,
Step 2: Obtain the DNS Verification Code
- Enter Your Domain:
- Input your domain name (e.g.,
example.com) and click Continue.
- Input your domain name (e.g.,
- Copy the TXT Record:
- Google will provide a TXT record that you need to add to your domain’s DNS settings.The TXT record typically looks like:
google-site-verification=xxxxxxxxxxxxxxxxxxxxxxxxxxxxxxCopy this TXT record for the next step.
- Google will provide a TXT record that you need to add to your domain’s DNS settings.The TXT record typically looks like:
Step 3: Add the TXT Record to Your Domain’s DNS Settings
- Log In to Your Domain Registrar:
- Access the account where your domain is registered (e.g., Namecheap, GoDaddy, Bluehost).
- Navigate to DNS Management:
- Find the section for managing DNS settings or DNS records. This is often labeled as DNS Management, DNS Settings, Zone File Settings, or similar.
- Add a New TXT Record:
- Click on Add Record or a similar option to create a new DNS record.Type: Select TXT.Host: Enter
@or leave it blank, depending on your registrar’s requirements.Value: Paste the TXT record you copied from Google Search Console.TTL: You can typically leave this at the default value (e.g., 3600 seconds).
- Click on Add Record or a similar option to create a new DNS record.Type: Select TXT.Host: Enter
- Save the Record:
- After entering the details, save the new TXT record. Changes may take a few minutes to propagate, but it can sometimes take up to 48 hours.
Step 4: Confirm Verification in Google Search Console
- Return to Google Search Console:
- After adding the TXT record, go back to the GSC verification page.
- Verify:
- Click the Verify button.Google will check for the TXT record in your domain’s DNS settings. If found, your ownership will be verified.
- Completion:
- Upon successful verification, you will gain full access to your Google Search Console property.
Step 5: Maintain Your Verification
- Do Not Remove the TXT Record:
- To maintain verification, ensure that the TXT record remains in your DNS settings. Removing it will result in loss of access to GSC.
- Monitor DNS Changes:
- Be cautious when making future DNS changes. Avoid deleting or altering the verification TXT record inadvertently.
Best Practices for DNS Verification
Implementing best practices ensures that your verification process is smooth and your GSC access remains secure.
Use a Reliable Domain Registrar
- Choose a reputable domain registrar that offers easy DNS management and reliable support. Popular registrars include Namecheap, GoDaddy, Bluehost, and Google Domains.
Double-Check DNS Entries
- Ensure that the TXT record is entered correctly without any typos. Even a minor error can prevent successful verification.
Allow Sufficient Time for DNS Propagation
- DNS changes can take time to propagate. If verification fails initially, wait a few hours and try again. In some cases, it might take up to 48 hours.
Secure Your Domain Account
- Protect your domain registrar account with strong passwords and enable two-factor authentication (2FA) to prevent unauthorized access and changes to your DNS settings.
Keep Documentation Handy
- Document the verification process and keep a record of the TXT record you added. This information is useful for troubleshooting and future reference.
Common Mistakes to Avoid
Avoiding these common pitfalls can enhance the accuracy and efficiency of your website ownership verification.
Incorrect TXT Record Entry
- Impact: An incorrect or incomplete TXT record will prevent successful verification.
- Solution: Carefully copy and paste the TXT record provided by Google Search Console without modifications.
Removing the TXT Record After Verification
- Impact: Deleting the TXT record will revoke verification, leading to loss of access to GSC features.
- Solution: Keep the TXT record intact in your DNS settings to maintain continuous verification.
Not Waiting for DNS Propagation
- Impact: Attempting verification before DNS changes have fully propagated can result in failed verification.
- Solution: Allow ample time (up to 48 hours) for DNS propagation before attempting verification.
Using Multiple Verification Methods Simultaneously
- Impact: Having multiple verification methods active can cause conflicts and confusion.
- Solution: Stick to one verification method at a time. If you switch methods, ensure the previous verification steps are properly removed.
Ignoring Security Best Practices
- Impact: Poor security measures can expose your domain to unauthorized access and potential misuse.
- Solution: Implement robust security practices, including strong passwords and 2FA for your domain registrar account.
Frequently Asked Questions
Can I Verify My Website Using Other Methods?
Yes, Google Search Console offers multiple verification methods, including HTML file upload, HTML tag, Google Analytics, and Google Tag Manager. Choose the method that best suits your technical comfort and access to website files.
What Should I Do If Verification Fails?
- Check DNS Entry: Ensure that the TXT record is correctly entered without any typos.
- Wait for Propagation: Allow additional time for DNS changes to propagate.
- Retry Verification: Attempt the verification process again after confirming the DNS settings.
- Seek Support: If issues persist, contact your domain registrar’s support or refer to Google’s Search Console Help for assistance.
How Long Does Verification Take?
DNS verification typically takes a few minutes to a few hours, but it can sometimes take up to 48 hours depending on your domain registrar’s DNS propagation speed.
Do I Need to Re-Verify My Website Periodically?
No, once your website is verified using DNS, it remains verified as long as the TXT record stays in your DNS settings. Avoid removing or altering the TXT record to maintain continuous verification.
Can I Verify Multiple Domains in One Google Search Console Account?
Yes, you can add and verify multiple domains within a single Google Search Console account. Each domain requires its own verification process.
Maximizing the Impact of Google Search Console
To fully leverage the benefits of Google Search Console, integrate these strategies into your broader SEO and website management plans.
Regularly Monitor Performance Metrics
- Track Impressions and Clicks: Use GSC to monitor how your site appears in search results, including impressions, clicks, and CTR.
- Analyze Search Queries: Identify which keywords drive traffic to your site and optimize your content accordingly.
Identify and Fix Technical Issues
- Crawl Errors: Detect and resolve crawl errors that prevent Google from indexing your pages effectively.
- Mobile Usability: Ensure your website is mobile-friendly by addressing any mobile usability issues flagged in GSC.
- Security Issues: Monitor for any security issues or manual actions that could impact your site’s visibility.
Optimize Content for SEO
- Submit Sitemaps: Regularly submit XML sitemaps to help Google crawl and index your website more efficiently.
- Enhance Rich Snippets: Implement structured data to enable rich snippets, improving your site’s appearance in search results.
- Manage URL Parameters: Use GSC to manage URL parameters and prevent duplicate content issues.
Utilize GSC Tools and Reports
- URL Inspection Tool: Use this tool to check the indexing status of specific URLs and request indexing for new or updated pages.
- Coverage Reports: Review coverage reports to understand which pages are indexed and identify any issues affecting indexing.
- Enhancements Reports: Access reports on various enhancements like AMP, structured data, and mobile usability to improve your site’s performance.
Stay Informed with GSC Updates
- New Features: Keep up with new features and updates in Google Search Console to continually enhance your SEO strategies.
- Educational Resources: Utilize Google’s educational resources and best practice guides to stay informed about effective SEO techniques.
Conclusion
Verifying your website ownership in Google Search Console using DNS is a fundamental step for any website owner aiming to optimize their site’s performance in search results. By following the step-by-step guide provided in this post, implementing best practices, and avoiding common mistakes, you can ensure a smooth and successful verification process. Once verified, leverage the full suite of tools and insights offered by Google Search Console to enhance your website’s SEO, monitor performance, and drive sustained growth. Proper verification and utilization of GSC empower you to make informed, data-driven decisions that can significantly impact your online presence and business success.
How to Index Website Pages with Google Search Console
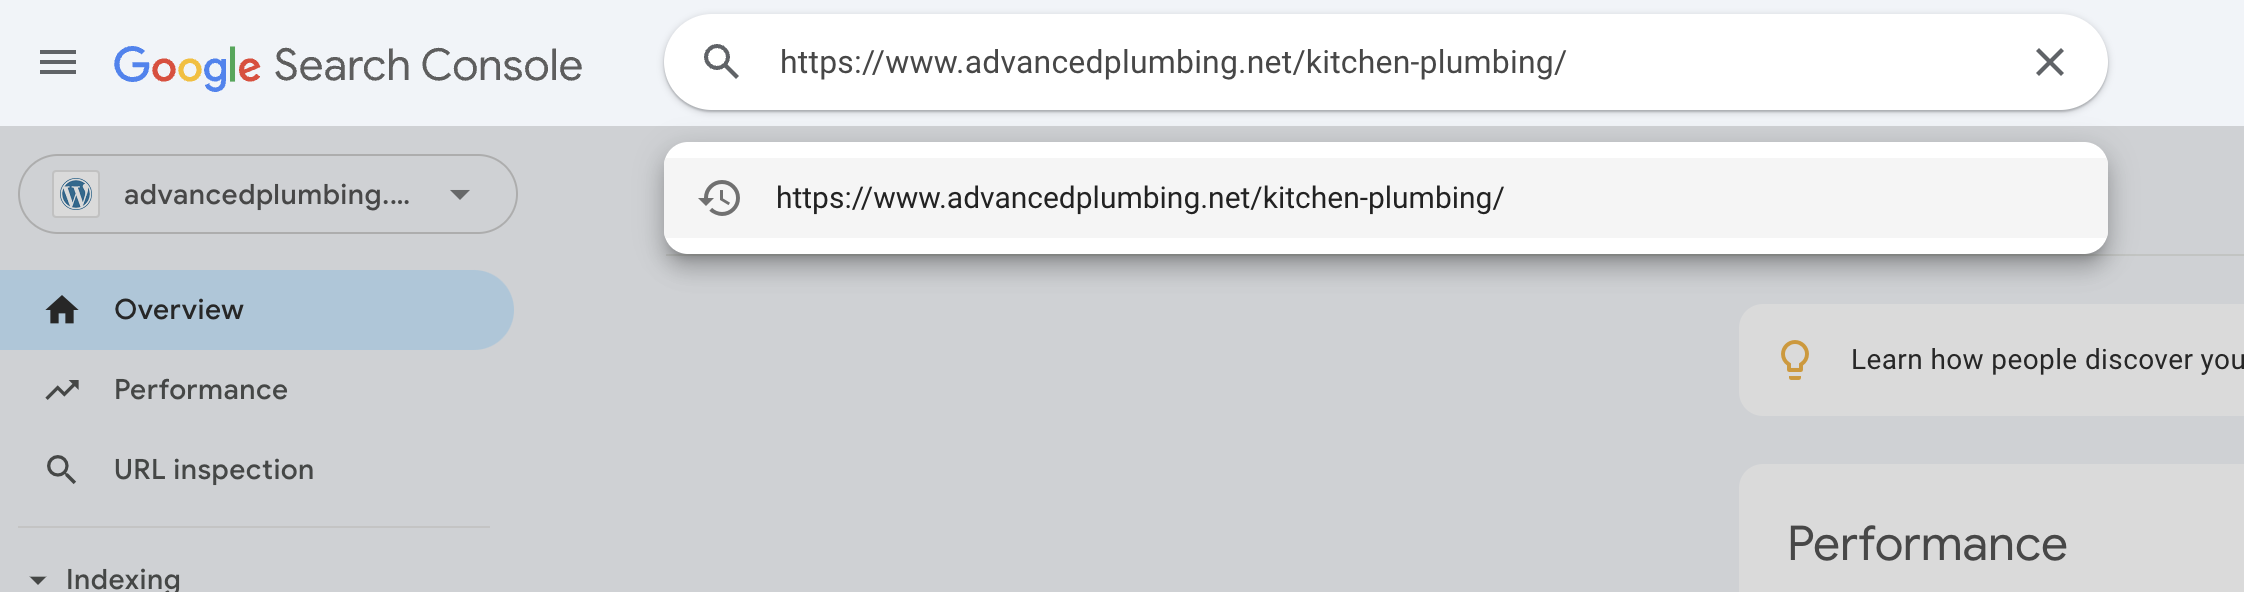
Ensuring that your website pages are indexed by Google is a fundamental step in enhancing your online visibility and driving organic traffic. In the “How to Index Website Pages with Google Search Console” video, you learn a straightforward method to expedite the indexing process, allowing your newly created pages to appear in search results more quickly. This comprehensive guide will expand on those instructions, providing you with detailed steps, best practices, and additional insights to effectively use Google Search Console for indexing your website pages.
Why Indexing Your Website Pages Matters
Indexing is the process by which Google adds your website pages to its search engine results. Proper indexing ensures that your content is discoverable by users searching for relevant information, products, or services. Here’s why indexing your website pages is crucial:
Enhance Online Visibility
Indexed pages appear in Google search results, making it easier for potential customers to find your business. Without indexing, your pages remain invisible to search engines, limiting your reach and reducing the chances of attracting organic traffic.
Improve Search Engine Rankings
Properly indexed pages contribute to your website’s overall SEO performance. When Google recognizes and indexes your content, it can better evaluate its relevance and quality, which can positively impact your search engine rankings.
Accelerate Content Updates
Regularly updating your website with new content is essential for maintaining an active online presence. Using Google Search Console to index new pages ensures that your latest content is promptly available to users, keeping your website fresh and engaging.
Drive Targeted Traffic
Indexed pages help attract targeted traffic by appearing in search results for specific queries related to your business. This targeted approach increases the likelihood of converting visitors into customers, enhancing your overall marketing efforts.
Step-by-Step Guide to Indexing Website Pages with Google Search Console
Follow these steps to efficiently index your website pages using Google Search Console, ensuring that your content is quickly discoverable by search engines.
Step 1: Set Up and Verify Your Google Search Console Account
- Access Google Search Console
- Navigate to Google Search Console and click on “Start now.”
- Sign In with Your Google Account
- Use the Gmail account associated with your website to sign in. If you don’t have a Google account, create one.
- Add Your Website Property
- Click on the “Add property” button and enter your website’s URL. Choose between the “Domain” or “URL prefix” verification methods.
- Verify Ownership
- Follow the verification steps provided by Google, such as adding a meta tag to your website’s
<head>section, uploading an HTML file, or using your domain name provider.
- Follow the verification steps provided by Google, such as adding a meta tag to your website’s
Step 2: Navigate to the URL Inspection Tool
- Access the Dashboard
- Once your website is verified, you’ll be directed to the Google Search Console dashboard.
- Select the URL Inspection Tool
- On the left-hand menu, click on “URL Inspection.” This tool allows you to check the indexing status of specific pages and request indexing.
Step 3: Request Indexing for Individual Pages
- Enter the Page URL
- In the URL Inspection tool, enter the exact URL of the page you want to index and press Enter.
- Check Indexing Status
- Google will display whether the page is indexed. If the page is not indexed, you’ll see a message indicating that the URL is not on Google.
- Request Indexing
- Click on the “Request indexing” button. Google will then queue the page for crawling and indexing.
- Repeat for Multiple Pages
- Perform this process for each new or updated page you want to be indexed. While you can submit multiple pages, it’s best to prioritize high-impact pages to maximize SEO benefits.
Step 4: Monitor Indexing Status
- Check Indexing Progress
- Regularly monitor the indexing status of your pages by revisiting the URL Inspection tool. It may take a few hours to a few days for Google to process the indexing request.
- Address Any Issues
- If a page fails to index, Google will provide error messages or warnings. Address these issues by following Google’s recommendations, such as improving content quality, fixing technical errors, or ensuring proper use of meta tags.
Step 5: Submit a Sitemap for Comprehensive Indexing
- Create a Sitemap
- Ensure your website has an XML sitemap, which lists all the important pages on your site. Most content management systems (CMS) like WordPress offer plugins (e.g., Yoast SEO) to generate sitemaps automatically.
- Submit the Sitemap in Google Search Console
- In the dashboard, click on “Sitemaps” under the “Index” section.
- Enter the URL of your sitemap (e.g.,
https://www.yourwebsite.com/sitemap.xml) and click “Submit.”
- Monitor Sitemap Status
- Google Search Console will process your sitemap and display any issues or errors. Ensure that all desired pages are included and correctly formatted.
Best Practices for Effective Indexing
Implementing best practices can enhance the efficiency and effectiveness of your indexing efforts, ensuring that your website pages are quickly and accurately indexed by Google.
Create High-Quality Content
- Relevance and Value: Ensure that each page provides valuable and relevant information to your target audience. High-quality content is more likely to be indexed and ranked higher in search results.
- Originality: Avoid duplicate content, as Google may penalize or ignore pages with copied material.
Optimize Technical SEO
- Fast Loading Speed: Ensure your website loads quickly to improve user experience and indexing efficiency.
- Mobile-Friendliness: Make sure your website is optimized for mobile devices, as Google prioritizes mobile-friendly sites in its rankings.
- Proper Use of Meta Tags: Use descriptive and keyword-rich meta titles and descriptions to help Google understand the content of your pages.
Ensure Proper Site Structure
- Clear Navigation: A well-structured website with clear navigation helps Google crawl and index your pages more effectively.
- Internal Linking: Use internal links to connect related pages, enhancing the crawlability and discoverability of your content.
Regularly Update Your Content
- Freshness: Regularly updating your website with new and relevant content signals to Google that your site is active and worth indexing.
- Content Audits: Periodically review and update existing content to maintain its accuracy and relevance.
Utilize Robots.txt and Noindex Tags Wisely
- Allow Important Pages: Ensure that important pages are not blocked by your
robots.txtfile and do not havenoindextags, which prevent Google from indexing them. - Disallow Irrelevant Pages: Block indexing of low-value or duplicate pages to focus Google’s attention on your most important content.
Common Mistakes to Avoid
Avoiding these common mistakes can help ensure that your indexing efforts are successful and that your website pages are properly indexed by Google.
Ignoring Google Search Console Notifications
- Impact: Missing notifications about indexing issues can lead to unresolved problems that hinder your website’s performance.
- Solution: Regularly check Google Search Console for alerts and address any issues promptly.
Submitting Low-Quality Pages for Indexing
- Impact: Submitting pages with thin content or technical errors can negatively impact your overall SEO.
- Solution: Ensure that only high-quality, fully optimized pages are submitted for indexing.
Overusing the URL Inspection Tool
- Impact: Submitting too many URLs at once can overwhelm the indexing process and may lead to delays.
- Solution: Prioritize important pages and limit the number of URLs you request indexing for at one time.
Neglecting Sitemap Maintenance
- Impact: An outdated sitemap can lead to incomplete indexing of your website.
- Solution: Regularly update and submit your sitemap to reflect any changes or additions to your website’s structure.
Failing to Optimize for Mobile
- Impact: A non-mobile-friendly website can lead to poor user experience and lower indexing priority.
- Solution: Ensure your website is responsive and performs well on mobile devices to improve indexing and rankings.
Frequently Asked Questions
How Long Does It Take for Google to Index a Page?
Typically, Google can index a page within a few hours to a few days after you request indexing. However, the exact time can vary based on factors like website authority, content quality, and existing crawl frequency.
Can I Request Indexing for Multiple Pages at Once?
Yes, you can request indexing for multiple pages, but it’s advisable to prioritize high-impact pages to maximize SEO benefits. Submitting too many URLs at once may overwhelm the indexing process.
What Should I Do If a Page Fails to Index?
If a page fails to index, review the error messages provided by Google Search Console. Address any technical issues, improve content quality, and ensure there are no noindex tags or robots.txt blocks preventing indexing.
Do I Need to Submit a Sitemap for a Small Website?
While submitting a sitemap is beneficial for larger websites, even small websites can benefit from having a sitemap to ensure that all important pages are discovered and indexed by Google.
How Often Should I Update My Sitemap?
Update your sitemap whenever you add, remove, or significantly change pages on your website. Regular updates ensure that Google has the most accurate and current view of your site’s structure.
Maximizing the Impact of Indexing with Google Search Console
To fully leverage the benefits of indexing your website pages, integrate these strategies into your broader SEO and marketing efforts.
Align with Your Content Strategy
- Consistent Publishing: Regularly publish new content and promptly index it to maintain an active online presence.
- Content Optimization: Optimize each piece of content for relevant keywords to enhance its visibility in search results.
Monitor Performance Metrics
- Track Indexed Pages: Use Google Search Console to monitor which pages are indexed and how they perform in search results.
- Analyze Traffic Sources: Understand where your traffic is coming from and adjust your SEO strategies accordingly to target high-performing areas.
Enhance Technical SEO
- Implement Structured Data: Use schema markup to provide additional context about your content, helping Google better understand and index your pages.
- Optimize Site Speed: Continuously improve your website’s loading speed to enhance user experience and indexing efficiency.
Foster Strong Internal Linking
- Link Strategically: Use internal links to connect related content, improving crawlability and helping Google discover and index new pages more effectively.
- Anchor Text Optimization: Use descriptive and relevant anchor text for internal links to provide clear signals about the linked pages’ content.
Utilize External Backlinks
- Build Quality Backlinks: Encourage other reputable websites to link to your content. High-quality backlinks can improve your website’s authority and speed up the indexing process.
- Guest Posting: Contribute guest posts to industry-related blogs and include links to your website to enhance visibility and indexing.
Conclusion
Effectively indexing your website pages with Google Search Console is a vital component of your SEO strategy, ensuring that your content is discoverable and accessible to potential customers. By following the step-by-step guide provided in this post, implementing best practices, and avoiding common mistakes, you can optimize your indexing process to enhance your website’s visibility and performance in search results. Regularly monitor and update your indexing efforts to stay aligned with your business goals and evolving SEO trends, driving sustained growth and success in the competitive online landscape.