Establishing a strong online presence is essential for any business, and having a professional website is a critical component of that presence. WordPress Engine offers a robust platform for hosting your WordPress website, providing enhanced performance, security, and scalability. However, to make your website accessible to the world, you need to point your domain to your WordPress Engine site. This guide will walk you through the process of pointing your domain from Namecheap to your WordPress Engine website, ensuring a seamless and efficient setup.
Why Point Your Domain to WordPress Engine?
Pointing your domain to WordPress Engine allows you to leverage the platform’s advanced features while maintaining your unique brand identity through a custom domain. This integration ensures that visitors can access your website using a memorable and professional URL, enhancing your business’s credibility and online visibility.
Benefits of Using WordPress Engine
- Enhanced Performance: WordPress Engine optimizes your website for speed and reliability, ensuring a smooth user experience.
- Robust Security: Benefit from advanced security measures that protect your website from threats and vulnerabilities.
- Scalability: Easily scale your website as your business grows, accommodating increased traffic and expanding content needs.
- Expert Support: Access dedicated support from WordPress Engine experts who can assist with technical issues and optimizations.
Step-by-Step Guide to Pointing Your Domain from Namecheap to WordPress Engine
Follow these detailed steps to successfully point your domain from Namecheap to your WordPress Engine website.
Step 1: Access Your WordPress Engine Dashboard
- Log In to WordPress Engine:
- Open your web browser and navigate to WordPress Engine.
- Click on Log In and enter your credentials to access your dashboard.
- Select the Correct Site:
- In the dashboard, select the site you want to point your new domain to. This ensures that the domain is correctly associated with the intended website.
Step 2: Log In to Your Namecheap Account
- Access Namecheap:
- Open a new tab and go to Namecheap.
- Click on Sign In and enter your Namecheap account credentials.
- Navigate to Domain Dashboard:
- Once logged in, click on Dashboard from the left-hand sidebar.
- If you have multiple domains, scroll down to find the domain you wish to point to WordPress Engine.
- Manage Your Domain:
- Locate the desired domain and click on the Manage button next to it.
Step 3: Configure Advanced DNS Settings in Namecheap
- Go to Advanced DNS:
- In the domain management page, click on the Advanced DNS tab. This section allows you to manage DNS records for your domain.
- Prepare to Add DNS Records:
- You will need to add either A Records or CNAME Records to point your domain to WordPress Engine. For simplicity, this guide focuses on using CNAME Records.
Step 4: Add Your Domain in WordPress Engine
- Access Domain Settings:
- Return to your WordPress Engine dashboard.
- In the left-hand sidebar, click on Domains.
- Add a New Domain:
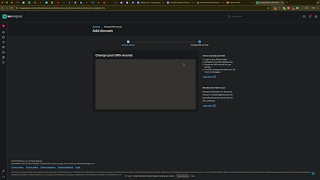
- Click on the Add a Domain button.
- Enter your domain name, including the www prefix (e.g., www.yourdomain.com), and set it as the primary domain if desired.
- Check the box that says “Also add the other domain” to include the non-www version.
- Configure Edge Full Page Cache (Optional):
- Decide whether to enable Edge Full Page Cache based on your website’s performance needs. This feature can improve load times by caching content closer to your visitors.
- Obtain DNS Records:
- After adding the domain, WordPress Engine will provide you with the DNS records needed to point your domain correctly. Note these down as you will need them in the next steps.
Step 5: Add CNAME Records in Namecheap
- Return to Namecheap’s Advanced DNS:
- Go back to the Advanced DNS tab in your Namecheap domain dashboard.
- Add CNAME Record for WWW:
- Click on Add New Record.
- Select CNAME Record from the dropdown menu.
- Host: Enter
www. - Value: Enter
wordpressenginepower.com. - TTL: Set to
Automaticor the default value. - Click the Checkmark to save the record.
- Add CNAME Record for @ (Root Domain):
- Click on Add New Record again.
- Select CNAME Record.
- Host: Enter
@. - Value: Enter
wordpressenginepower.com. - TTL: Set to
Automatic. - Click the Checkmark to save the record.
Step 6: Verify DNS Changes in WordPress Engine
- Confirm DNS Setup:
- Return to your WordPress Engine dashboard.
- Click on I’ve done this to notify WordPress Engine that you’ve added the necessary DNS records.
- Wait for DNS Propagation:
- DNS changes can take anywhere from a few minutes to 24 hours to propagate fully. However, Namecheap typically updates DNS records within a few hours.
- Check Verification Status:
- Monitor the verification status in WordPress Engine. Once the DNS records are correctly pointing to WordPress Engine, you will see a green checkmark indicating successful verification.
Step 7: Finalize and Test Your Setup
- Access Your Website:
- Once verification is complete, visit your domain (e.g., www.yourdomain.com) to ensure it correctly points to your WordPress Engine-hosted website.
- SSL Certificate:
- WordPress Engine automatically provisions an SSL certificate for your domain. Ensure that the SSL is active by checking for the secure padlock icon in the browser’s address bar.
- Update Any Additional Settings:
- If you have any specific configurations, such as redirects or additional DNS records, make sure to update them accordingly in both Namecheap and WordPress Engine.
Best Practices for Pointing Your Domain
Implementing best practices ensures a smooth and efficient domain pointing process, minimizing downtime and optimizing performance.
1. Double-Check DNS Records
- Accuracy: Ensure that all DNS records are entered correctly to prevent misdirection.
- No Typos: Double-check for any typos in the hostnames or values to avoid errors.
2. Use CNAME Records for Flexibility
- Easier Management: CNAME records are easier to manage, especially if you plan to switch hosting providers in the future.
- Consistency: Ensure both
wwwand root domains point to the same target for consistency.
3. Monitor DNS Propagation
- Timeframe: Be aware that DNS changes can take up to 24 hours to propagate fully, although it usually happens faster with Namecheap.
- Patience: Allow sufficient time before troubleshooting, as delays are common.
4. Enable SSL for Security
- Automatic Provisioning: WordPress Engine typically handles SSL setup automatically, but always verify its activation.
- Manual Intervention: If SSL is not active, contact WordPress Engine support to resolve the issue promptly.
5. Maintain NAP Consistency
- Name, Address, Phone: Ensure that your business’s Name, Address, and Phone number (NAP) are consistent across all online platforms to boost local SEO.
Common Mistakes to Avoid
Avoiding these common pitfalls can help ensure a successful domain pointing process.
1. Incorrect DNS Records
- Impact: Misconfigured DNS records can lead to website downtime or misdirection.
- Solution: Carefully follow the DNS record setup instructions provided by WordPress Engine and double-check entries.
2. Not Waiting for Propagation
- Impact: Attempting to access your website before DNS propagation is complete can result in errors or a “site not found” message.
- Solution: Wait for DNS propagation to finish before testing your website.
3. Overlooking SSL Activation
- Impact: Without an active SSL certificate, your website may appear insecure to visitors, negatively impacting trust and SEO.
- Solution: Verify SSL activation in your WordPress Engine dashboard and ensure it’s functioning correctly.
4. Using Personal Contact Information
- Impact: Using personal phone numbers or addresses in your domain settings can lead to privacy issues and inconsistencies.
- Solution: Always use business-specific contact information to maintain professionalism and accuracy.
5. Ignoring Support Resources
- Impact: Struggling with setup issues without seeking help can lead to prolonged downtime.
- Solution: Utilize WordPress Engine’s support resources or contact their support team if you encounter any challenges during the setup process.
Frequently Asked Questions
Can I Use A Records Instead of CNAME Records?
Yes, you can use A Records instead of CNAME Records to point your domain to WordPress Engine. A Records directly map your domain to an IP address, whereas CNAME Records alias your domain to another domain name. Choose the method that best fits your management preferences.
How Long Does DNS Propagation Take?
DNS propagation can take anywhere from a few minutes to 24 hours, depending on various factors such as your domain registrar and the TTL (Time to Live) settings of your DNS records. Namecheap typically updates DNS records within a few hours.
Do I Need to Update DNS Settings for Subdomains?
Yes, if you have subdomains (e.g., blog.yourdomain.com), you will need to configure DNS settings for each subdomain separately, either by adding additional CNAME or A Records as required.
What If My Domain Isn’t Verifying?
If your domain isn’t verifying after 24 hours:
- Double-Check DNS Records: Ensure that all entries are correct and free of typos.
- Clear DNS Cache: Sometimes clearing your local DNS cache can help.
- Contact Support: Reach out to WordPress Engine support for assistance in troubleshooting the verification issue.
Can I Point Multiple Domains to One WordPress Engine Site?
Yes, WordPress Engine allows you to point multiple domains to a single site. This can be useful for managing different variations of your domain name or catering to different geographic regions.
Maximizing the Impact of Pointing Your Domain
To fully leverage the benefits of pointing your domain to WordPress Engine, integrate these strategies into your broader marketing and operational plans.
Align with Your Marketing Goals
- Define Objectives: Clearly outline what you aim to achieve with your website, such as increasing leads, boosting online sales, or enhancing brand awareness.
- Tailor Content: Ensure your website content aligns with your marketing goals and resonates with your target audience.
Use Data to Optimize Strategies
- Analytics Integration: Integrate Google Analytics with your WordPress Engine site to monitor website performance and user behavior.
- Conversion Tracking: Set up conversion tracking to measure the effectiveness of your marketing campaigns and optimize accordingly.
Integrate with Other Marketing Tools
- CRM Systems: Connect your website with Customer Relationship Management (CRM) systems to streamline lead management and follow-up processes.
- Email Marketing: Utilize email marketing tools to engage with your audience and drive traffic back to your website.
Foster Team Collaboration
- Share Responsibilities: Delegate tasks such as content creation, SEO optimization, and website maintenance to team members to enhance productivity and creativity.
- Regular Meetings: Hold regular team meetings to discuss website performance, analyze data, and brainstorm new strategies.
Enhance Customer Experience
- Optimize User Interface: Ensure your website is user-friendly, with intuitive navigation and a responsive design that works well on all devices.
- Provide Value: Focus on delivering valuable content and resources that address your audience’s needs and interests.
Conclusion
Pointing your domain from Namecheap to your WordPress Engine website is a strategic step that enhances your online presence, leverages WordPress Engine’s robust features, and ensures your website is accessible through a professional and memorable URL. By following this step-by-step guide, implementing best practices, and avoiding common mistakes, you can ensure a seamless domain pointing process that supports your business goals and drives growth. Embrace the power of WordPress Engine to optimize your website’s performance, security, and scalability, and watch your business thrive in the digital landscape.


