Integrating a live chat widget into your website can greatly enhance customer engagement and drive conversions. In this guide, we’ll walk you through installing the Podium web chat widget on your WordPress site. While there are various methods available for different website builders, this tutorial focuses specifically on WordPress—making it ideal for home service businesses and others looking to boost their online communication without overloading their site with extra plugins.
Why Use the Podium Web Chat Widget?
Podium’s web chat widget offers a dynamic way to connect with visitors in real time. By enabling live chat on your site, you can:
- Increase Conversions: Capture leads directly by engaging visitors instantly.
- Enhance Customer Support: Provide immediate answers to questions, improving overall customer satisfaction.
- Customize Engagement: Tailor the appearance and behavior of the chat widget to match your brand.
Step-by-Step Guide to Installing Podium on WordPress
Follow these steps to install and activate the Podium web chat widget on your WordPress website.
Step 1: Install the Podium Plugin
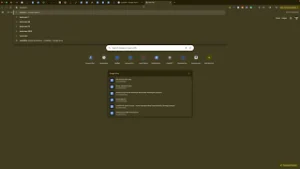
- Log in to Your WordPress Dashboard:
- Navigate to
yourwebsite.com/wp-adminand enter your login credentials.
- Navigate to
- Add a New Plugin:
- In the left-hand sidebar, click on Plugins.
- Click Add New at the top left of the Plugins page.
- In the search bar, type Podium.
- Install and Activate:
- Locate the Podium plugin in the search results and click Install Now.
- Once installed, click Activate. If you don’t see the activation button immediately, go to your Plugins list and activate it from there.
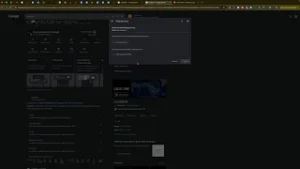
Step 2: Configure Podium Settings
- Access the Podium Dashboard:
- Once the plugin is activated, a new Podium menu will appear at the top of your WordPress dashboard. Click on it.
- Enable the Web Chat Widget:
- In the Podium settings, you’ll be prompted to choose whether your Podium web chat is enabled or disabled. Select Enabled.
- Get Your Widget Code:
- Sign in to your Podium account (make sure you’re in the correct business or location if you manage multiple accounts).
- Click on your name in the bottom left, then select View Profile.
- Navigate to Lead Sources, and then click on Web Chat.
- Locate the Widget Options button (typically found at the top right) and click Copy to copy the widget code.
- Paste the Widget Code:
- Return to the Podium settings in WordPress.
- Paste the copied widget code into the designated field.
- Click Save Changes to confirm your settings.
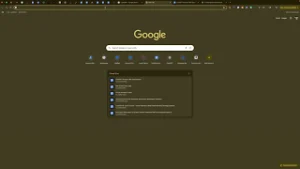
Step 3: Verify and Test the Widget
- Test the Installation:
- Visit your website and navigate to a page where the widget should appear.
- Confirm that the Podium chat widget loads correctly.
- If you encounter any issues, double-check the copied code and ensure that you’re signed in with the correct Podium account.
- Customize Further (Optional):
- Explore additional settings in Podium to adjust the widget’s appearance, automated responses, and other features. For advanced users, there’s also an option to install the widget via Google Tag Manager, which can reduce the number of plugins on your site.
Best Practices for Using the Podium Web Chat Widget
Implementing the chat widget effectively is key to maximizing its benefits. Consider these best practices:
1. Maintain a Clean and Responsive Design
- Brand Consistency: Customize the widget’s colors and layout to match your website’s branding.
- Mobile Optimization: Ensure the widget functions seamlessly on mobile devices, as many visitors access your site via smartphones.
2. Monitor and Optimize Engagement
- Track Conversions: Use analytics tools to measure the effectiveness of your chat widget in generating leads.
- Adjust Settings: Regularly update the widget’s automated responses and appearance based on customer feedback and engagement metrics.
3. Keep Plugin Usage Minimal
- Streamline Your Site: As an agency or business owner, consider managing the Podium script via Google Tag Manager if you want to reduce the number of active plugins on your website.
Common Mistakes to Avoid
Avoid these pitfalls to ensure a smooth installation and optimal performance of your Podium chat widget:
- Incorrect Account Selection: Make sure you’re signed in to the correct Podium account, especially if you manage multiple businesses or locations.
- Incomplete Code Copy: Verify that you have copied the entire widget code correctly from your Podium dashboard.
- Neglecting Testing: Always test the widget after installation to confirm it’s functioning as expected on various pages and devices.
- Overloading Your Website: If you’re an agency or business owner, consider using Google Tag Manager for a cleaner integration rather than installing multiple plugins.
Conclusion
Installing the Podium web chat widget on your WordPress site is a powerful way to boost customer engagement and increase conversions. By following this step-by-step guide, you can easily add the widget via the Podium plugin and configure it to meet your specific business needs. Remember to customize the widget to align with your brand, test its functionality thoroughly, and consider more streamlined solutions like Google Tag Manager for a cleaner website setup.