Ensuring that your website is correctly tagged with essential tools like Google Tags, Google Analytics, and Google Tag Manager is crucial for effective digital marketing and data-driven decision-making. In the “How to Check if a Website is Tagged Properly” video, you learn how to verify the installation of these tags using the Google Tag Assistant Chrome extension. This comprehensive guide will expand on those instructions, providing you with detailed steps, best practices, and additional insights to ensure your website is accurately tagged for optimal performance and analytics.
Why Proper Tag Installation Matters
Accurate tagging of your website is fundamental for tracking user interactions, measuring campaign effectiveness, and optimizing your marketing strategies. Here’s why it’s essential:
Enhanced Data Collection
Proper tags ensure that you collect accurate and comprehensive data about your website visitors’ behaviors, interactions, and conversions. This data is invaluable for understanding your audience and improving your website’s performance.
Improved Marketing ROI
By accurately tracking conversions and user actions, you can better assess the effectiveness of your marketing campaigns. This allows you to allocate your budget more efficiently, focusing on strategies that yield the highest return on investment (ROI).
Better User Experience
Tags help you understand how users interact with your website, enabling you to make informed decisions about website design and functionality. Enhancing user experience can lead to higher engagement and increased conversions.
Compliance and Security
Proper tag management ensures that your website complies with data privacy regulations, such as GDPR and CCPA. It also helps maintain the security and integrity of the data you collect.
Step-by-Step Guide to Checking Tag Installation
Follow these steps to verify that your website or any other website has Google Tags, Google Analytics, and Google Tag Manager installed properly using the Google Tag Assistant Chrome extension.
Step 1: Install the Google Tag Assistant Chrome Extension
- Access the Chrome Web Store:
- Open Google Chrome and navigate to the Chrome Web Store.
- Search for Google Tag Assistant:
- In the search bar, type “Google Tag Assistant” and press Enter.
- Add the Extension to Chrome:
- Locate the Google Tag Assistant extension in the search results.
- Click on the Add to Chrome button.
- Confirm the installation by clicking Add extension in the pop-up dialog.
- Pin the Extension for Easy Access:
- After installation, click on the puzzle piece icon (🔍) in the Chrome toolbar.
- Find Google Tag Assistant in the list and click the pin icon to add it to your extension bar for easy access.
Step 2: Verify Tag Installation on Your Website
- Navigate to the Website:
- Open a new tab and go to the website you want to check for tag installations.
- Activate the Google Tag Assistant:
- Click on the Google Tag Assistant icon in the Chrome toolbar.
- Analyze the Tag Status:
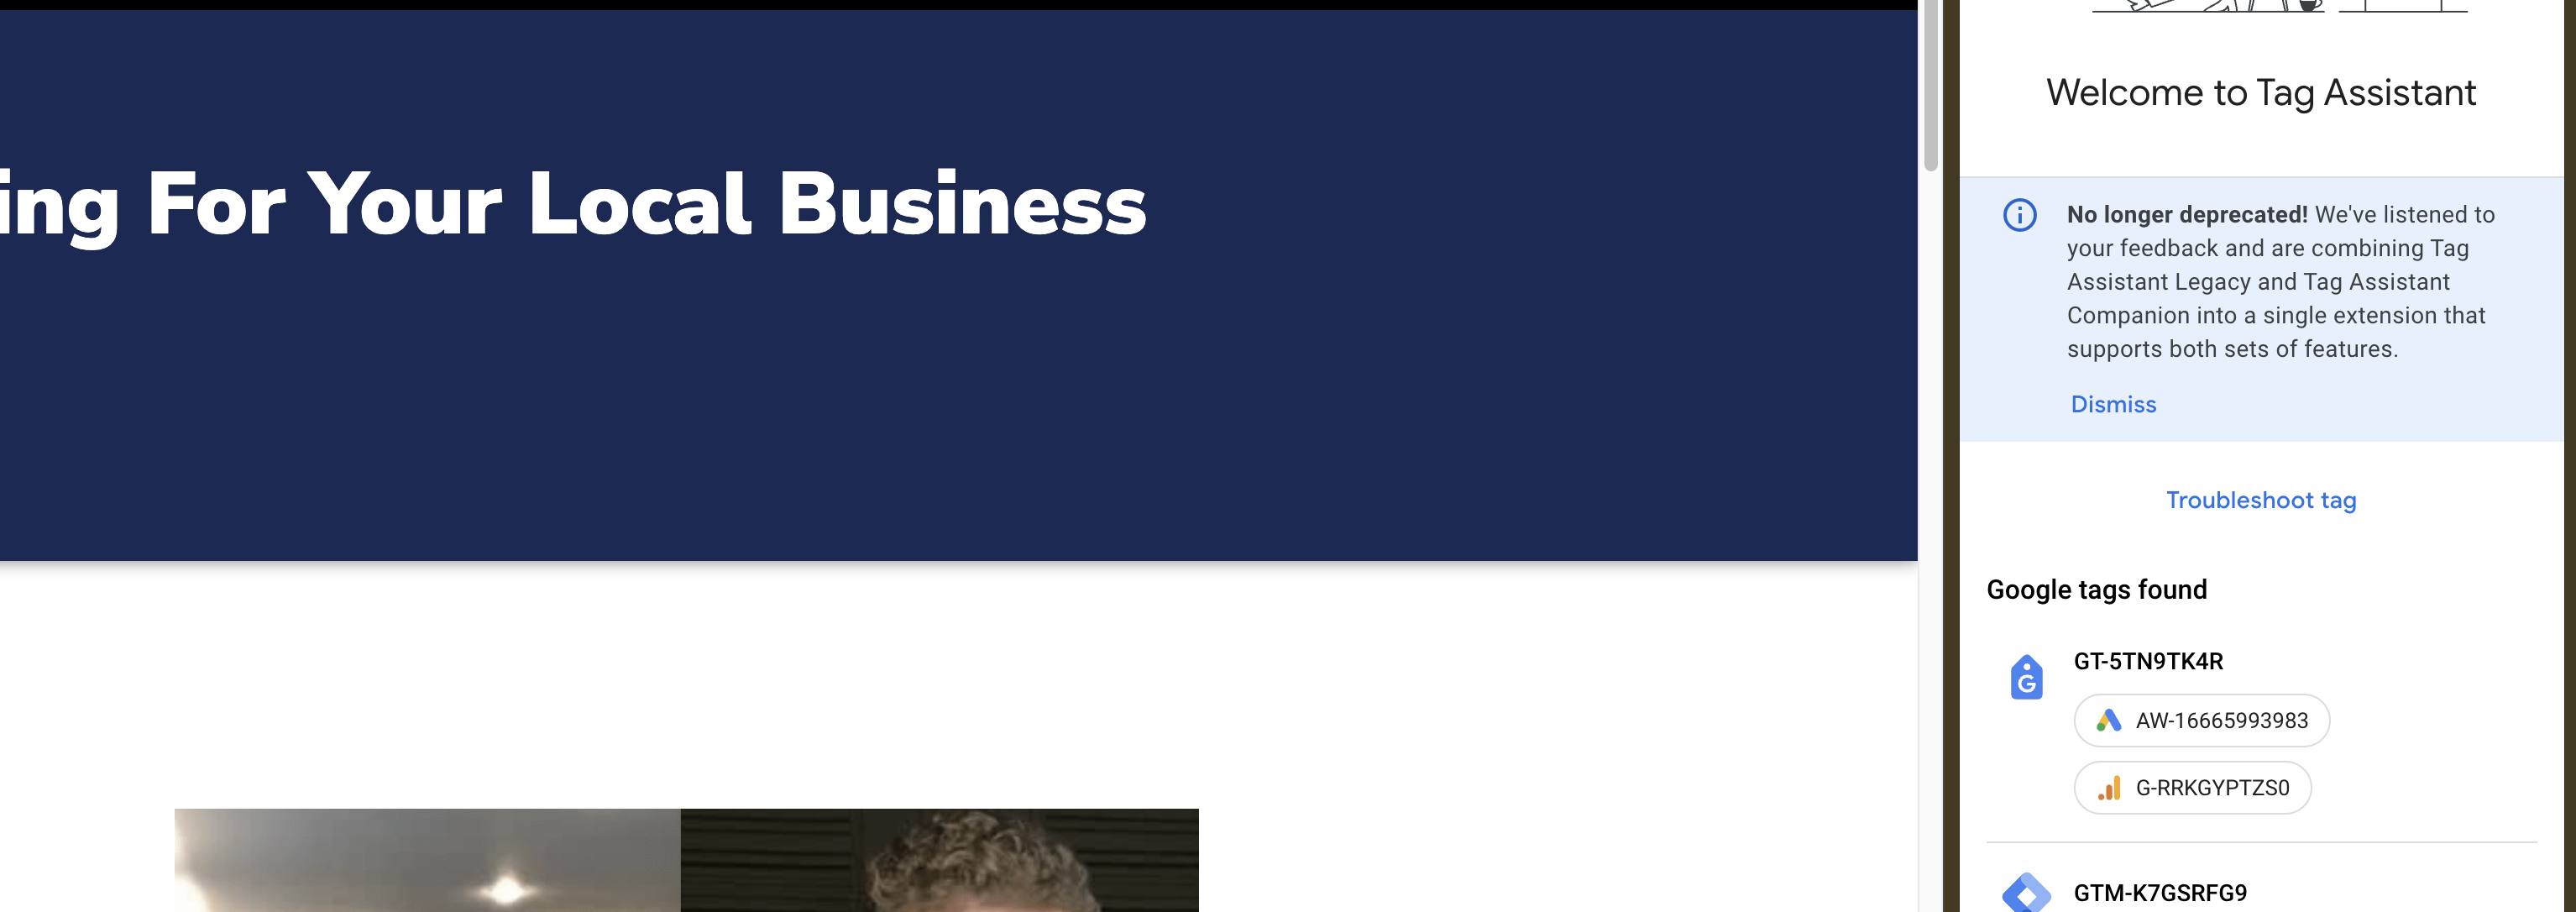
- The extension will display a small window indicating whether Google Tags are detected on the page.
- If Tags are Found:
- You will see details about the tags installed, including Google Analytics, Google Ads, and Google Tag Manager.
- The extension may provide additional information about each tag, such as version and any potential issues.
- If No Tags are Found:
- The extension will notify you that no Google Tags were detected on the page.
Step 3: Troubleshoot Common Tag Issues
- Tags Not Found:
- Check Tag Installation Code: Ensure that the tag codes for Google Analytics, Google Ads, and Google Tag Manager are correctly placed in the
<head>section of your website’s HTML. - Use Correct IDs: Verify that the IDs used in the tag codes match those in your respective Google accounts.
- Clear Browser Cache: Sometimes, cached data can prevent the latest tag codes from loading. Clear your browser cache and reload the page.
- Check Tag Installation Code: Ensure that the tag codes for Google Analytics, Google Ads, and Google Tag Manager are correctly placed in the
- Multiple Tags Detected:
- Consolidate Tags: Ensure that you only have one instance of each tag installed to avoid data discrepancies.
- Remove Duplicates: Delete any duplicate tag codes from your website’s HTML or CMS settings.
- Tag Errors or Warnings:
- Follow Google Tag Assistant Suggestions: The extension will provide specific warnings or errors. Address these based on the recommendations provided.
- Update Tag Codes: Ensure that your tag codes are up-to-date with the latest versions provided by Google.
Step 4: Test Tag Functionality
- Perform Test Actions:
- Navigate through your website and perform actions you want to track, such as filling out a form, making a purchase, or clicking a button.
- Check Google Tag Assistant:
- After performing each action, check the Google Tag Assistant to see if the corresponding tags are firing correctly.
- Verify Event Data:
- Ensure that the correct events are being tracked and that the data captured aligns with your tracking goals.
Best Practices for Tag Management
Implementing best practices ensures that your tags function correctly and provide accurate data for your marketing strategies.
Use Google Tag Manager for Easier Management
- Centralized Tag Management: Google Tag Manager (GTM) allows you to manage all your tracking codes in one place without modifying your website’s code directly.
- Simplified Updates: Easily add, update, or remove tags through GTM’s user-friendly interface.
Regularly Audit Your Tags
- Periodic Checks: Regularly use Google Tag Assistant to verify that your tags are functioning correctly and capturing the desired events.
- Monitor Tag Performance: Use Google Analytics and Google Ads to review tag data and ensure that your tracking aligns with your campaign objectives.
Implement Enhanced Tracking Features
- Enhanced Ecommerce: For ecommerce websites, enable Enhanced Ecommerce tracking in Google Analytics to gain deeper insights into user behavior and purchase patterns.
- Custom Events: Set up custom events in GTM to track specific user interactions that are unique to your business needs.
Maintain Consistency Across Platforms
- Uniform Tagging: Ensure that your tagging strategy is consistent across all web pages and marketing platforms to maintain data integrity.
- Cross-Device Tracking: Implement cross-device tracking to understand user behavior across different devices, enhancing your marketing strategies.
Protect Against Double Tracking
- Unique Triggers: Ensure that each tag has a unique trigger to prevent multiple tags from firing for a single action.
- Thorough Testing: Test your tag setup thoroughly to confirm that each action is tracked only once, maintaining accurate data collection.
Common Mistakes to Avoid
Avoiding these common pitfalls can enhance the effectiveness of your tag management efforts.
Incorrect Tag Placement
- Impact: Placing tag codes outside the
<head>section or on incorrect pages can prevent proper tracking. - Solution: Ensure that all tag codes are correctly placed in the
<head>section of every page you want to track.
Using Outdated Tag Codes
- Impact: Outdated tag codes can lead to inaccurate data collection and reduced functionality.
- Solution: Regularly update your tag codes to the latest versions provided by Google. Use GTM to manage and implement these updates seamlessly.
Ignoring Tag Errors
- Impact: Unresolved tag errors can compromise data accuracy and tracking reliability.
- Solution: Address any errors or warnings reported by Google Tag Assistant promptly. Follow the provided recommendations to resolve issues.
Overloading with Multiple Tags
- Impact: Installing too many tags can slow down your website and lead to data discrepancies.
- Solution: Only install necessary tags and regularly review your tag implementation to remove any redundant or unnecessary tags.
Neglecting Mobile Optimization
- Impact: Tags not optimized for mobile devices can result in incomplete tracking, as mobile and desktop versions of your website might behave differently.
- Solution: Test your tags on both mobile and desktop devices to ensure consistent tracking across all platforms.
Frequently Asked Questions
What is the Google Tag Assistant Chrome Extension?
The Google Tag Assistant is a Chrome extension developed by Google that helps you verify the correct installation of various Google tags on your website, including Google Analytics, Google Ads, and Google Tag Manager. It provides real-time feedback on tag functionality and highlights any issues or errors.
Do I Need Google Tag Manager to Use Google Tag Assistant?
No, Google Tag Assistant can be used independently of Google Tag Manager. However, using GTM simplifies the management and deployment of tags, making it easier to implement and maintain your tracking setup.
Can I Use Google Tag Assistant on Any Website?
Yes, you can use Google Tag Assistant to check tags on any website, not just your own. This is particularly useful for auditing competitor websites or learning how other businesses implement their tracking codes.
How Often Should I Audit My Tags?
It’s recommended to audit your tags at least once a month or whenever you make significant changes to your website’s structure or marketing strategies. Regular audits help ensure that your tags are functioning correctly and collecting accurate data.
What Should I Do If a Tag Isn’t Firing Correctly?
If a tag isn’t firing correctly, follow these steps:
- Check Tag Placement: Ensure the tag code is correctly placed in the website’s HTML.
- Verify Tag ID: Confirm that the tag ID matches the one in your Google account.
- Clear Cache: Clear your browser cache and reload the page.
- Disable Conflicting Extensions: Some browser extensions might interfere with tag firing. Try disabling them temporarily.
- Consult Google’s Documentation: Refer to Google’s official documentation or seek support if issues persist.
Maximizing the Impact of Proper Tag Installation
To fully leverage the benefits of a properly installed tagging system, integrate these strategies into your broader marketing and operational plans.
Align with Your Marketing Goals
- Define Clear Objectives: Identify what you want to achieve with your tracking setup, such as increasing conversions, improving user engagement, or enhancing campaign performance.
- Tailor Events to Goals: Set up specific events that align with your marketing objectives, ensuring that you capture the most relevant data for your analysis.
Use Data to Optimize Campaigns
- Analyze Conversion Data: Use the data collected by your tags to understand which campaigns, channels, and strategies are driving the most conversions.
- Refine Targeting: Adjust your ad targeting based on insights gained from tag data to reach more qualified audiences and improve campaign effectiveness.
Integrate with Other Marketing Tools
- CRM Integration: Connect your tagging data with your Customer Relationship Management (CRM) system to streamline lead management and follow-up processes.
- Email Marketing: Use tag data to create targeted email marketing campaigns based on user interactions and behaviors on your website.
Leverage Advanced Analytics Features
- Enhanced Ecommerce: For ecommerce websites, implement Enhanced Ecommerce tracking to gain deeper insights into customer purchase behavior and product performance.
- Custom Dashboards: Create custom dashboards in Google Analytics to visualize and monitor the most important metrics for your business.
Foster Team Collaboration
- Training and Guidelines: Ensure that all team members understand the importance of accurate tagging and are trained on how to manage and troubleshoot tags using GTM and Google Tag Assistant.
- Shared Responsibilities: Distribute tag management tasks among team members to maintain efficiency and accuracy in your tracking setup.
Conclusion
Ensuring that your website is properly tagged with Google Tags, Google Analytics, and Google Tag Manager is essential for capturing accurate data, optimizing your marketing strategies, and driving business growth. By following the step-by-step guide provided in this post, implementing best practices, and avoiding common mistakes, you can ensure that your tagging setup is both accurate and effective. Regularly audit your tags and stay updated with the latest tracking technologies to maintain a robust and insightful analytics system that supports your business objectives.


