Knowing how to add a clickable link to an image in WordPress Elementor is essential for making your website more interactive and user-friendly. This functionality is particularly valuable for guiding visitors toward important pages, products, or offers seamlessly, boosting both engagement and conversions.
In this detailed guide, we’ll walk through each step necessary to link images within Elementor clearly and effectively, ensuring your visitors experience seamless navigation and effortless interactions.
Why Add Clickable Links to Images?
Clickable images are more than just visually appealing—they significantly improve user experience. When you include clickable images, you offer:
- Enhanced Navigation: Visitors easily find key pages, products, or content.
- Improved User Engagement: Images attract clicks more naturally than text-based links.
- Increased Conversions: Directing traffic to specific pages can boost conversion rates.
Step-by-Step Guide to Adding Clickable Links to Images in Elementor
Follow these clear and easy-to-follow steps to incorporate clickable links into your images using WordPress Elementor:
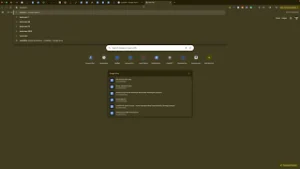
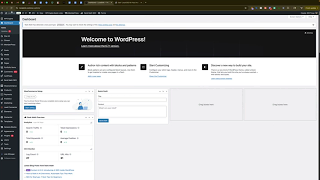
Step 1: Access the WordPress Backend
First, navigate to your WordPress admin panel:
- Log in to your backend by visiting your URL (typically:
yourwebsite.com/wp-admin). - Enter your credentials and log into your dashboard.
Step 2: Open Elementor Page Editor
You have two options to open Elementor:
- From the backend dashboard, go to “Pages” → “All Pages,” find your desired page, and click “Edit with Elementor.”
- Alternatively, from your website’s front end, click the “Edit with Elementor” button on the top toolbar.
This will open your page within Elementor’s intuitive visual editor.
Step 3: Select the Image to Link
Once the Elementor editor loads:
- Scroll to the image you wish to link.
- Click the image, and you’ll see settings appear in the Elementor sidebar.
Step 4: Add Your Custom Link
With your image selected:
- Find the “Link” option in the settings sidebar.
- Select “Custom URL” from the available choices.
- Paste your desired URL directly into the provided field.
You can also choose other options like linking to a media file or creating downloadable content.
Step 5: Publish or Update the Changes
After inserting the URL:
- Click the green “Publish” or “Update” button at the top right corner of the Elementor editor.
- Your changes will go live, and the image becomes clickable.
Step 6: Clear Cache if Necessary
Sometimes your changes may not immediately reflect on the live site due to caching:
- Clear your browser’s cache.
- Refresh your webpage.
- Check your link to ensure it works properly.
Typically, updates appear quickly, but clearing cache helps verify the link promptly.
Common Issues and How to Solve Them
While adding links to images is usually straightforward, you might encounter common issues. Here’s how to handle them:
Issue: Link Isn’t Working
If your clickable image doesn’t link correctly, try the following:
- Double-check the URL entered for accuracy.
- Ensure the URL format is complete and correct (include “https://”).
- Update or refresh the Elementor page editor to confirm changes are saved.
Issue: Changes Aren’t Visible
If updates don’t immediately show:
- Clear your browser cache or WordPress site cache if using a caching plugin.
- Try refreshing the page after clearing cache.
- Check in another browser or incognito window to verify updates.
Benefits of Clickable Image Links in Elementor
Including clickable image links within Elementor brings several distinct advantages:
- Professional Appearance: Your website appears more sophisticated and professionally designed.
- Better Navigation: Visitors can intuitively explore and access content.
- Increased Conversion Rates: Directly linking promotional images can significantly boost your conversions and engagement metrics.
Advanced Tips for Enhancing Clickable Images
Here are some additional tips for making your clickable images more effective:
- Strategic Placement: Position clickable images prominently to attract attention and encourage interaction.
- Clear Calls to Action: Use clear, concise text or visual cues around the image to prompt clicks.
- Monitor Performance: Utilize analytics tools to assess which images drive the most clicks and engagement.
Conclusion
Learning how to add a clickable link to an image in WordPress Elementor significantly boosts your website’s user experience, guiding visitors smoothly through your content. By following this comprehensive guide, you ensure that your clickable images function perfectly, enhancing your website’s overall effectiveness and appeal.
Master this essential Elementor feature today, and watch your user engagement and conversion rates improve.