
Customizing the appearance of your WordPress forms is essential for maintaining brand consistency and enhancing user experience. Elementor, a popular WordPress page builder, offers powerful tools to design and modify forms. However, changing the colors of different form elements can sometimes be tricky. This comprehensive guide will walk you through the process of changing the colors on an Elementor form, ensuring your forms are both visually appealing and aligned with your brand identity.
Why Customize Form Colors?
The colors you choose for your forms play a significant role in how users perceive your brand and interact with your website. Proper color customization can:
Benefits of Customizing Form Colors
- Brand Consistency: Align form colors with your brand palette to reinforce brand identity.
- Enhanced User Experience: Use colors strategically to guide users’ attention and improve form usability.
- Increased Conversions: Visually appealing forms can encourage more users to complete and submit them.
- Professional Appearance: Well-designed forms contribute to the overall professionalism of your website.
Step-by-Step Guide to Changing Form Colors in Elementor
Follow these detailed steps to customize the colors of various elements in your Elementor form, ensuring a cohesive and attractive design.
Step 1: Access Your WordPress Dashboard
- Log In to WordPress:
- Open your web browser and navigate to
yourwebsite.com/wp-admin. - Enter your WordPress username and password, then click Log In.
- Open your web browser and navigate to
- Navigate to Pages:
- In the left-hand sidebar, click on Pages.
- Select the page containing the form you want to customize and click Edit with Elementor.
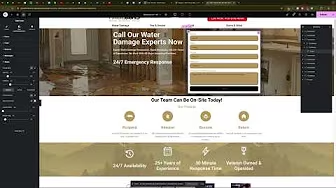
Step 2: Select the Form Widget
- Locate the Form:
- In the Elementor editor, scroll to the section containing your form.
- Click on the form to select the Form Widget.
- Access Form Settings:
- Once the form is selected, the Form settings panel will appear on the left side of the screen.
Step 3: Customize Text Colors
- Change Label Text Color:
- In the Style tab, click on Label.
- Under Text Color, click the color picker and choose your desired color.
- Change Input Text Color:
- Still under the Style tab, click on Input.
- Under Text Color, select the color that complements your form’s design.
Step 4: Customize Background Colors
- Change Input Background Color:
- In the Style tab, under Input, find the Background Color option.
- Click the color picker and choose a background color that enhances readability and matches your brand.
- Change Button Background Color:
- Click on Button under the Style tab.
- Under Background Color, select the desired color for your submit button.
- Change Button Text Color:
- Under Button, find Text Color.
- Choose a color that ensures the text is easily readable against the button’s background.
Step 5: Customize Border Colors
- Change Input Border Color:
- In the Style tab, under Input, locate the Border Color option.
- Select a border color that defines the input fields without being too overpowering.
- Change Button Border Color:
- Under Button, find Border Color.
- Choose a color that complements the button’s background and enhances its visibility.
Step 6: Adjust Hover and Focus States
- Hover State for Inputs:
- Still under Input, go to the Hover tab.
- Change the Background Color, Text Color, and Border Color to provide visual feedback when users hover over input fields.
- Hover State for Buttons:
- Under Button, switch to the Hover tab.
- Modify the Background Color, Text Color, and Border Color to create an interactive experience when users hover over the submit button.
Step 7: Save and Publish Your Changes
- Preview Your Form:
- Click the Preview icon to see how your customized form looks on the live site.
- Publish Changes:
- If satisfied with the customization, click Update to save and publish your changes.
Best Practices for Customizing Form Colors
Implementing best practices ensures that your form colors not only look good but also enhance functionality and user experience.
1. Maintain Brand Consistency
- Use Brand Colors: Incorporate your brand’s primary and secondary colors to maintain a consistent look across your website.
- Limit Color Palette: Stick to a limited color palette to avoid overwhelming users and to keep the form design clean and professional.
2. Ensure Readability and Accessibility
- Contrast: Ensure sufficient contrast between text and background colors to enhance readability.
- Accessible Colors: Choose colors that are accessible to all users, including those with color vision deficiencies. Tools like WebAIM Contrast Checker can help verify color contrast ratios.
3. Highlight Important Elements
- Call-to-Action (CTA) Buttons: Use a distinct color for your submit button to make it stand out and encourage user interaction.
- Focus States: Clearly indicate when an input field is focused to guide users through the form.
4. Test Across Devices
- Responsive Design: Ensure that your form looks and functions well on all devices, including desktops, tablets, and smartphones.
- Cross-Browser Compatibility: Test your form in different browsers to ensure consistent appearance and functionality.
5. Optimize for Speed
- Image Optimization: Use optimized images for backgrounds to ensure fast loading times.
- Minimal Use of Heavy Scripts: Avoid using excessive scripts that can slow down form performance.
Common Mistakes to Avoid
Avoiding common pitfalls can help you create effective and visually appealing forms that enhance user experience and drive conversions.
1. Overcomplicating the Design
- Issue: Adding too many colors and design elements can make the form look cluttered and distract users.
- Solution: Keep the design simple and focus on essential elements. Use colors strategically to guide user attention.
2. Ignoring Mobile Users
- Issue: Forms that don’t display well on mobile devices can frustrate users and reduce conversions.
- Solution: Ensure your form is responsive and looks great on all screen sizes. Test the form on various devices to identify and fix any display issues.
3. Poor Contrast and Readability
- Issue: Low contrast between text and background colors can make the form difficult to read.
- Solution: Choose colors with high contrast to enhance readability. Use tools like WebAIM Contrast Checker to ensure compliance with accessibility standards.
4. Neglecting to Highlight CTAs
- Issue: If the submit button doesn’t stand out, users may overlook it, reducing form submissions.
- Solution: Use a distinct and contrasting color for your submit button. Ensure it’s easily noticeable and inviting.
5. Inconsistent Styling
- Issue: Inconsistent use of colors and styles can make the form look unprofessional.
- Solution: Maintain consistency in color usage and styling across all form elements to create a cohesive and professional appearance.
Frequently Asked Questions
Can I Use Custom Colors Outside of Elementor’s Color Picker?
Yes, you can use custom colors by entering the specific HEX, RGB, or HSL color codes in Elementor’s color settings. This allows for precise color matching to your brand’s palette.
How Do I Reset to Default Colors if I Make a Mistake?
- Solution: In the Elementor editor, select the form widget, navigate to the Style tab, and manually revert each color setting to its default state. Alternatively, you can duplicate the form before making changes, allowing you to restore it if needed.
Can I Change Colors for Individual Fields?
Yes, Elementor allows you to customize colors for individual fields by selecting each field and adjusting its style settings separately. This provides greater control over the form’s appearance.
How Do I Ensure My Form is Accessible?
- Solution: Use high-contrast colors for text and backgrounds, add descriptive alt text to images, and ensure that the form is navigable via keyboard. Regularly test your form using accessibility tools to identify and address any issues.
Is It Possible to Animate Color Changes on Hover?
Yes, Elementor supports animations and transitions. You can add hover effects to buttons and other form elements by navigating to the Advanced tab and configuring the Motion Effects settings.
Maximizing the Impact of Your Customized Form
To fully leverage the benefits of a customized form, integrate these strategies into your broader marketing and user experience efforts.
Align with Your Marketing Goals
- Lead Generation: Ensure your form captures the necessary information to generate quality leads.
- User Engagement: Use engaging colors and interactive elements to enhance user interaction with the form.
Use Data to Optimize Form Performance
- Analytics Integration: Connect your form to Google Analytics to track submissions and user behavior.
- A/B Testing: Experiment with different color schemes and styles to determine which combinations yield the highest conversion rates.
Integrate with Other Marketing Tools
- CRM Systems: Connect your form to Customer Relationship Management (CRM) tools to streamline lead management and follow-up processes.
- Email Marketing: Integrate with email marketing platforms to automate responses and nurture leads captured through the form.
Foster Team Collaboration
- Share Design Guidelines: Ensure that your team understands the color schemes and design principles to maintain consistency across all forms and marketing materials.
- Provide Training: Train team members on using Elementor’s form customization features to empower them to make effective design changes independently.
Enhance Customer Experience
- Responsive Design: Ensure that your form is mobile-friendly, providing a seamless experience for users on all devices.
- User-Friendly Layout: Organize form fields logically and ensure that the form is easy to navigate, reducing the likelihood of user frustration and abandonment.
Conclusion
Changing the colors of your WordPress Elementor forms is a straightforward process that can significantly enhance your website’s aesthetics and user experience. By following this step-by-step guide and adhering to best practices, you can create visually appealing forms that align with your brand identity, improve readability, and drive higher conversion rates. Remember to maintain consistency, prioritize accessibility, and regularly update your forms to keep them engaging and effective.