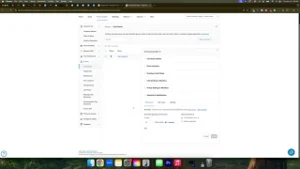
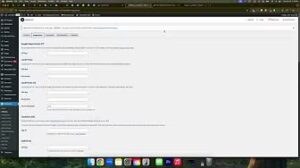
A well-structured and intuitive navigation menu is essential for any successful WordPress website. It not only helps visitors find the information they need quickly but also enhances the overall user experience and SEO performance. Whether you’re using page builders like Elementor or Divi or managing a standard WordPress site, customizing your website menu is straightforward. This comprehensive guide will walk you through the steps to change and customize your WordPress website menu effectively.
Why Customize Your WordPress Menu?
Your website’s menu serves as the primary navigation tool, guiding visitors through your site’s content. Customizing your menu allows you to:
Benefits of a Customized Menu
- Enhanced User Experience: A clear and organized menu helps visitors find what they’re looking for without frustration.
- Improved SEO: Well-structured menus can contribute to better site indexing and search engine rankings.
- Brand Consistency: Customized menus can reflect your brand’s style and priorities, showcasing key content effectively.
- Increased Engagement: Highlighting important pages and services encourages visitors to explore more of your website.
Step-by-Step Guide to Changing and Customizing Your WordPress Menu
Follow these detailed steps to customize your WordPress website menu, whether you’re adding new links, organizing existing ones, or creating dropdowns for better navigation.
Step 1: Access Your WordPress Dashboard
- Log In to Your Account:
- Open your web browser and navigate to
yourwebsite.com/wp-admin. - Enter your WordPress username and password, then click Log In.
- Open your web browser and navigate to
- Navigate to Menus:
- Once logged in, look at the left-hand sidebar.
- Hover over Appearance and click on Menus.
Step 2: Select or Create a Menu
- Choose an Existing Menu:
- At the top of the Menus page, you’ll see a dropdown labeled Select a menu to edit.
- Choose your Primary Menu (often labeled as such) and click Select.
- Create a New Menu (If Needed):
- Click on the Create a new menu link.
- Enter a Menu Name (e.g., “Services Menu”) and click Create Menu.
Step 3: Add Pages to Your Menu
- Add Existing Pages:
- On the left side, you’ll see a list of Pages.
- Check the boxes next to the pages you want to add to your menu.
- Click the Add to Menu button.
- Organize Menu Items:
- Drag and drop the menu items to arrange them in your desired order.
- To create a submenu (dropdown), drag an item slightly to the right under a parent item.
Step 4: Add Custom Links to Your Menu
- Add External or Custom URLs:
- In the Add menu items panel, click on Custom Links.
- Enter the URL and Link Text.
- Click Add to Menu.
- Example: Adding a link to your personal website:
- URL:
https://www.yourpersonalwebsite.com - Link Text:
Will Troop - Click Add to Menu.
- URL:
Step 5: Remove or Edit Menu Items
- Remove an Item:
- Click the dropdown arrow on the menu item you wish to remove.
- Click Remove.
- Edit an Item:
- Click the dropdown arrow on the menu item you want to edit.
- Make necessary changes (e.g., rename the link text or update the URL).
- Click Save Menu.
Step 6: Assign the Menu to a Location
- Select Menu Location:
- Scroll down to the Menu Settings section.
- Check the box for the location where you want the menu to appear (e.g., Primary Menu).
- Save Your Menu:
- Click the Save Menu button to apply your changes.
Step 7: Customize Menu Appearance with Page Builders
If you’re using page builders like Elementor or Divi, you can further customize your menu’s appearance:
- Elementor:
- Edit your header template using Elementor.
- Add or modify the Nav Menu widget to reflect your customized menu.
- Style the menu using Elementor’s design options.
- Divi:
- Use the Divi Theme Builder to edit your header.
- Incorporate the Menu Module and adjust its settings to match your design preferences.
Best Practices for WordPress Menu Customization
Implementing best practices ensures that your menu is not only visually appealing but also functional and user-friendly.
1. Keep It Simple
- Limit Menu Items: Avoid overcrowding your menu. Stick to essential pages to prevent overwhelming visitors.
- Use Clear Labels: Ensure that menu labels are descriptive and easily understood by your audience.
2. Prioritize Important Pages
- Highlight Key Sections: Place the most important pages (e.g., Services, Contact) prominently in the menu.
- Use Dropdowns for Subcategories: Organize related pages under parent items to maintain a clean menu structure.
3. Ensure Mobile Responsiveness
- Test on Devices: Check how your menu appears on various devices to ensure it’s mobile-friendly.
- Use Responsive Design: Utilize responsive menu styles provided by your theme or page builder.
4. Maintain Consistent Styling
- Align with Branding: Ensure that the menu’s colors, fonts, and styles match your overall website design.
- Uniform Structure: Keep the menu structure consistent across different pages for a cohesive user experience.
5. Optimize for SEO
- Use Keyword-Rich Labels: Incorporate relevant keywords in your menu labels to enhance SEO.
- Internal Linking: Ensure that your menu links facilitate easy navigation and improve internal linking for better search engine indexing.
Common Mistakes to Avoid
Avoiding these common pitfalls can help you maintain an effective and user-friendly menu.
1. Overcomplicating the Menu
- Impact: A complex menu can confuse visitors and make navigation difficult.
- Solution: Keep the menu straightforward with clearly defined categories and minimal nesting.
2. Ignoring User Experience
- Impact: Poorly organized menus can frustrate visitors, leading to higher bounce rates.
- Solution: Design your menu with the user in mind, ensuring intuitive navigation and easy access to key pages.
3. Neglecting Mobile Users
- Impact: A non-responsive menu can deter mobile visitors, who make up a significant portion of web traffic.
- Solution: Ensure your menu is optimized for mobile devices, using responsive design principles.
4. Failing to Update the Menu Regularly
- Impact: Outdated menus can mislead visitors and negatively affect SEO.
- Solution: Regularly review and update your menu to reflect new content, services, or changes in your website structure.
5. Inconsistent Menu Placement
- Impact: Inconsistent menu placement can confuse users and disrupt the visual flow of your website.
- Solution: Maintain consistent menu placement across all pages, typically in the header or a designated navigation area.
Frequently Asked Questions
Can I Have Multiple Menus on My WordPress Website?
Yes, WordPress allows you to create multiple menus for different locations, such as a primary menu, footer menu, or sidebar menu. You can manage and assign each menu to its respective location under the Menu Settings section.
How Do I Create a Dropdown Menu?
To create a dropdown menu:
- Add the desired pages or custom links to your menu.
- Drag a menu item slightly to the right beneath a parent item.
- Release to nest it as a submenu.
- Save the menu to apply the changes.
What If My Menu Doesn’t Appear After Saving?
- Check Menu Assignment: Ensure that you’ve assigned the menu to the correct location under Menu Settings.
- Clear Cache: Sometimes, caching plugins or browser caches may prevent changes from appearing immediately.
- Theme Compatibility: Verify that your theme supports the menu location you’ve assigned.
How Can I Add Icons to My Menu Items?
Adding icons can enhance the visual appeal of your menu. You can use plugins like Menu Icons by ThemeIsle or Font Awesome to add icons to your menu items:
- Install and activate the chosen icon plugin.
- Edit your menu and select the icon you want to associate with each menu item.
- Save the menu to apply the changes.
Is It Possible to Style the Menu Using CSS?
Yes, you can customize your menu’s appearance using CSS:
- Navigate to Appearance > Customize > Additional CSS.
- Add your custom CSS code to style the menu as desired.
- Publish the changes to apply the new styles.
Conclusion
Customizing your WordPress website menu is a fundamental step in enhancing your site’s navigation, user experience, and SEO performance. By following this step-by-step guide, you can efficiently manage your menu, ensuring that it aligns with your business goals and provides a seamless browsing experience for your visitors. Remember to keep your menu simple, prioritize important pages, and regularly update it to reflect your website’s evolving content and structure. With a well-organized and visually appealing menu, you’ll create a more engaging and effective website that attracts and retains visitors.


