Effective tracking of your Google Ads campaigns is crucial for measuring performance, optimizing your marketing strategies, and maximizing your return on investment (ROI). By setting up a Google Ads tag on your website using Google Tag Manager (GTM), you can streamline the tracking process, ensure accurate data collection, and manage your tags efficiently without modifying your website’s code directly. This comprehensive guide will walk you through the steps to set up a Google Ads tag using GTM the right way, ensuring seamless integration and optimal campaign tracking.
Why Use Google Tag Manager for Google Ads Tracking?
Google Tag Manager is a powerful tool that simplifies the process of managing and deploying marketing tags on your website. By leveraging GTM for Google Ads tracking, you can:
Benefits of Using Google Tag Manager
- Ease of Implementation: Deploy and manage tags without needing to alter your website’s codebase.
- Centralized Tag Management: Organize all your tracking codes in one place, simplifying updates and maintenance.
- Enhanced Flexibility: Quickly add, modify, or remove tags as your tracking needs evolve.
- Improved Site Performance: Optimize tag loading to enhance website speed and user experience.
- Error Reduction: Utilize GTM’s built-in validation and debugging tools to minimize the risk of tag-related errors.
Step-by-Step Guide to Setting Up a Google Ads Tag with Google Tag Manager
Follow these detailed steps to set up a Google Ads tag on your website using Google Tag Manager, ensuring accurate tracking and seamless integration.
Step 1: Sign In to Your Google Tag Manager Account
- Access Google Tag Manager:
- Open your web browser and navigate to Google Tag Manager.
- Click on the Sign In button and enter your Google account credentials associated with GTM.
- Select the Appropriate Container:
- Once signed in, select the container linked to the website where you want to install the Google Ads tag.
- If you don’t have a container set up yet, click on Create Account, follow the prompts to set up a new container, and install the GTM code on your website.
Step 2: Create a New Tag in Google Tag Manager
- Navigate to Tags:
- In the GTM dashboard, click on Tags in the left-hand sidebar.
- Create a New Tag:
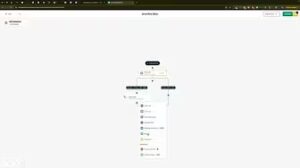
- Click on the New button to create a new tag.
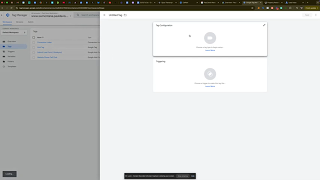
- Click on the Tag Configuration box to choose the type of tag you want to set up.
- Select Google Ads Tag:
- From the list of tag types, select Google Ads.
- Choose Google Ads Conversion Tracking if you want to track conversions or Google Ads Remarketing for remarketing purposes.
Step 3: Configure the Google Ads Tag
- Enter Tag Details:
- Tag Name: Enter a descriptive name for your tag, such as “Google Ads Conversion Tracking”.
- Conversion ID: Locate your Google Ads Conversion ID in your Google Ads account under Tools & Settings > Measurement > Conversions. Click on the specific conversion action to find the Conversion ID.
- Conversion Label: Copy the Conversion Label provided for the specific conversion action you are tracking.
- Paste the Conversion ID and Label:
- Enter the Conversion ID and Conversion Label into the respective fields in GTM.
- Set Up Triggering:
- Click on Triggering and choose when you want the tag to fire. For conversion tracking, select the trigger that corresponds to the conversion event (e.g., form submission, purchase confirmation).
- If you’re setting up a general conversion tracking tag, you might use a Page View trigger on a thank-you page.
Step 4: Save and Publish Your Tag
- Save the Tag:
- After configuring the tag and setting up the appropriate trigger, click Save.
- Submit and Publish:
- In the top-right corner of the GTM dashboard, click on Submit.
- Add a descriptive version name and description (e.g., “Added Google Ads Conversion Tracking Tag”).
- Click Publish to apply the changes to your website.
Step 5: Verify the Tag Installation
- Use Tag Assistant:
- Install the Google Tag Assistant browser extension if you haven’t already.
- Enable Tag Assistant and reload your website to ensure the Google Ads tag is firing correctly.
- Check in Google Ads:
- In your Google Ads account, navigate to Tools & Settings > Measurement > Conversions.
- Confirm that the conversion actions are receiving data by checking the status and recent activity.
- Debug with GTM Preview Mode:
- In GTM, click on Preview to enter debug mode.
- Visit your website in the debug window to ensure that the Google Ads tag is firing as intended during the specified events.
Best Practices for Managing Google Ads Tags with GTM
Implementing best practices ensures that your Google Ads tracking setup is both effective and secure, providing accurate data to inform your marketing strategies.
Use Descriptive Naming Conventions
- Tag Names: Clearly name your tags (e.g., “Google Ads Purchase Conversion”) to easily identify their purpose within GTM.
- Version Control: Document changes with version names and descriptions to track updates and modifications over time.
Keep Tags Organized
- Folders: Use folders within GTM to categorize tags based on their function or marketing channel.
- Consistent Structure: Maintain a consistent tagging structure to simplify management and troubleshooting.
Minimize Third-Party Integrations
- Selective Integration: Only integrate essential third-party scripts to reduce potential conflicts and maintain site performance.
- Regular Audits: Periodically review and clean up unused tags to keep your GTM container streamlined.
Monitor Tag Performance
- Regular Checks: Continuously monitor your Google Ads tags to ensure they are firing correctly and collecting accurate data.
- Analytics Integration: Integrate Google Ads data with Google Analytics to gain deeper insights into campaign performance and user behavior.
Maintain Security
- Access Control: Limit GTM access to trusted team members and use strong authentication methods.
- Secure Scripts: Ensure that all scripts, including the Google Ads tag, are securely implemented to prevent vulnerabilities.
Common Mistakes to Avoid
Avoiding these common pitfalls can enhance the effectiveness of your Google Ads tracking setup and ensure accurate data collection.
Incorrect Tag Configuration
- Impact: Misconfigured tags can lead to inaccurate tracking data, affecting your campaign analysis and optimization.
- Solution: Double-check all tag settings, including Conversion ID and Label, to ensure they are entered correctly.
Failing to Set Up Proper Triggers
- Impact: Incorrect or missing triggers can prevent tags from firing, resulting in lost conversion data.
- Solution: Carefully select and configure triggers that accurately represent the conversion events you want to track.
Not Testing the Tags
- Impact: Unverified tags may not function as intended, leading to incomplete or inaccurate data.
- Solution: Use GTM’s Preview Mode and Tag Assistant to thoroughly test your tags before publishing.
Overloading GTM with Unnecessary Tags
- Impact: Too many tags can slow down your website and complicate tag management.
- Solution: Only add necessary tags and regularly review and remove any that are no longer needed.
Ignoring Google Ads Analytics
- Impact: Without analyzing the data collected by your Google Ads tags, you miss opportunities to optimize your campaigns.
- Solution: Regularly review your Google Ads and Google Analytics data to inform your marketing strategies and improve ROI.
Frequently Asked Questions
Can I Use Google Tag Manager for Multiple Google Ads Accounts?
Yes, Google Tag Manager allows you to manage tags for multiple Google Ads accounts within a single container. Simply configure separate tags for each account, ensuring that each tag has the correct Conversion ID and Label.
How Do I Find My Google Ads Conversion ID and Label?
- Access Google Ads:
- Log in to your Google Ads account.
- Navigate to Tools & Settings > Measurement > Conversions.
- Locate the Conversion Action:
- Click on the specific conversion action you want to track.
- The Conversion ID and Conversion Label will be displayed in the tag setup instructions.
What If My Google Ads Tag Isn’t Firing Correctly?
- Check Tag Configuration: Ensure that the Conversion ID and Label are entered correctly.
- Verify Triggers: Confirm that the correct triggers are assigned to the tag.
- Use Debugging Tools: Utilize GTM’s Preview Mode and Google Tag Assistant to identify and resolve issues.
- Contact Support: If problems persist, reach out to Google Ads or GTM support for assistance.
Can I Schedule Tags to Fire at Specific Times?
Google Tag Manager doesn’t support scheduling tags to fire at specific times. However, you can control when tags fire based on user interactions or specific conditions set within your triggers.
Do I Need to Use Both Google Analytics and Google Ads Tags?
While not mandatory, using both Google Analytics and Google Ads tags can provide a more comprehensive understanding of your website’s performance and user behavior, enhancing your ability to optimize marketing strategies effectively.
Maximizing the Impact of Your Google Ads Tag Setup
To fully leverage the benefits of setting up a Google Ads tag with Google Tag Manager, integrate these strategies into your broader marketing and operational plans.
Align with Your Marketing Goals
- Define Objectives: Clearly outline what you aim to achieve with your Google Ads campaigns, such as increasing sales, generating leads, or boosting brand awareness.
- Tailor Tagging Strategy: Ensure that your tagging setup aligns with your marketing objectives, tracking the most relevant conversion actions.
Use Data to Optimize Strategies
- Analyze Conversion Data: Regularly review the data collected by your Google Ads tags to identify trends, measure campaign effectiveness, and make informed decisions.
- Refine Campaigns: Use insights from conversion data to adjust your ad targeting, budgets, and creative strategies for better performance.
Integrate with Other Marketing Tools
- Connect with CRM Systems: Integrate Google Ads data with your Customer Relationship Management (CRM) system to streamline lead management and enhance customer interactions.
- Leverage Marketing Automation: Use marketing automation tools in conjunction with Google Ads data to create personalized and targeted marketing campaigns.
Leverage Advanced Google Tag Manager Features
- Dynamic Tagging: Utilize GTM’s dynamic tagging capabilities to create more responsive and context-aware tracking setups.
- Custom Variables and Triggers: Implement custom variables and triggers to track more specific user interactions and behaviors on your website.
Foster Team Collaboration
- Share Insights: Regularly share Google Ads performance data with your team to inform collective marketing strategies and objectives.
- Provide Training: Ensure that team members are trained on using GTM and understanding Google Ads data to maximize the effectiveness of your tracking setup.
Enhance Customer Experience
- Optimize Landing Pages: Use the insights from Google Ads tracking to optimize your landing pages, ensuring they are tailored to convert the traffic driven by your ads.
- Personalize User Interactions: Leverage conversion data to personalize user experiences, enhancing satisfaction and increasing the likelihood of conversions.
Conclusion
Setting up a Google Ads tag on your website using Google Tag Manager is a strategic move that can significantly enhance your ability to track, measure, and optimize your advertising campaigns. By following this step-by-step guide, implementing best practices, and avoiding common mistakes, you can ensure that your Google Ads tracking is accurate, efficient, and aligned with your marketing goals. Proper tag management not only improves your campaign performance but also empowers you to make data-driven decisions that drive business growth and success in the competitive digital landscape.